CloudLink Box or CloudLink Bar
User Interface and Wake-up
- The Touch automatically starts up after being powered on.
- If the touch is in sleep mode, touch Start on it to wake it up.
- If the voice assistant has been enabled, you can say "Hey Scotty" to wake up the system.

Joining a Meeting
Holding a Meeting
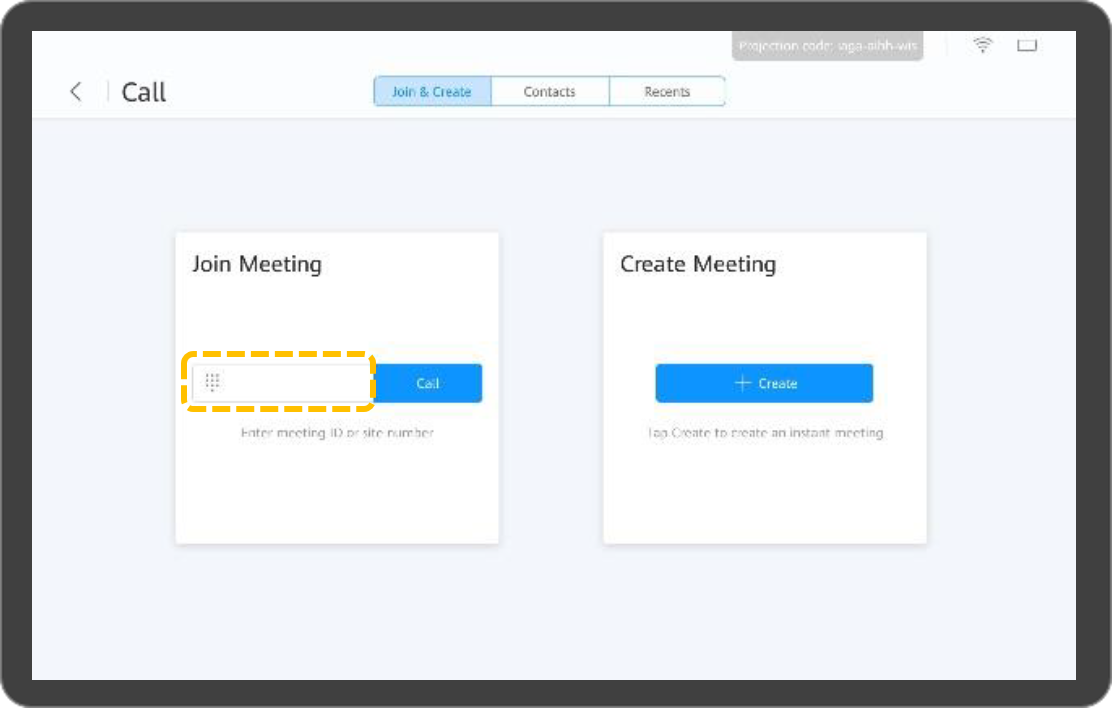
- Creating a meeting
- Touch
 .
.
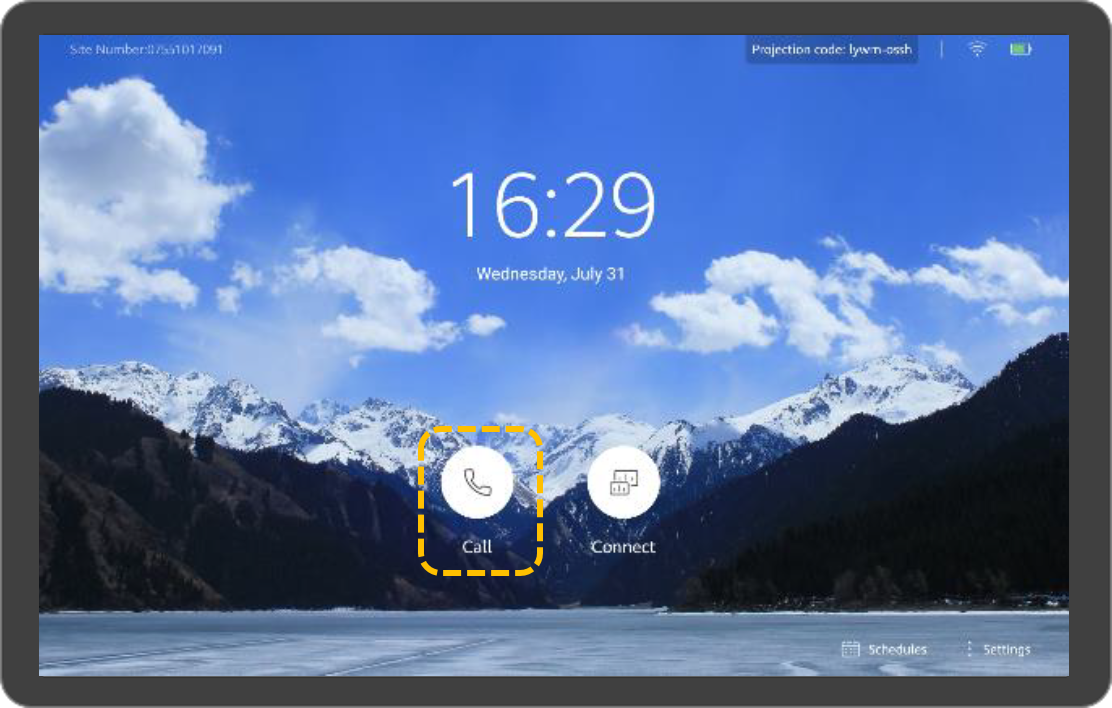
-
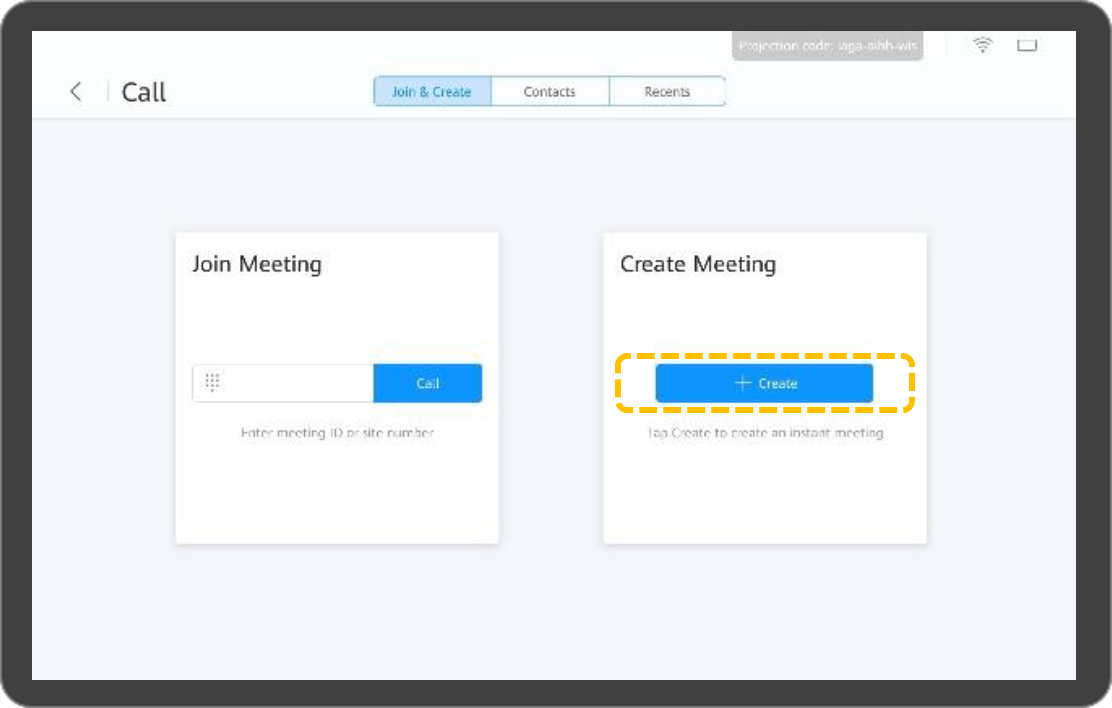
- After you create a meeting, a meeting ID is generated. You can send this ID to participants to let them join the meeting by dialing this ID. You can also invite participants.

- The Box or Bar can be used to hold a meeting in a cloud meeting room only after the enterprise administrator allocates the cloud meeting room to the Box or Bar on the HUAWEI CLOUD Meeting Management Platform.
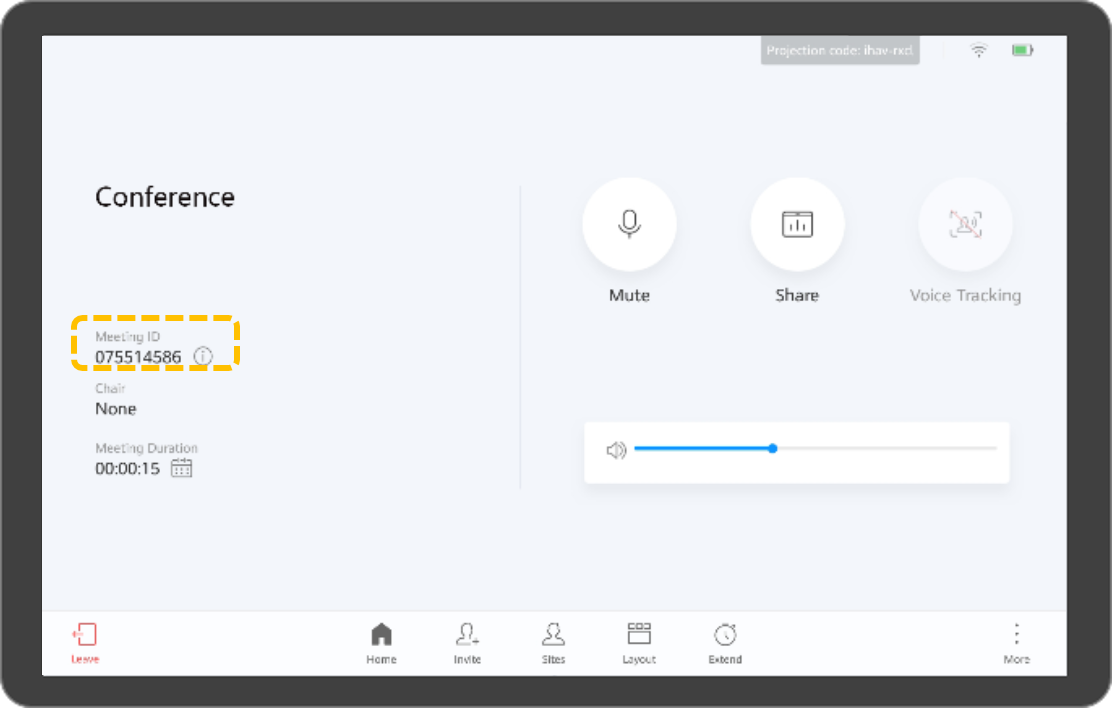
- Touch
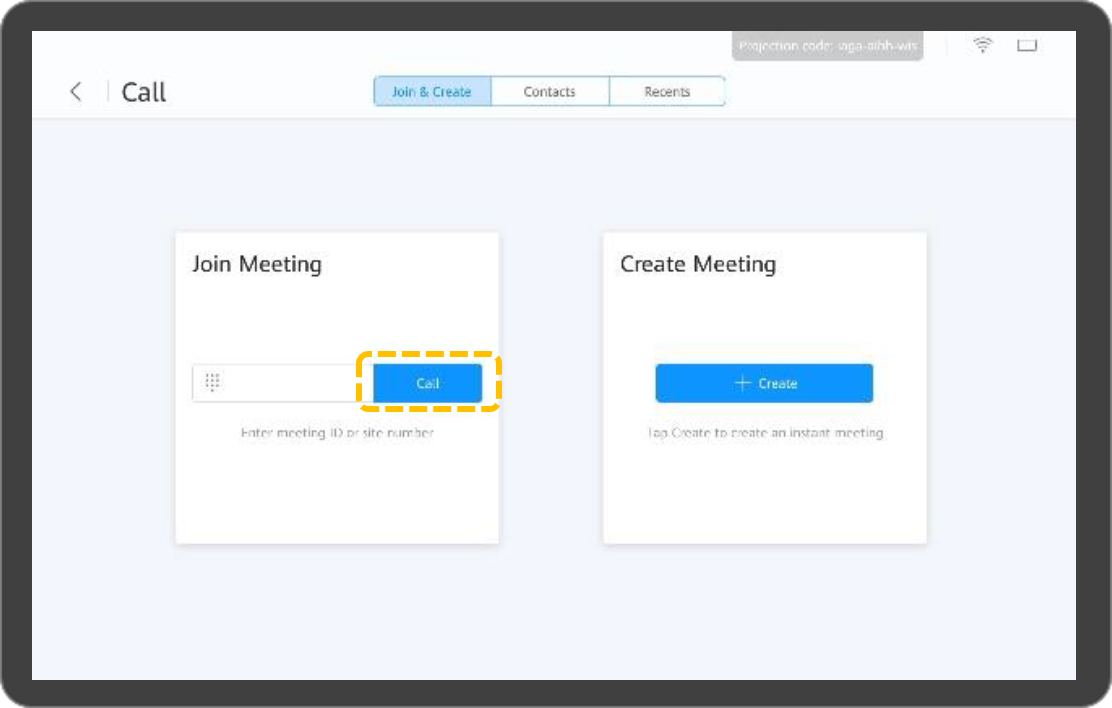
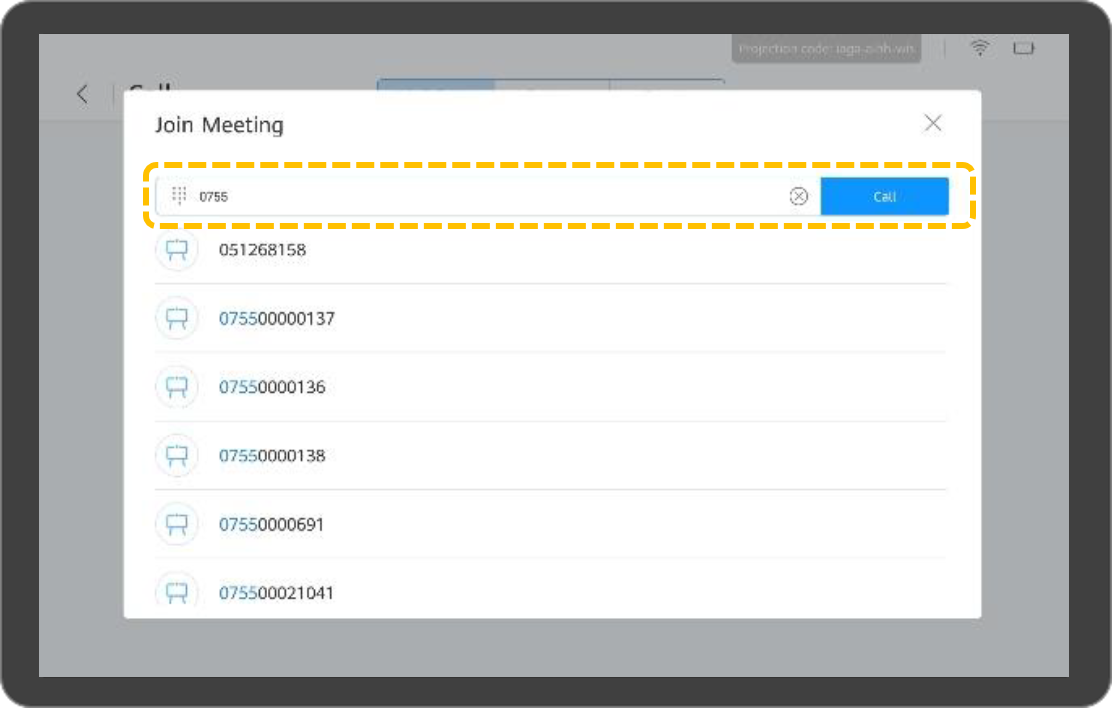
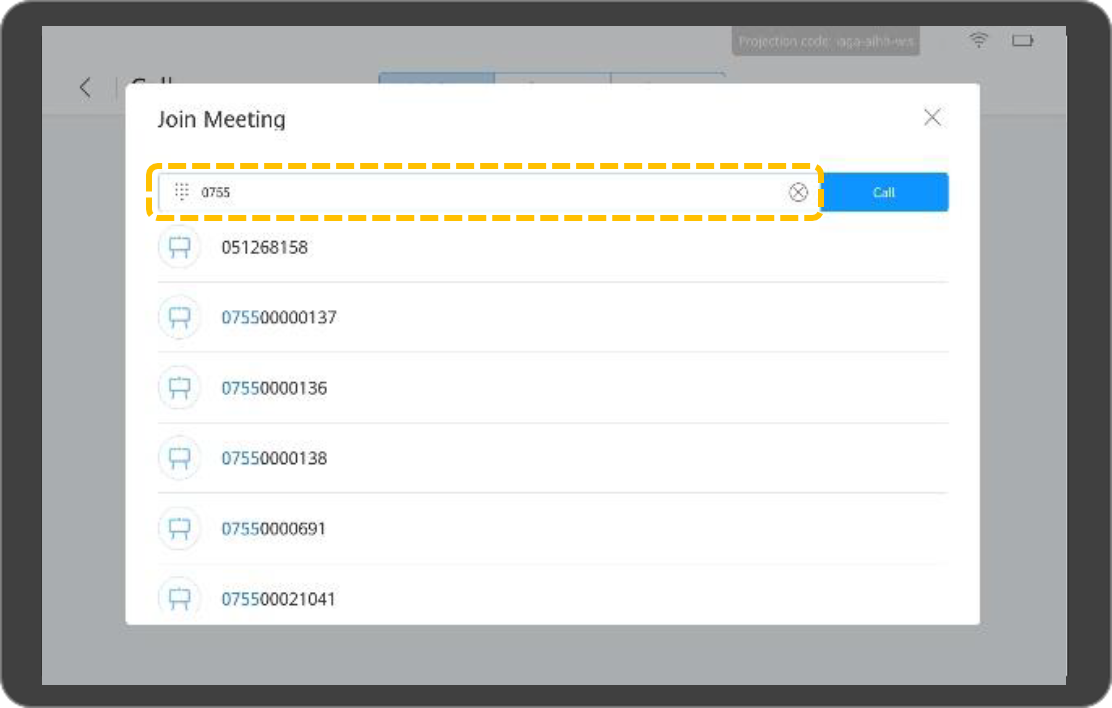
- Calling a site
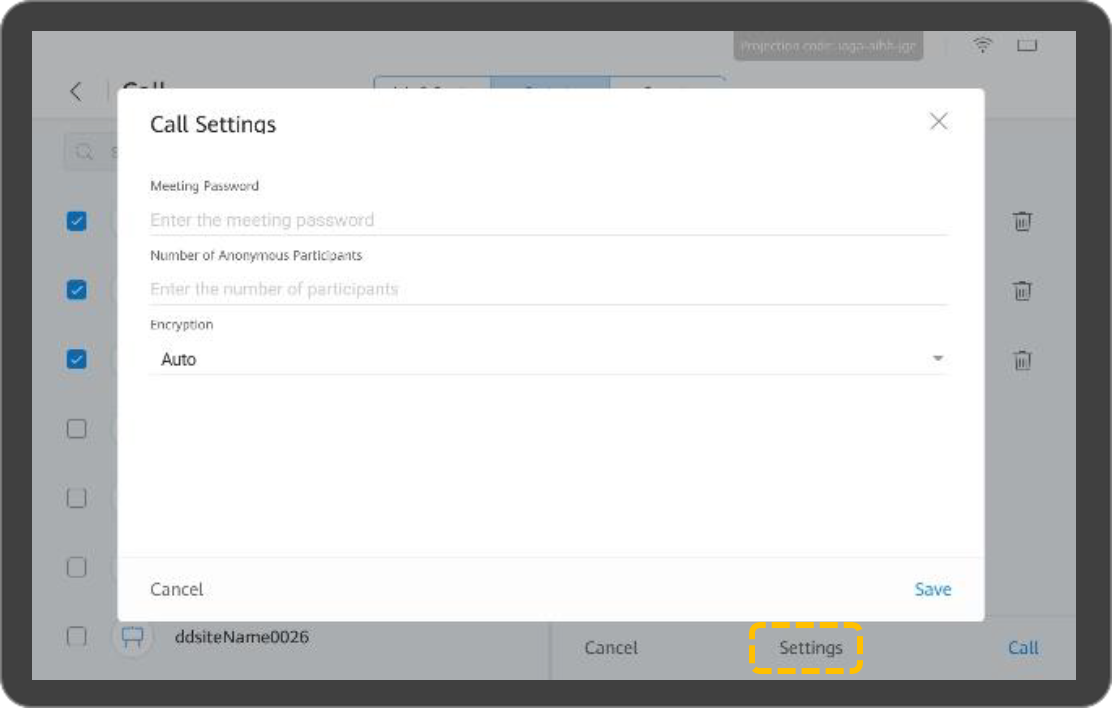
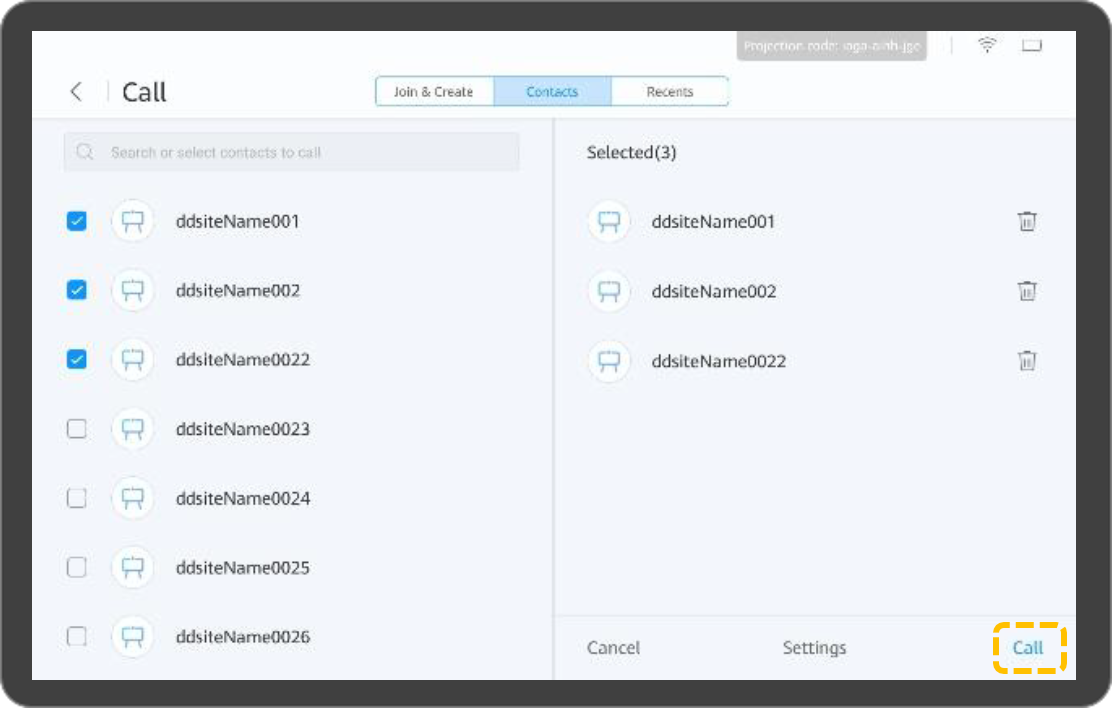
- Calling multiple sites
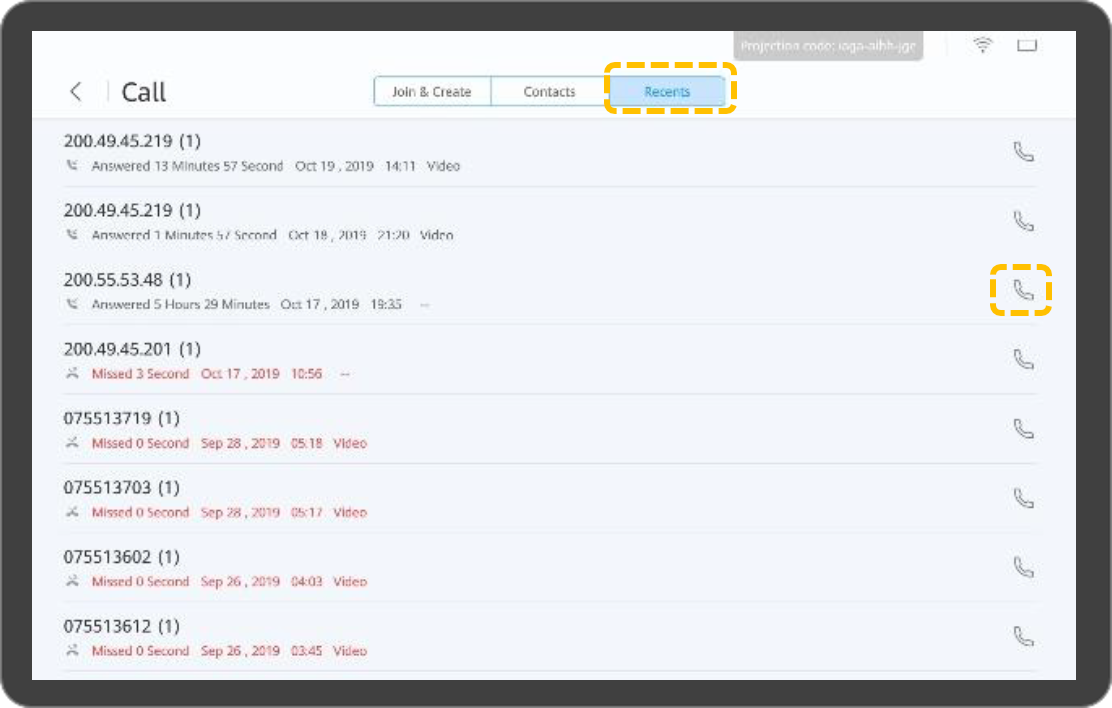
- Placing a call from Recents
Sharing Content
The Box or Bar allows you to share content in the following ways:
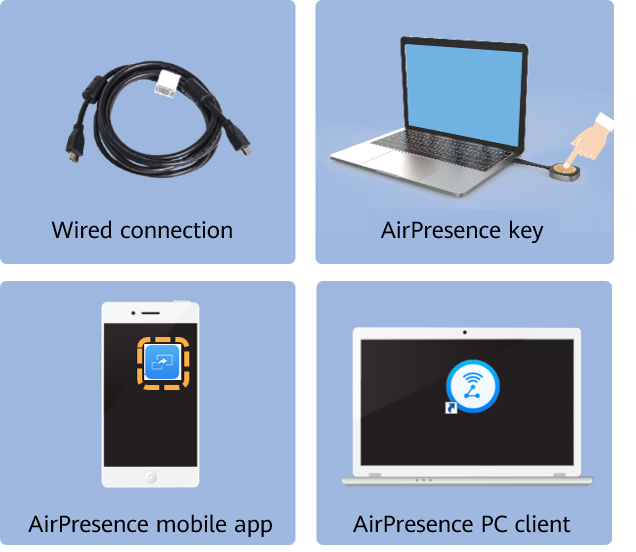
- Projecting content
Before projecting the local content, connect the presentation source to the terminal first
- Touch
 .
.
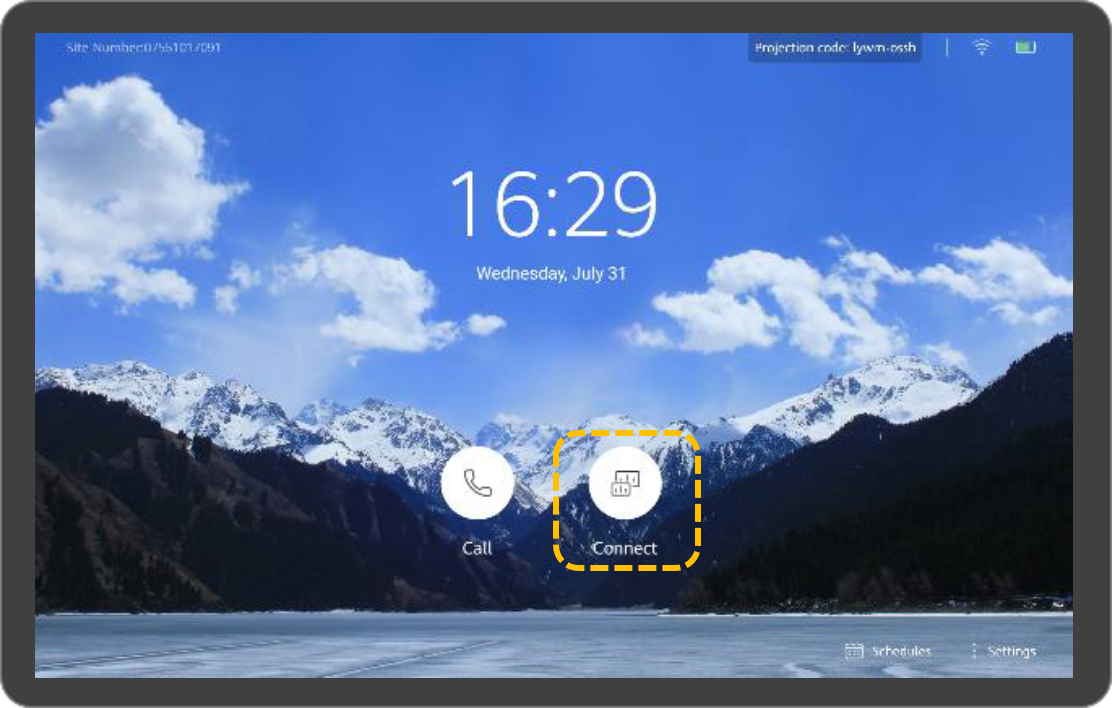
- Touch Open.
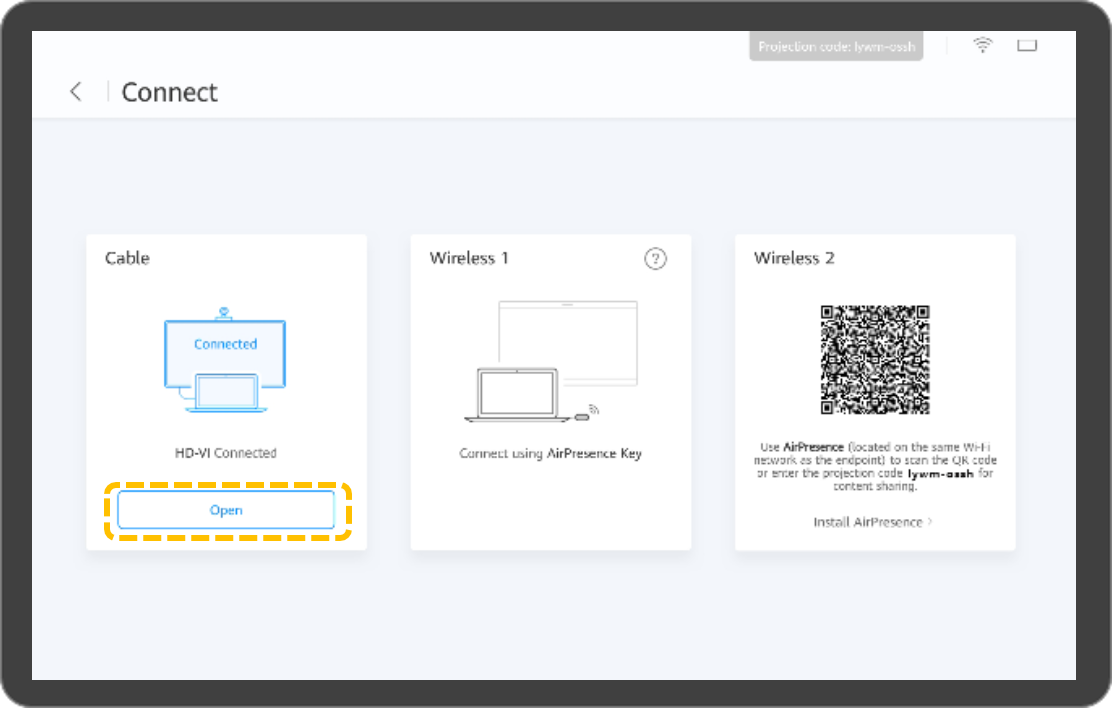
- Touch
- Sharing content using a cable connection
You can use your terminal to share content with remote sites in a meeting. To share a presentation, connect the presentation source to the terminal first. Otherwise, the Share icon is unavailable.
- Touch Share to share the presentation with remote sites. You can touch Share again to stop sharing the presentation.
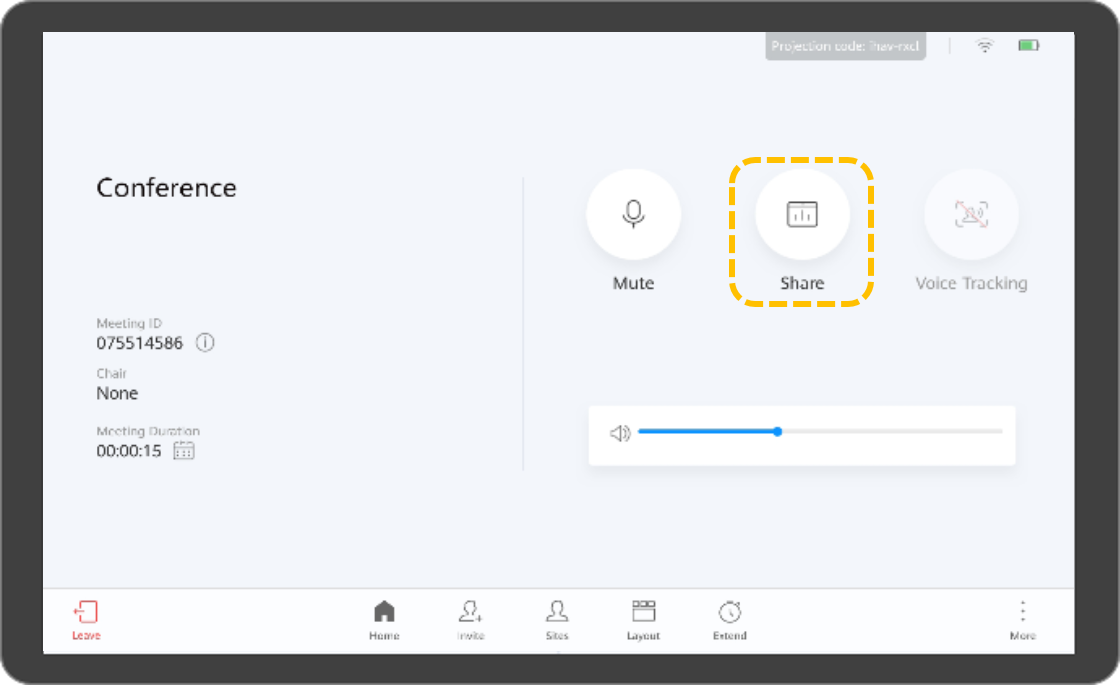
- Touch Share to share the presentation with remote sites. You can touch Share again to stop sharing the presentation.
- Sharing content using the AirPresence Key
- Insert the AirPresence Key into the USB port of the terminal for automatic pairing.
- After the pairing is successful, remove the AirPresence Key from the terminal and insert it into the USB port on the PC.
- Install the AirPresence Key program on the PC. After the installation is complete, the message is displayed, indicating that you can press the button on the AirPresence Key to share materials.
- Press the button on the AirPresence Key to share the PC desktop.
- Sharing content using the AirPresence mobile app

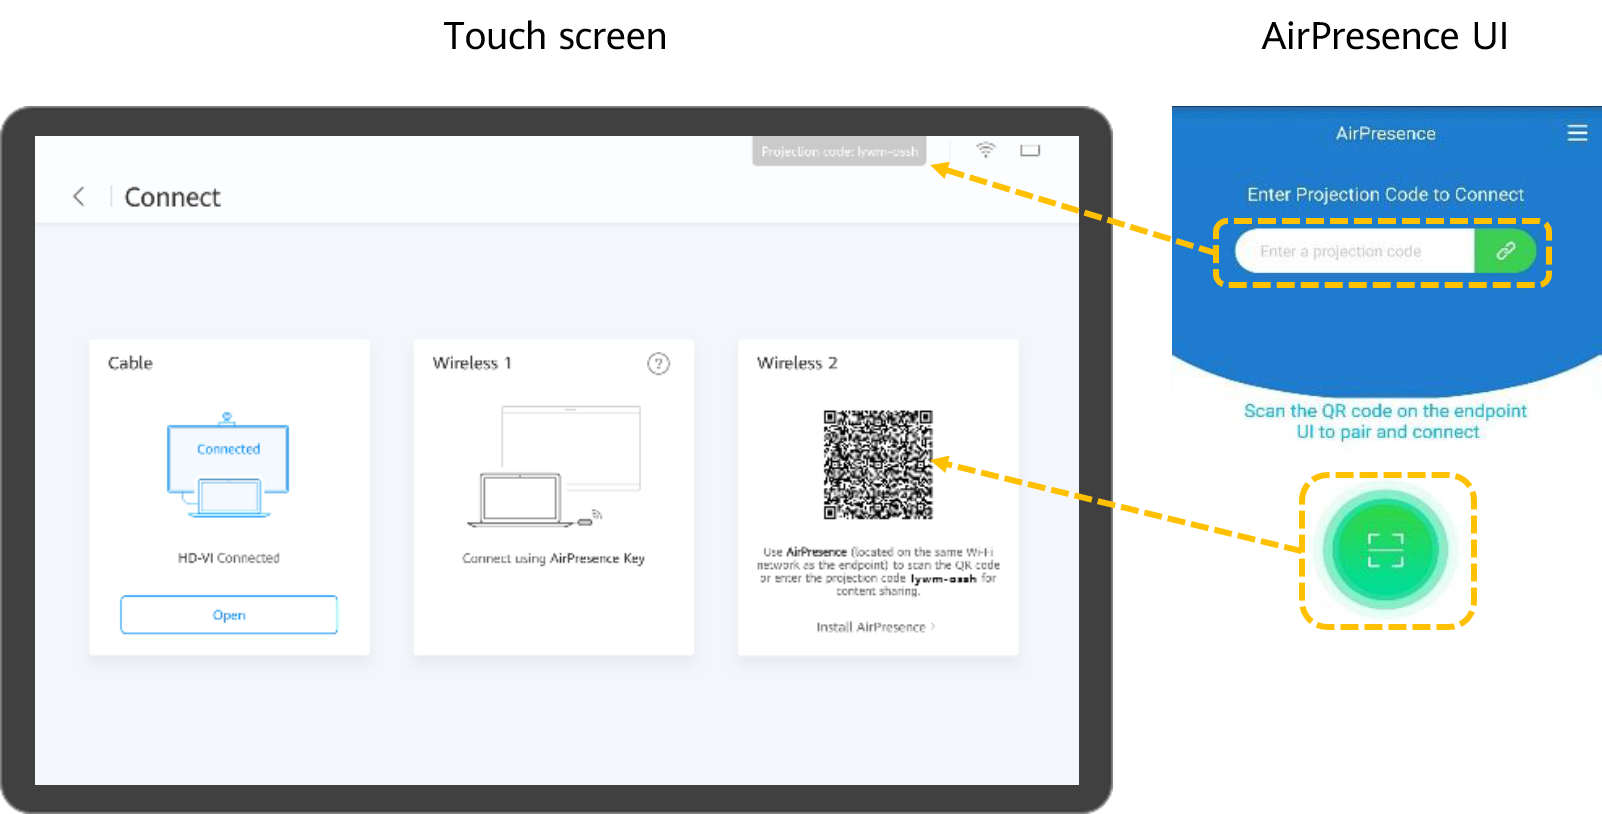
The mobile device that has AirPresence installed must connect to the same wireless network as the terminal and is reachable to the terminal.
-
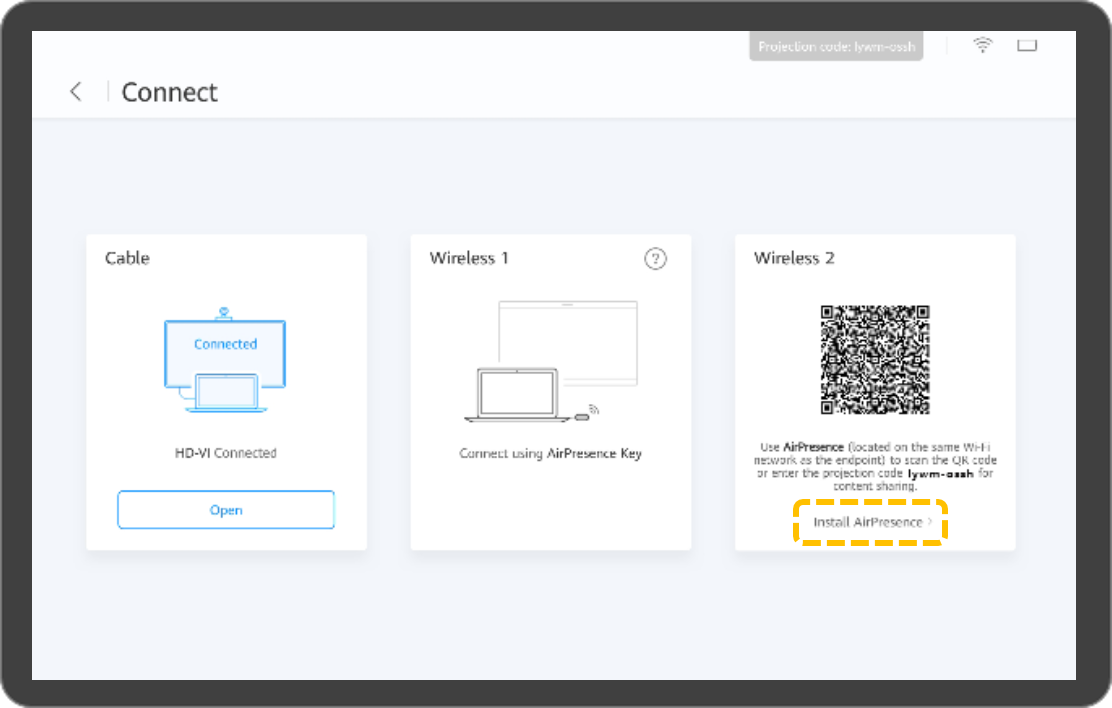
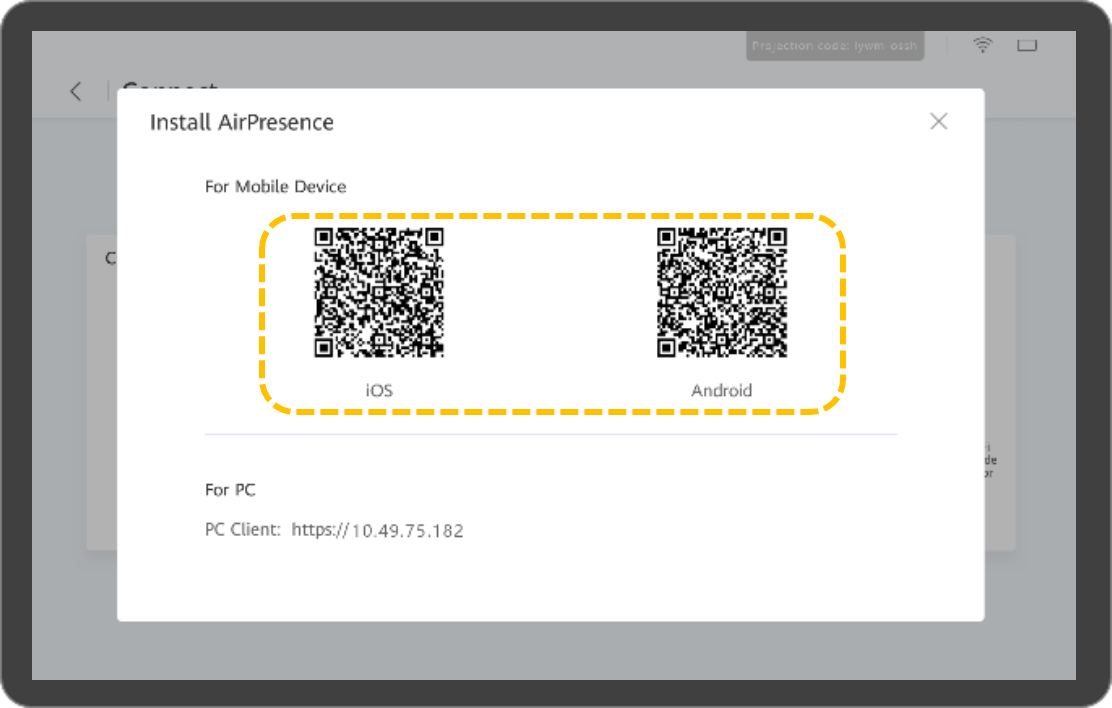
- Use your mobile device to scan the QR code displayed on the terminal and install AirPresence as instructed.
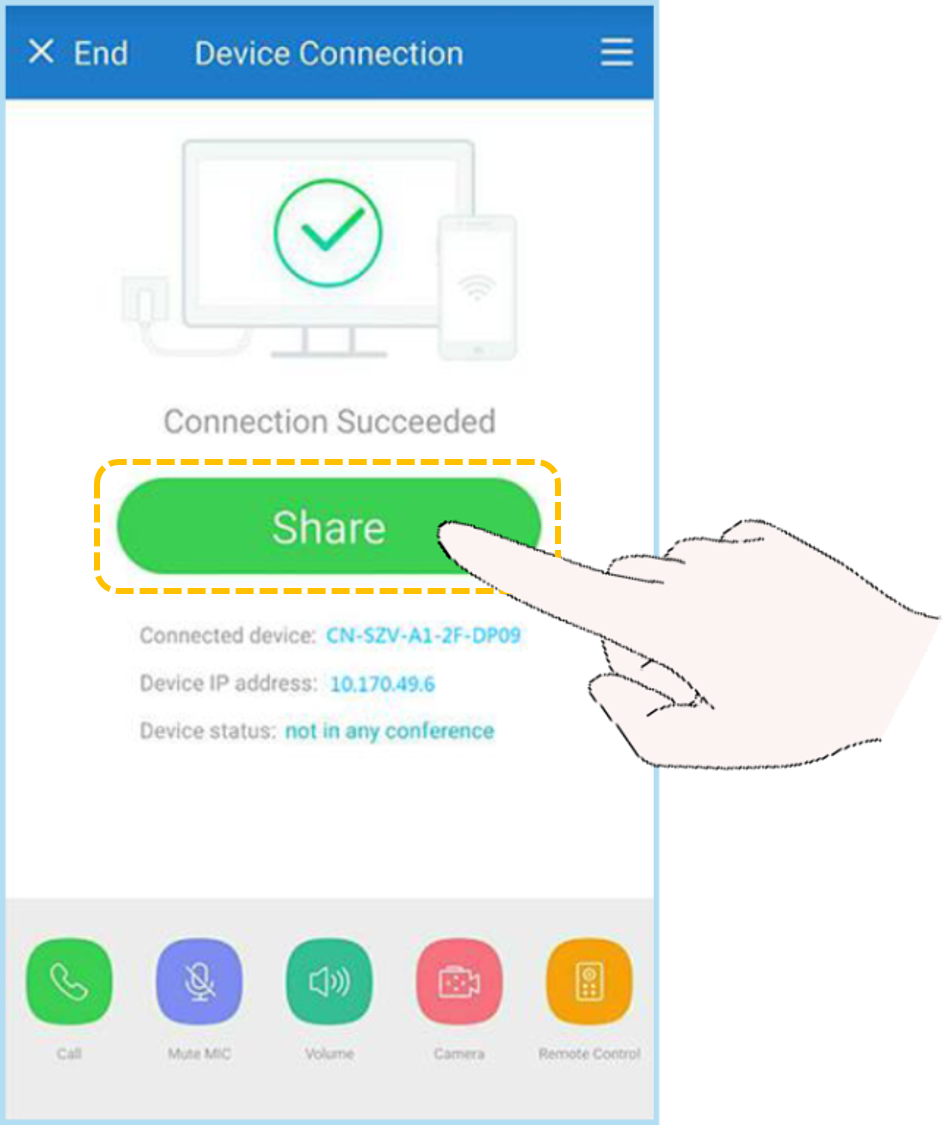
- After the installation is complete, touch the AirPresence icon to start it, and use it to scan the pairing code or enter the projection code displayed on the terminal.
- Touch Share and select the file you want to share.
-
Hosting a Meeting
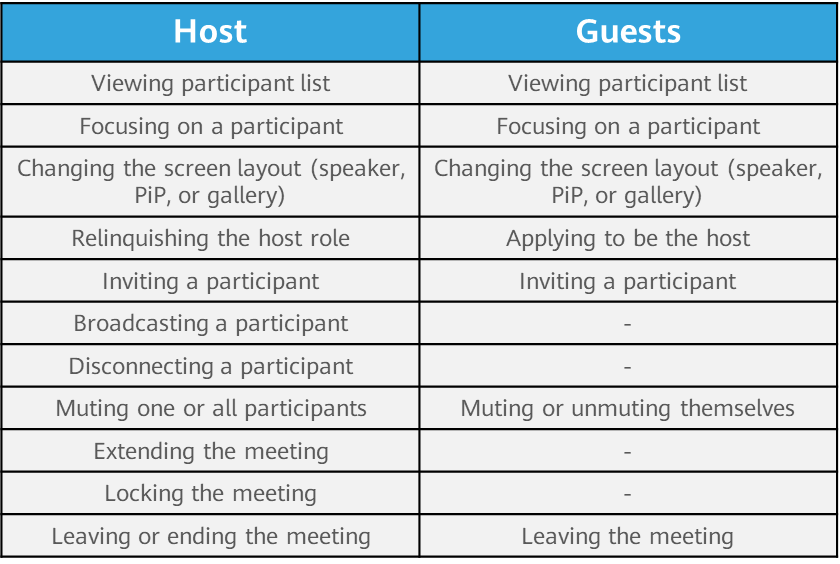
- Focusing on a site
- Touch
 .
.

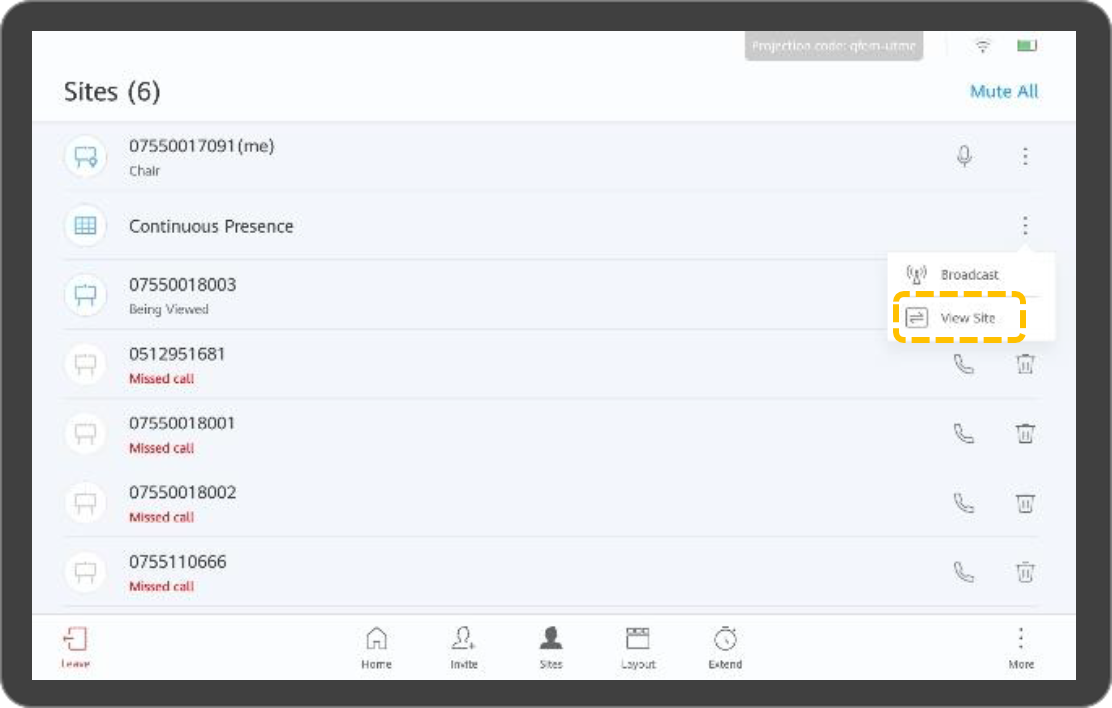
- To focus on a site, touch
 in the row containing the site and touch View Site.
- Touch
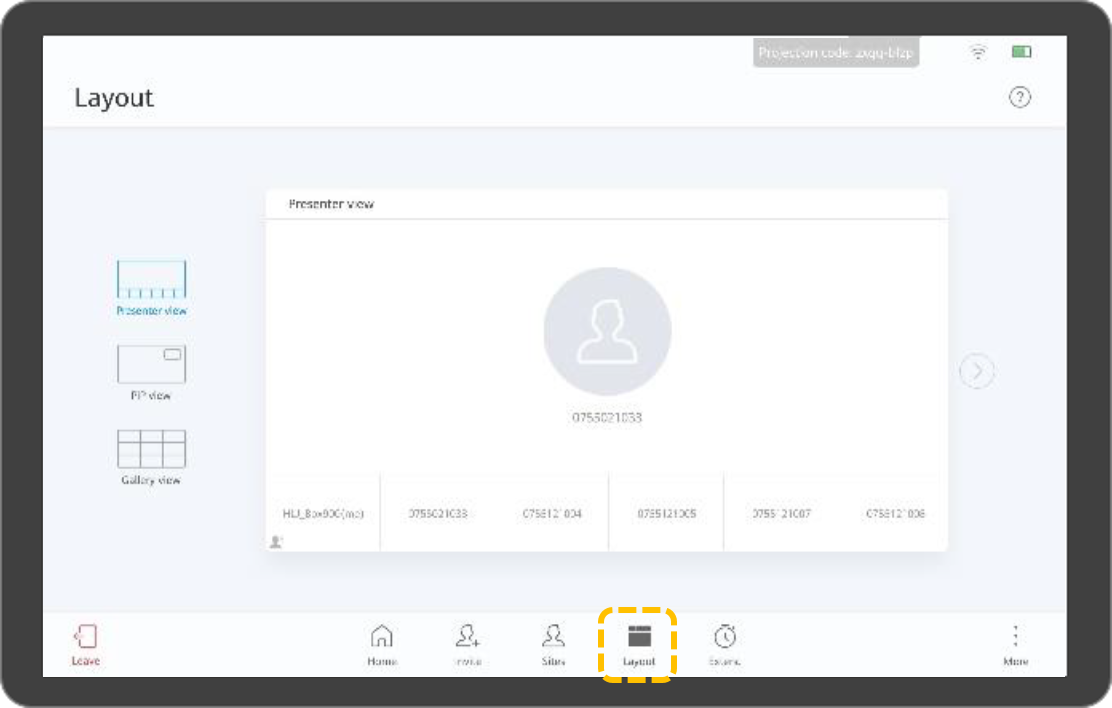
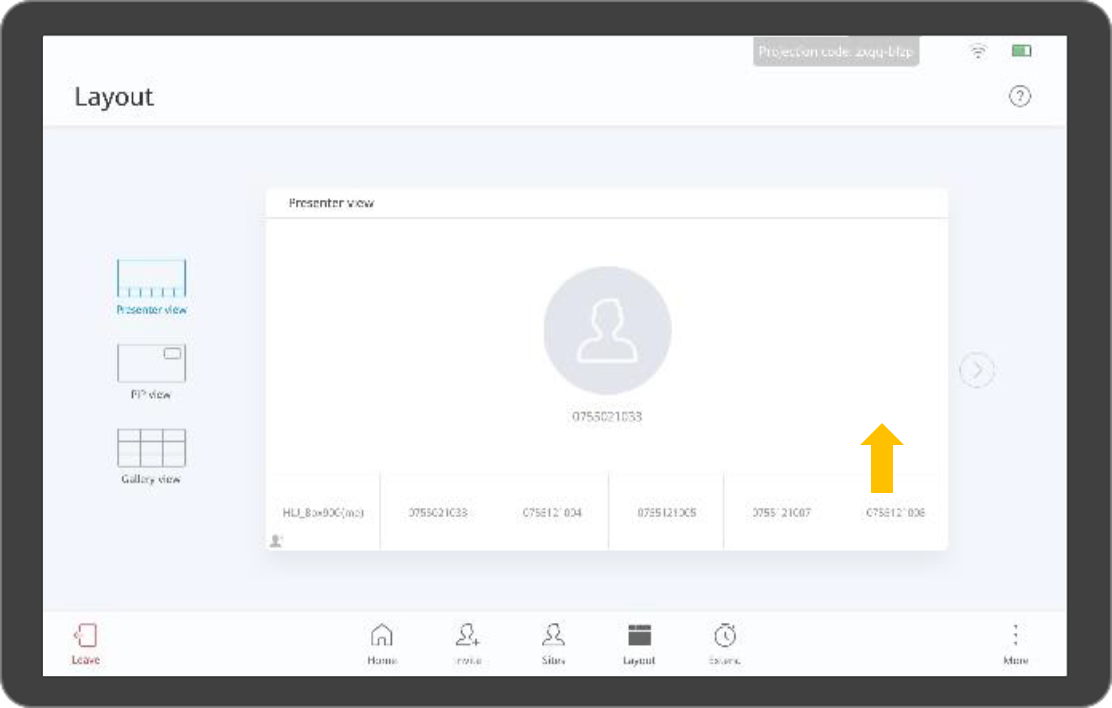
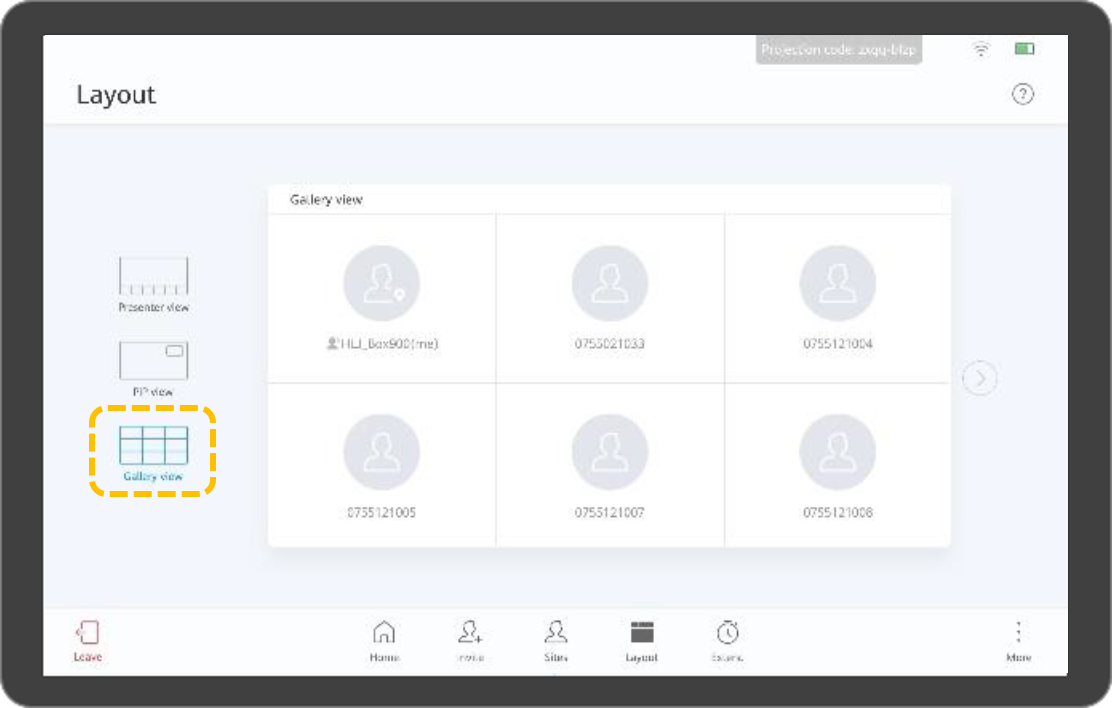
- Modifying the video layout
- Presenter view
- PiP view
- Touch and hold the small screen and drag it to any of the four corners.
- Touch the arrow icon in the upper right corner of the small screen to hide or show the small screen.
- Touch Exchange Panes to exchange the display positions of the large and small screens.
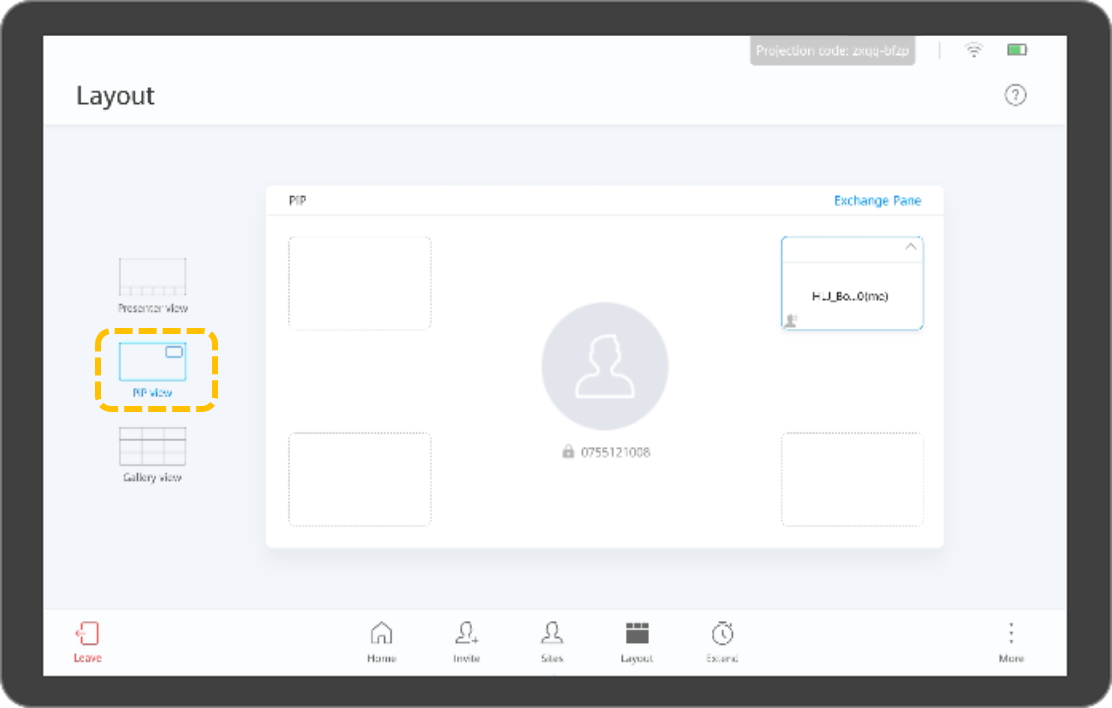
- Gallery view
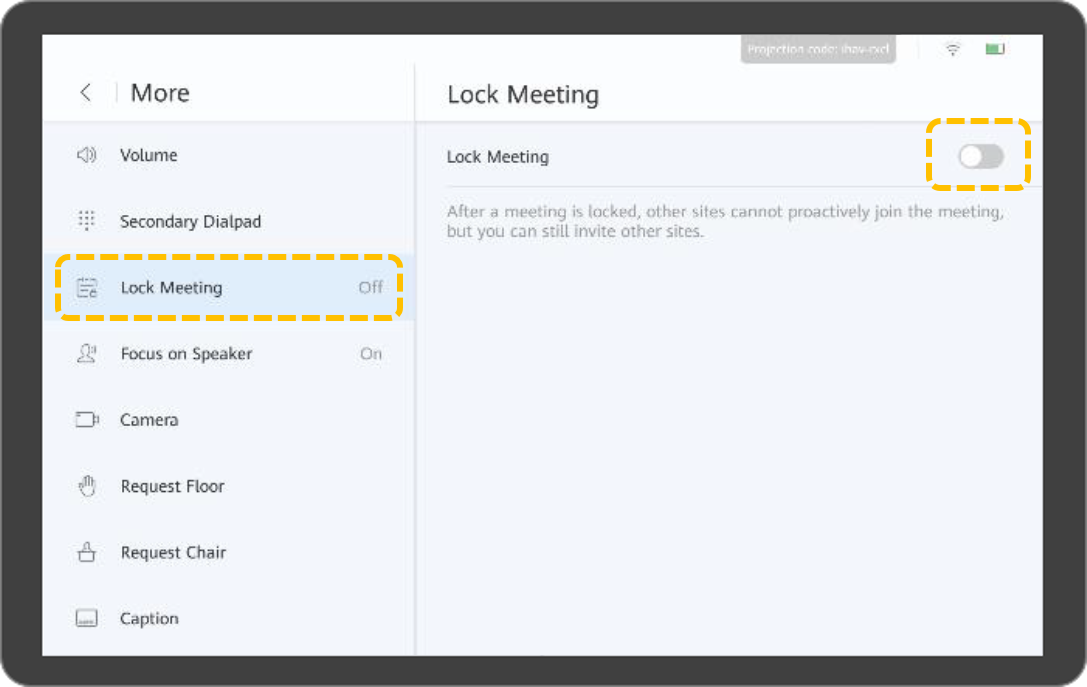
- Applying for or relinquishing the host role
- Touch
 .
.
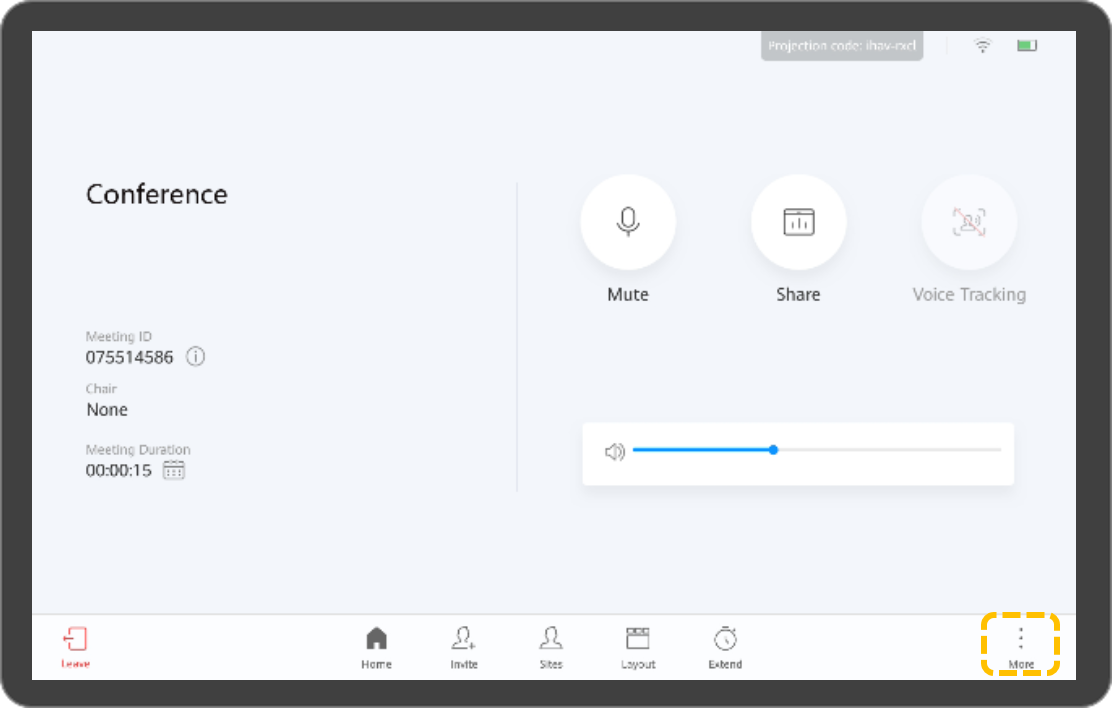
- Touch Request Chair on the left, enter the host password, and touch Request Chair in the lower right corner.

The host password can be obtained from the meeting scheduler.
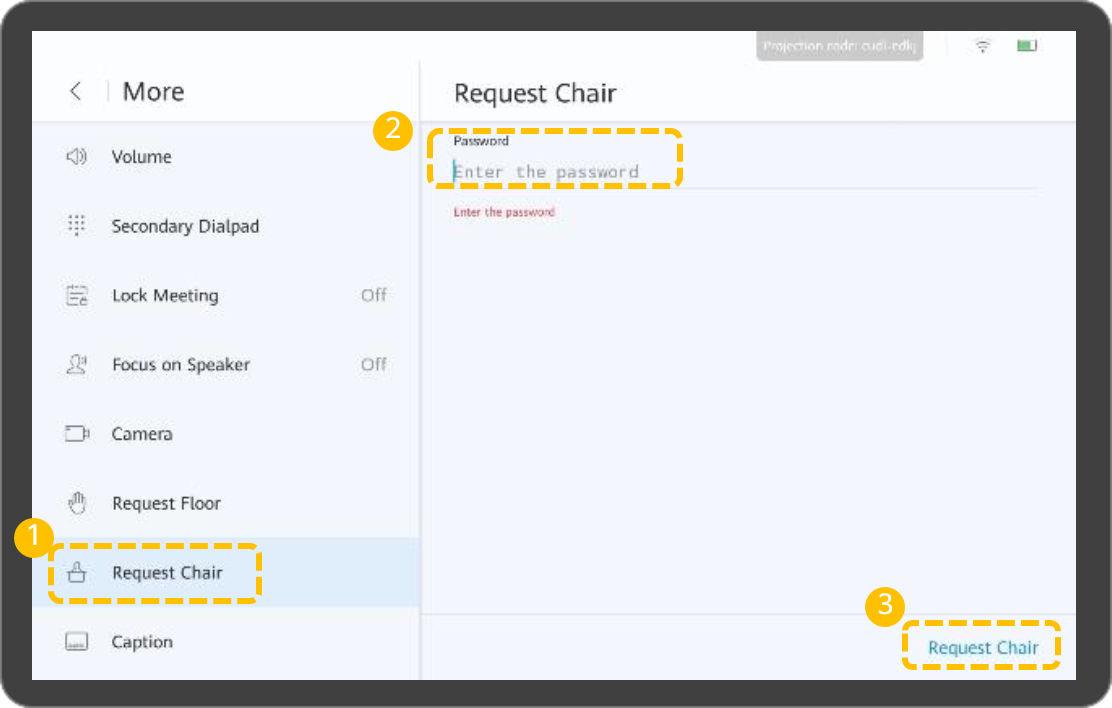
- Touch Release Chair to release host control rights.
- Touch
- Requesting the floor
- Touch
 .
.

- Choose Request Floor > Request Floor.
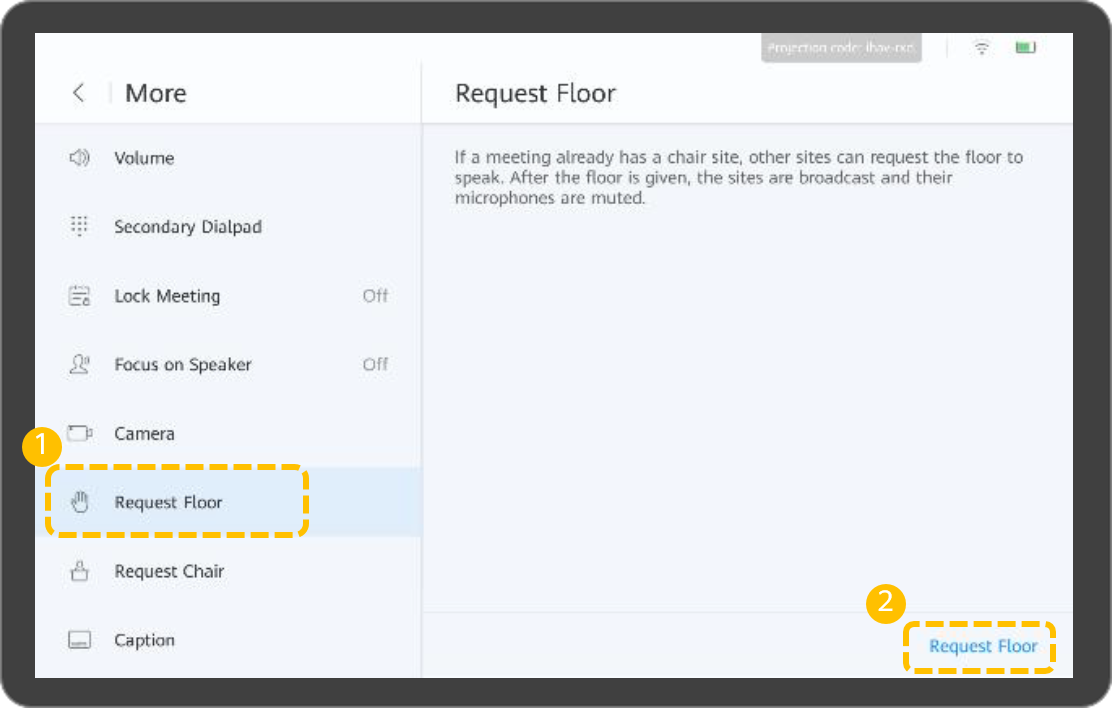
- Touch
- Inviting sites
- Touch
 .
.
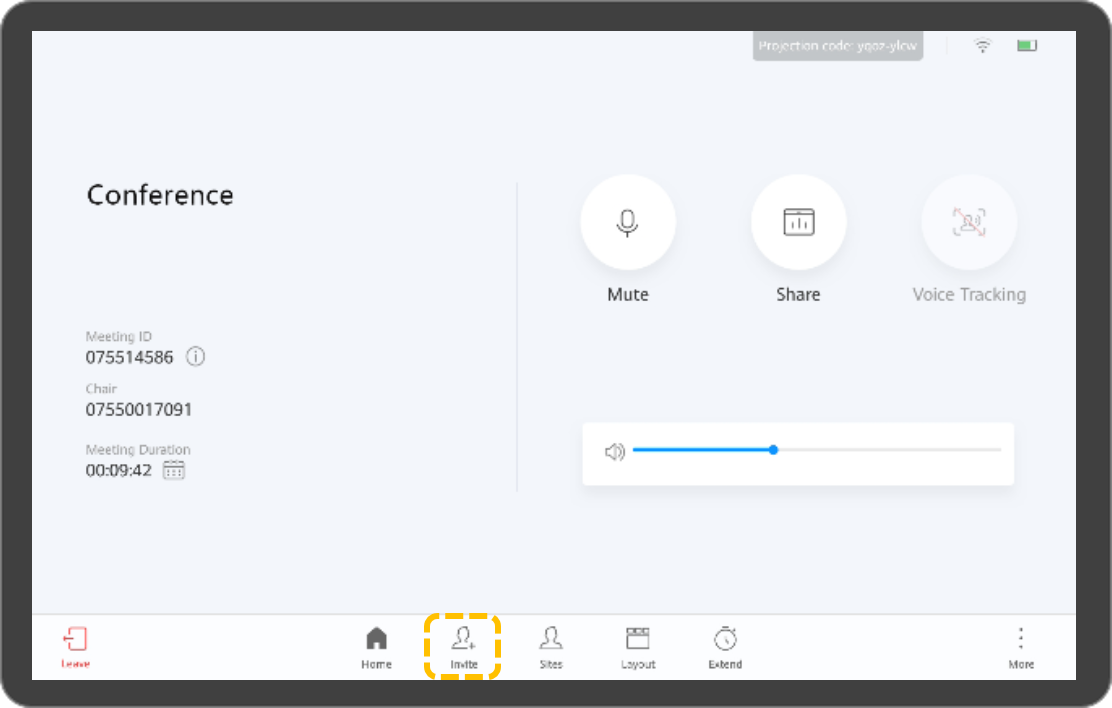
- Select one or more sites and touch Call.
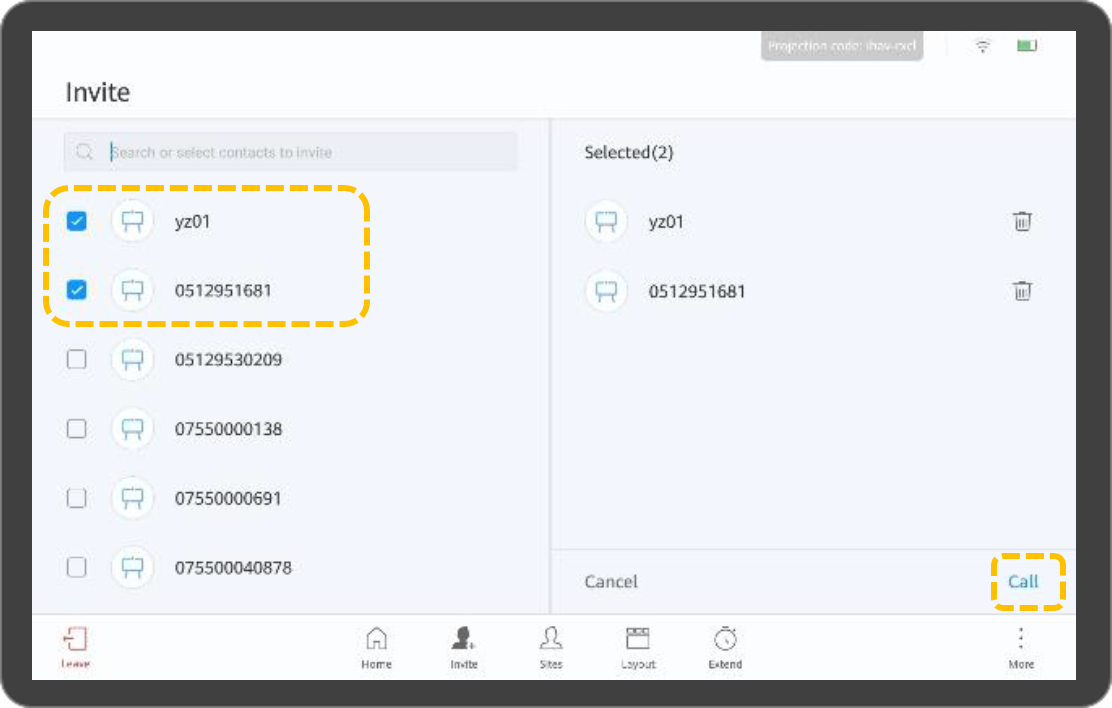
- Touch
- Broadcasting a site
When the host site broadcasts a site, all the other sites except the broadcast site are forced to view the site. The host site can still choose to view other sites. The host site can broadcast any video site, including the host site itself.
- Touch
 .
.
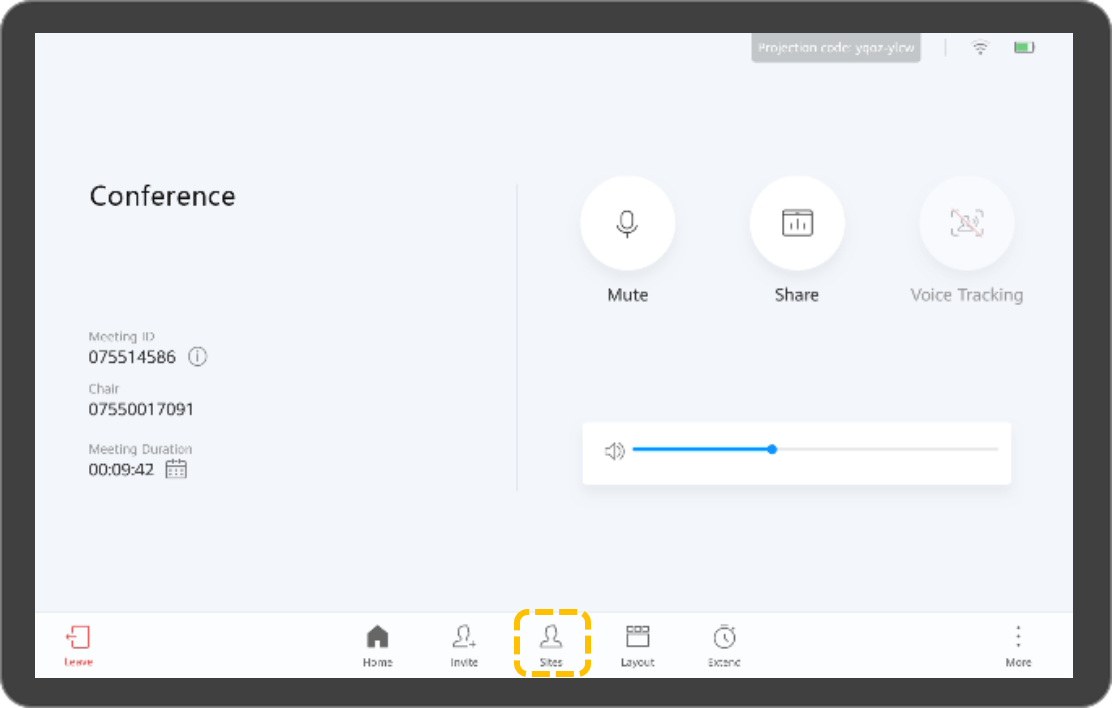
- Touch
 in the row containing the site you want to broadcast, and touch Broadcast.
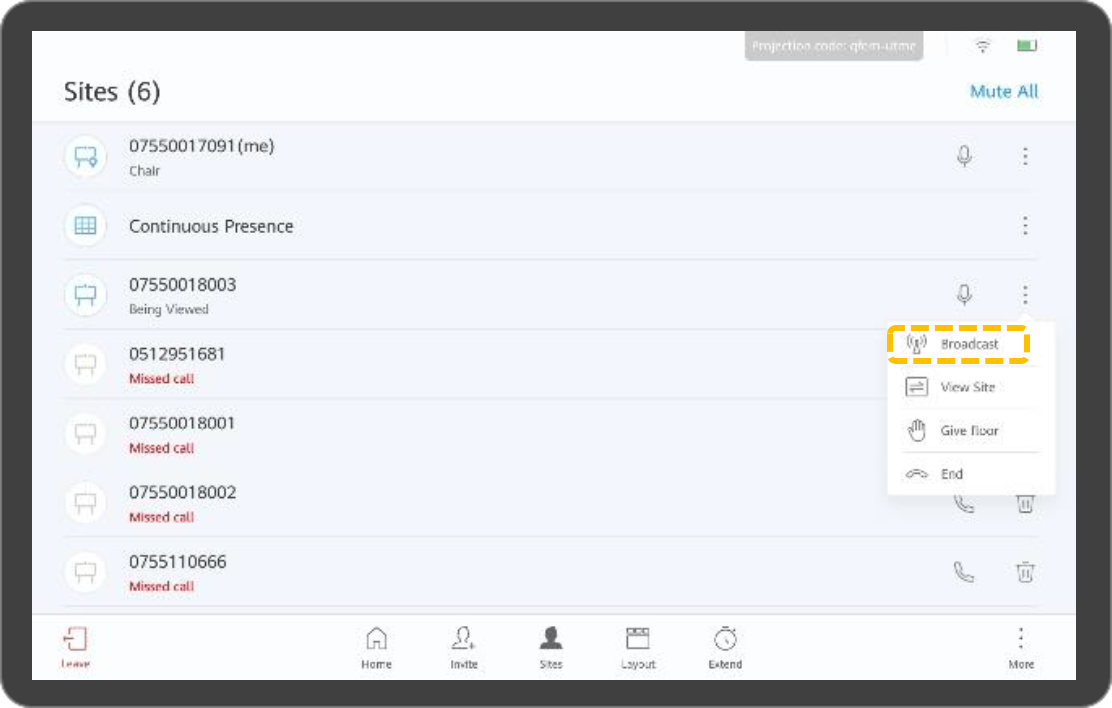
- Touch
- Disconnecting a site
The host can disconnect a site. After the site is disconnected, the site automatically leaves the meeting.
- Touch
 .
.

- Touch
 in the row containing the site you want to disconnect, and touch End.
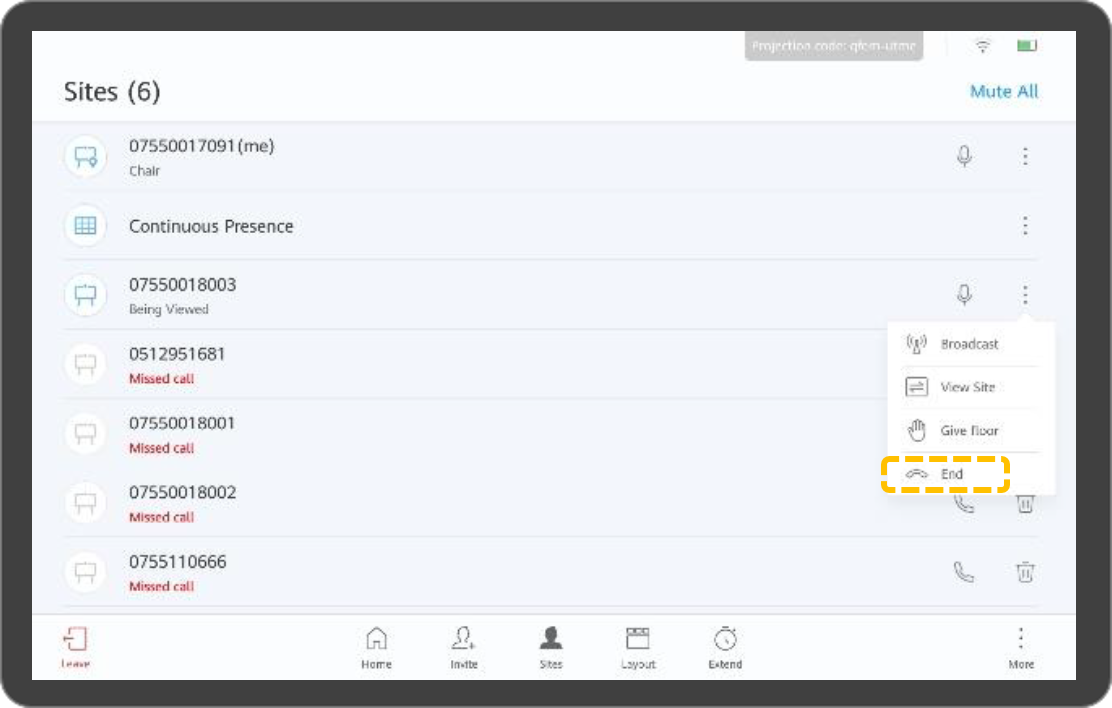
- Touch
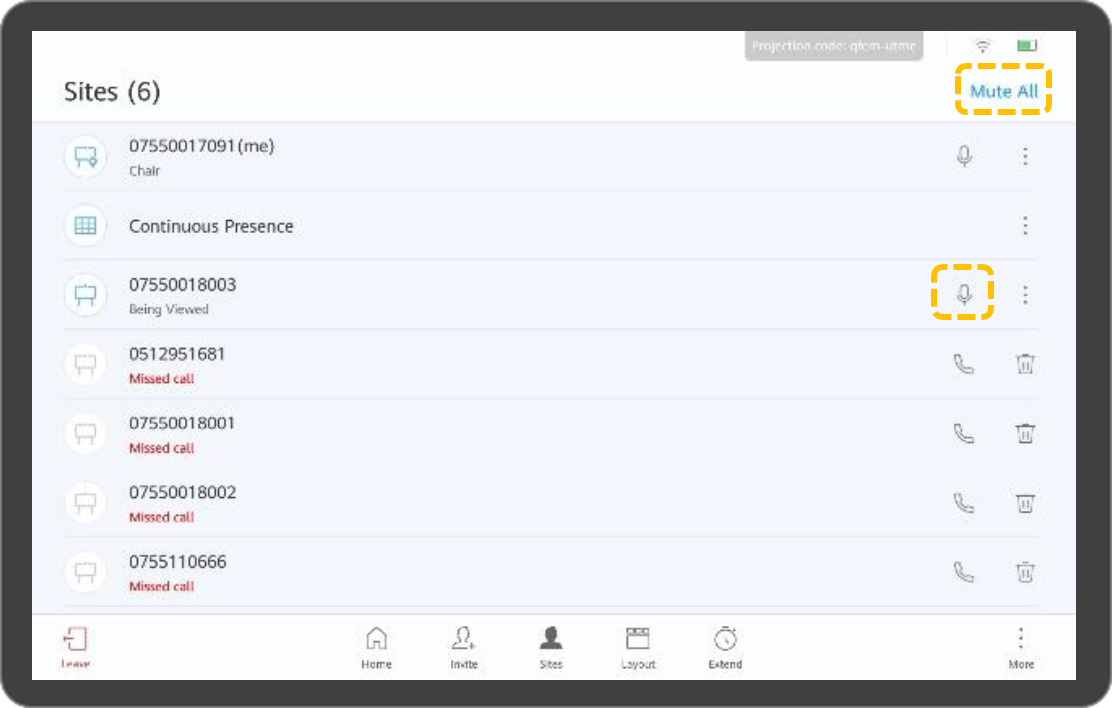
- Muting a site or all sites
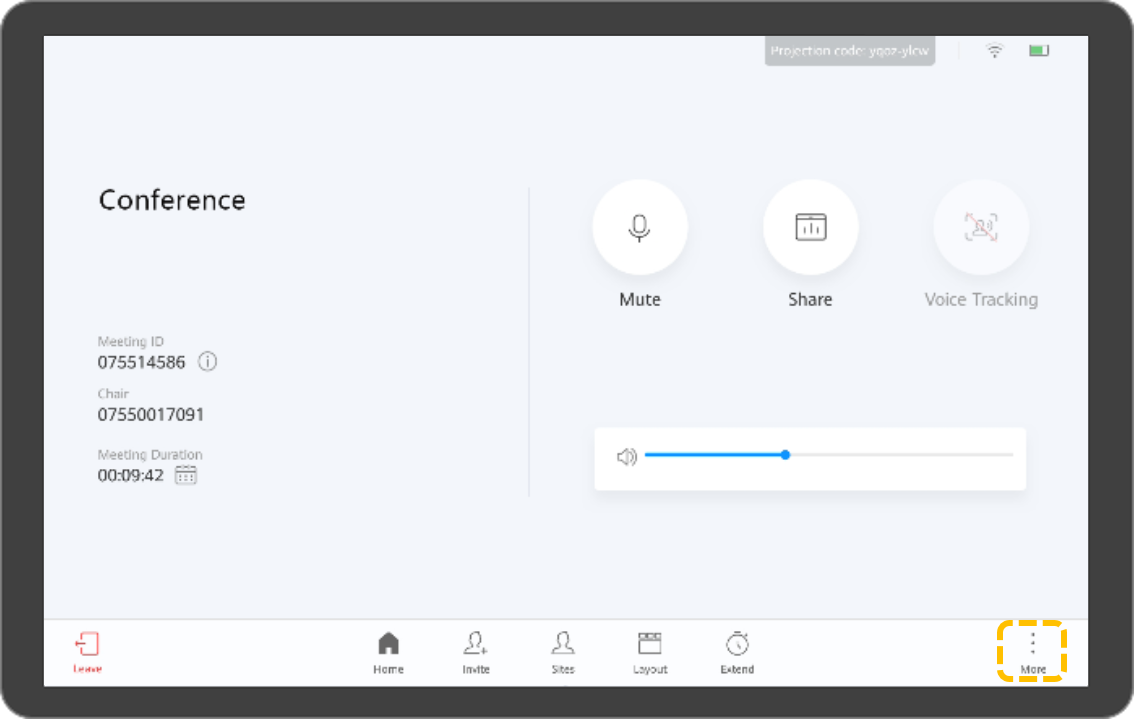
- Leaving a meeting
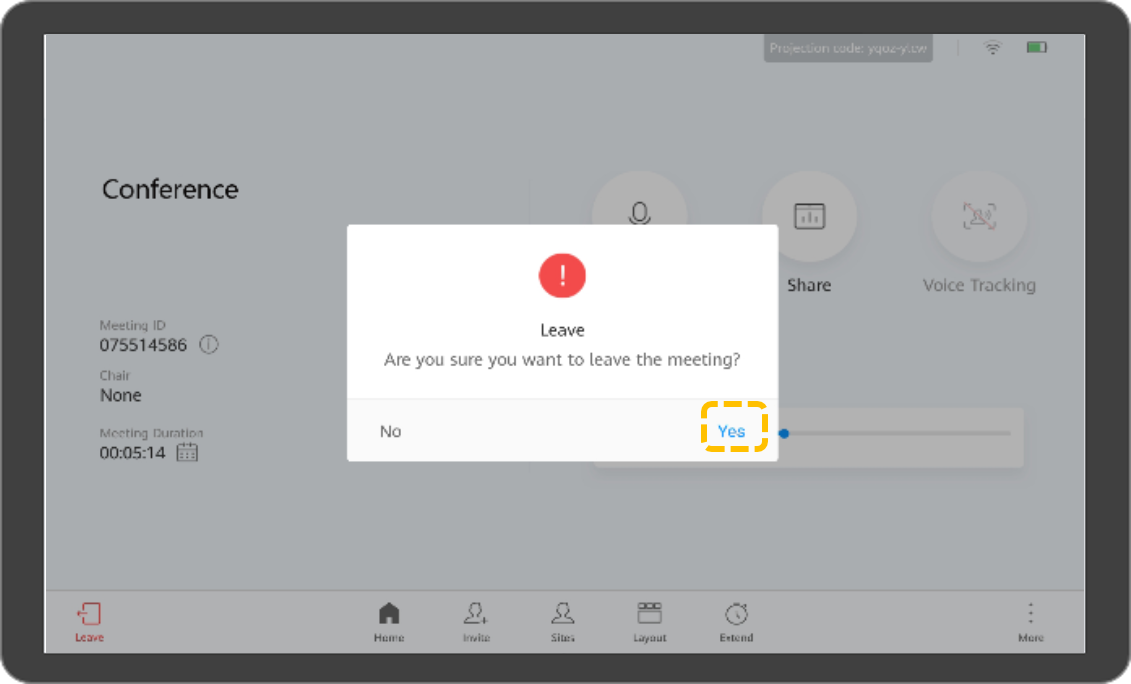
- Touch
 .
.
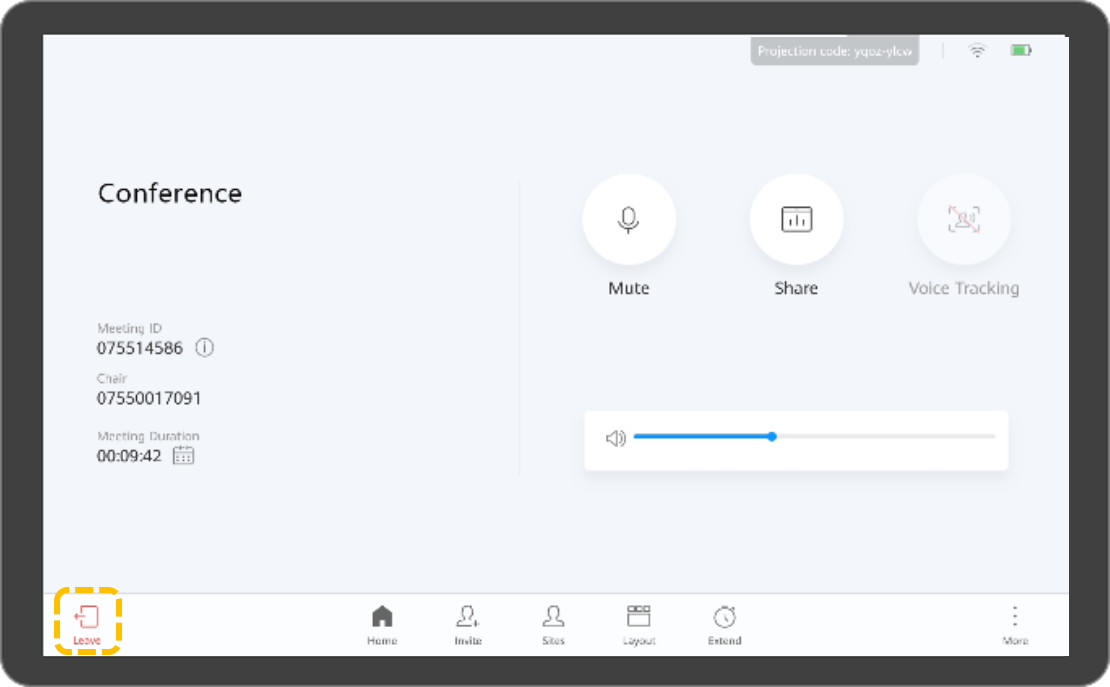
- For a guest site, touch Yes to leave the meeting.
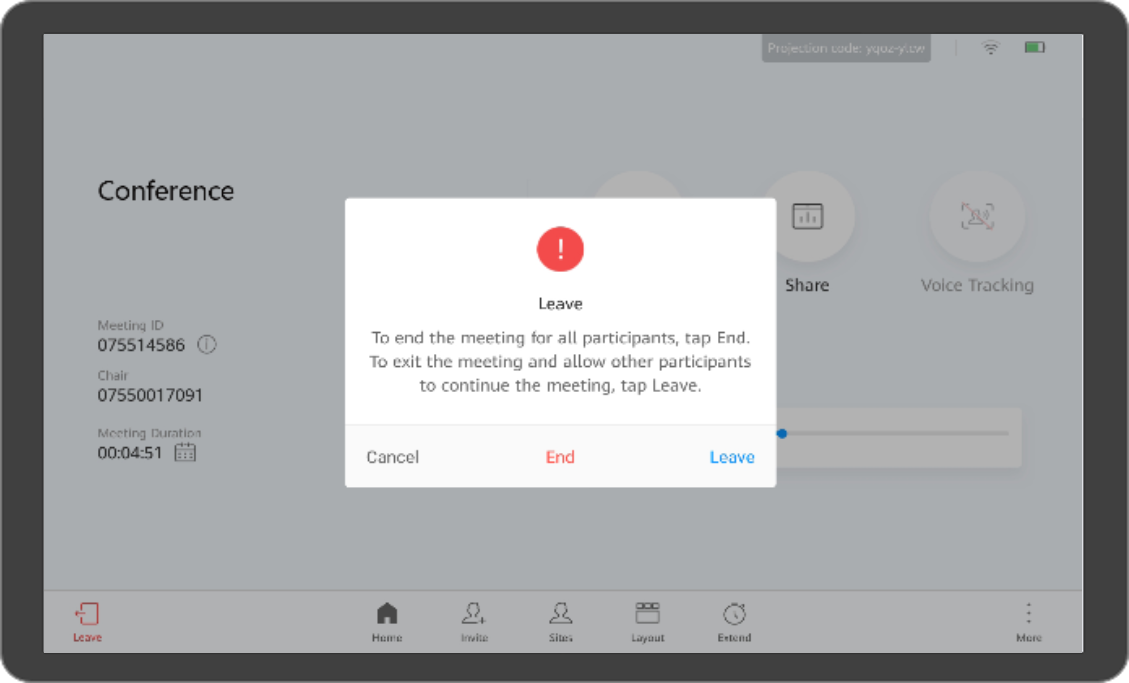
- At the host site, you can touch Leave to leave the meeting, or touch End to end the meeting.
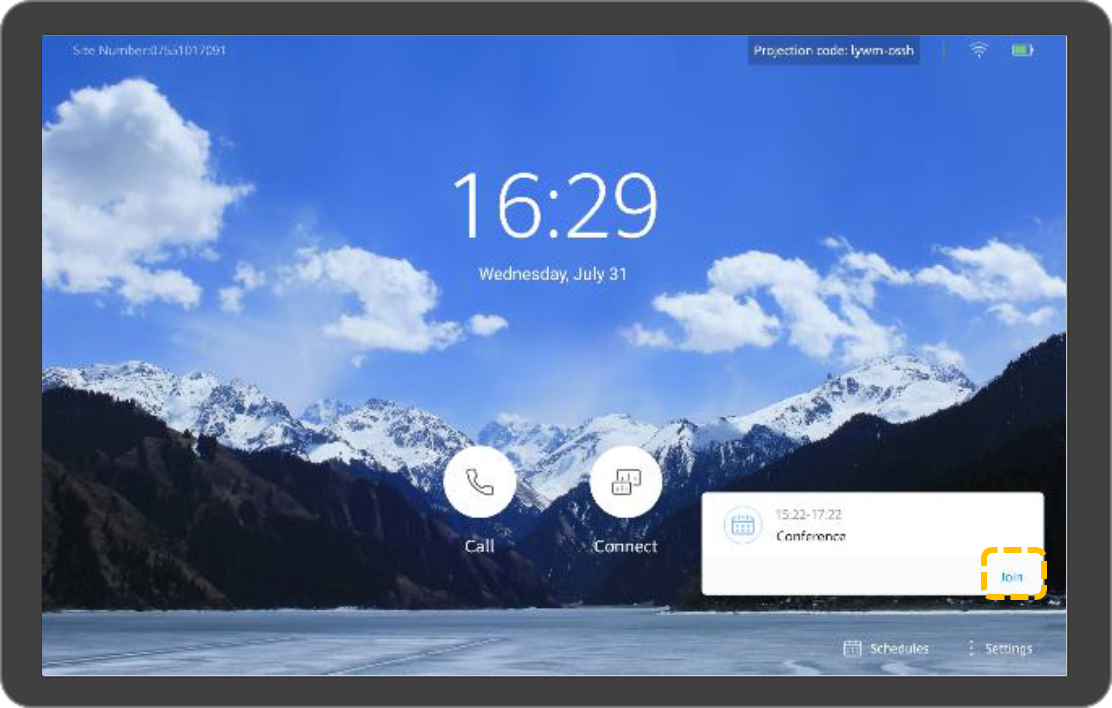
If you choose to leave the meeting, the host control rights are released and you leave the meeting. If the meeting has not ended, you can touch Join in the meeting notification area on the home page to join the meeting again as a guest.
- Touch
Controlling a Local Camera
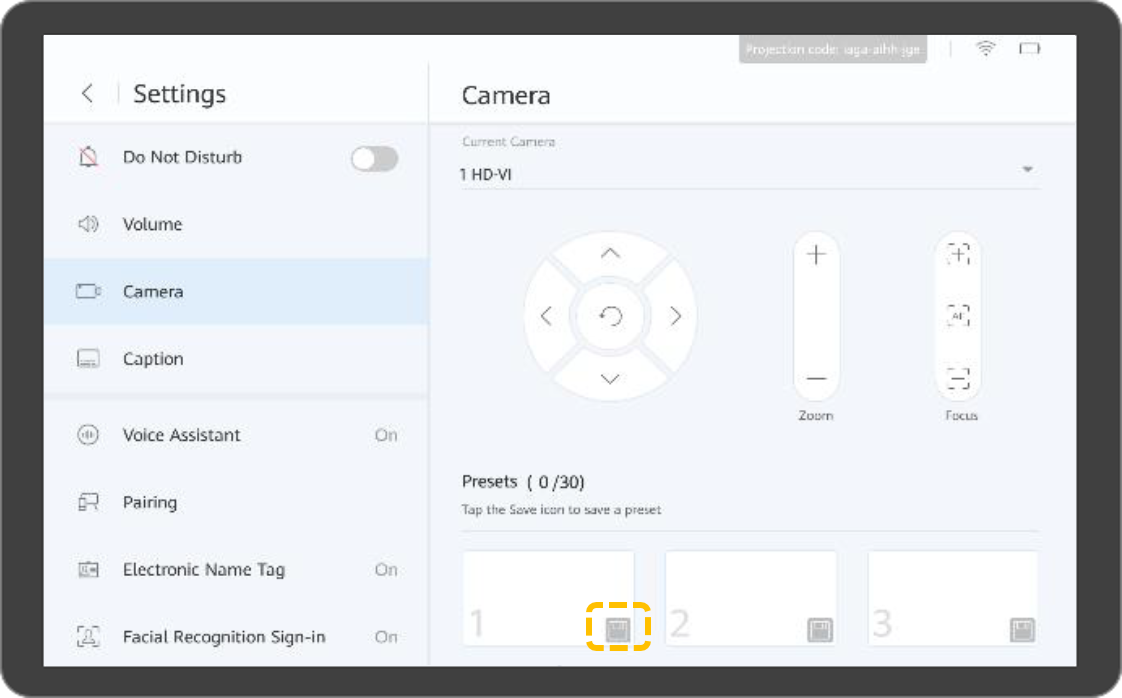
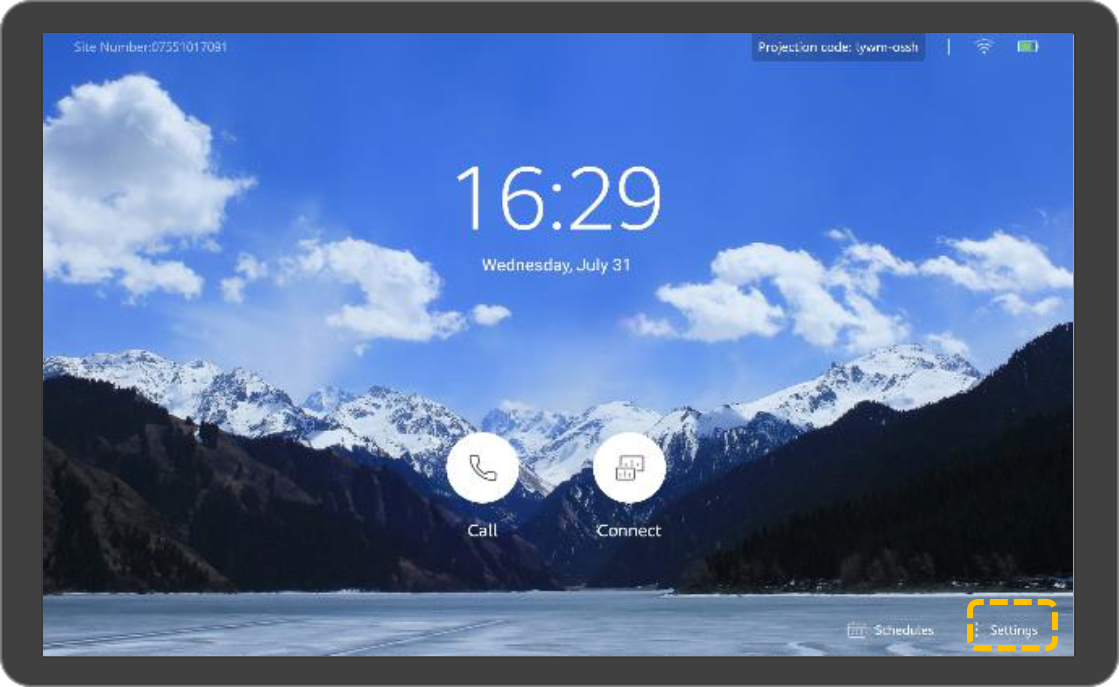
- Touch Settings.
- Select a camera and touch the arrow keys, +, –, and
 to adjust the camera.
- Touch arrow keys to pan or tilt the local camera.
- Touch
 to restore the camera to its initial position.
 - Touch + to zoom in.
- Touch – to zoom out.
- Touch
 to adjust the focal length.
 - Touch
 for the camera to automatically adjust the focal length.
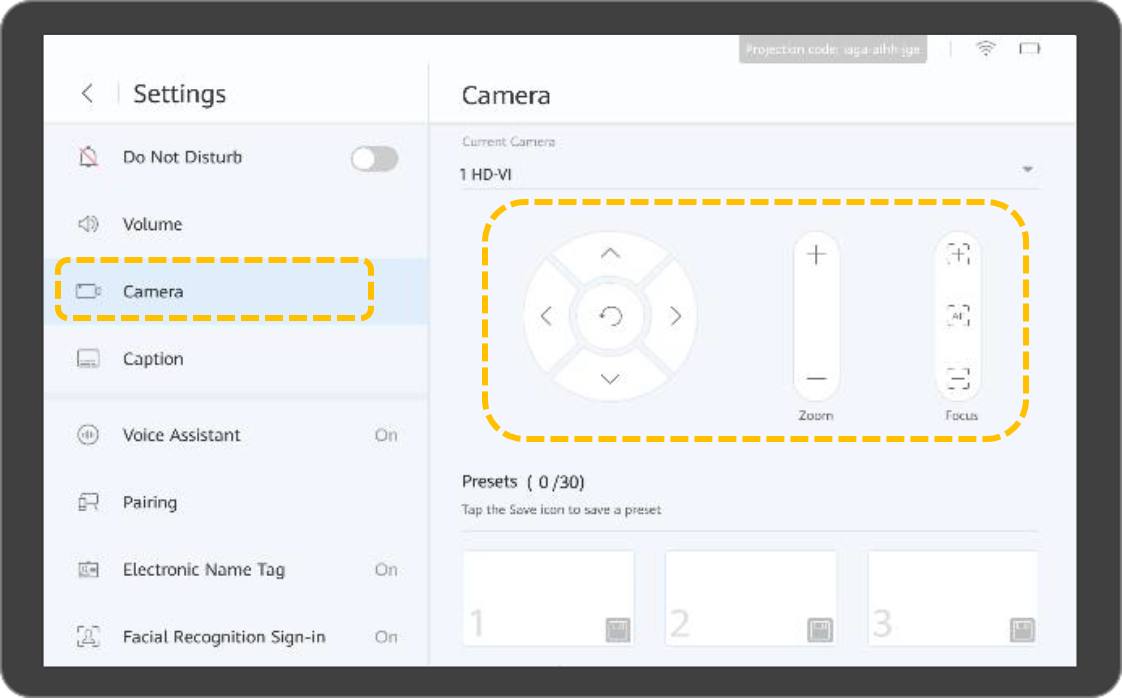
- If the view captured by the camera is exactly what you want, save the camera position as a preset. You can quickly use these presets to improve meeting efficiency.
Dual-Screen Mode
- Enabling the dual-screen mode
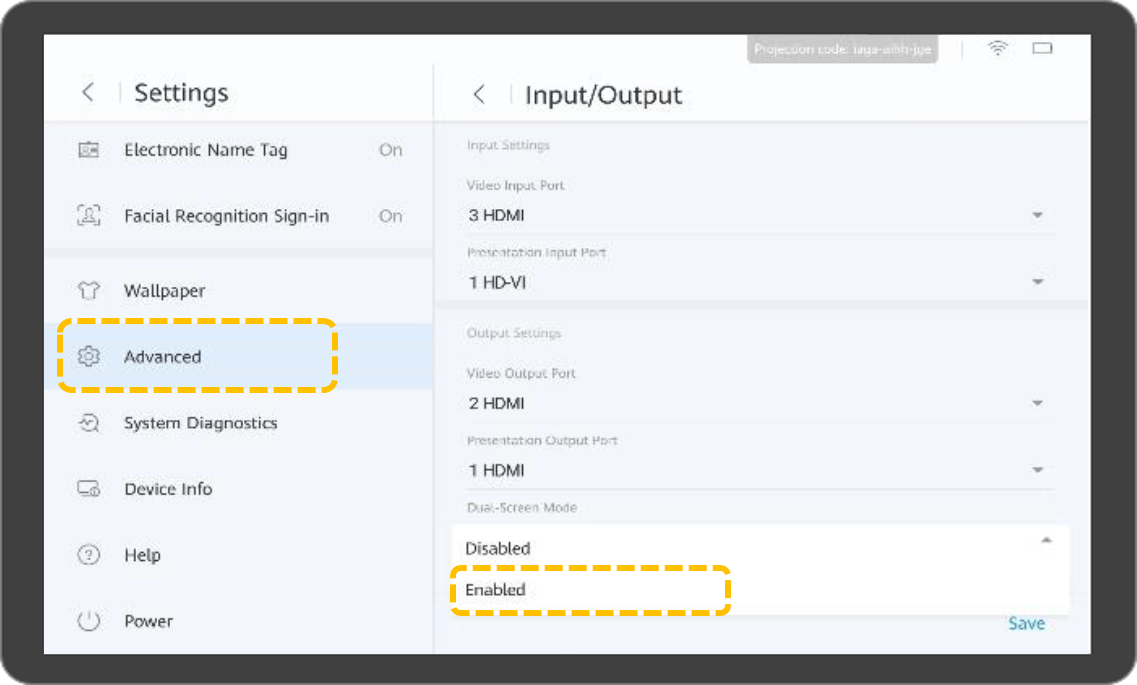
Before enabling the dual-screen mode, ensure that the terminal has been connected to a screen through cables. After you enable the dual-screen mode, the video and presentation are displayed on the two screens. You can exchange or copy the content displayed on both screens.
- Touch Settings.

- Choose Advanced > Input/Output.
- Set Dual-Screen Mode to Enabled and save the settings.
- Touch Settings.
- Switching screen content
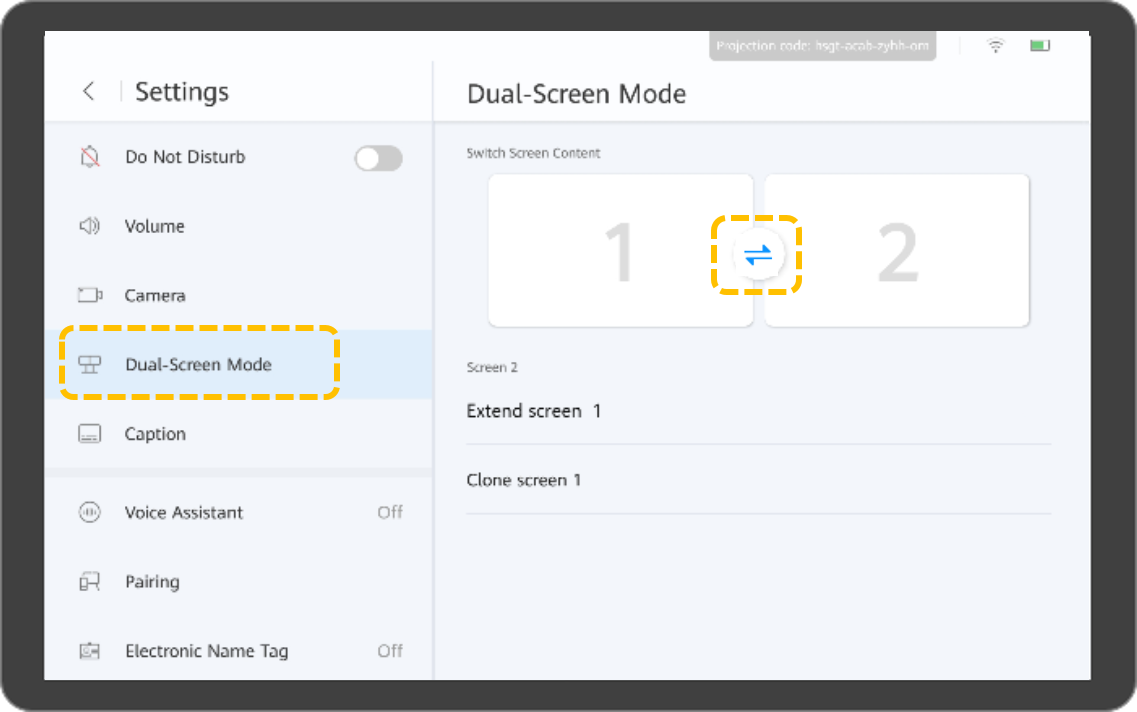
To switch screen content is to exchange the content displayed on both screens. For example, if the video is displayed on screen 1 and the presentation is displayed on screen 2, after you switch screen content, the presentation is displayed on screen 1 and the video is displayed on screen 2.
- Touch Settings.

- Touch Dual-Screen Mode, and touch
 to switch screen content.
- Touch Settings.
- Setting the dual-screen display mode
- Touch Settings.

- Touch Dual-Screen Mode, and select the dual-screen display mode under Clone Screen Content.
- Normal mode: The video and presentation are displayed on the two screens respectively.
- Dual-screen video: The video is displayed on both screens.
- Dual-screen presentation: The presentation is displayed on both screens.
- Touch Settings.
Feedback
Was this page helpful?
Provide feedbackThank you very much for your feedback. We will continue working to improve the documentation.See the reply and handling status in My Cloud VOC.
For any further questions, feel free to contact us through the chatbot.
Chatbot

