CloudLink Board
User Interface and Wake-up
Connect the Board to the power supply and press the Power button at the rear of it. Then the Board automatically starts up.
To wake the Board up when it is in sleep mode, you can:
- Touch the Board screen.
- Press the Home button.
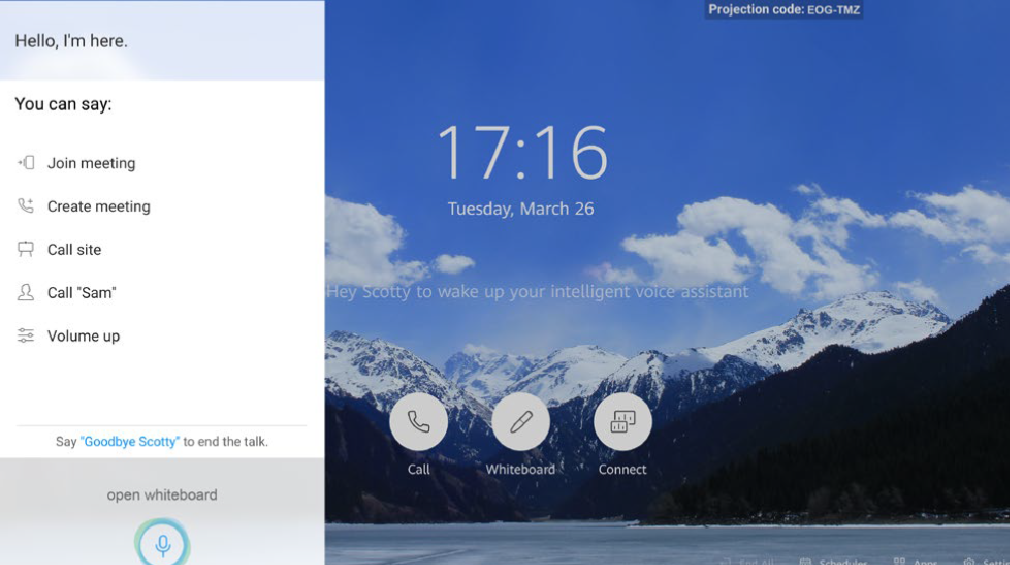
- Say "Hey Scotty" if the voice assistant has been enabled.
- Take a pen from its dock.

Joining a Meeting
- Joining an ongoing meeting or a scheduled meeting
Join an ongoing meeting or a scheduled meeting that is about to start, as prompted in the meeting notification box that appears on the Board's home screen.

- Joining a meeting using a meeting ID
If you have a meeting ID, dial it to join the meeting.
- Touch
 .
.

- Enter the meeting ID and touch Call.
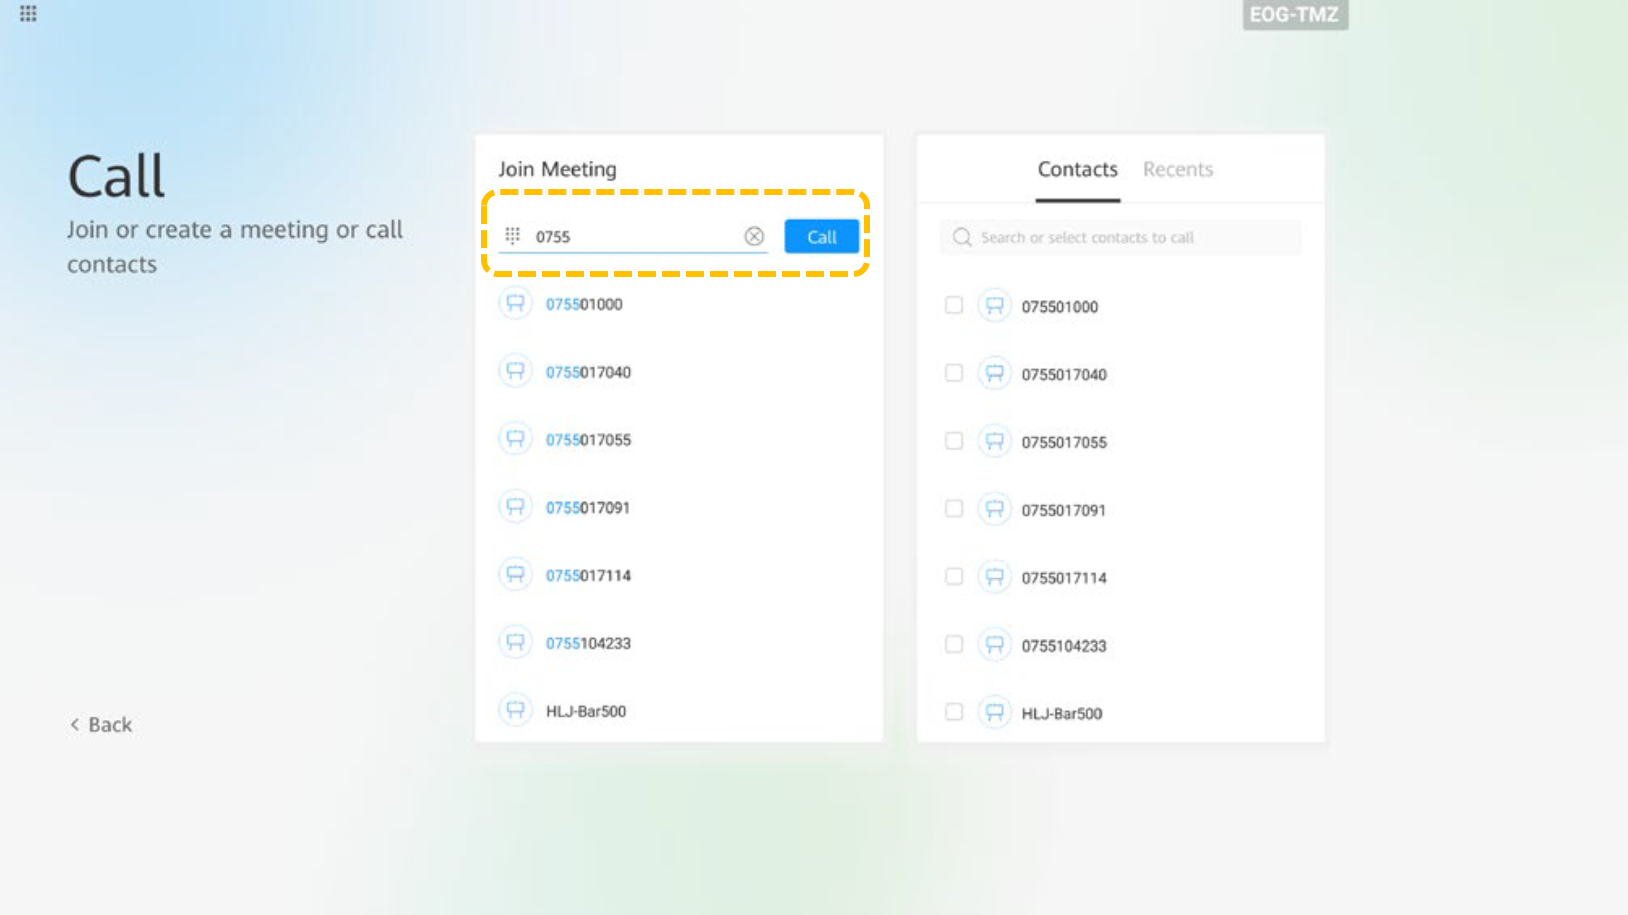
- (Optional) When necessary, enter a meeting's password in the second dialing keyboard.
- Touch
Holding a Meeting
- Creating a meeting
After you create a meeting, a meeting ID is generated. You can send this ID to participants to let them join the meeting by dialing this ID.
After the meeting is created, you are the host of the meeting.
- Touch
 .
.

- Touch Create Meeting.

- Touch
- Calling a site
Enter the keyword and touch a site name to select the site, or call a site from the contact list.
- Touch
 .
.

- Touch the text box, enter the site number, and touch Call.
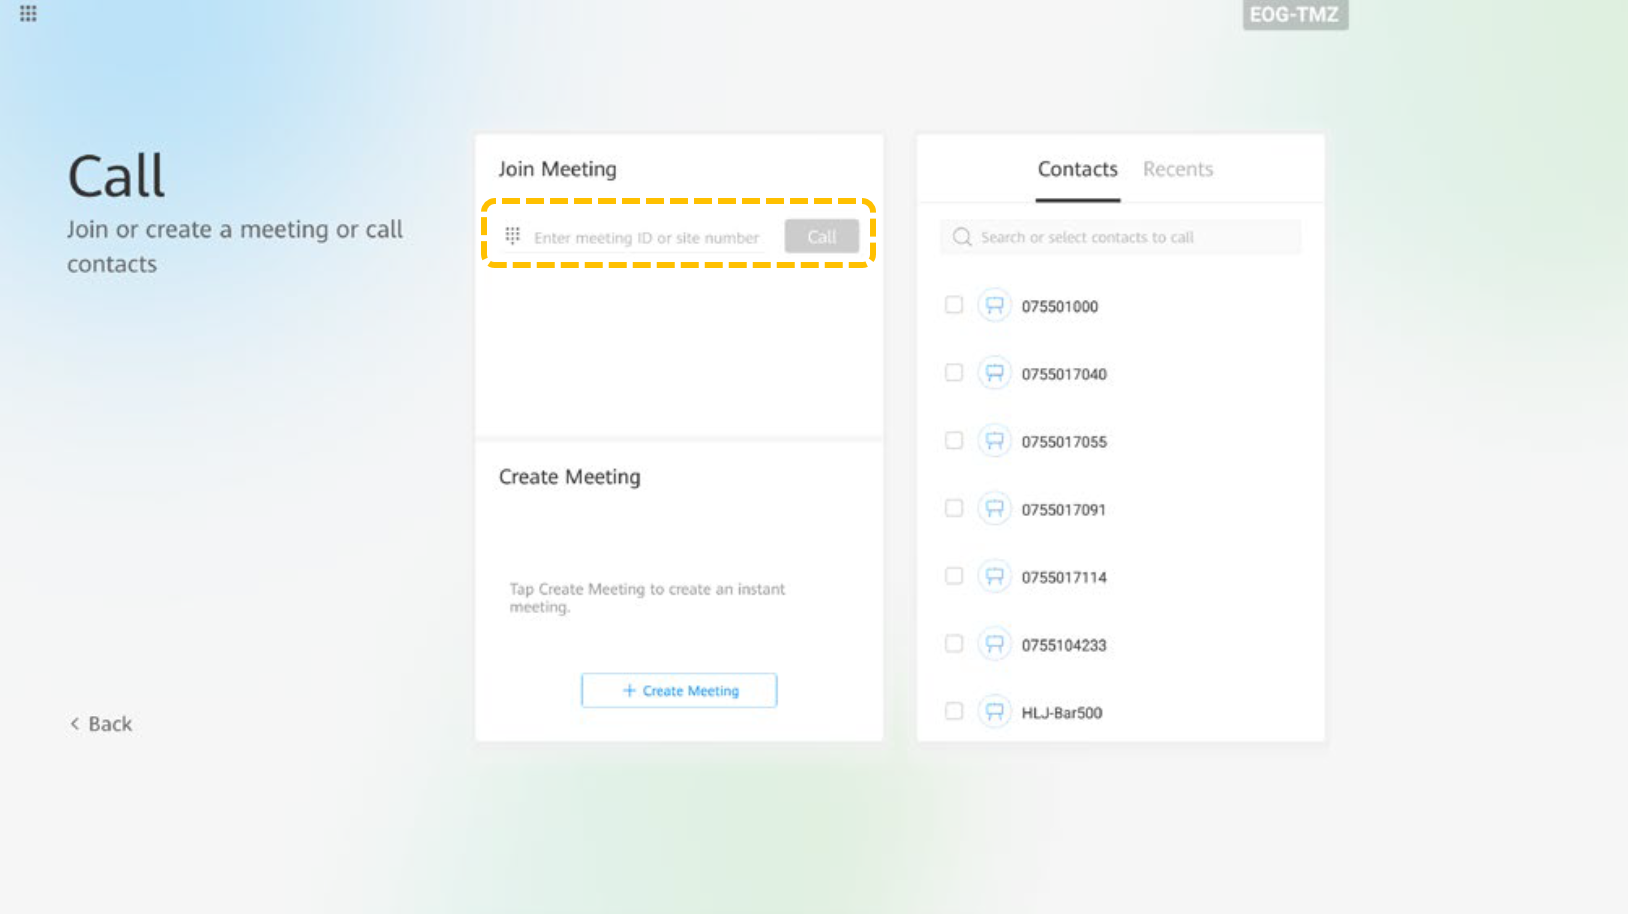
- Touch
- Calling multiple sites
- Touch
 .
.

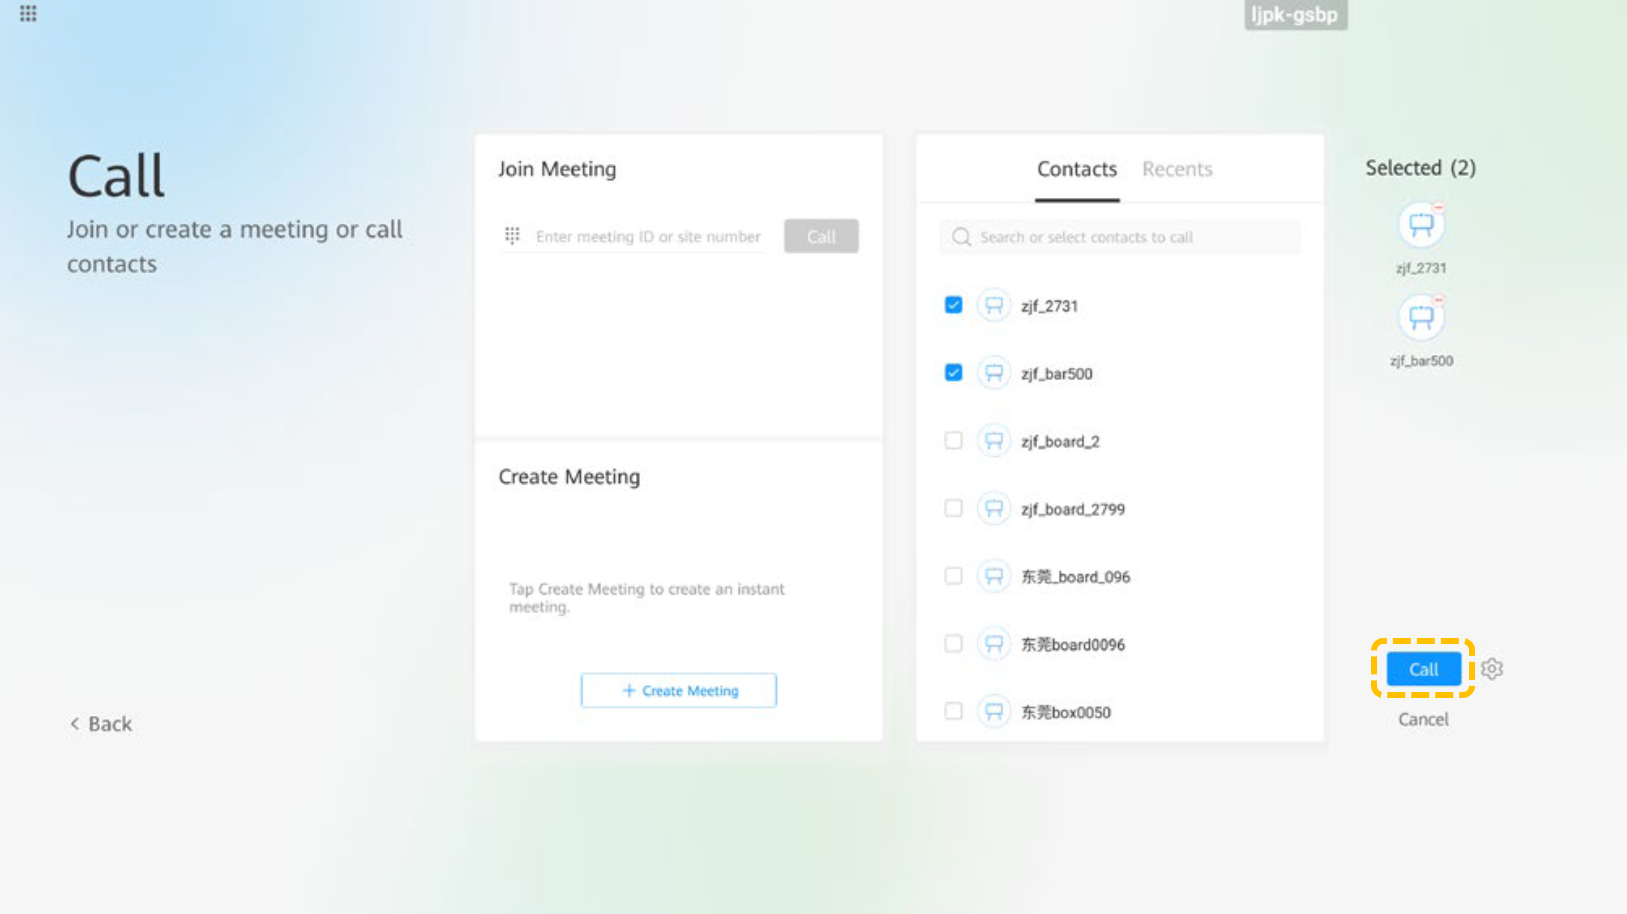
- On the Contacts tab page, select the sites to call.

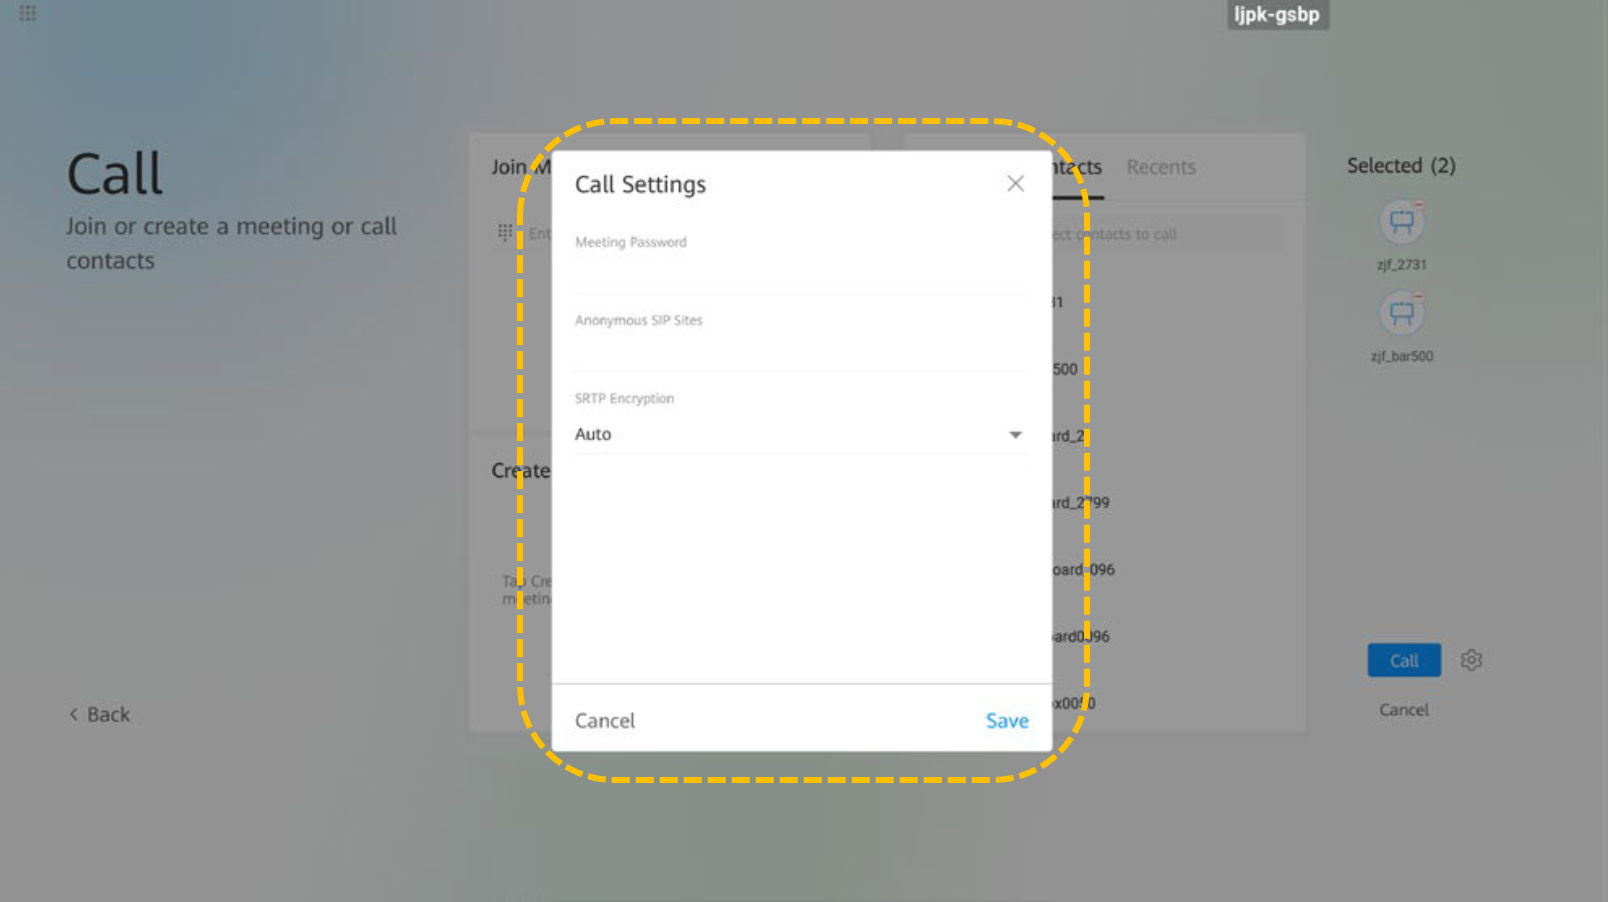
- (Optional) Touch
 , set parameters such as the meeting password, and touch Save. You can use the default settings.
- Touch Call.
- Touch
- Placing a call from Recents
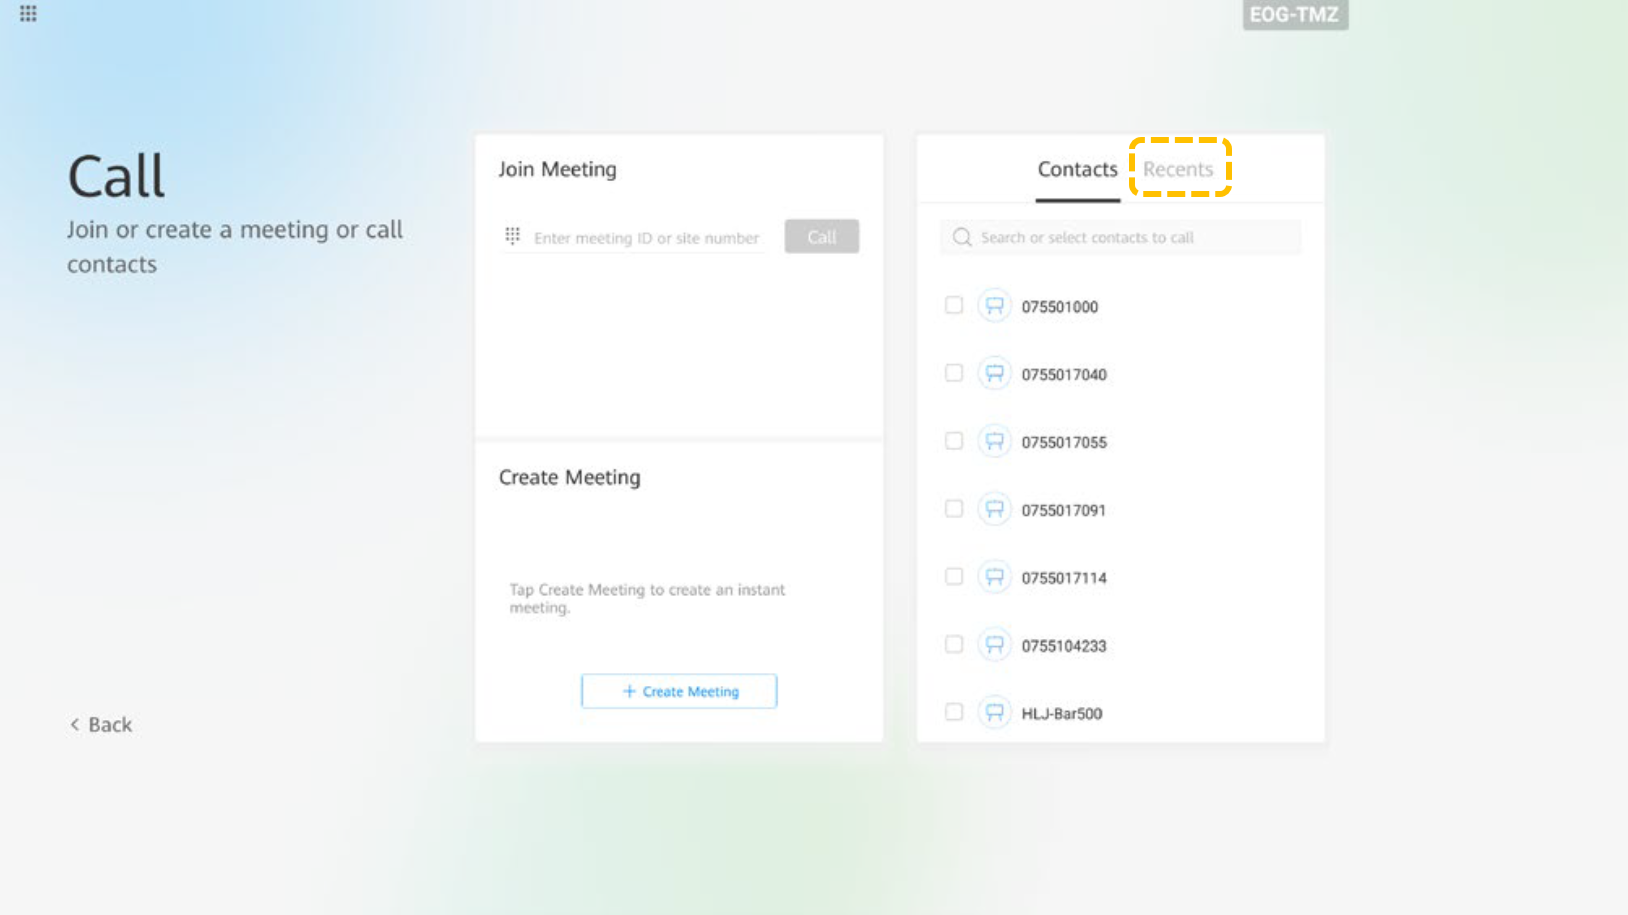
Recents is a list of calls you have placed, received, or missed earlier. You can place a call from Recents.
- Touch
 .
.

- Touch Recents.
- Find the site you want to call and touch
 .
.

- Touch
- Holding a meeting in a cloud meeting room

The Board can hold a meeting in a cloud meeting room only after the enterprise administrator allocates the cloud meeting room to the Board on the HUAWEI CLOUD Meeting Management Platform.
- Touch
 .
.

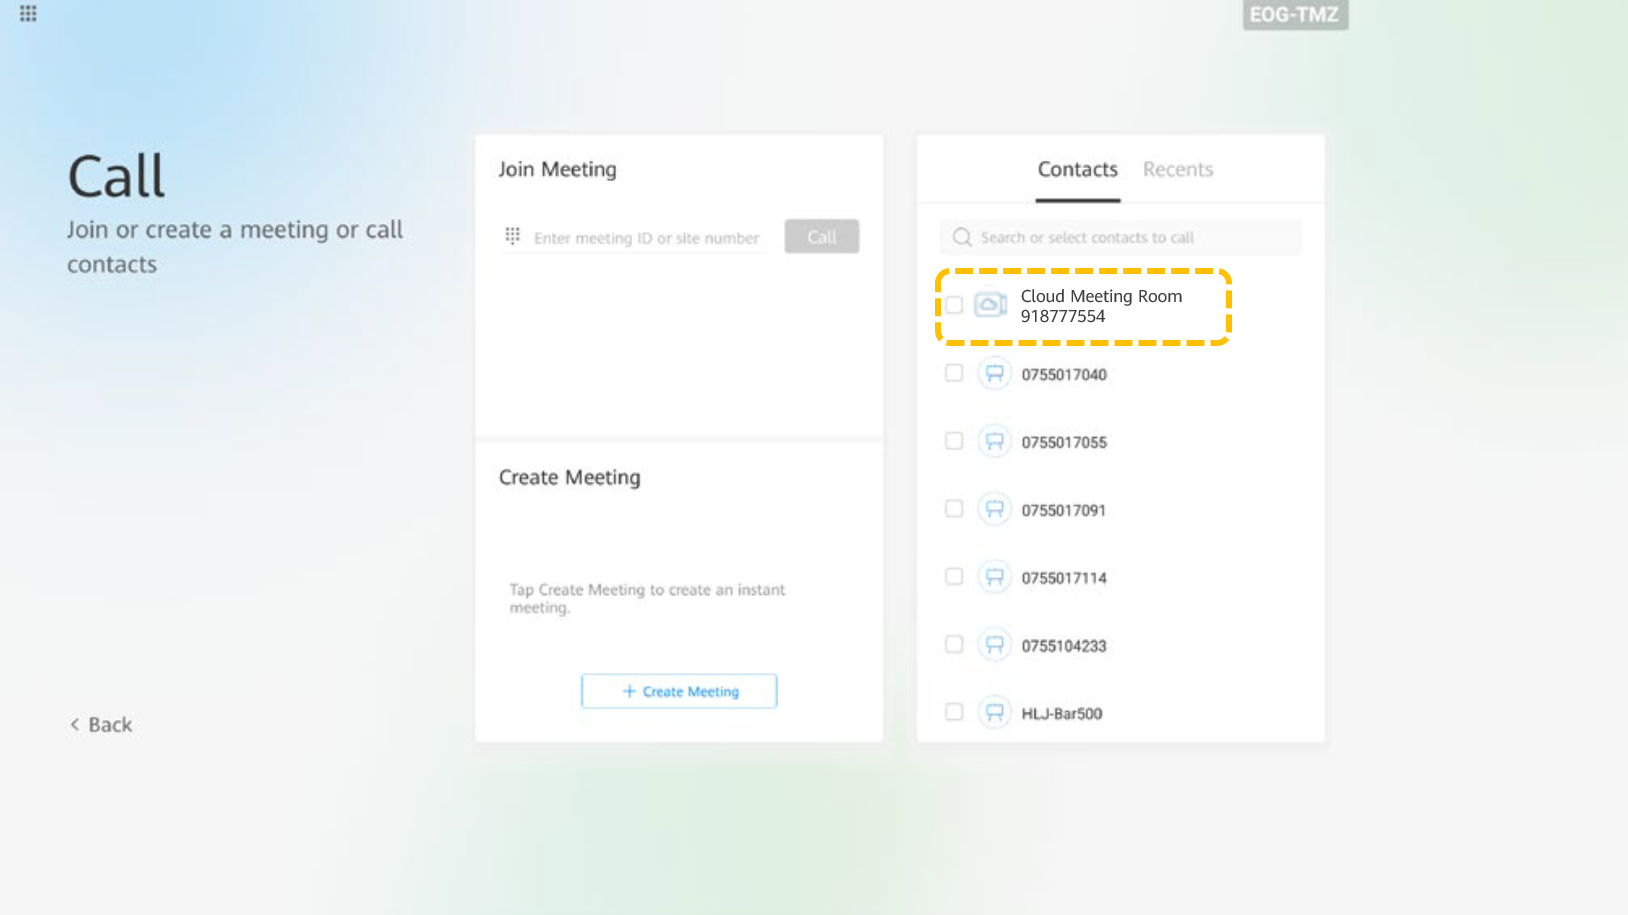
- On the Contacts tab page, touch Cloud Meeting Room.
- Touch
Sharing Content
The Board allows you to share content in the following ways:
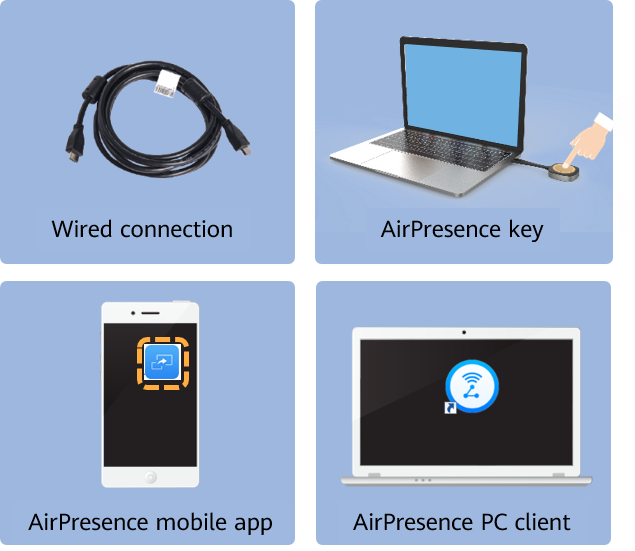
- Projecting content
- Touch
 .
.

- To project the content using a cable connection, touch Preview.

- Touch
- Sharing content using a cable connection
Before sharing the content, ensure that you have connected a material source using a cable.
- Touch Share and then touch Wired share.

- Touch the screen, touch
 to edit the shared material, and copy the material to a whiteboard.
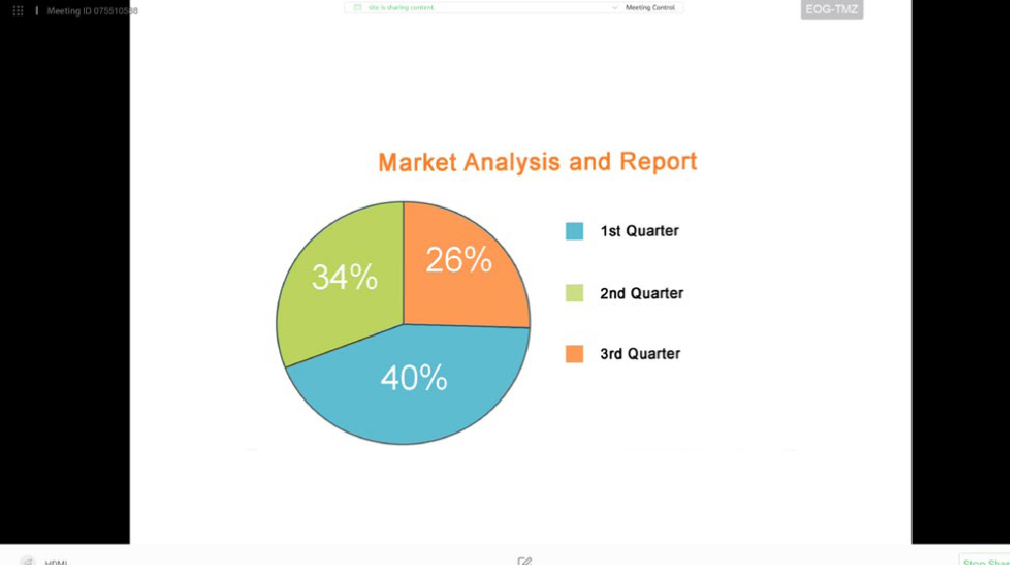

- Touch Share and then touch Wired share.
- Sharing content using the AirPresence Key
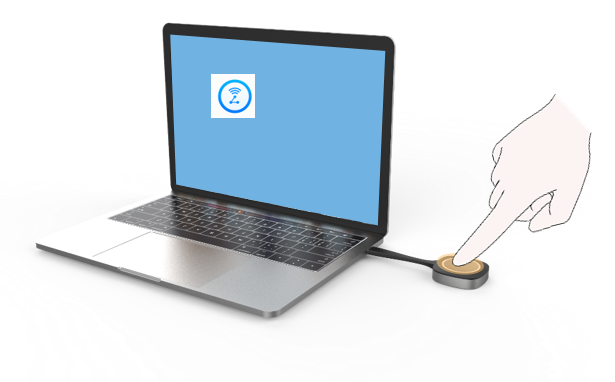
- Insert the AirPresence Key into the USB port of the terminal for automatic pairing.
- After the pairing is successful, remove the AirPresence Key from the terminal and insert it into the USB port on the PC.
- Install the AirPresence Key program on the PC. After the installation is complete, the message is displayed, indicating that you can press the button on the AirPresence Key to share materials.
- Press the button on the AirPresence Key to share the PC desktop.
- Sharing content using the AirPresence mobile app

The mobile device that has AirPresence installed must connect to the same wireless network as the terminal and is reachable to the terminal.
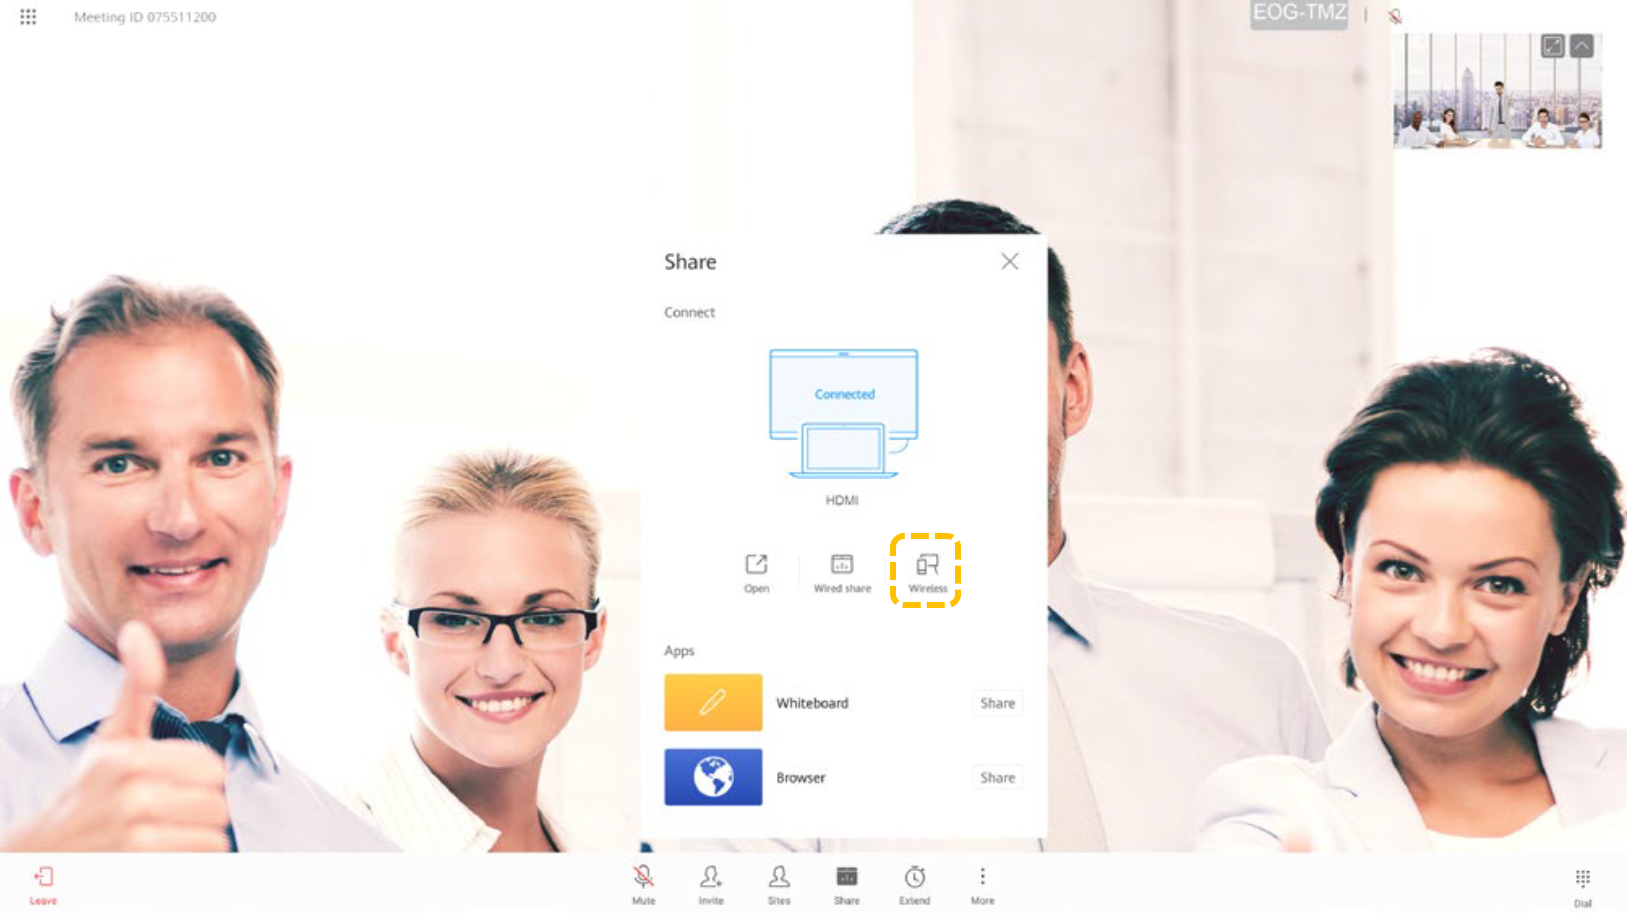
- Touch Share and then touch Wireless.
-

- Use your mobile device to scan the QR code and install AirPresence as instructed.
- After the installation is complete, touch the AirPresence icon to start it, and use it to scan the pairing code or enter the projection code displayed on the terminal.
- Touch Share and select the file you want to share.

- Touch Share and then touch Wireless.
Hosting a Meeting
Available operations for the host and guests are listed below.
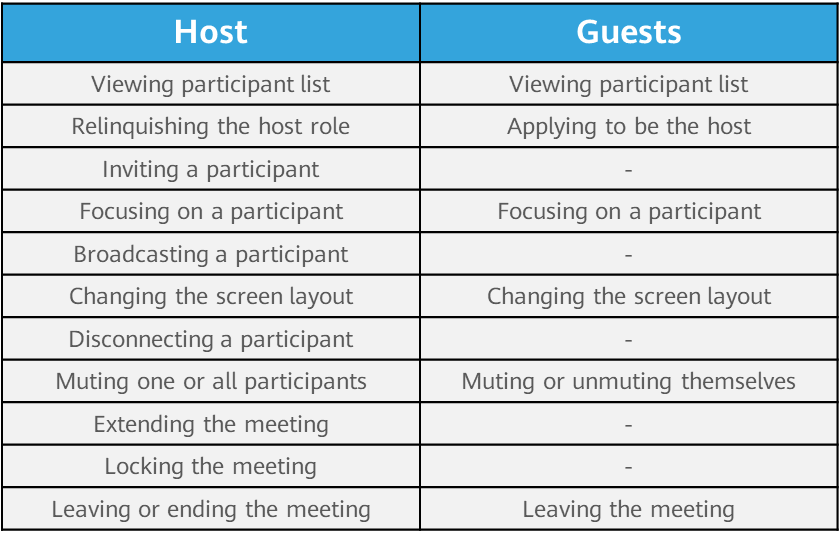
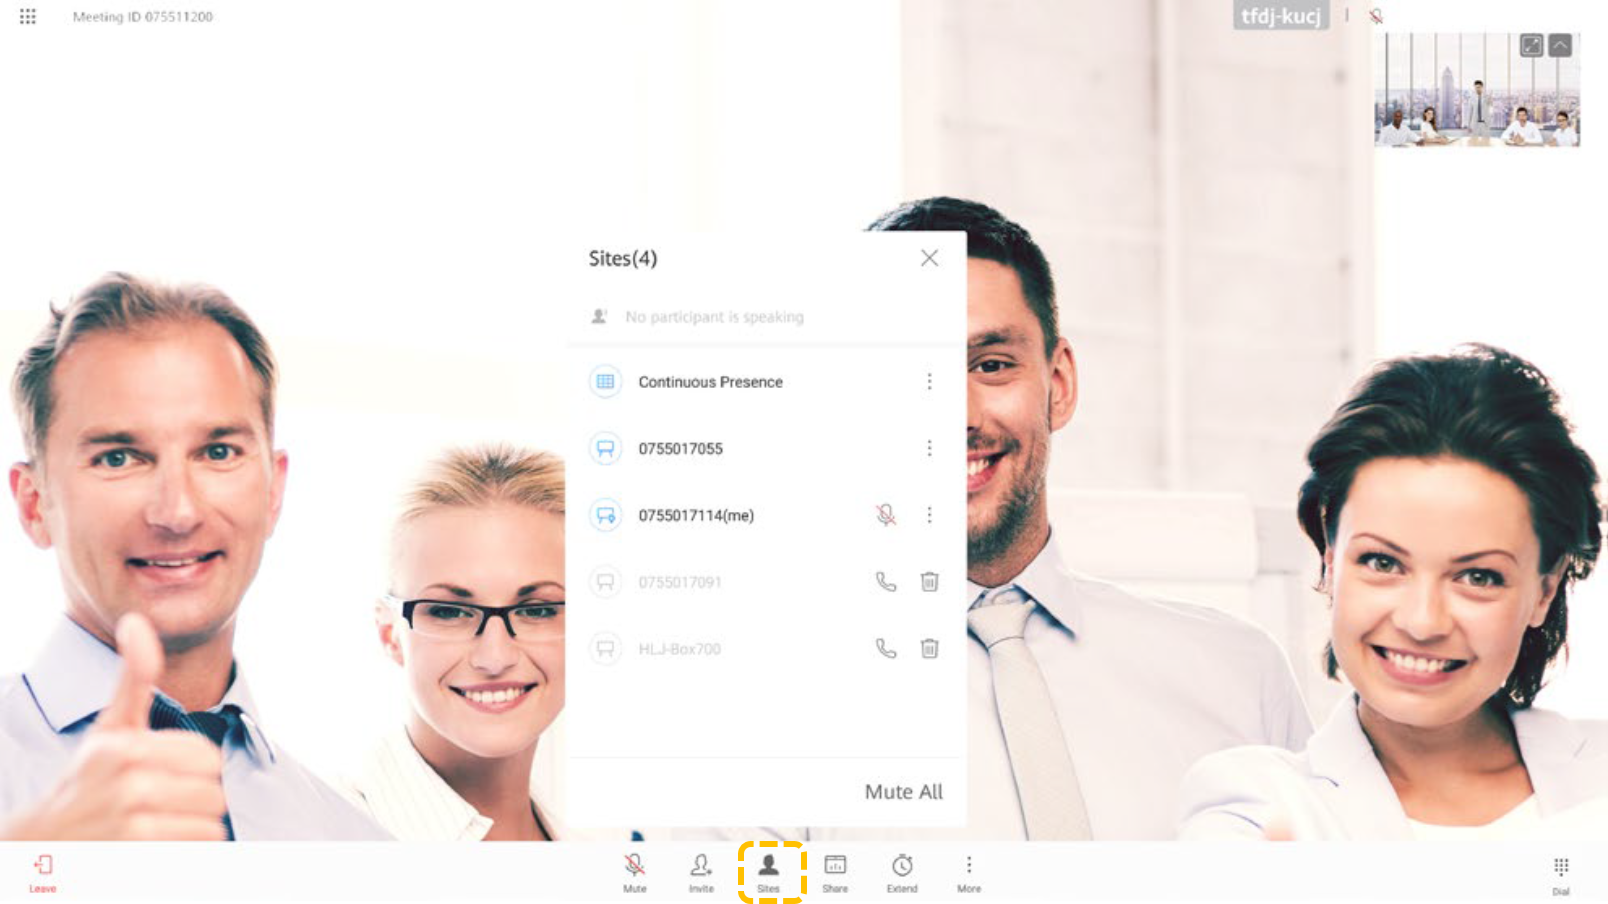
- Viewing the participant list
All participants in a meeting can view the participant list.

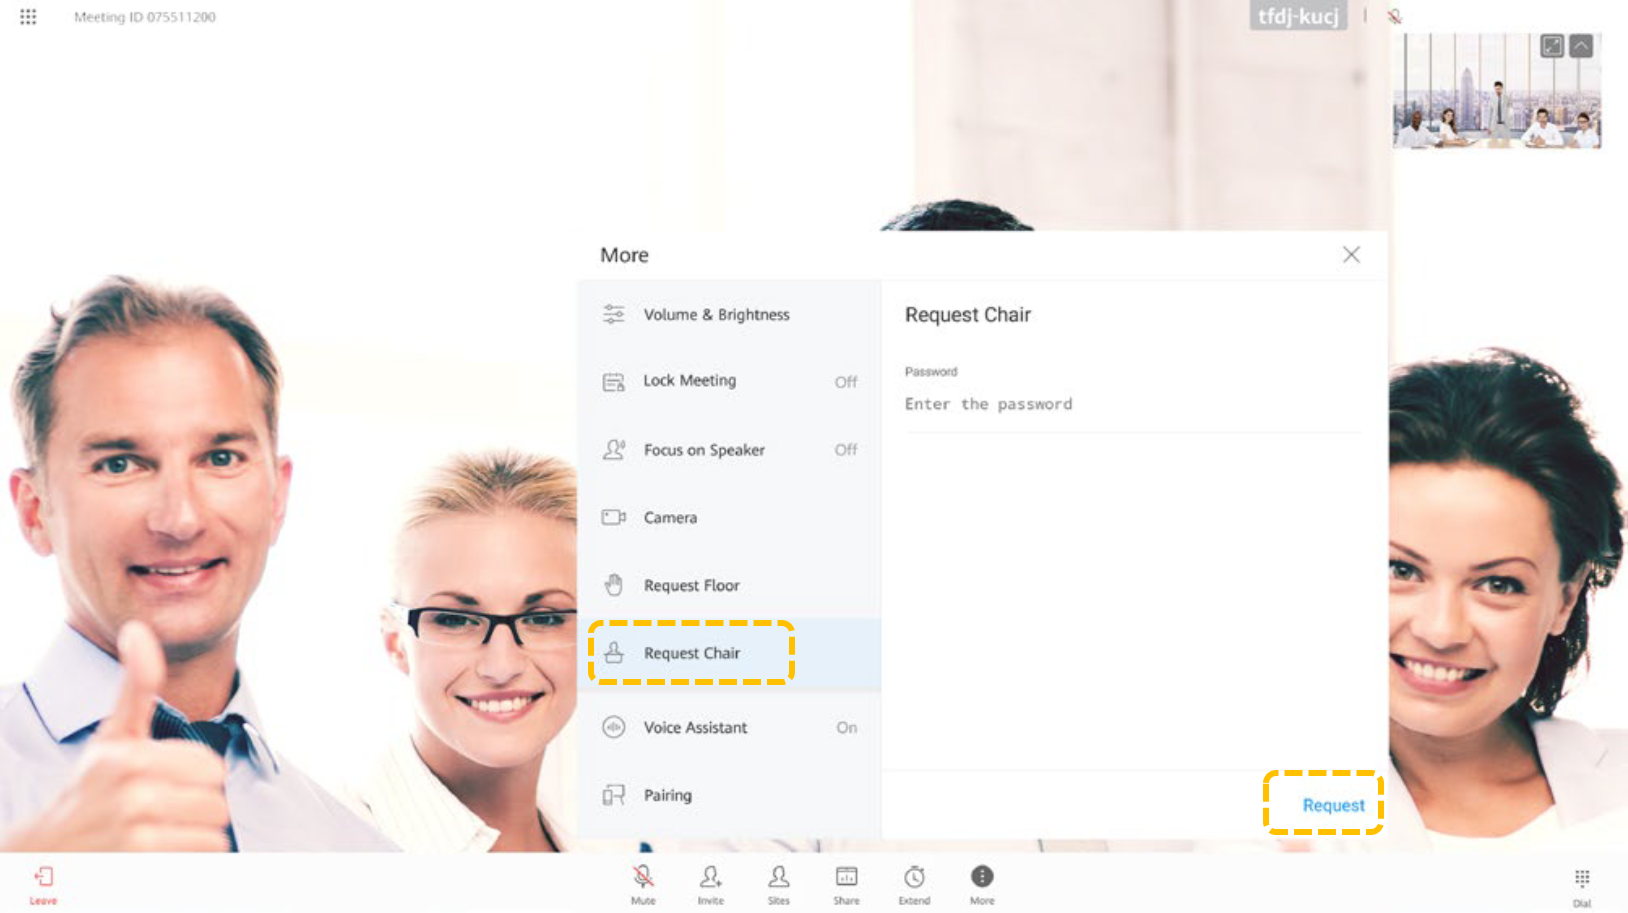
- Applying to be the host
- If a meeting has no host site, you can apply to be the host.
- A two-party meeting does not support the host role.
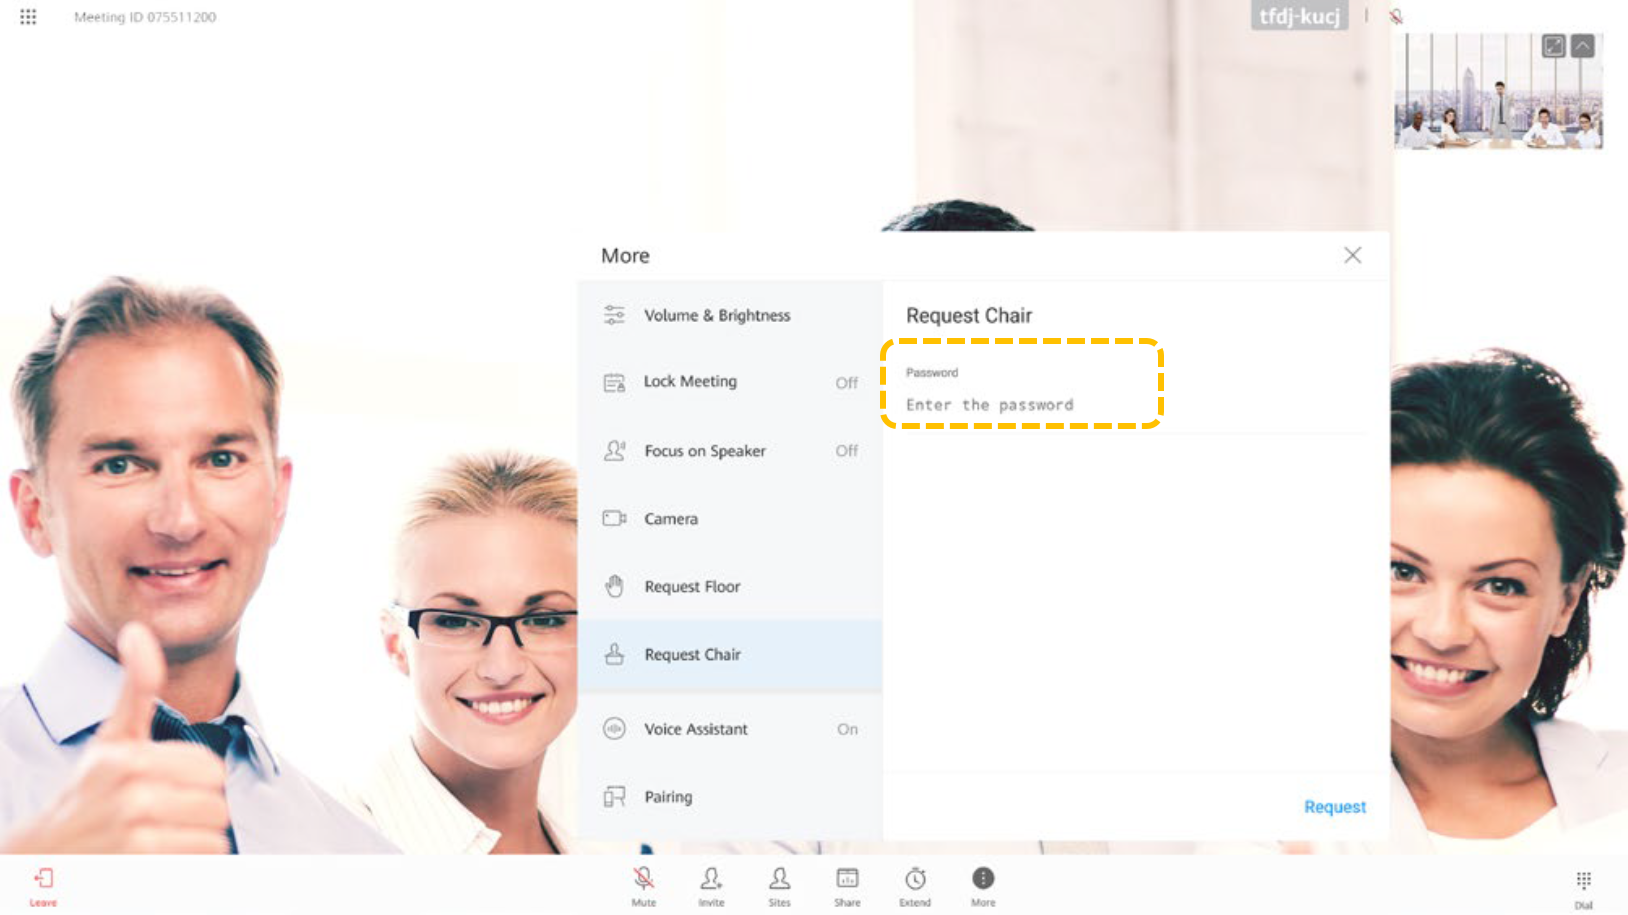
- Applying to be the host requires the host password if one has been set during meeting creation. Obtain the password from the meeting scheduler.
- Requesting the floor
If a meeting has the host site, guest sites can request the floor from the host site to speak in the meeting. After being given the floor, the requesting site can speak and be broadcasted, and microphones of other sites are automatically muted.

This function is supported only when the host site joins the meeting using TE30, TE40, TE50, TE60, or TX50.
- Touch More.
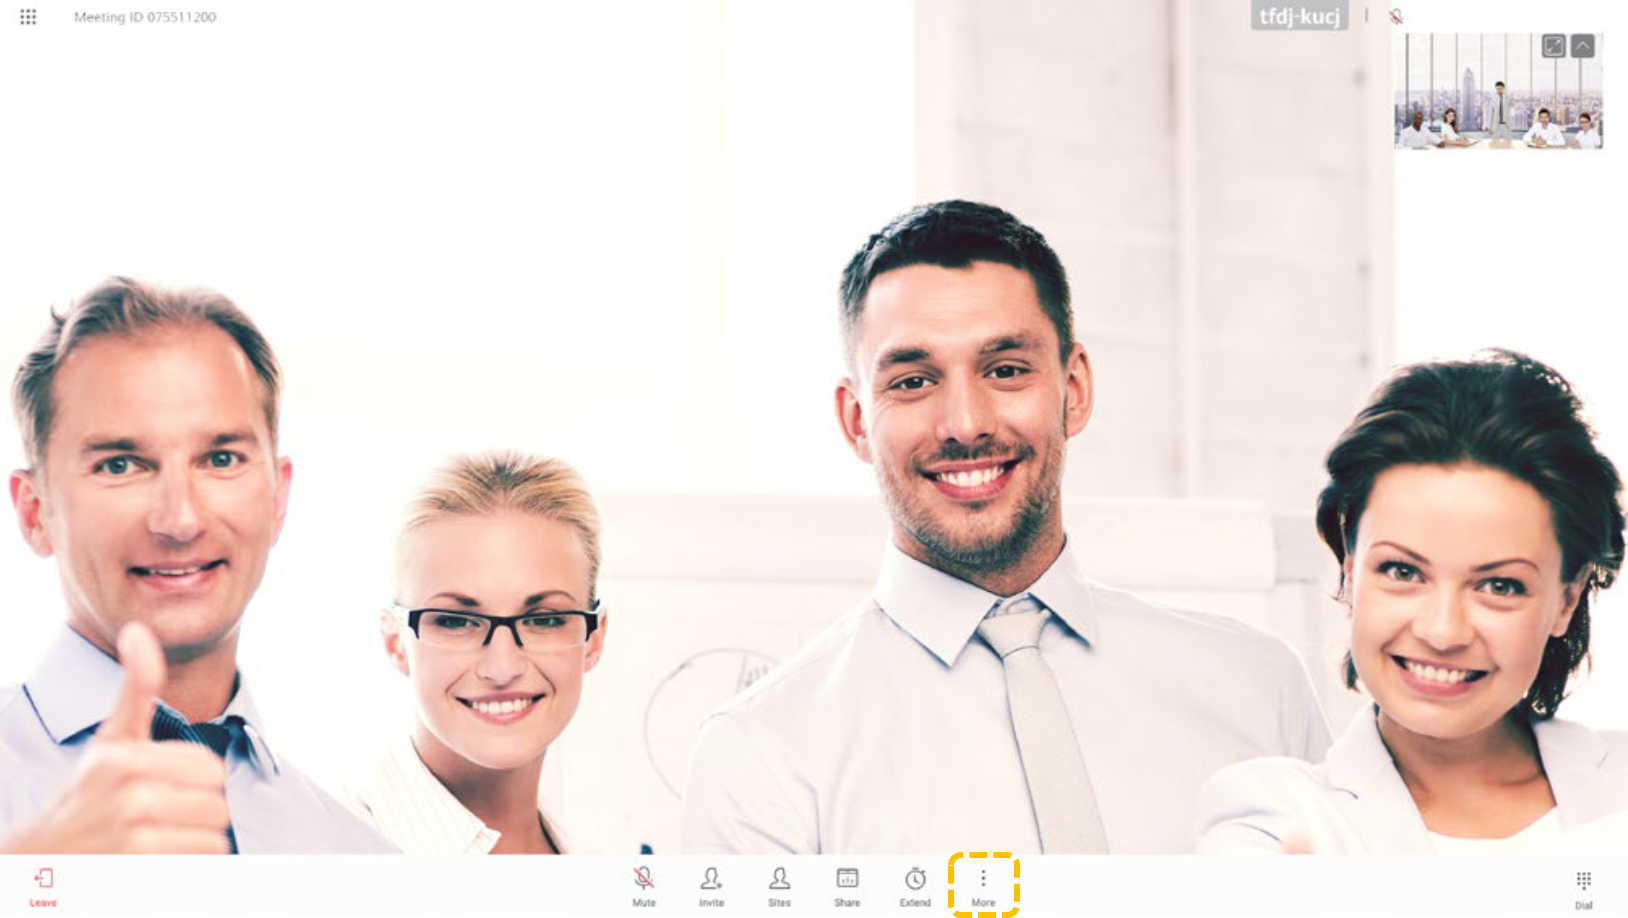
- Select Request Floor and touch Request Floor.

- Touch More.
- Inviting sites
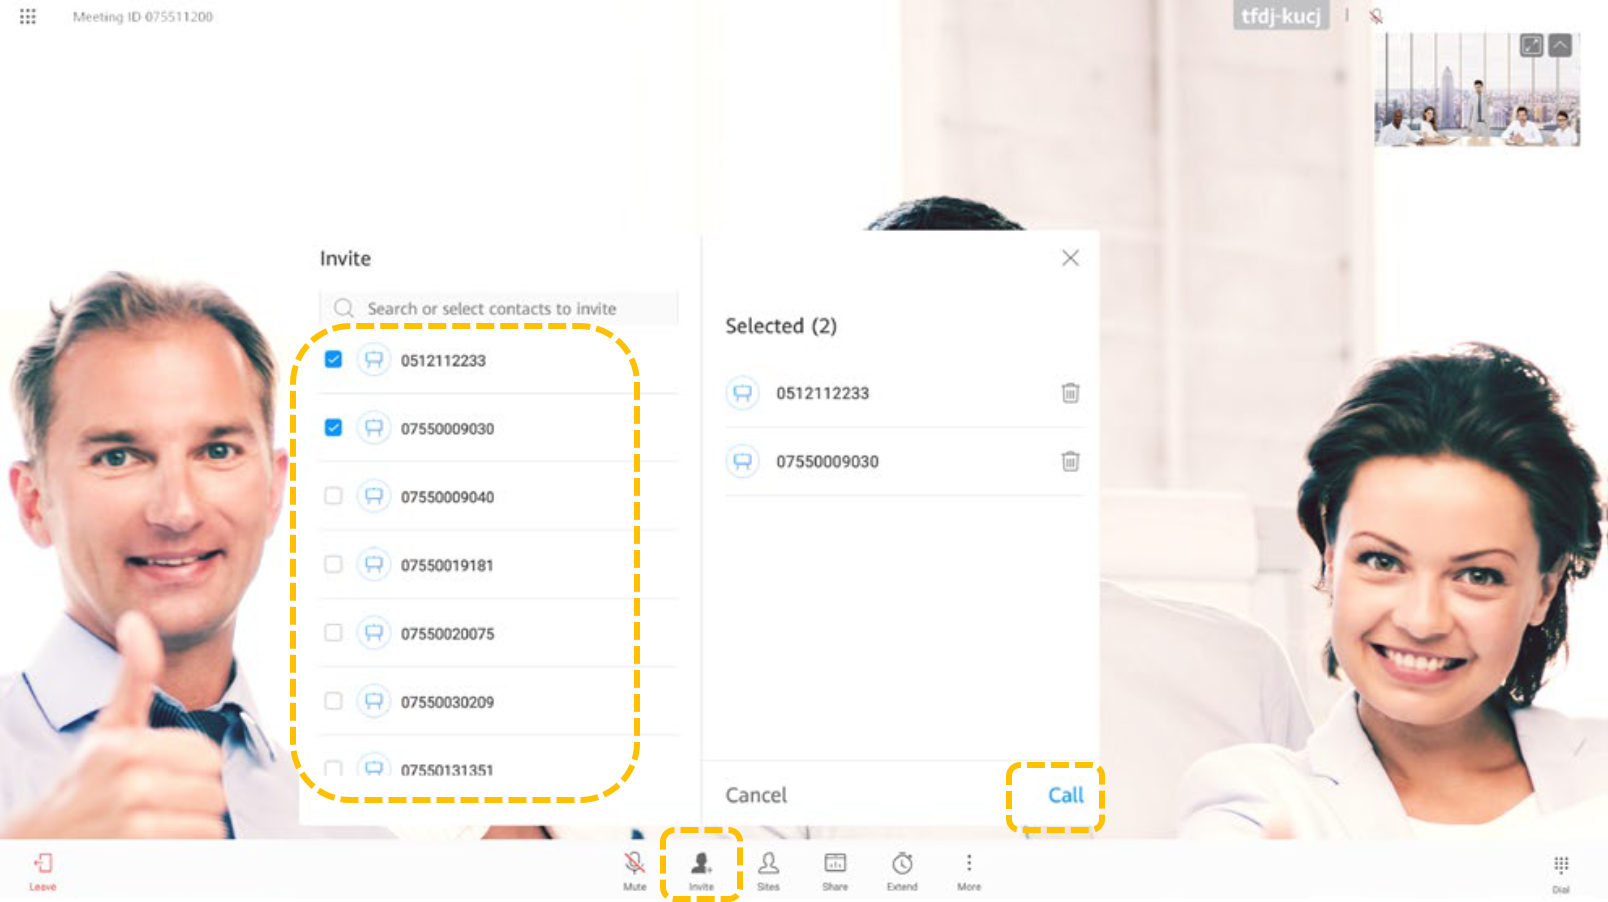
- During a meeting, users who are not supposed in the meeting can be invited.
- You can search for a site by keyword and select it, or press the Home button to return to the home screen, touch Call, and then select the site to call on the Contacts tab page.
Touch Invite, select the sites to invite, and touch Call.
- Focusing on a site
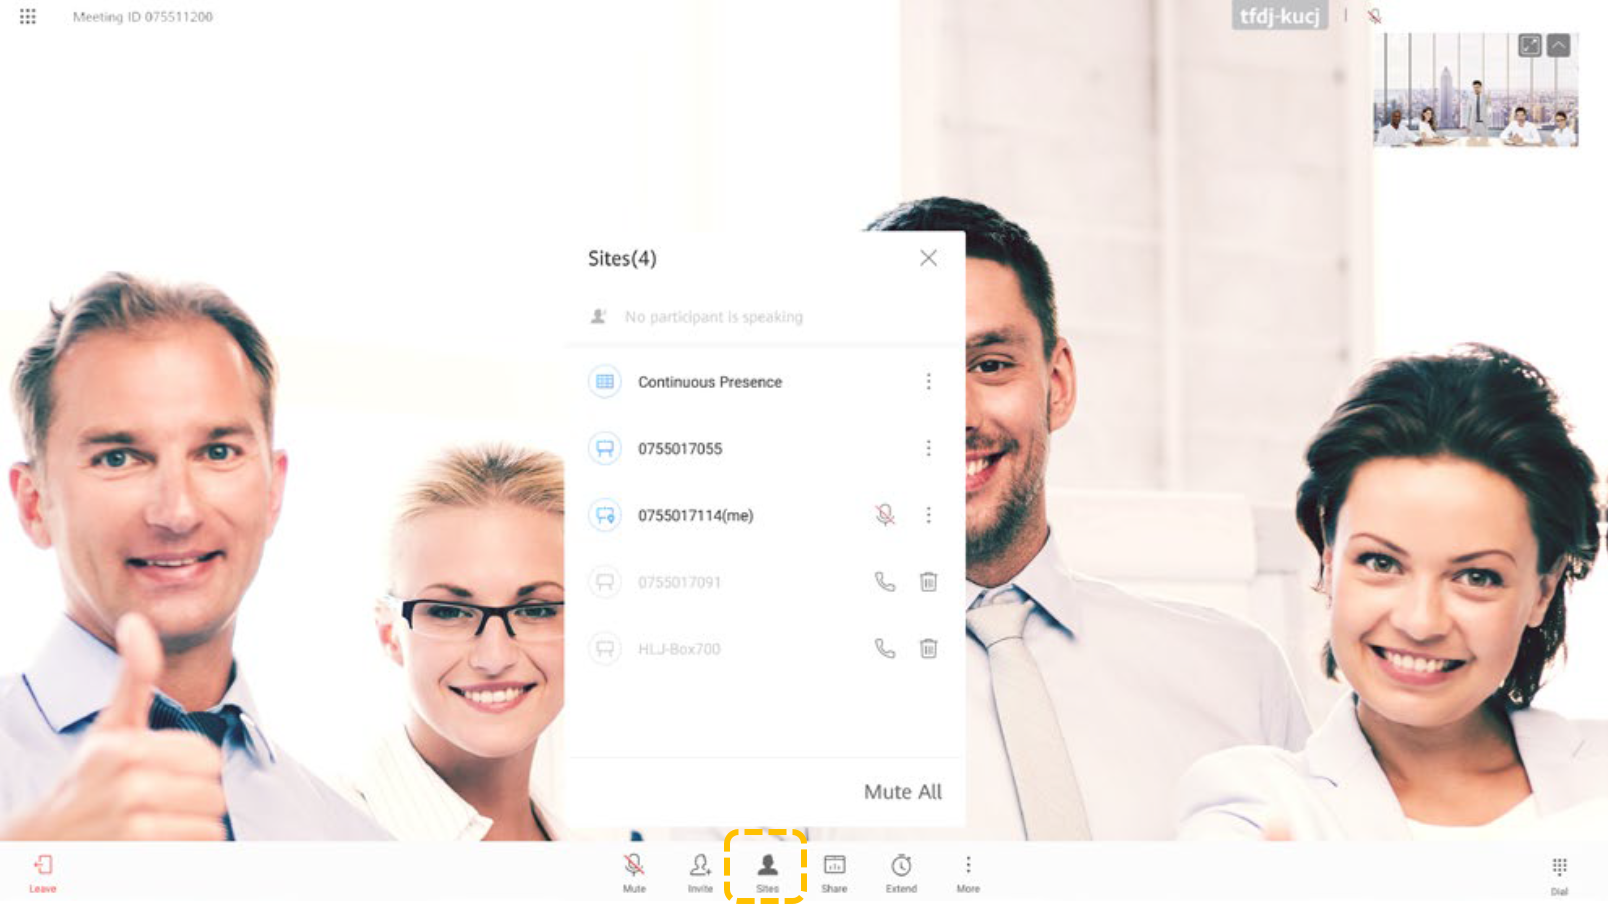
If the host site does not broadcast a site, the host site and other participants can focus on any site.
- Touch Sites.
- Touch
 in the row containing the site to focus on, and touch View Site.

- Touch Sites.
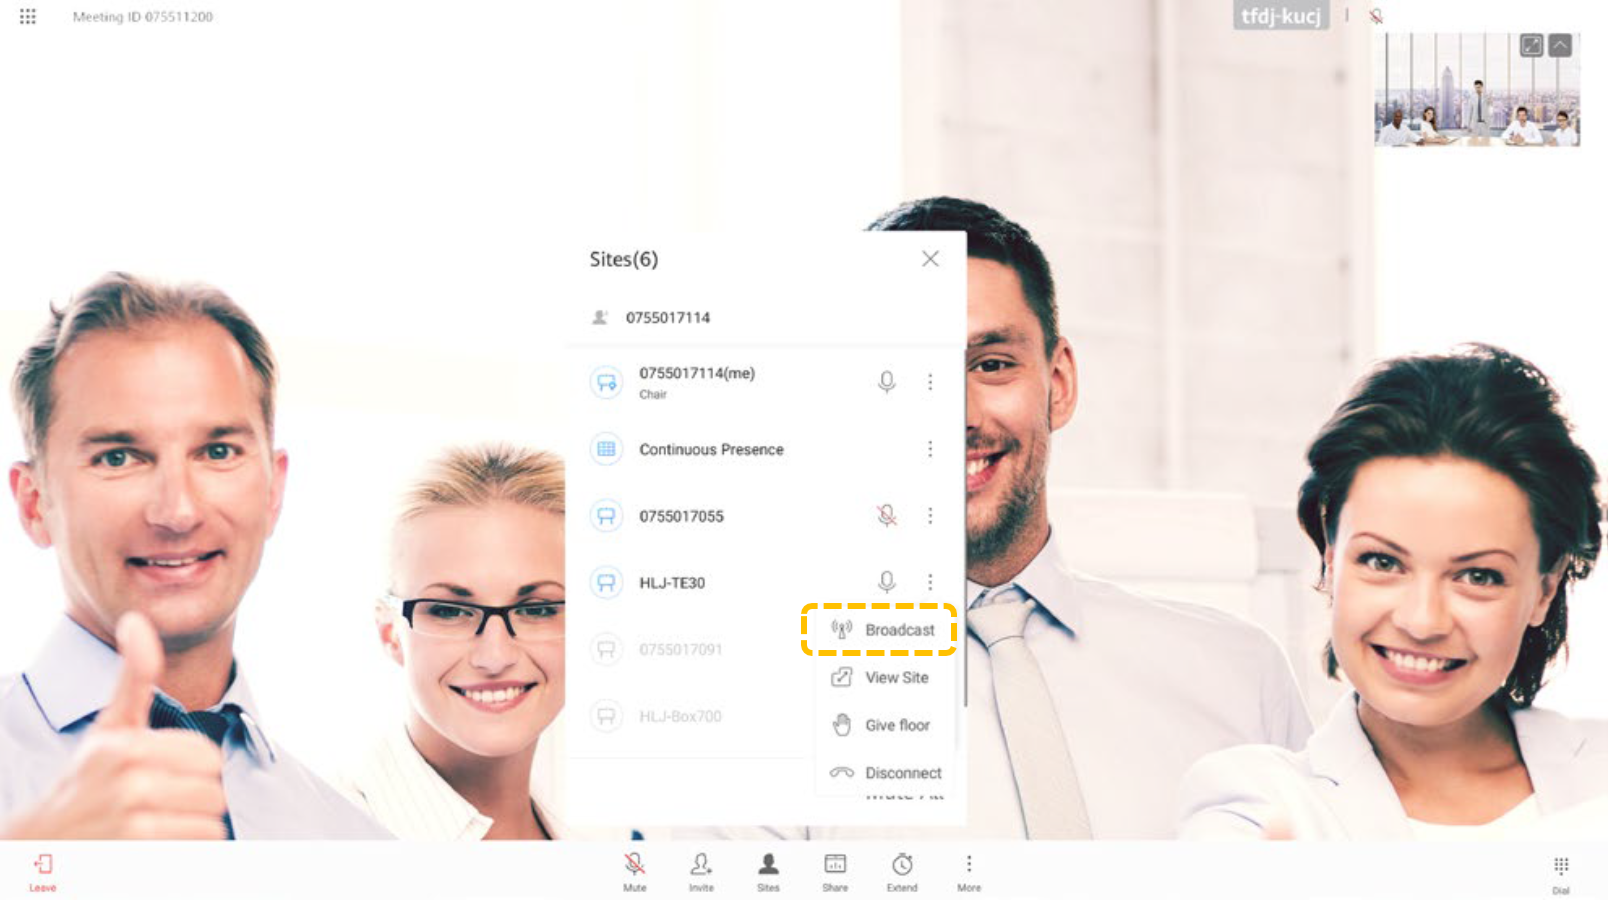
- Broadcasting a site
When the host site broadcasts a site, all the other sites in the meeting are forced to view the site. The host site can still choose to view other sites.
The host site can broadcast any video site, including the host site itself.- Touch Sites.
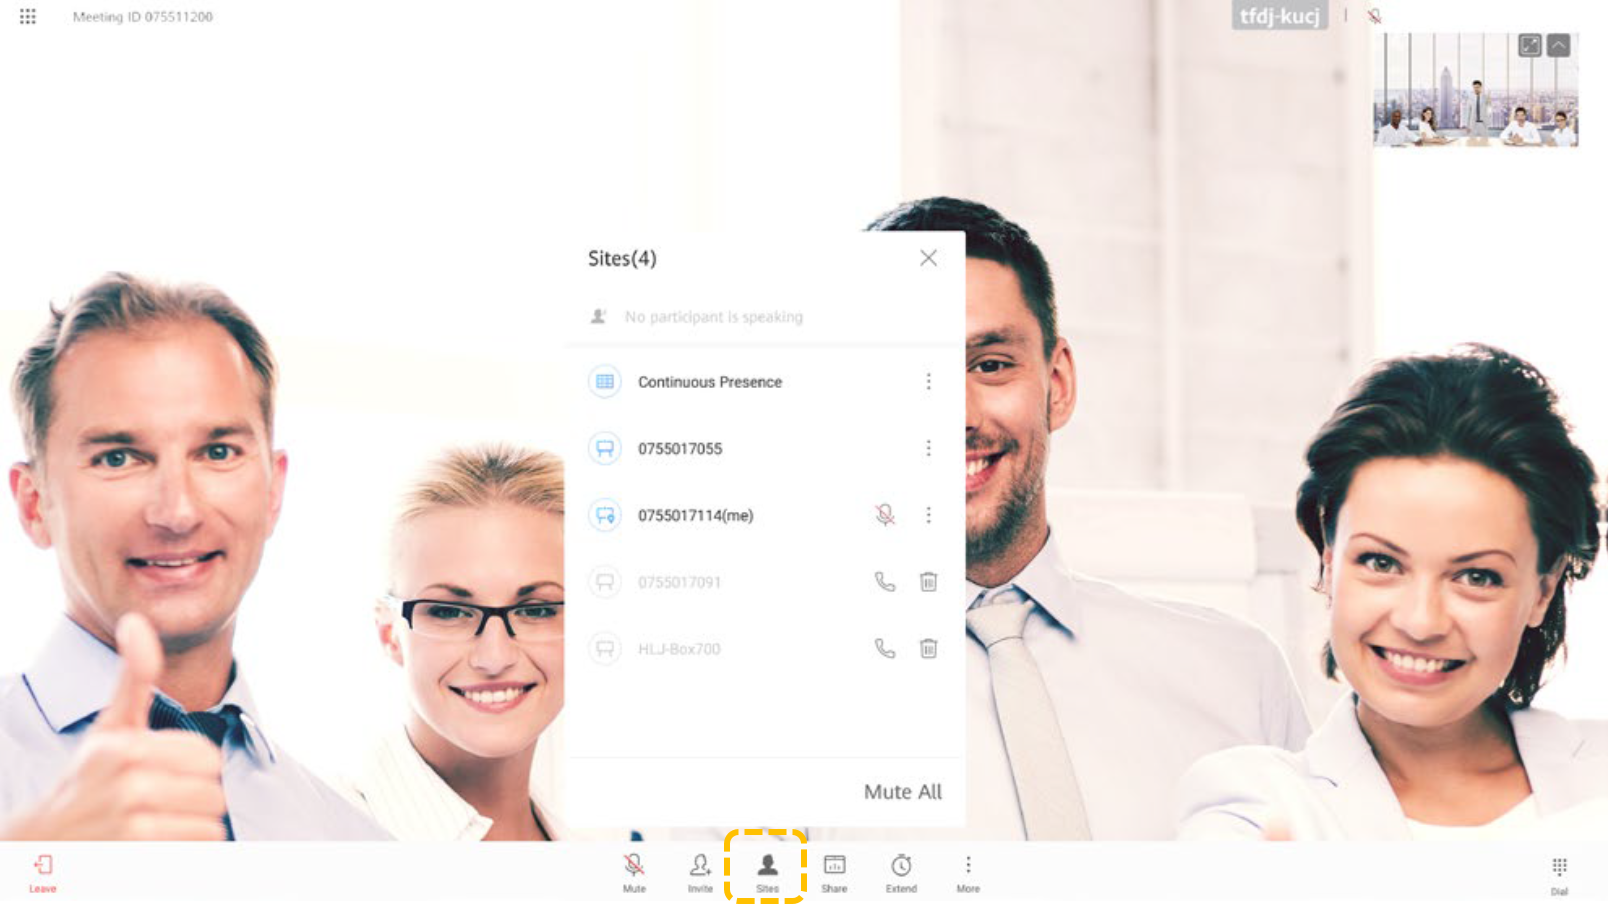
- Select the site you want to view, touch
 , and touch Broadcast.
- Touch Sites.
- Modifying the video layout
Touch Layout and select a layout mode.
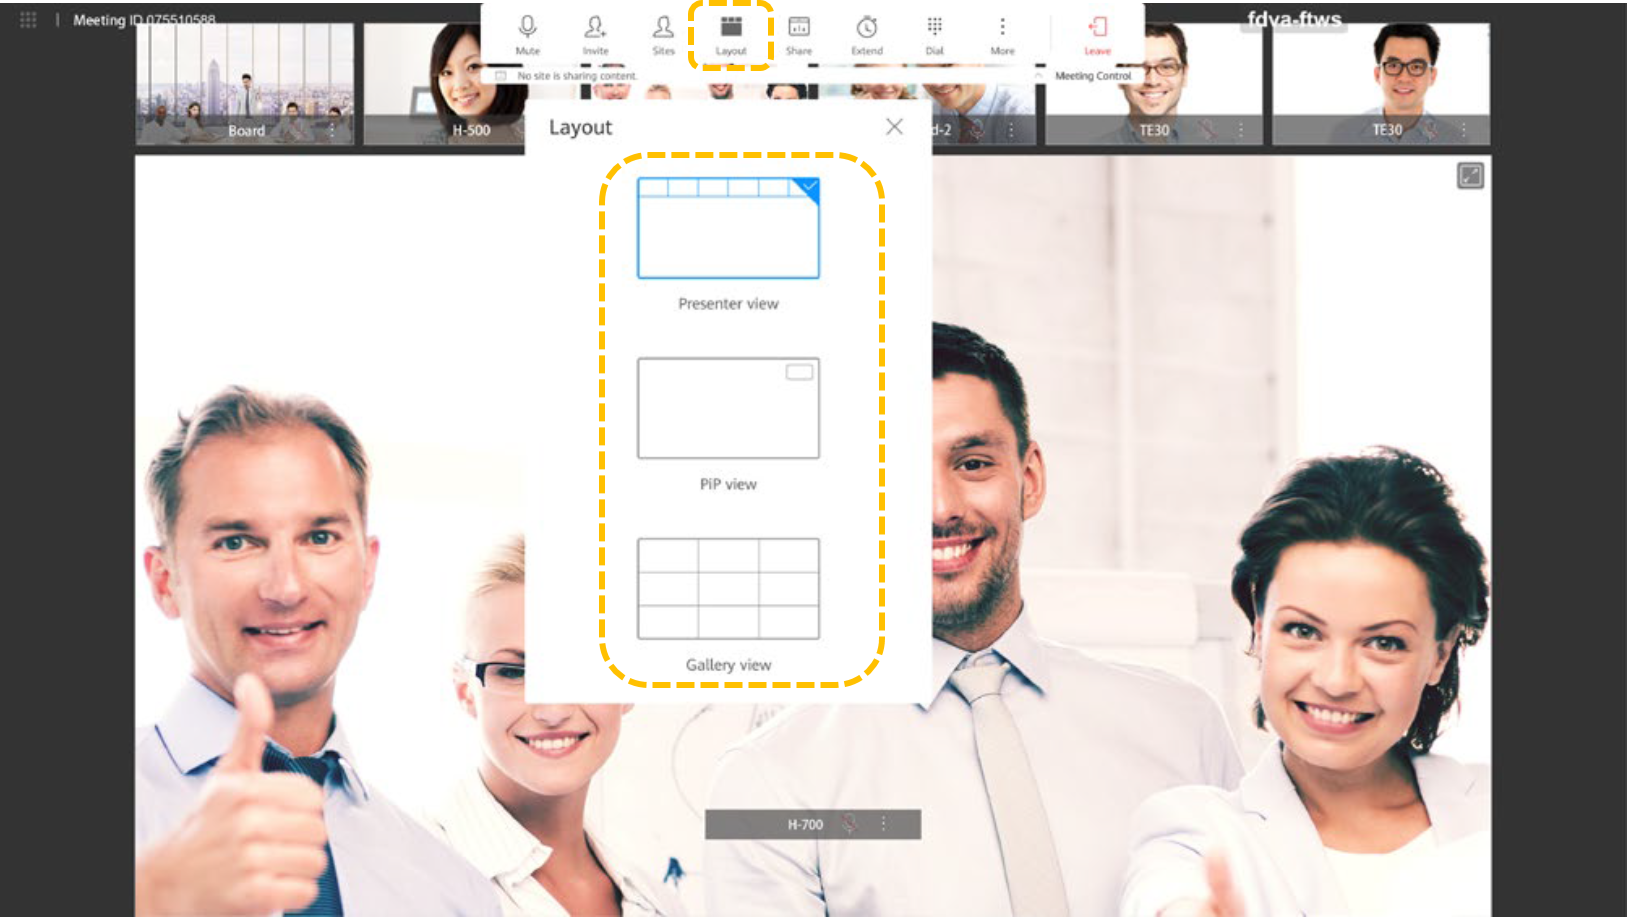
- Presenter view
Drag a small screen to the large screen to view the site in the large screen. The large screen is locked by default. After the large screen is unlocked, the video of the participant speaking the loudest among multiple sites will be automatically displayed in the large screen.
You can touch
 in the upper right corner of the large screen to view the site in full screen. The layout mode is automatically switched to the PiP view.
Touch
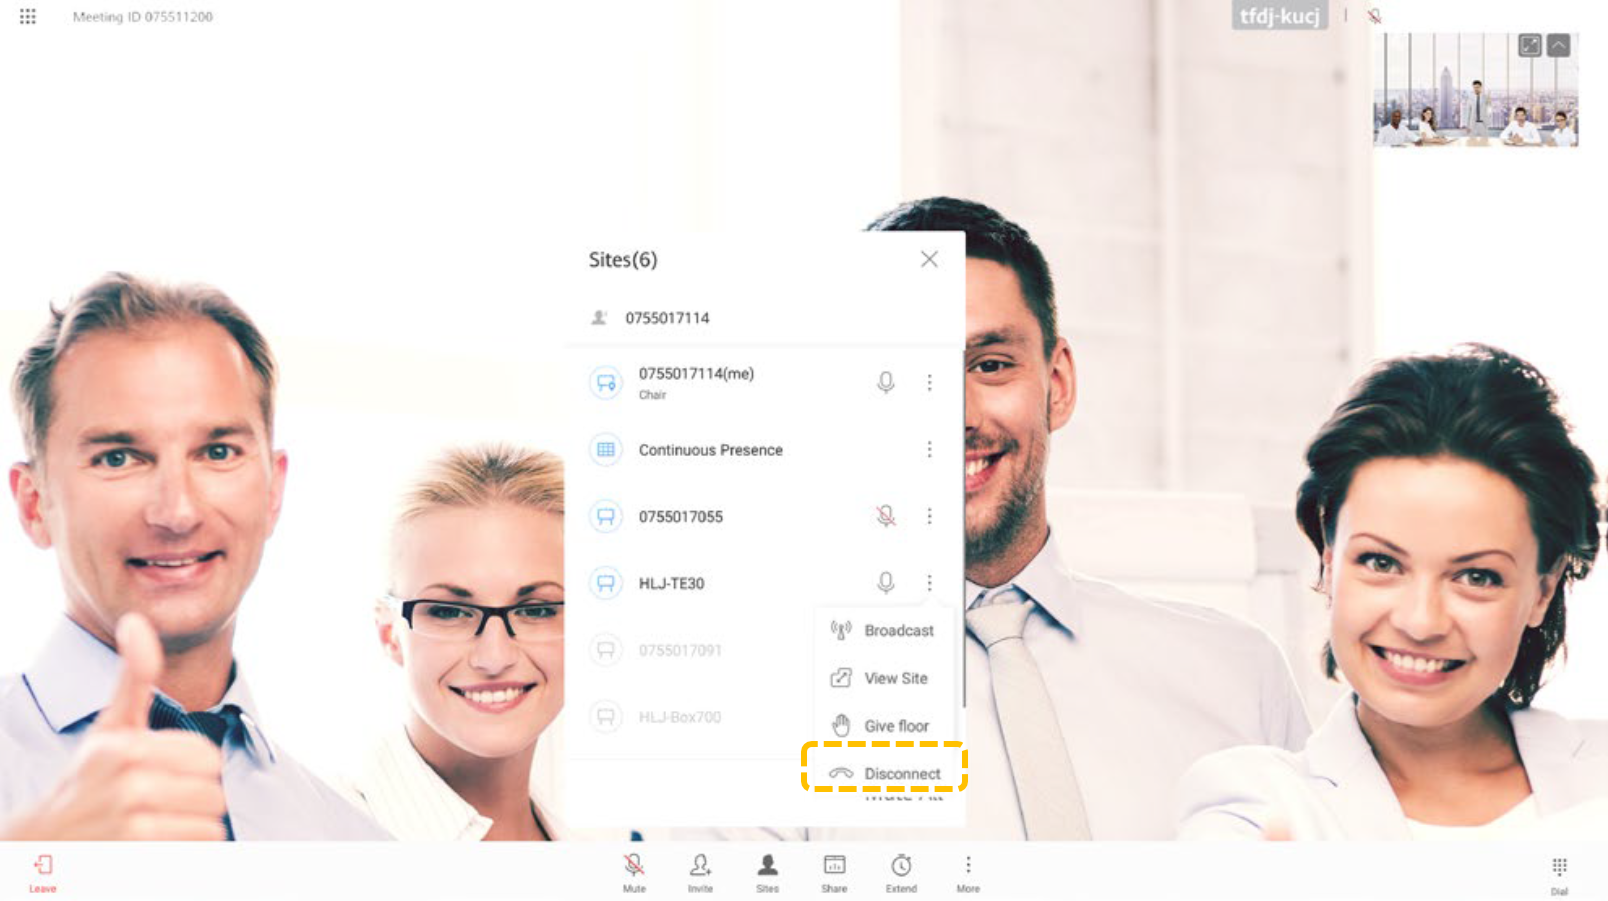
 next to a site in the large screen and choose to broadcast, unlock, or disconnect the site.
- PiP view
Touch
 next to a site in the large screen and choose to broadcast, unlock, or disconnect the site.
- Gallery view
Touch
 and choose to broadcast the site, view the site in the large pane, or disconnect the site.
- Presenter view
- Disconnecting a site
- Muting one or all sites
The host site can mute a specific site or all sites. A muted site cannot be heard in the meeting.
- Touch Sites.
- Touch
 next to a site to mute it, or touch Mute All to mute all sites except the host site.

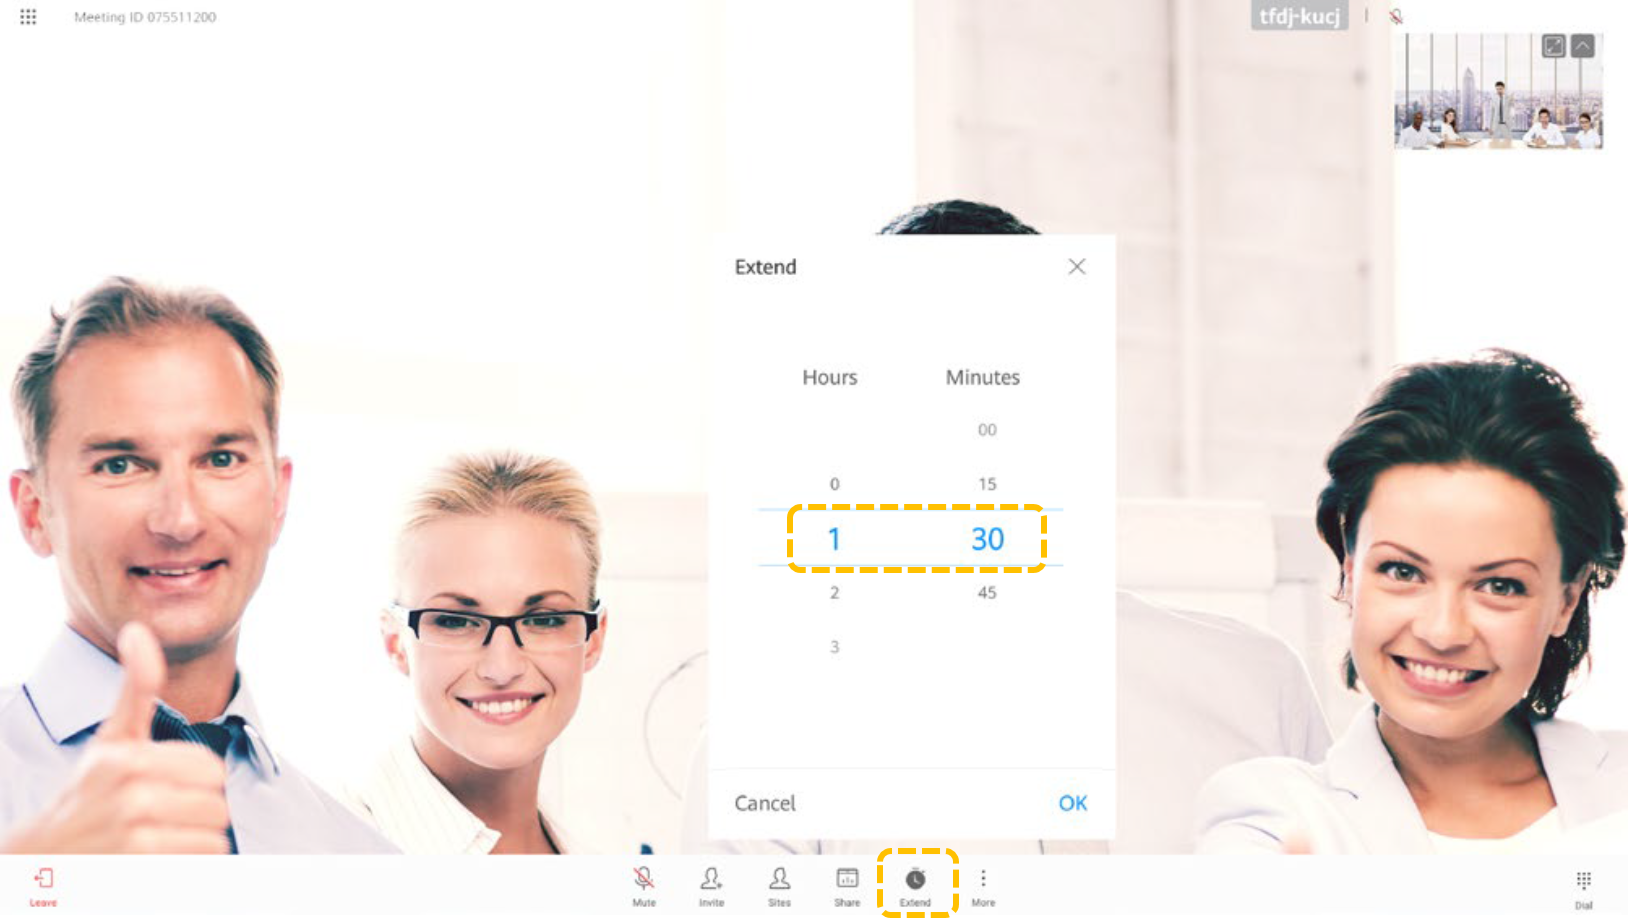
- Extending a meeting
You can touch Extend to extend a meeting.
- Touch Extend.
- Scroll up or down to select the desired extension time, and touch OK.
- Leaving a meeting
The host site can choose to leave or end the meeting.
If the host site chooses to leave the meeting, the host control rights are released and the site leaves the meeting.
If the meeting has not ended, you can touch Join in the meeting notification area on the home page to join the meeting again as a guest.
- Touch Leave.

- Touch Leave to leave the meeting. If you are the host, you can touch End to end the meeting.

- Touch Leave.
- Locking a meeting
After the meeting is locked, guest sites cannot dial into the meeting, but can be invited by the host site.
- Touch More.
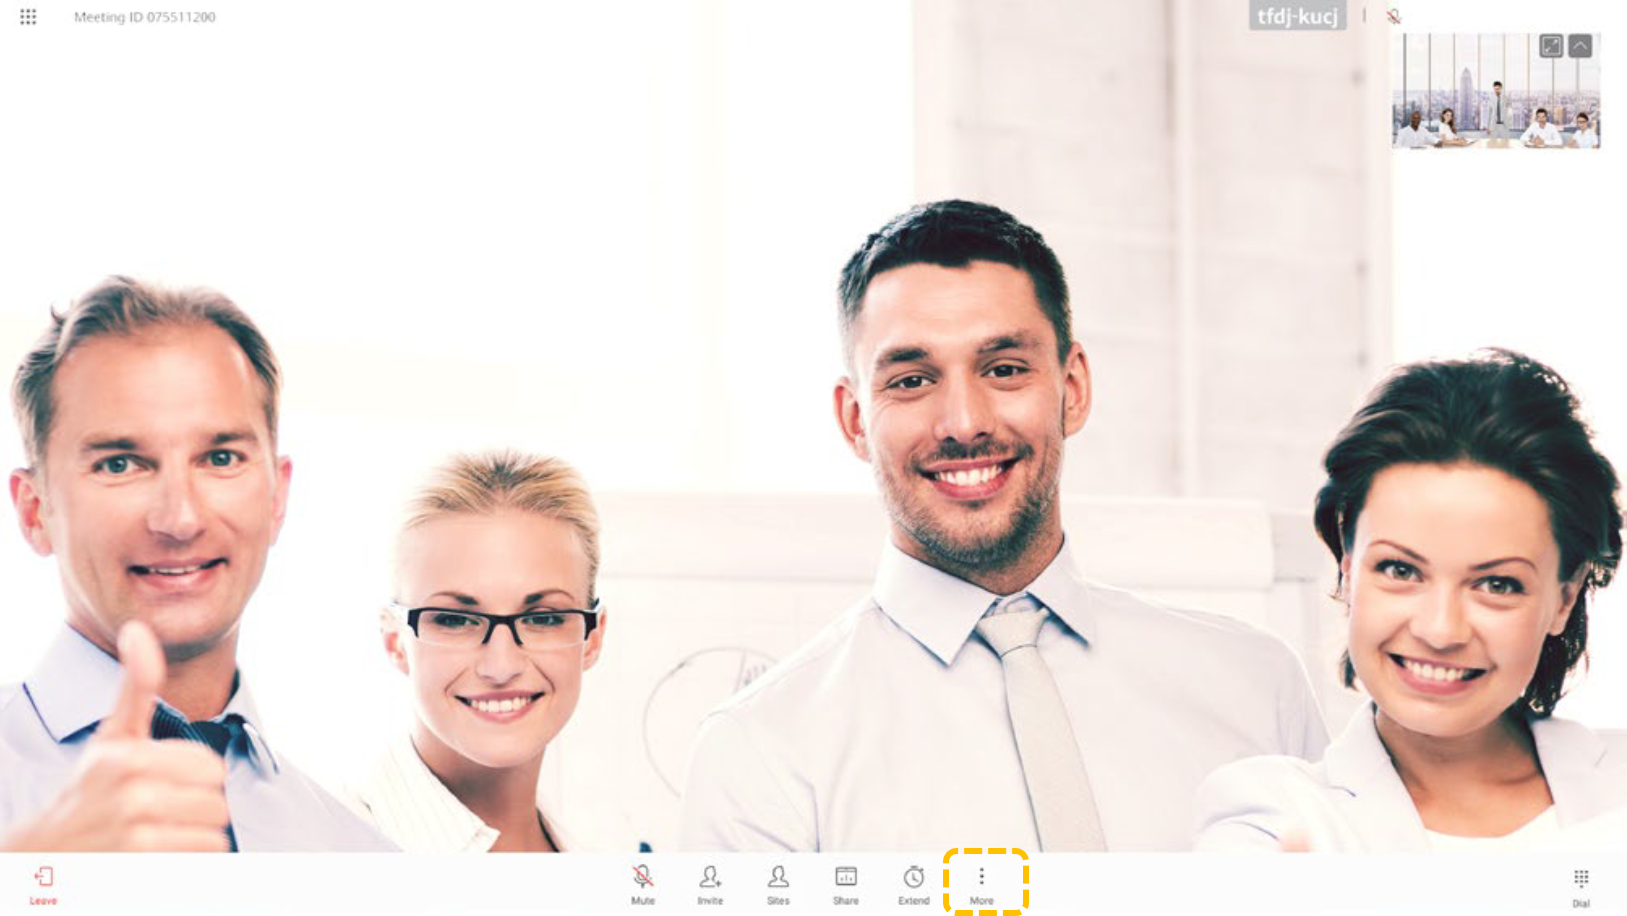
- Select Lock Meeting, and enable Lock Meeting.

- Touch More.
Using Whiteboard Collaboration
- Creating or deleting a whiteboard
- Touch Whiteboard.

- A whiteboard is displayed.
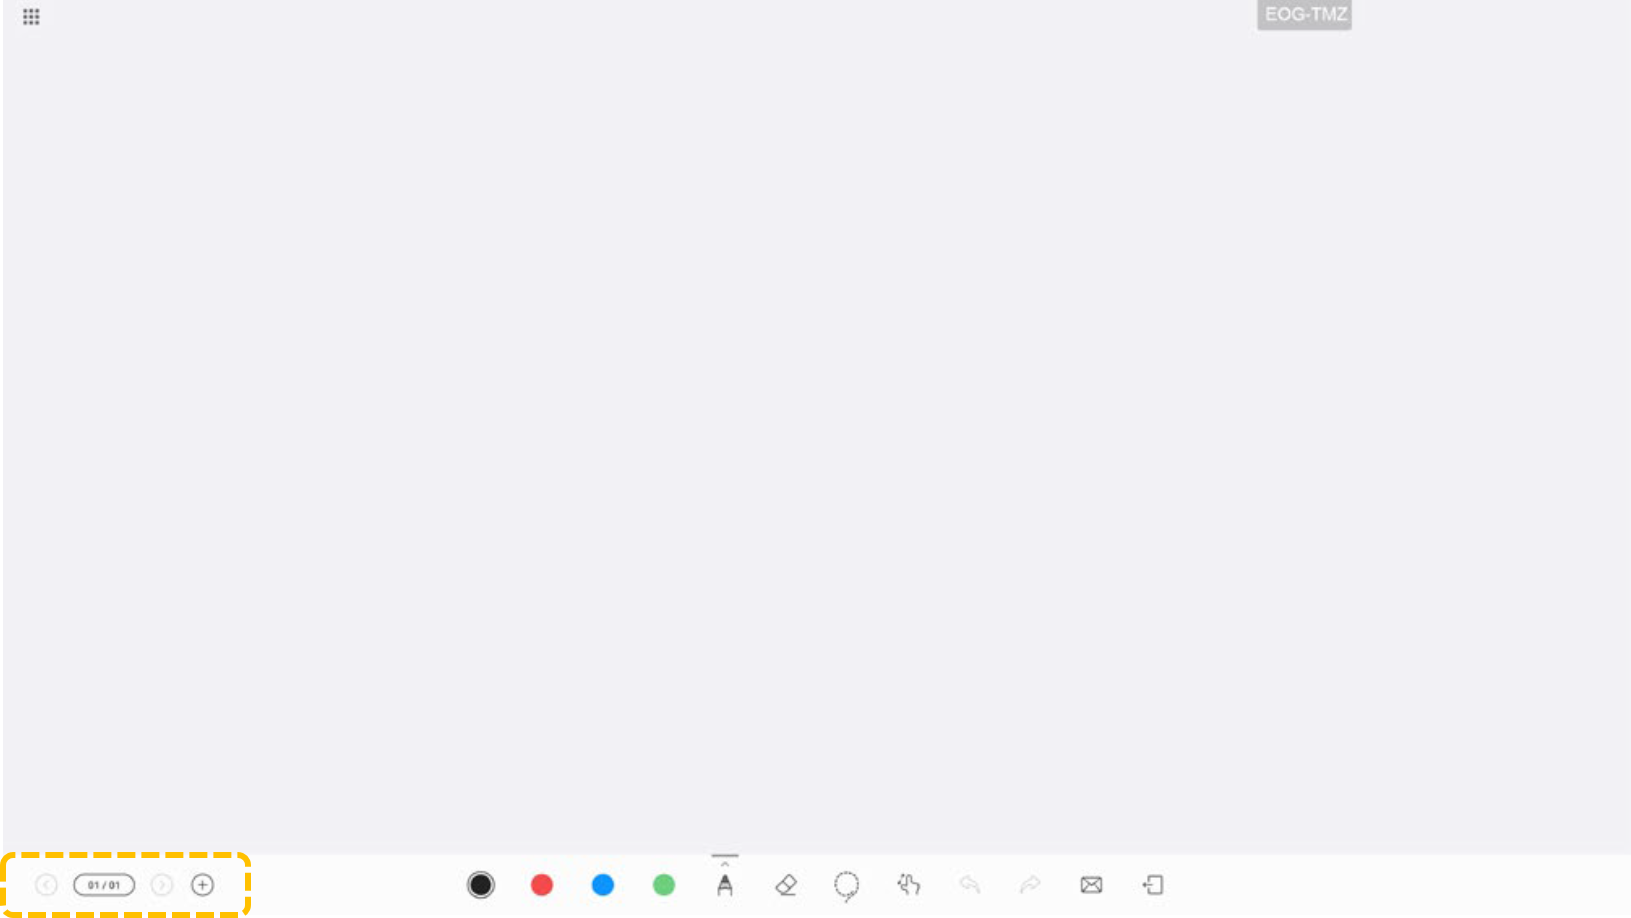
- Touch
 to create another whiteboard. The current whiteboard still exists.
 - Touch
 and
and  to turn pages and view created whiteboards.
 - Touch
 to show the whiteboard management screen. You can search for or delete any whiteboard.
 - Press the Home button to return to the home screen.
- Touch
- Touch Whiteboard.
- Editing whiteboard content
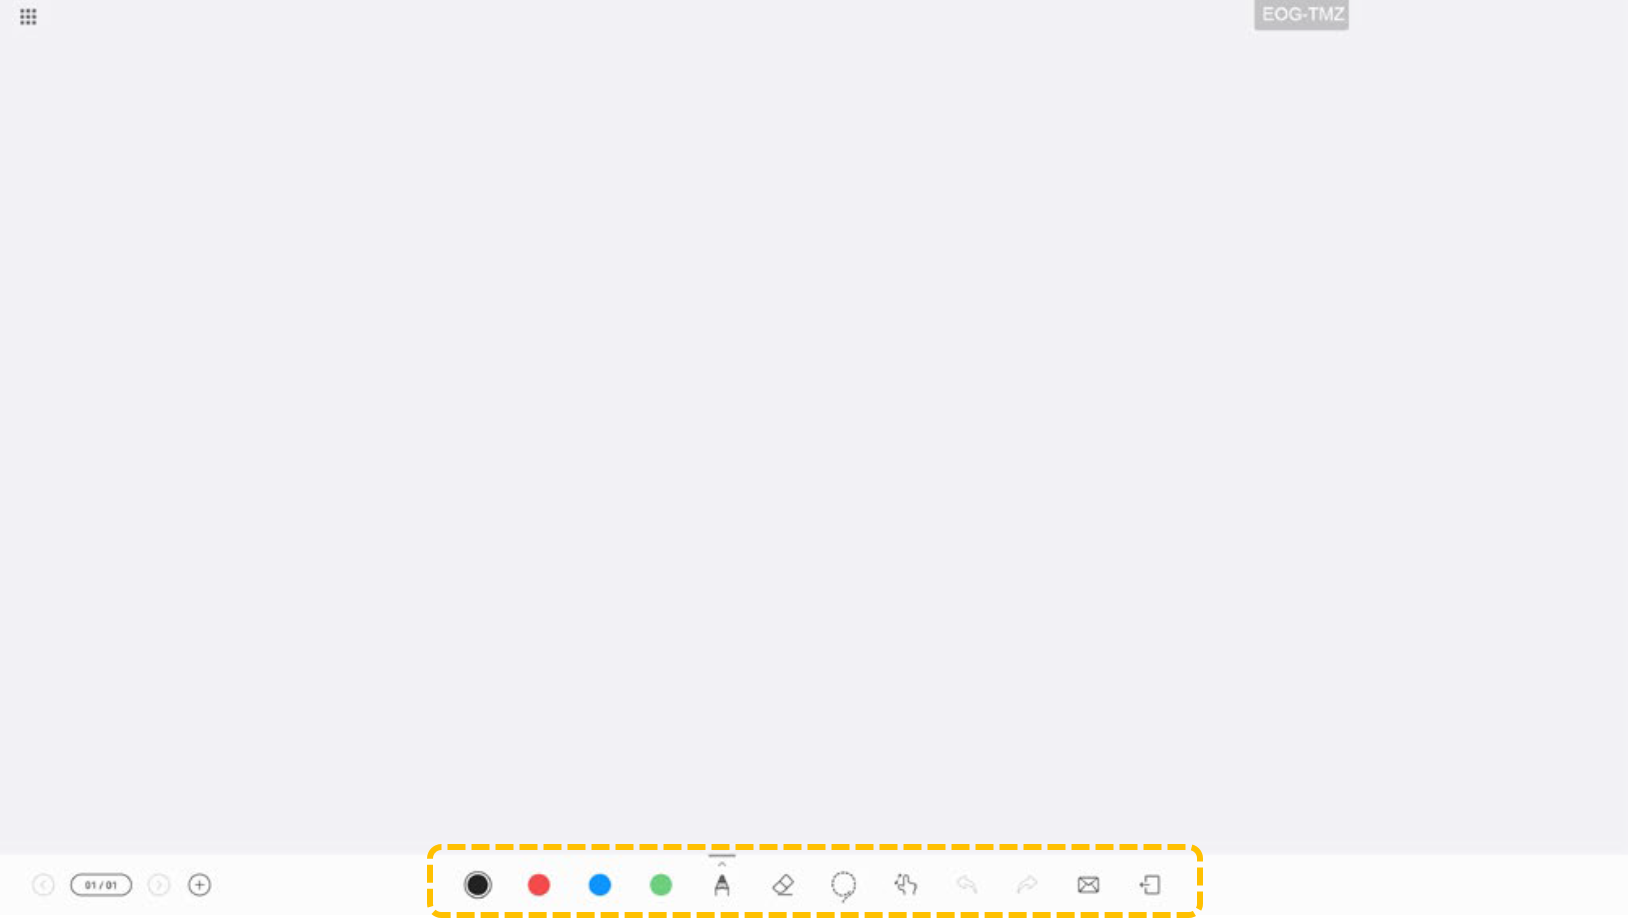
- Touch
 , select a pencil, marker pen, and writing brush, and select a color.
 - Eraser
 : Erase content using your finger, fist, or palm.
 - Double-click
 to erase or clear the screen.
 - If you select Clear, all the content on the whiteboard is cleared.
- Lasso
 : Circle an area to select all the content in it. Then you can move or delete the selected area, and zoom in or out on the selected area.
 - Undo
 : Undo the previous operation.
 - Redo
 : Redo the last action you have undone.
 - Email
 : Email whiteboards to recipients. For details, see Emailing whiteboard content.
 - Exit
 : Exit the whiteboard screen.
- Touch
- Locking and unlocking the canvas
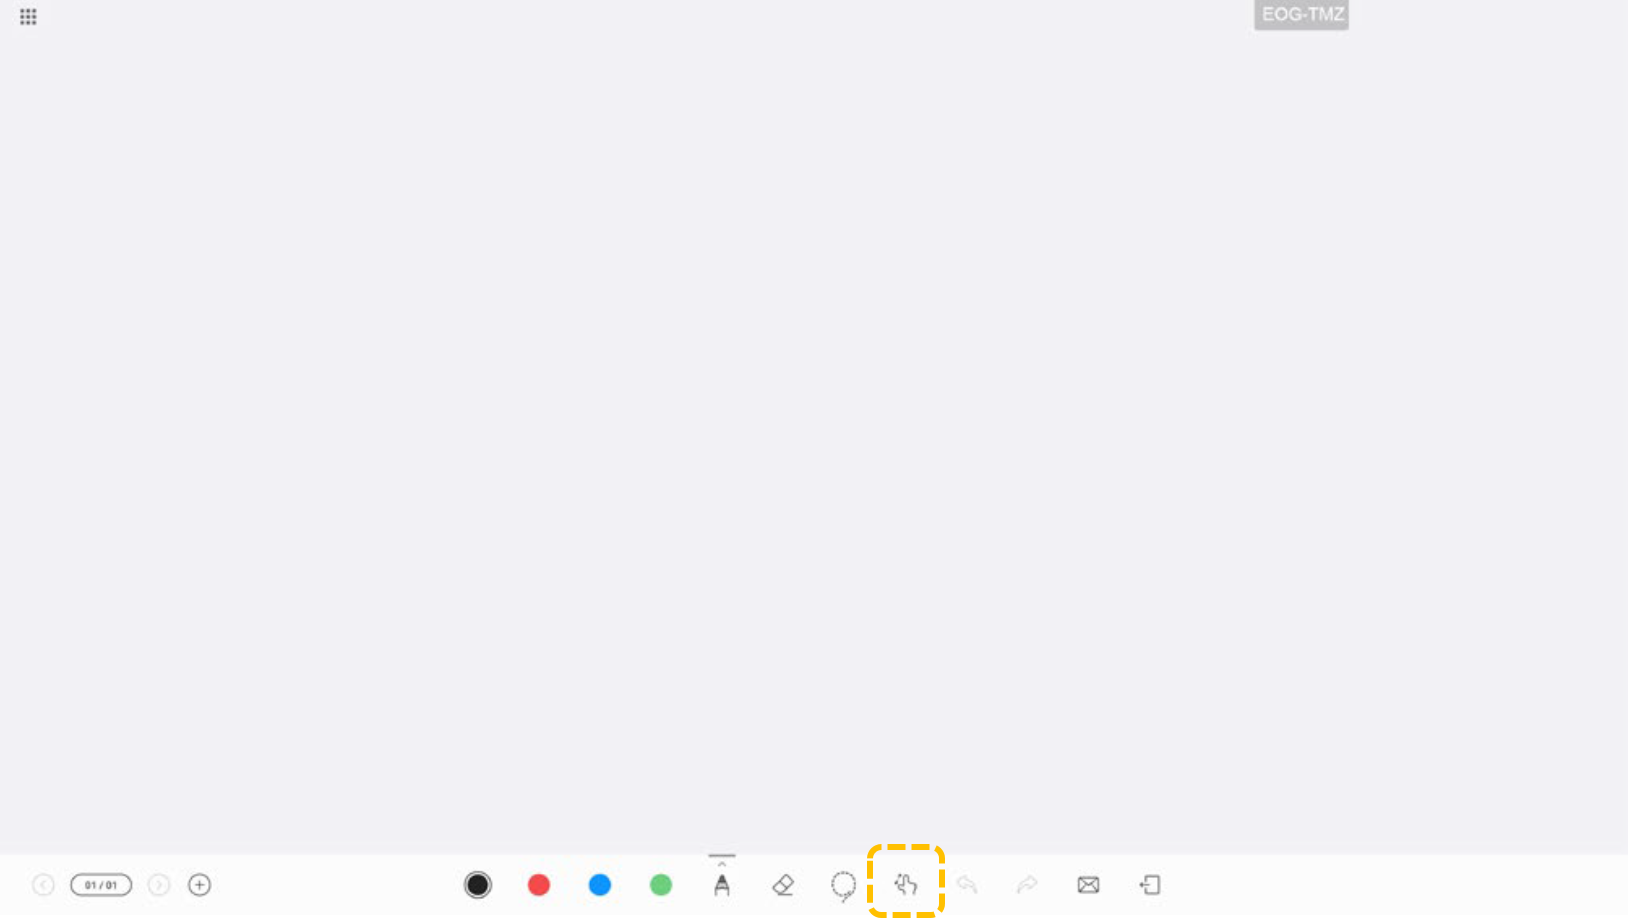
When the canvas is locked, two persons are allowed to write on the same whiteboard.
- In
 state, you can drag and move the canvas, and zoom in or out on the canvas using your fingers.
 - Touch
 . The icon changes to
  , indicating that the canvas is locked.
- In
- Emailing whiteboard content
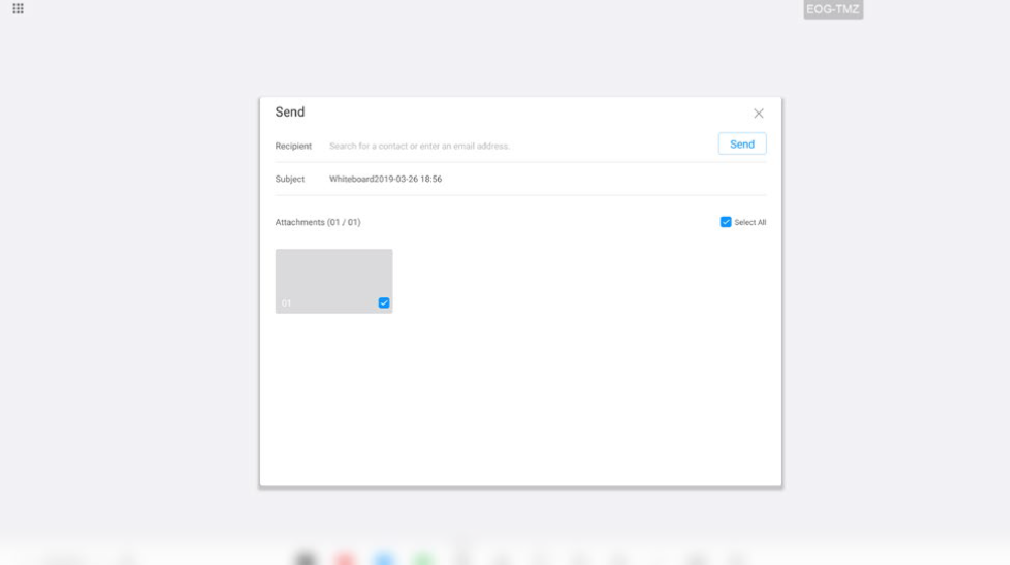
You can send whiteboards to a specific email address. You need to configure the email server first. For details, see the HUAWEI Board Configuration Guide.
- Edit a whiteboard and touch
 .
.

- Enter the recipient's email address, set the email subject, and touch Send.
- Edit a whiteboard and touch
- Sharing a whiteboard with remote sites
You can share a whiteboard to remote sites so that all participants can view the whiteboard presentation at the same time.
During a meeting, the whiteboard content is synchronized to remote sites in real time, including layout, page, writing, erasing, and every action.
- Touch Share, and then touch Share under Apps.
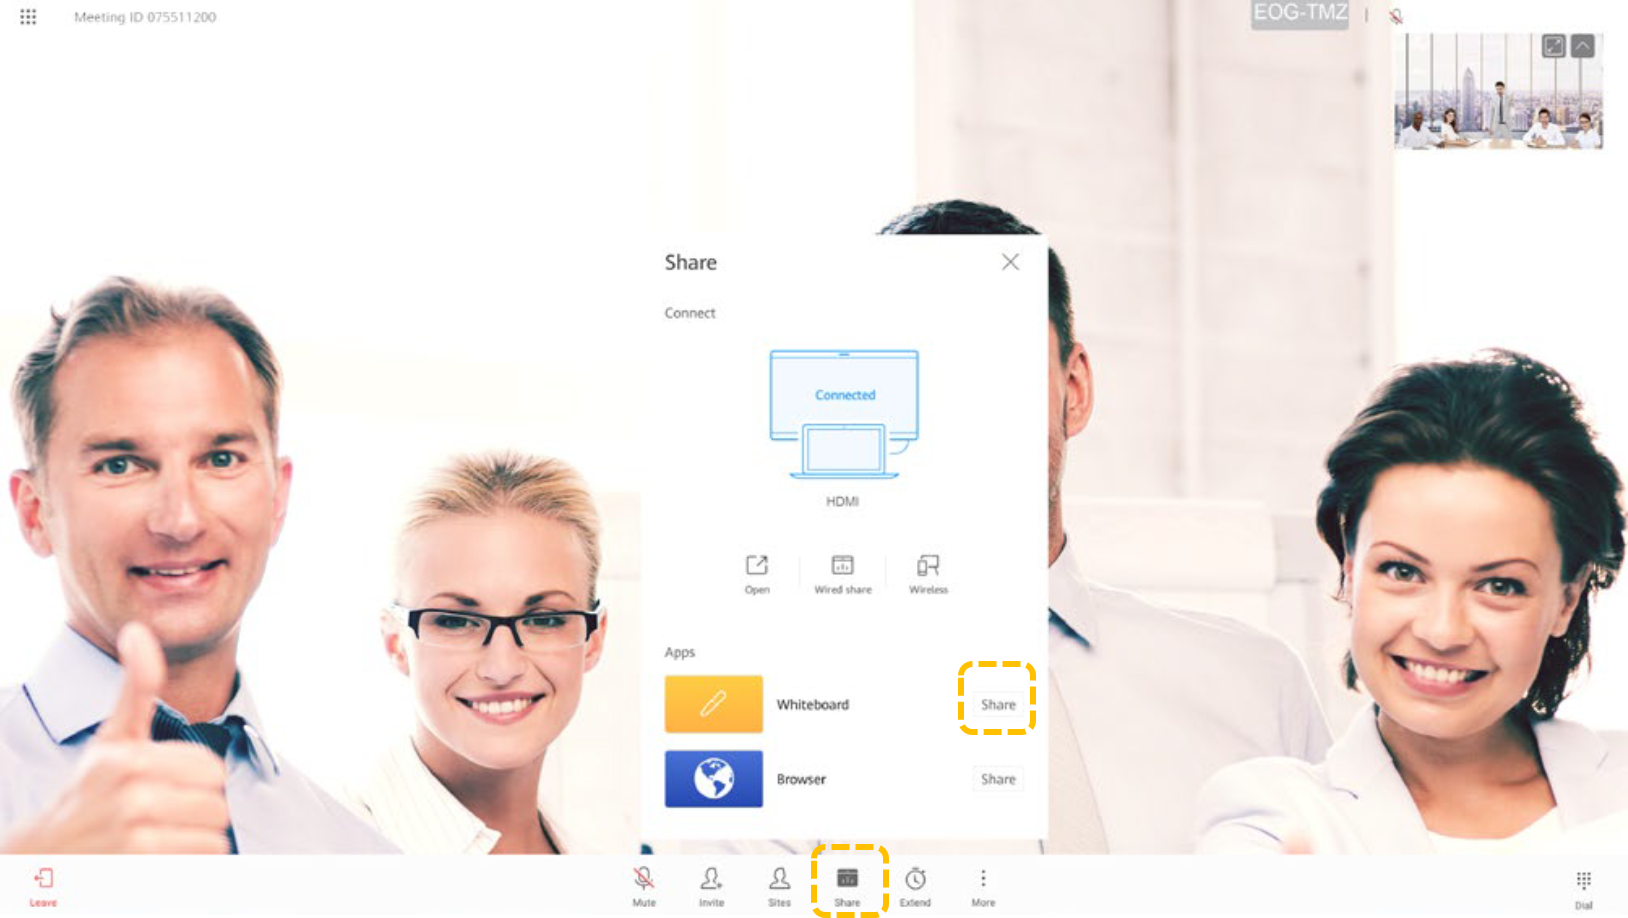
- To exit whiteboard sharing, touch Stop Sharing.

- Touch Share, and then touch Share under Apps.
- Entering the split-screen mode
When you open an app, it appears alongside the whiteboard. Only two apps (including the whiteboard) can be displayed at a time. You can drag the vertical bar to adjust the display size. The new app is displayed on the right by default.
- On the whiteboard, touch the Home button to return to the home screen.
- Touch Apps, and then touch the app to display alongside the whiteboard.

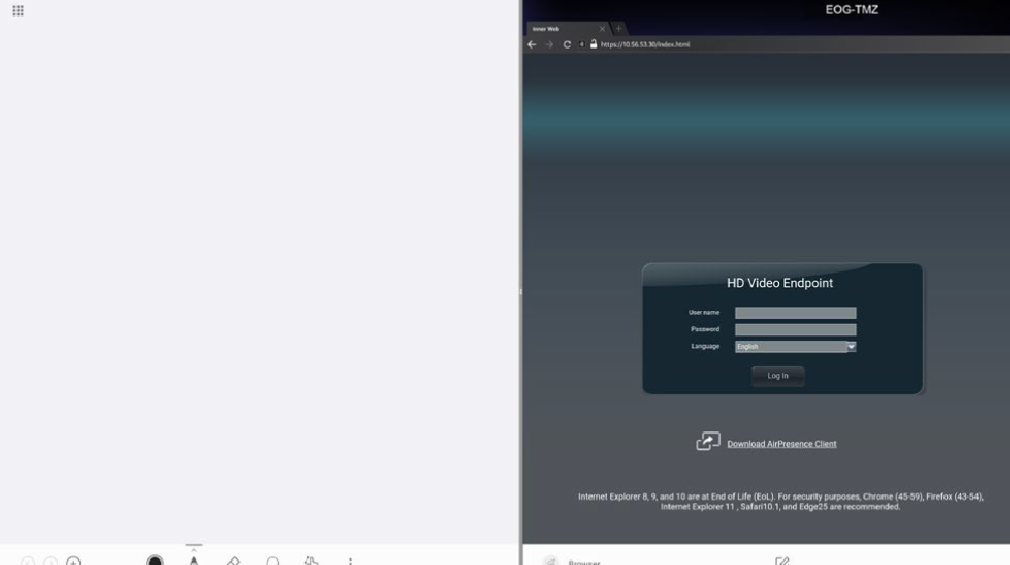
- Editing or modifying content in split-screen mode
You can edit, modify, and copy content in split-screen mode.
- Edit, write, draw, and annotate on the whiteboard on the left.
- You can also touch
 on the right toolbar to write on the whiteboard.
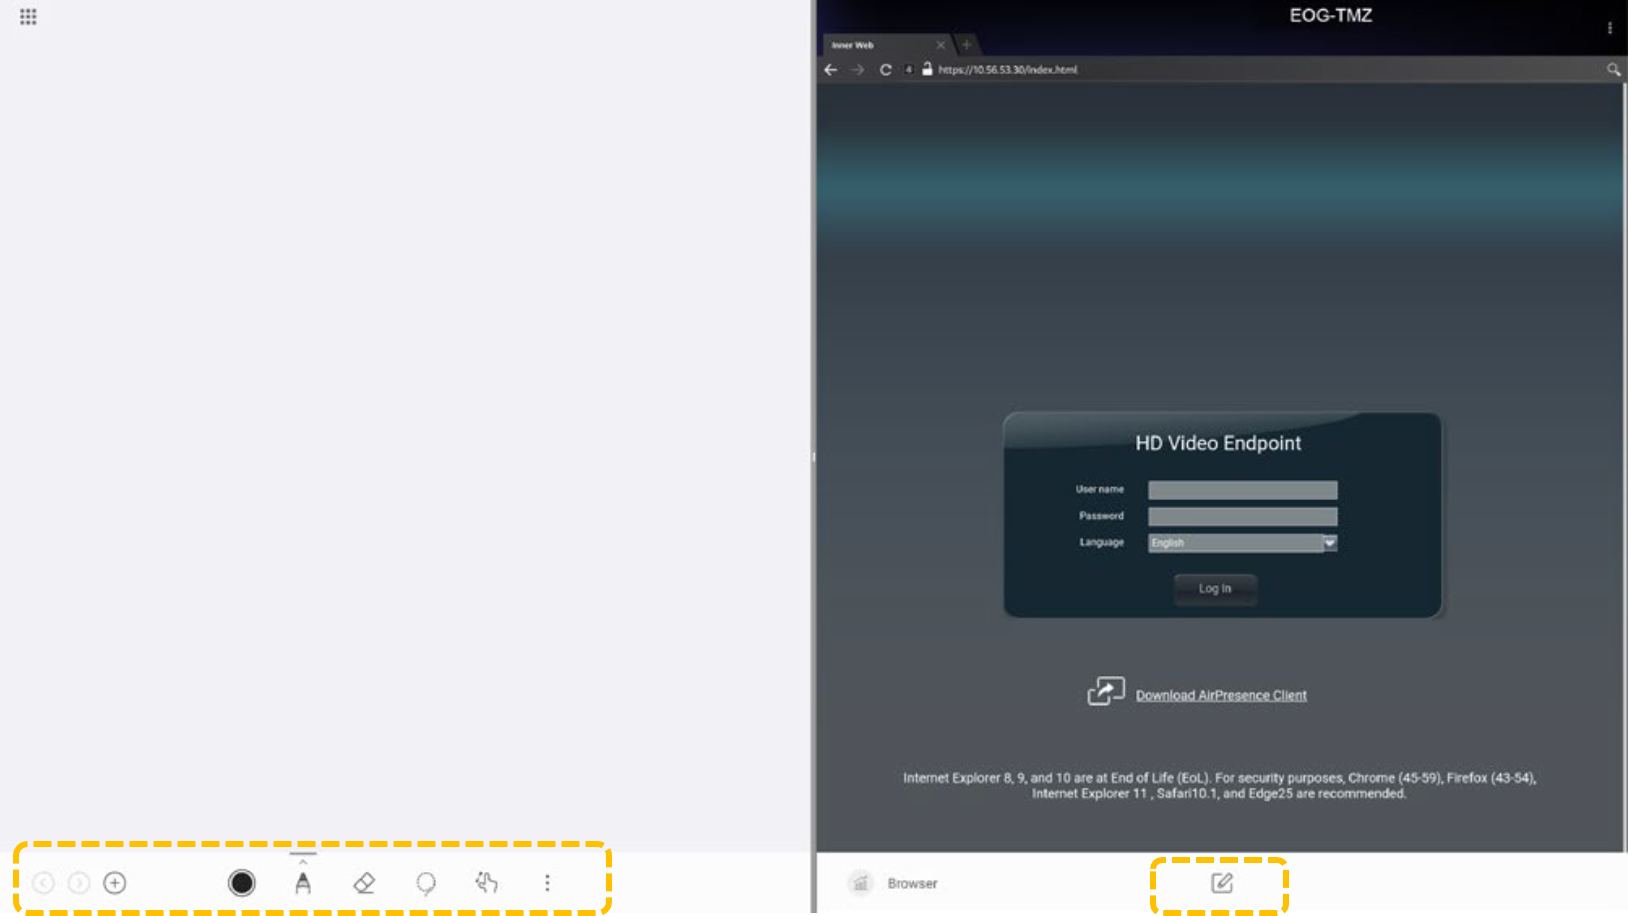
- Touch a tool icon on the right to write and annotate on top of the content.
- You can touch Pin To Whiteboard to send the annotated page to the whiteboard on the left.
- Touch
 to exit.

- Sharing content in split-screen mode
During a meeting, you can share content of a screen in split-screen mode with remote sites.

Controlling a Camera
- Controlling the local camera (local collaboration)
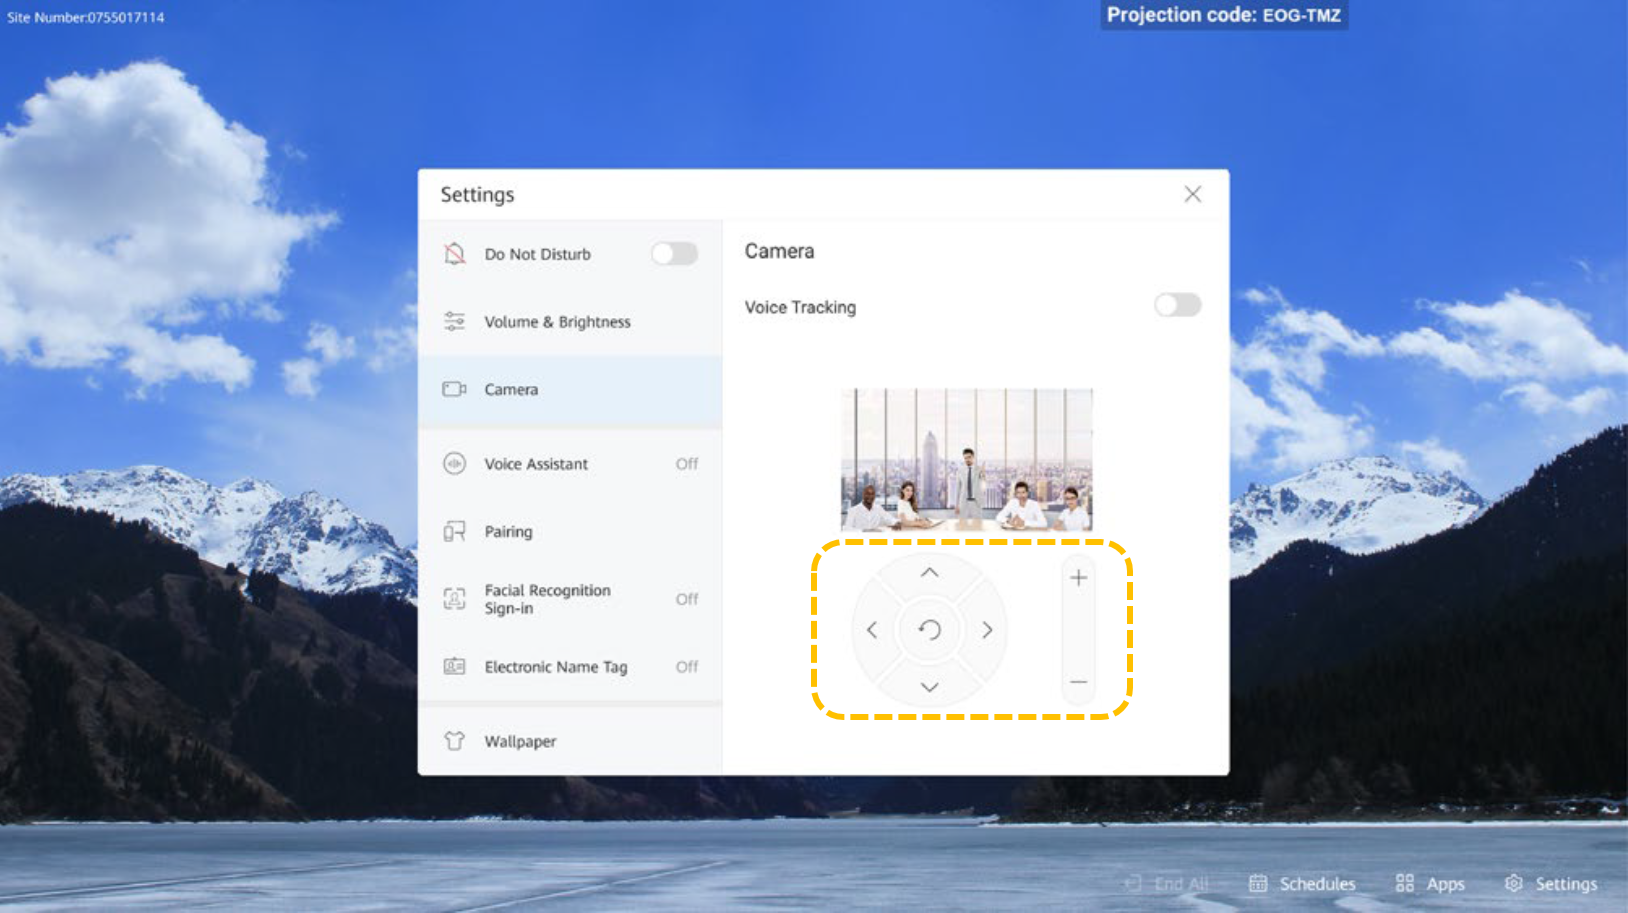
- Touch Settings.
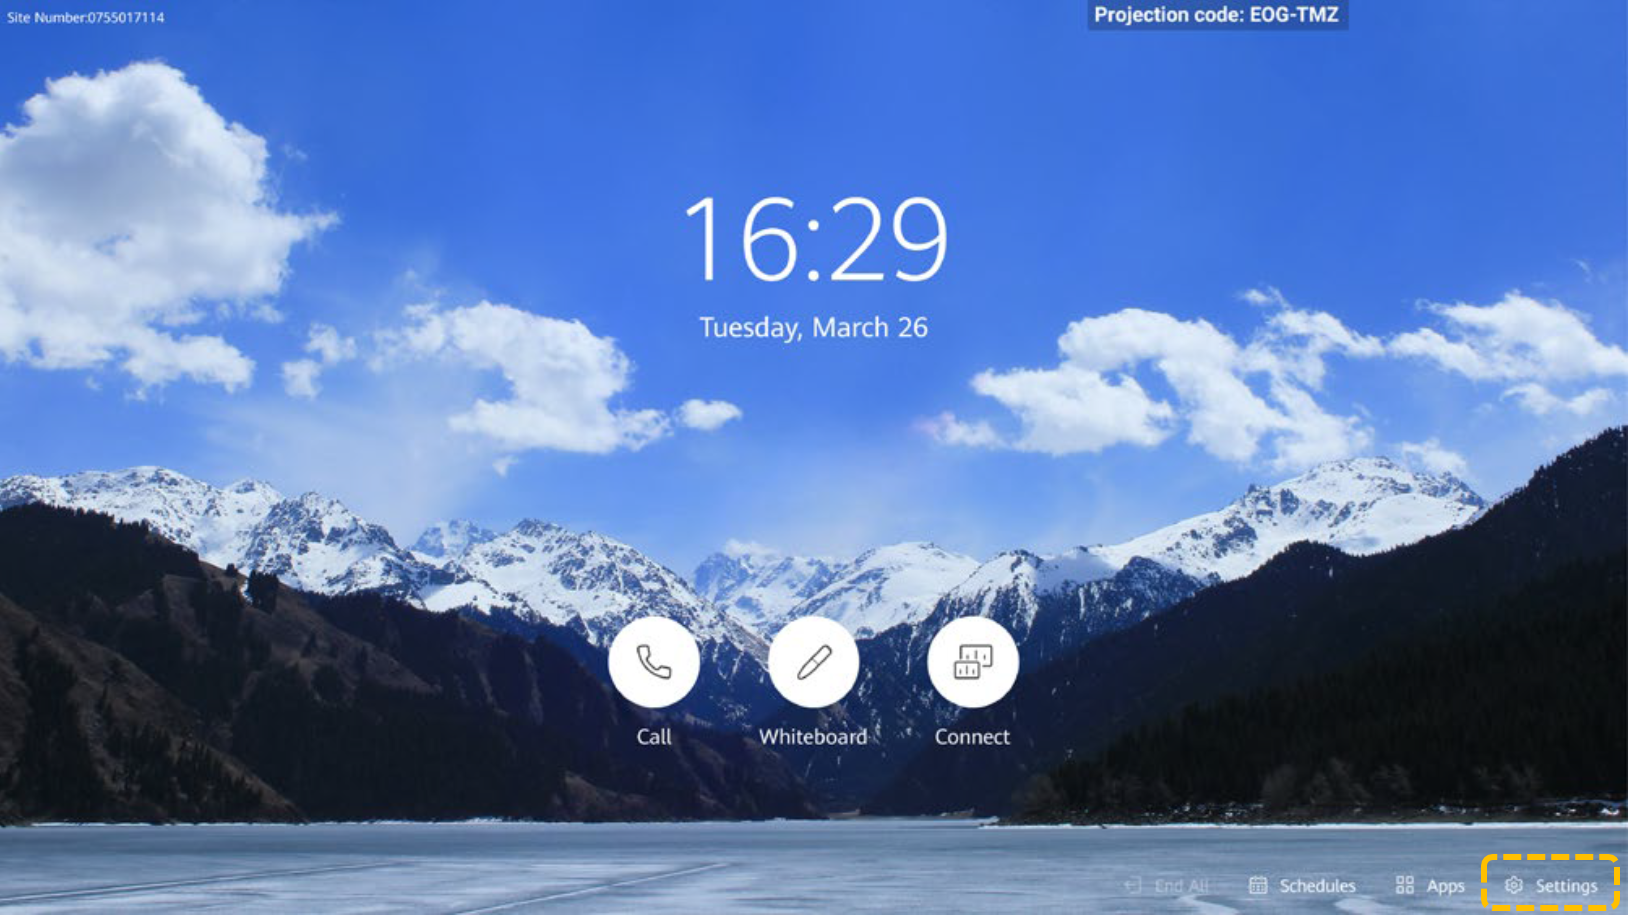
- Select Camera.

- Adjust the camera based on the site requirements.
- Touch arrow keys to pan or tilt the local camera. When the Board camera is at the widest angle, arrow keys cannot be used to control the camera.
- Touch
 to restore the camera to its initial position.
 - Touch + to zoom in.
- Touch – to zoom out.
- Touch Settings.
- Enabling voice tracking (local collaboration)
If Intelligent tracking is enabled (Track when not in conference is disabled by default), the system automatically tracks and shows a close-up image of the person speaking in meetings.
If Track when not in conference is also enabled, the system automatically tracks and shows a close-up image of the person speaking regardless of whether the person speaking is in a meeting.
- Touch Settings.

- Select Camera.

- Enable Voice Tracking or Track when not in conference.

- Touch Settings.
Using the Voice Assistant
- Enabling the voice assistant
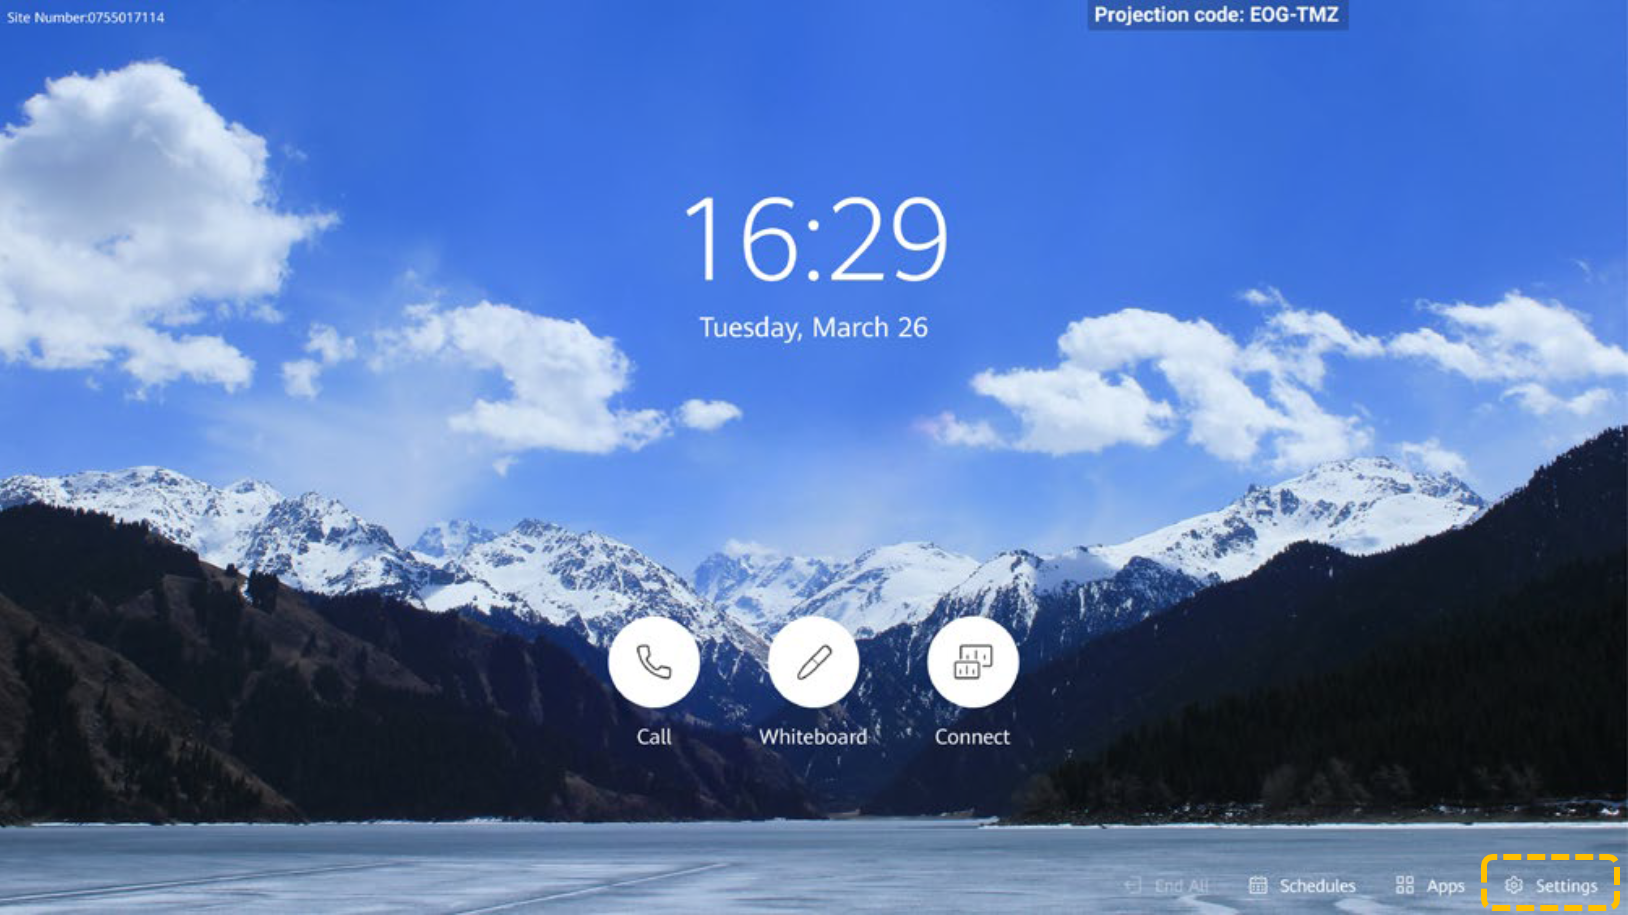
- Touch Settings.
- Select Voice Assistant.
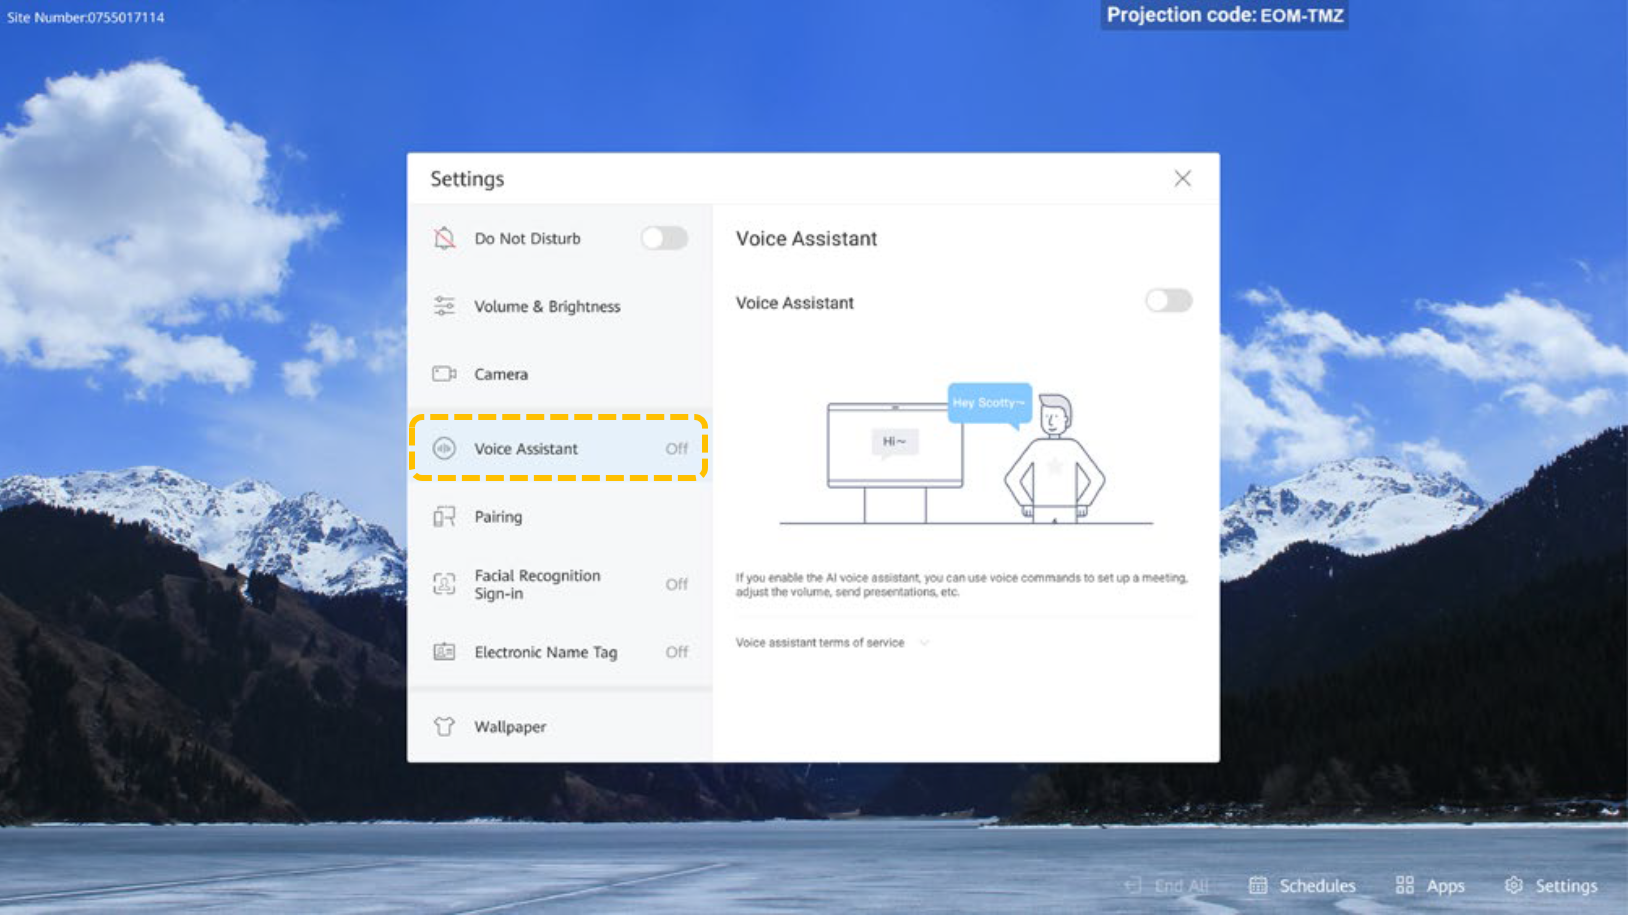
- Enable Voice Assistant.

- Touch Settings.
- Using the Voice Assistant
You can use the voice assistant to perform the following operations: make a call, cancel a call, create a meeting, join a meeting, extend a meeting, add a site, view a site, view continuous presence, share presentation, stop sharing presentation, open the whiteboard, increase or decrease the volume, mute a site, unmute a site, and perform smart diagnostics.
You must comply with the following for the voice assistant to correctly identify your voice:
- Use standard pronunciation and avoid local slang and phrases.
- You are less than 3 meters away from the Board.
Feedback
Was this page helpful?
Provide feedbackThank you very much for your feedback. We will continue working to improve the documentation.See the reply and handling status in My Cloud VOC.
For any further questions, feel free to contact us through the chatbot.
Chatbot

