
Enabling the Online Customer Service Function in the CEC
- Sign in to the CEC as a tenant administrator.
- Add a multimedia skill queue.
Choose . For the multimedia skill queue configuration page, see Figure 1. If you need to enable the click-to-dial function, also configure a click-to-dial skill queue. Figure 2 shows the page for configuring a click-to-dial skill queue.
- Click New and set parameters based on Table 1.
Table 1 Parameter description Parameter
Description
Skill Queue Name
The value can contain a maximum of 100 characters.
Description
The value can contain a maximum of 255 characters.
Type
The options are as follows:
- Voice: A voice skill queue handles voice businesses.
- Multimedia: A multimedia skill queue handles multimedia businesses.
- Video: A video skill queue handles video businesses.
- Voice Click to Dial: A voice click-to-dial skill queue is used together with multimedia businesses. During a text chat with an agent, a customer can directly make a voice call to the agent.
- Video Click to Dial: A video click-to-dial skill queue is used together with multimedia businesses. During a text chat with an agent, a customer can directly make a video call to the agent.
NOTE:Click-to-dial skill queues apply only to the web channel.
Default value: Voice
Subtype
This parameter needs to be set when Type is set to Multimedia.
Select a channel type. If no channel type is selected, the skill queue can be used by all channels. The options are as follows:
- Web
- LINE
- X (Twitter)
- 5G RCS
- SMS
- Telegram
Organization Unit
Add an OU for a skill queue.
The options are as follows:
- Tenant administrator: All OUs under the current tenant are available.
- Common agent:
- If the tenant parameter Has the tenant enabled inter-organization data isolation enforcement is set to Yes, accessible OUs that have the read and write permissions are available.
- If the tenant parameter Has the tenant enabled inter-organization data isolation enforcement is set to No, Unorganized and all OUs are available.
If the value of Organization Unit is left empty, Unorganized is selected.
Max. Waiting Time (s)
Default value: 60
Unit: second
Value range: 1–60000
Maximum call duration (s)
For agent service, the duration of conversations between agents and customers needs to be limited.
If the duration from the time when a customer initiates a call to the time when the call ends exceeds the value of this parameter, the system automatically releases the call.
Default value: 86400
Unit: second
Value range: 1–86400
Duration (s) in Arranging State
Duration during which an agent is in wrap-up state after a call ends.
After this duration, the agent enters the idle state and can answer calls from customers.
The interval between maximum wrap-up state durations is 5. If the value is in the range of [1,5), the actual maximum wrap-up state duration is 5; if the value is in the range of [5,10), the actual maximum wrap-up state duration is 10; if the value is in the range of [10,15), the actual maximum wrap-up state duration is 15; and so on.
For example, if the value is 12, the actual maximum wrap-up state duration is 15.
Default value: 5
Unit: second
Value range: 0–3600
Max. Calls in Queue
Default value: 100
Value range: 0–10000
Queuing Processing Parameter Configuration
Personalized configuration. The options are as follows:
- Queuing timeout processing configuration
- Skill Timeout
- Release (default)
- Transfer
- Transfer Type
- Skill Queue
- IVR
The default value is IVR. When Type is set to Multimedia, Transfer Type can only be Skill Queue.
- Select IVR/Select Skill
- Skill Timeout
- Queue busy or overflow processing
- Skill Busy
- Release (default)
- Transfer
- Transfer Type
- Skill Queue
- IVR
The default value is IVR. When Type is set to Multimedia, Transfer Type can only be Skill Queue.
- Select IVR/Select Skill
- Queue Usage (%)
Device usage of the transferred-to skill queue when Transfer Type is set to Skill Queue.
Device usage (%) = (Number of non-idle agents/Number of signed-in agents) x 70% + (Number of queuing calls/Maximum number of queuing calls) x 30%
This parameter is valid when Transfer Type is set to Skill Queue.
The system can transfer a call to a skill queue only when the device usage of the skill queue after the call transfer is lower than the value of this parameter. Otherwise, the system releases the call.
The value ranges from 0 to 100.
- Forwarding on Busy Condition
- Device Usage (%)
- Waiting duration (s)
- Device Usage Threshold (%)/Waiting duration (s)
- If Forwarding on Busy Condition is set to Device Usage (%), the value of Device Usage Threshold (%) ranges from 0 to 100.
- If Forwarding on Busy Condition is set to Waiting duration (s), the value of Waiting duration (s) ranges from 0 to 9999.
- Maximum call queuing data calculation method
- Fixed value: The value of Maximum number of queuing calls is used as the maximum number of queuing calls.
- Percentage of signed-in agents: The value of Scale Factor is divided by 100 and then multiplied by the number of signed-in agents. The calculation result is rounded up and used as the maximum number of queuing calls allowed in the skill queue.
- Maximum number of queuing calls/Scale Factor
- If Type is set to Voice or Video, the value ranges from 0 to 10000.
- If Type is set to Multimedia, Voice Click to Dial, or Video Click to Dial, the value ranges from 1 to 10000.
- Skill Busy
- Call processing on nobody on-duty
- Call Processing on Nobody On-Duty
- Release (default)
- Transfer
- Transfer Type
- Skill Queue
- IVR
The default value is IVR. When Type is set to Multimedia, Transfer Type can only be Skill Queue.
- Select IVR/Select Skill
- Call Processing on Nobody On-Duty
NOTE:Calls in voice, video, and click-to-dial skill queues can be transferred to IVRs or skill queues. Calls in multimedia skill queues can be transferred only to skill queues.
The skill queue selected for call transfer must be of the same type as the skill queue to be created.
Setting Prompt Information Parameters
Personalized configuration.
This configuration is available only when Type is set to Voice or Video.
The options are as follows:
- Queuing configuration
- Queuing Method
- Default Wait Tone (default)
- Customizing the Wait Tone
- IVR
- Select IVR/Please select a waiting tone
- Queuing Method
- Hold waiting configuration
- Keeping Method
- Default Keeping Tone (default)
- Customizing the Wait Tone
- Please select a keeping tone
- Keeping Method
- Agent answer mode configuration
- Answer Type
- Report employee ID (default)
- Report no voice
- Report employee ID and customized voices
- Answer Type
NOTE:The waiting tones can be set only for voice and video skill queues and are not displayed for multimedia and click-to-dial skill queues.
- Click Save.
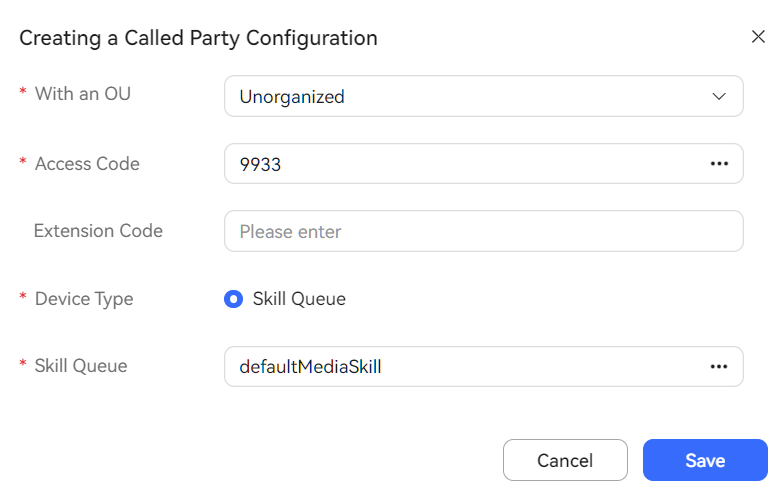
- Configure a multimedia called route.
- Choose Configuration Center > Access Configuration > Called Party.
- Click New to add parameter information for the VCC and click Save, as shown in Figure 3. Table 2 describes the parameters. If you need to enable the click-to-dial function, also configure a click-to-dial called route.
Table 2 Parameters for configuring a called route Parameter
Mandatory or Not
Description
Organization Unit
Yes
Select the OU (organization unit) to which the called party belongs.
OUs are classified into unorganized and organized OUs.
You can filter organized OUs by keyword.
The options are as follows:
- Tenant administrator: all OUs under the current tenant and the unorganized OU
- Common agent:
- If the tenant parameter Has the tenant enabled inter-organization data isolation enforcement is set to Yes, accessible OUs are available.
- If the tenant parameter Has the tenant enabled inter-organization data isolation enforcement is set to No, the home OU, accessible OUs, and unorganized OU are available.
Access Code
Yes
Customer service hotline. Customers can dial the access code to connect to agents.
Click
 to select an access code, for example, a multimedia access code, from the list in the dialog box that is displayed.
Extension Code
No
To set one access code for multiple destination devices, you can configure extension codes.
For example, if the access code is 12345, you can add extension code 1 to route calls to skill queue A and extension code 2 to route calls to skill queue B. In this way, customers can dial 123451 to directly access skill queue A.
Device Type
Yes
Select Skill Queue to configure a called route of the skill queue type.
Skill Queue
Yes
Associate the skill queue created in Step 3.
Skill Queue: Click
 to select a skill queue from the list in the dialog box that is displayed. The skill queues displayed in the dialog box are of the same type as that of the access code. For example, if the access code is of the Multimedia type, all available skill queues are of the same type.
- Configure a business account and skill queue.
- Choose Configuration Center > Employee Center > Agent Management.
- Select an agent and click Configure in the Operation column. The agent information configuration page is displayed.
- Associate a business account and skill queue with the agent. If you need to enable the click-to-dial function, also associate a click-to-dial skill queue. Figure 4 Page for configuring agent information
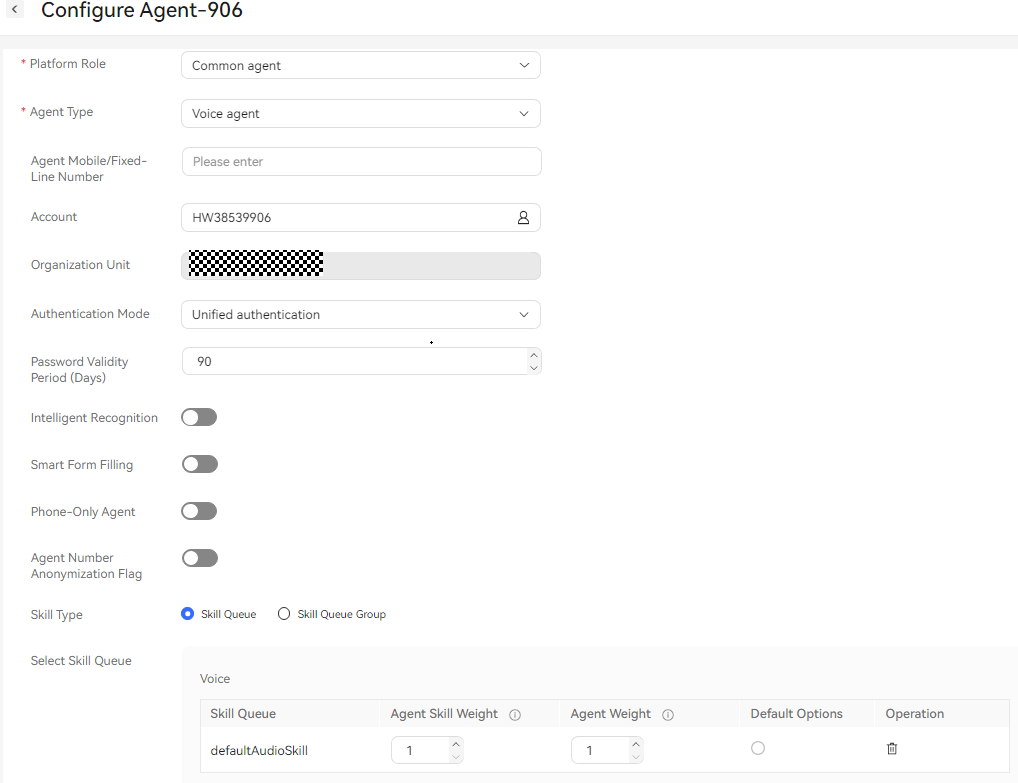
Table 3 Parameters for configuring agent information Parameter
Mandatory or Not
Description
Platform Role
Yes
Agent role. This parameter is mandatory.- Common agent: This role can answer or transfer inbound calls from customers.
- Quality checker: This role can intervene in calls between common agents and customers. For example, this role can perform operations, such as insertion, interception, and forcible busy state setting, to coach and supervise agents' handling of inbound calls.
- Callout agent: This role can answer, transfer, or reject inbound calls from customers.
Agent Type
Yes
Agent type based on the businesses that can be handled. This parameter is mandatory.- Audio agent
- Video agent
- Multimedia agent
- Versatile agent
Agent Mobile/Fixed-Line Number
No
Mobile number or fixed-line phone number used by an agent.
Account
Yes
Employee account.
For details, see Configuring Employee Information.
Intelligent Recognition
No
Whether an agent is an intelligent agent. By default, this switch is turned off. In addition to basic voice control functions, intelligent agents support real-time ASR and related intelligent recommendation functions. Before turning on this switch, ensure that the number of agents for which intelligent recognition is enabled does not exceed the number of intelligent agents allocated when the tenant is created.
Smart Form Filling
No
This feature is disabled by default. After it is enabled, the system automatically extracts the information contained in the dialog text between the customer and agent when the agent creates a case on the workbench, and fills the information in the corresponding case form to complete the case filling task, which reduces the manual input workload of the agent.
This parameter is available only when the tenant parameter Enabling the Intelligent TT Filling Feature is set to Yes.
To enable Smart Form Filling, enable Intelligent Recognition first.
Phone-Only Agent
No
After this switch is turned on, an agent can dial a specified access code to access an IVR flow, press a key as prompted to enter the employee ID and password to sign in, and answer calls on a mobile phone. When this switch is turned on, system O&M personnel need to customize the single-phone agent process for the tenant based on the platform, and the tenant needs to provide number resources for accessing the single-phone agent process.
Agent Number Anonymization Flag
No
Flag for a third party to mark whether an agent has the anonymization feature. This is not a feature switch. The anonymization feature enables agents to customize the calling number displayed on the user side (the calling number displayed to the user) and the calling number displayed on the agent side (the calling number displayed to the customer manager).
Skill Type
Yes
Skill Type: Select Skill Queue and click
 to set the skill queues of the agent. Alternatively, select Skill Queue Group and set the skill queue group of the agent. If multiple skill queues need to be added, ensure that the media types of all the skill queues are the same, except for versatile agents. For example, the media types of all the skill queues are voice and video, or multimedia. Click default to specify the default skill queue.NOTE:
- If Agent Type is set to Video agent, the corresponding number of video agents must have been applied for during tenant resource application.
- If Agent Type is set to Multimedia agent, the corresponding number of multimedia agents must have been applied during tenant resource application.
- If Agent Type is set to Versatile agent, the corresponding number of versatile agents must have been applied during tenant resource application.
- To add more business accounts, choose Configuration Center > Employee Center > Employee.
- Click Save. The business account and skill queue are associated with the agent ID.
- (Optional) Click Configure in the upper right corner of the page. On the Batch Agent Info Configuration page, configure agent information in batches. Figure 5 Page for configuring agent information in batches
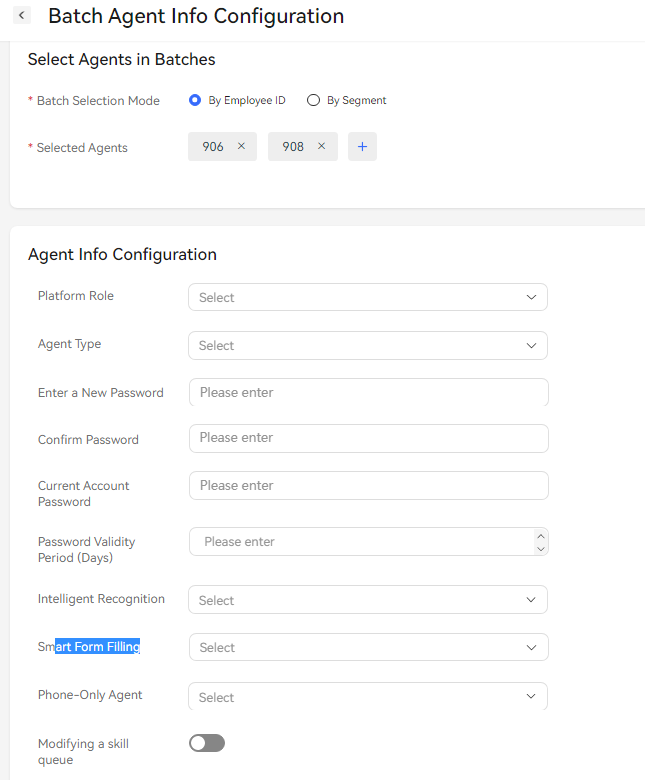
- Batch Select: Select agents to be configured by employee ID or employee ID segment.
- Agent Info Configuration: Set parameters by referring to 5.
- Configure the web channel.
- Choose Configuration Center > Access Configuration > Channel Configuration.
- Click New, set Channel Access Code, select WEB, and click Next to enter the page for configuring the web channel.

The channel access code must be unique. The code can contain only letters, digits, and underscores (_), and must start with a letter or an underscore (_).
- Set the web channel parameters shown in Figure 6 based on Table 4. If you need to enable the click-to-dial function, configure CTD Called Party Configuration and Click-to-Call Skill Queue on this page.
Table 4 Web channel parameters Parameter
Description
Common Configuration
Info Configuration
Set the following parameters:
- Skill Queue: The options are all multimedia called routes of the current tenant space. Select an option as required.
- Keyword for Transfer to Agent: Keywords for switching from robot service to manual service. After a customer enters any of the keywords on the HTML5 client, robot service is switched to manual service. NOTE:
If the intelligent robot is disabled, you do not need to set this parameter.
- CTD Called Party Configuration: The options are all voice and video agents and IVRs of the current tenant space.
- Click-to-Call Skill Queue: If CTD Called Party Configuration is set to Audio and video agent, you need to configure the related skill queue.
- Click to obtain the IVR access code: If CTD Called Party Configuration is set to IVR, you need to configure the IVR access code.
Dialog End Method
This function is disabled by default. If it is disabled, the default timeout period is 20 minutes. If it is enabled, set the following parameters:
- Prompt Interval for No Reply (min): If a customer does not reply on the client within this period, the session is disconnected.
- Conclusion: The system sends an end reminder after the session is disconnected.
Third-party authentication key
This function is disabled by default. If it is enabled, set secretKey. This parameter is mandatory when the authorization mode is used.
Agent Work Time
- Workday: A maximum of four working time segments (from 00:00 to 24:00) can be configured. By default, a time segment is displayed. You can click New to add a time segment.
- Non-workday: A maximum of four working time segments (from 00:00 to 24:00) can be configured. By default, a time segment is displayed. You can click New to add a time segment.
- Non-Working Time Notification: Notification displayed when a customer calls in non-working time.
Queue reminder
Set the following parameters:
- Queue reminder interval (seconds): This parameter is mandatory. The default value is 10.
- Queue reminder content: Notification displayed if a customer is in a queue after making an inbound call.
Chatbot Configuration
This function is disabled by default. If it is enabled, customers are preferentially connected to the robot. Set the following parameters:
- Change Avatar: Robot avatar.
- Name: Robot name.
- Gender: Robot gender.
- Chatbot Access Code: Robot access code configured in the intelligent IVR.
- Default reply: Customized reply displayed when the robot cannot recognize the intent of a customer.
- Timeout reply: Customized reply displayed when the session with a customer times out.
- Prompt for transfer to agent: Customized prompt message indicating that robot service is switched to manual service.
NOTE:If you want to enable the robot function to allow customers to chat with the robot, configure a robot based on the required robot type. For details, see Configuring an Intelligent Robot.
Robot Assistant Configuration
This function is disabled by default. If it is enabled, the robot assistant is enabled on the agent side.
- Assistant Access Code: Robot access code configured in the intelligent IVR.
- SilentAgent Skill Queue: The options are all multimedia called routes of the current tenant space. Select an option as required.
- Click Save And Proceed To The Next Step. The Integration instructions page is displayed.
- (Optional) On the Integration instructions tab page, click Try. On the page that is displayed, set customer information to simulate the dialog window on the customer side.
Verify that customers can chat with agents or the robot through the current channel.
- Click Try, and click
 in the lower right corner of the page that is displayed. The Online Customer Service dialog box is displayed. The online customer service has two chat modes:
 - If Connect to Chatbot is enabled, customers are connected to and chat with the robot by default. If the chat content entered by a customer contains a keyword that can be recognized by the robot, the robot recognizes the keyword and replies to the customer.
- If Connect to Chatbot is disabled, customers are automatically connected to and chat with online agents. Click Sign In on the CEC to sign in as a multimedia agent, and choose Online Chat Workbench. The workbench of the current session is displayed. After a customer is connected, you can chat with the customer online.
When chatting with the robot, the customer can click Transfer to Agent or enter content that contains any of the keywords specified by Keyword for Transfer to Agent to switch from the robot to an agent. (Keyword for Transfer to Agent can be set in Step 6.) However, the customer cannot switch to the robot or another agent when chatting with an agent.
- In the Online Customer Service dialog box, enter the chat content, click Send, and check the reply of the robot or agent.
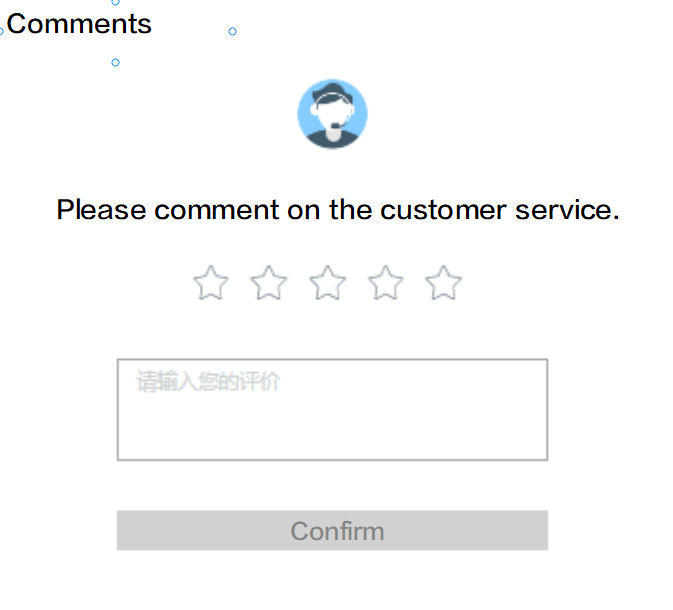
- (Optional) Click
 and choose Evaluation to comment on the customer service, including the satisfaction rating and evaluation content, as shown in Figure 7. Click Confirm to submit the evaluation.
 Customers can evaluate the agents who chat with them. During or after a chat, the customer can evaluate the service of the agent at any time. The last evaluation is used.
- Click Try, and click


After the channel configuration is complete, record the channel configuration ID, which will be used during verification API development and page integration.

Feedback
Was this page helpful?
Provide feedbackThank you very much for your feedback. We will continue working to improve the documentation.See the reply and handling status in My Cloud VOC.
For any further questions, feel free to contact us through the chatbot.
Chatbot


