Implementation Procedure
- Log in to the FunctionGraph console. On the Dashboard page, click Create Function. For details, see Developing a Custom Authorizer with FunctionGraph.
- Set the parameters according to the following table, and click Create Function.
Table 1 Function configuration Parameter
Description
Function Type
Default: Event Function
Region
Select the same region as that of APIG.
Project
Projects group and isolate resources (including compute, storage, and network resources) across physical regions. A default project is provided for each Huawei Cloud region, and subprojects can be created under each default project. Users can be granted permissions to access all resources in a specific project. The selected region is used by default.
Function Name
Enter a name that conforms to specific rules to facilitate search.
Enterprise Project
Enterprise projects group and manage resources across regions. Resources in enterprise projects are logically isolated. Select default.
Agency
An agency that delegates FunctionGraph to access other cloud services. For this example, select Use no agency.
Runtime
Select Python 3.9.
- After the function is created, go to the function details page. On the Configuration tab, choose Environment Variables in the left pane, and click Edit Environment Variable > Add. test is a header for identity authentication, and query is for parameter query. If token involves sensitive data, enable the Encrypted option.

- On the Code tab, copy the following code to index.py, and click Deploy. For details about coding, see Creating a Function for Frontend Custom Authentication in the API Gateway Developer Guide.
# -*- coding:utf-8 -*- import json def handler(event, context): testParameter = context.getUserData('test'); userToken = context.getUserData('token'); if event["headers"].get("token") == userToken and event["queryStringParameters"].get("test") == testParameter: resp = { 'statusCode': 200, 'body': json.dumps({ "status":"allow", "context":{ "user":"auth success" } }) } else: resp = { 'statusCode': 401, 'body': json.dumps({ "status":"deny", }) } return json.dumps(resp) - Configure a test event to debug the code.
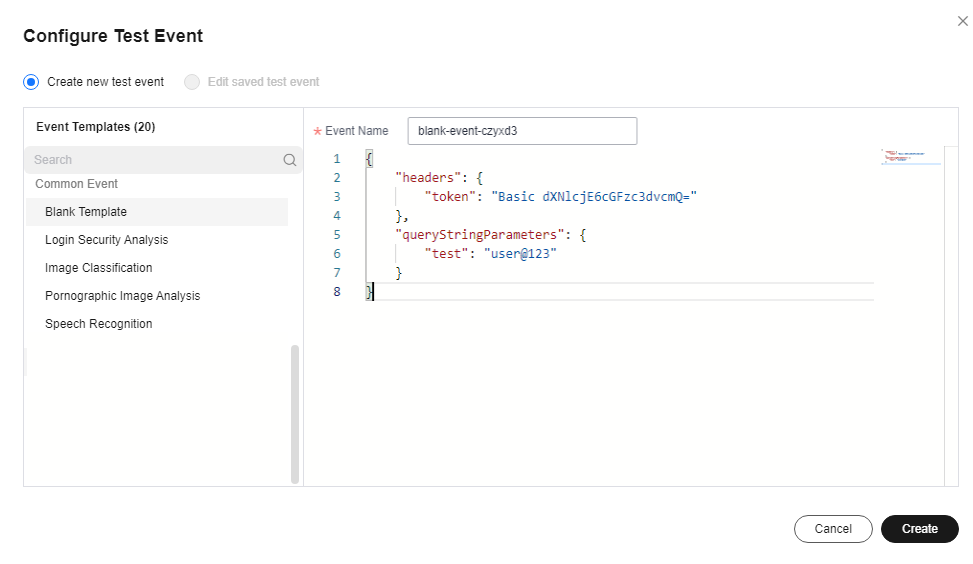
- Select Configure Test Event from the drop-down list and configure a test event.

The parameter values in the test event must be the same as those of the environment variables.

- Click Test.

- Click Deploy.
- Select Configure Test Event from the drop-down list and configure a test event.
- Set the parameters according to the following table, and click Create Function.
- Go to the APIG console, and choose API Management > API Policies.
On the Custom Authorizers tab, create a custom authorizer.
Table 2 Custom authorizer configuration Parameter
Description
Name
Enter a name that conforms to specific rules to facilitate search.
Type
Select Frontend.
Function URN
Click Select and select the created function.
Version/Alias
Version is selected by default.
Max. Cache Age (s)
30
Identity Sources
Set two identity sources: header token and query string test.
- Choose API Management > APIs, and click Create API > Create API.
- Configure the frontend information according to the following table.
Table 3 Frontend configuration Parameter
Description
API Name
Enter a name that conforms to specific rules to facilitate search.
Group
The default option is DEFAULT.
URL
Method: Request method of the API. Set this parameter to GET.
Protocol: Request protocol of the API. Set this parameter to HTTPS.
Subdomain Name: The system automatically allocates a subdomain name to each API group for internal testing. The subdomain name can be accessed 1000 times a day.
Path: Path for requesting the API. Enter /api/two_factor_authorization.
Gateway Response
Select a response to be displayed if the gateway fails to process an API request.
The default gateway response is default.
Authentication Mode
API authentication mode. Set this parameter to App.
Two-Factor Authentication
Enable this option and select a custom authorizer.
- Click Next and set the backend type to Mock.
Select a status code, set the response, and click Finish.
- Publish the API.
- Configure the frontend information according to the following table.
- In the navigation pane, choose API Management > Credentials.
Click Create Credential, enter a credential name, and click OK.
- Bind this credential to the API.
Click the credential name to go to the details page. In the APIs area, click Bind to APIs, select an API, and click OK.
- Verify the API.
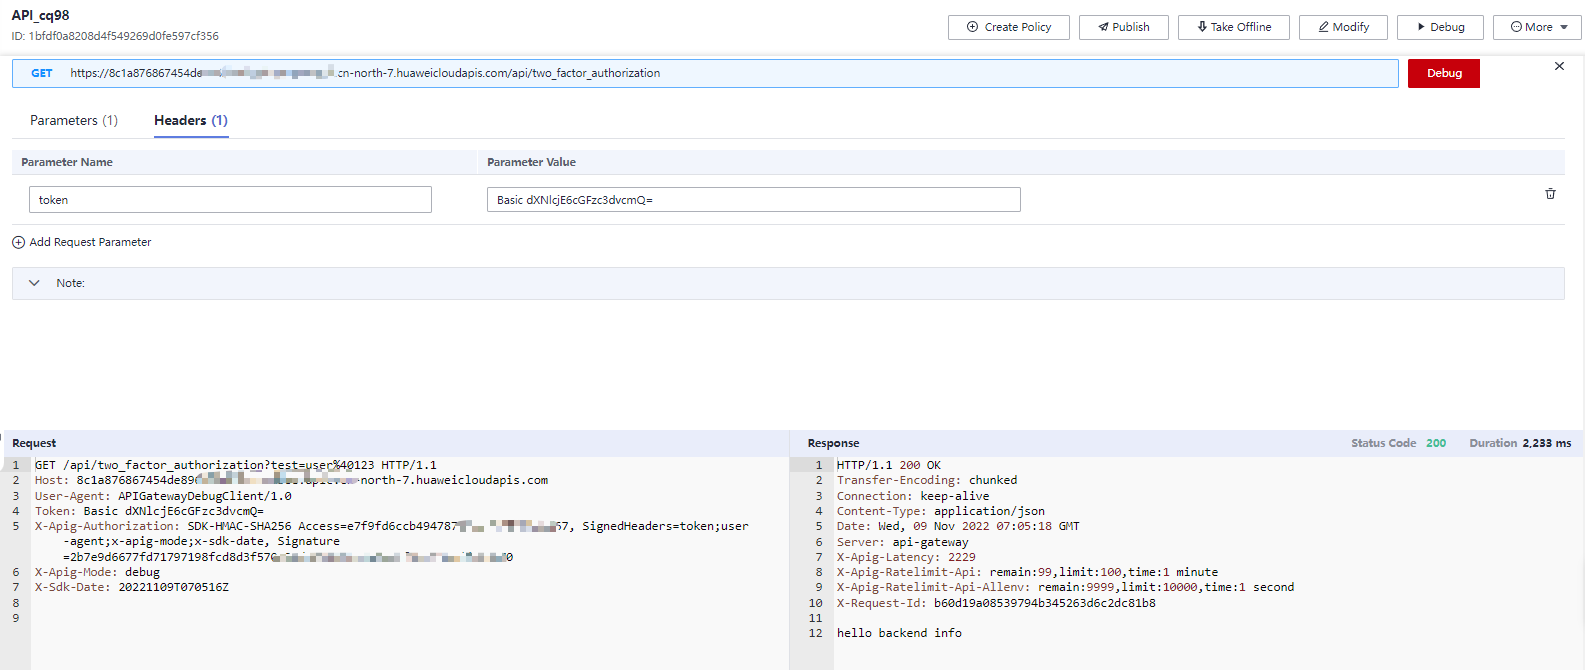
- Call the API on the debugging page of APIG to verify if two-factor authentication is configured successfully.
Add test on the Parameters tab and add token on the Headers tab. Use the same parameter values set for the custom authentication function. If the parameter values are different, the server will return a 401 message indicating that the authentication fails.

- Alternatively, call the API with a curl command. Download the JavaScript SDK first. To call the API, input a key and secret as well as the header and query string to generate a curl command, and then copy this command to your CLI for execution. For details, see curl in the API Gateway Developer Guide.

- Call the API on the debugging page of APIG to verify if two-factor authentication is configured successfully.
Feedback
Was this page helpful?
Provide feedbackThank you very much for your feedback. We will continue working to improve the documentation.See the reply and handling status in My Cloud VOC.
For any further questions, feel free to contact us through the chatbot.
Chatbot


