Developing a Custom Authorizer with FunctionGraph
Scenario
In addition to IAM and app authentication, APIG also supports custom authentication with your own authentication system, which can better adapt to your business capabilities.
Custom authentication is implemented using the FunctionGraph service. You can create a FunctionGraph function so that APIG can invoke it to authenticate requests for your API. This section uses basic authentication as an example to describe how to implement custom authentication with FunctionGraph.
General Procedure

- Developing a Custom Authentication Function
Create a function for custom authentication.
- Creating a Custom Authorizer
Create a custom authorizer in APIG to connect the function.
- Creating a Custom Authentication API
Create an API with Custom authentication mode.
- Setting the Error Response
To include the context field of the function response in the API response result, modify the gateway response.
- Mapping Frontend Authentication Parameters to Backend Parameters
Add a system parameter to transfer the context information returned by the function to the backend.
- Verifying the API
Call the API and check whether the context information of the function is successfully returned.
Developing a Custom Authentication Function
Create a function on the FunctionGraph console by referring to Creating a Function for Frontend Custom Authentication.
Create a function on the FunctionGraph page according to the following table.
|
Parameter |
Description |
|---|---|
|
Create With |
Select Create from scratch. |
|
Function Type |
Default: Event Function |
|
Region |
Select the same region as that of APIG. |
|
Project |
Projects group and isolate resources (including compute, storage, and network resources) across physical regions. A default project is provided for each Huawei Cloud region, and subprojects can be created under each default project. Users can be granted permissions to access all resources in a specific project. The selected region is used by default. |
|
Function Name |
Set this name as planned. |
|
Enterprise Project |
Enterprise projects group and manage resources across regions. Resources in enterprise projects are logically isolated. Select default. |
|
Agency |
An agency that delegates FunctionGraph to access other cloud services. For this example, select Use no agency. |
|
Runtime |
Select Python 3.6. |
After the function is created, go to the function details page. On the Code tab page, copy the following code to index.py (if you are using a dedicated gateway, for which the authorizer_context_support_num_bool parameter has been enabled, the type of value in context can be boolean or number).
1 2 3 4 5 6 7 8 9 10 11 12 13 14 15 16 17 18 19 20 21 22 23 24 25 26 |
# -*- coding:utf-8 -*- import json def handler(event, context): # If the authentication information is correct, the username is returned. if event["headers"]["authorization"]=='Basic dXN****cmQ=': return { 'statusCode': 200, 'body': json.dumps({ "status":"allow", "context":{ "user_name":"user1" } }) } else: return { 'statusCode': 200, 'body': json.dumps({ "status":"deny", "context":{ "code": "1001", "message":"incorrect username or password", "authorizer_success": "false" } }) } |
Creating a Custom Authorizer
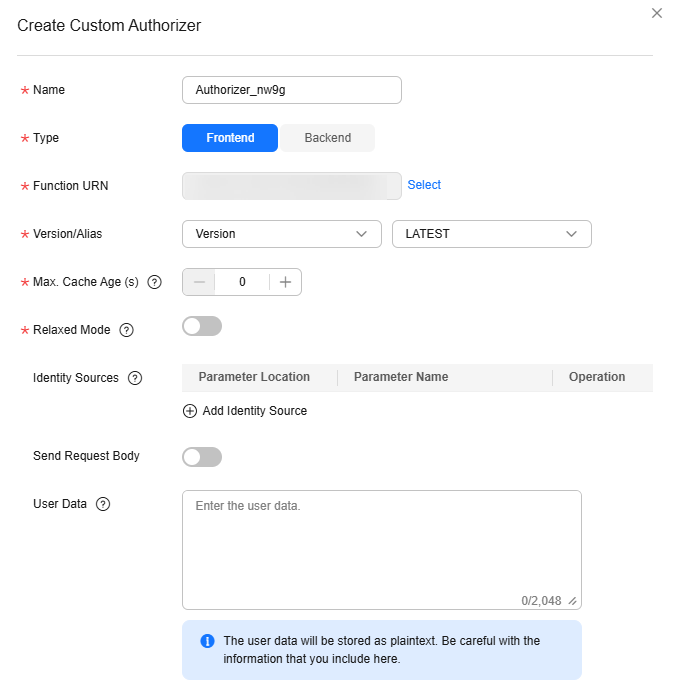
On the APIG console, choose API Policies > Custom Authorizers, click Create Custom Authorizer page, set Type to Frontend, and select the created function for Function URN.

Creating a Custom Authentication API
On the APIs page of the APIG console, create an API by referring to Creating an API. Set the authentication mode to Custom, and select the custom authorizer created in the preceding section. After modifying the API, publish it.
Setting the Error Response
If incorrect authentication information is carried in a request for the API, the response is displayed as follows:
1
|
{"error_msg":"Incorrect authentication information: frontend authorizer","error_code":"APIG.0305","request_id":"36e42b3019077c2b720b6fc847733ce9"} |
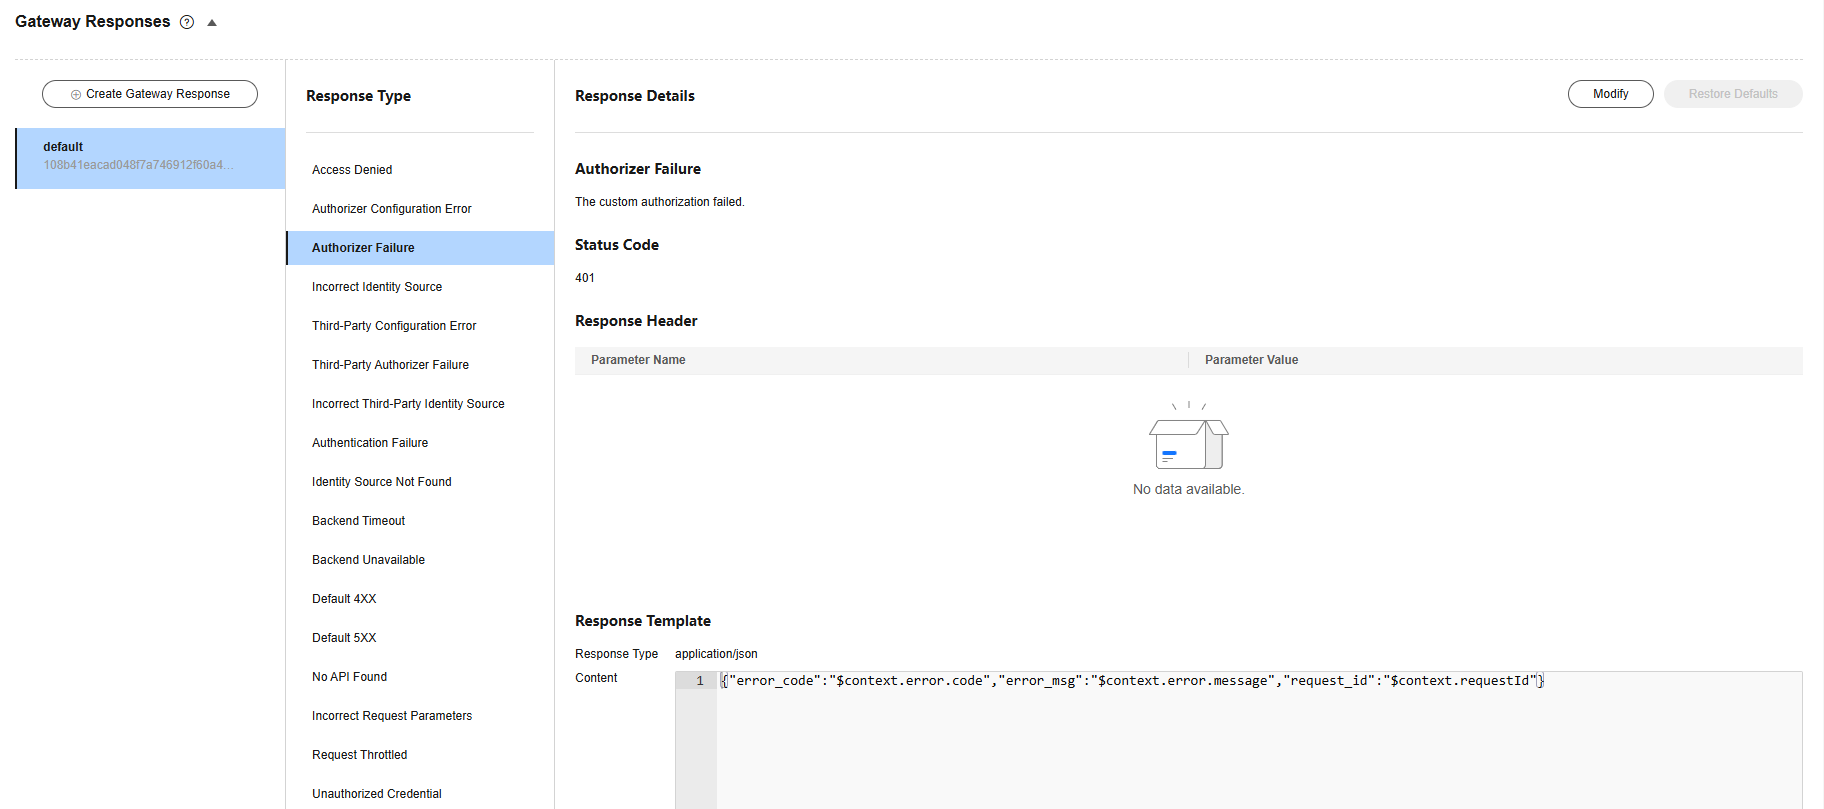
To return the field in the function's context as the API response (if you are using a dedicated gateway, for which the authorizer_context_support_num_bool parameter has been enabled, the type of value in context can be boolean or number), modify the gateway response template. On the details page of the group to which the API belongs, navigate to the Gateway Responses area on the Gateway Information tab, and click Edit. Change the status code to 401, modify the response template with the following code, and click OK (no need to add double quotes for variables of the boolean or number type):
1
|
{"code":"$context.authorizer.frontend.code","message":"$context.authorizer.frontend.message", "authorizer_success": "$context.authorizer.frontend.authorizer_success"} |

After the modification, if incorrect authentication is transferred when calling the API, the status code 401 is returned and the response result is as follows:
1
|
{"code":"1001","message":"incorrect username or password","authorizer_success": "false"} |
Mapping Frontend Authentication Parameters to Backend Parameters
If the authentication is successful, the context information returned by the function can be transferred to the backend of the API. To do this, perform the following configurations:
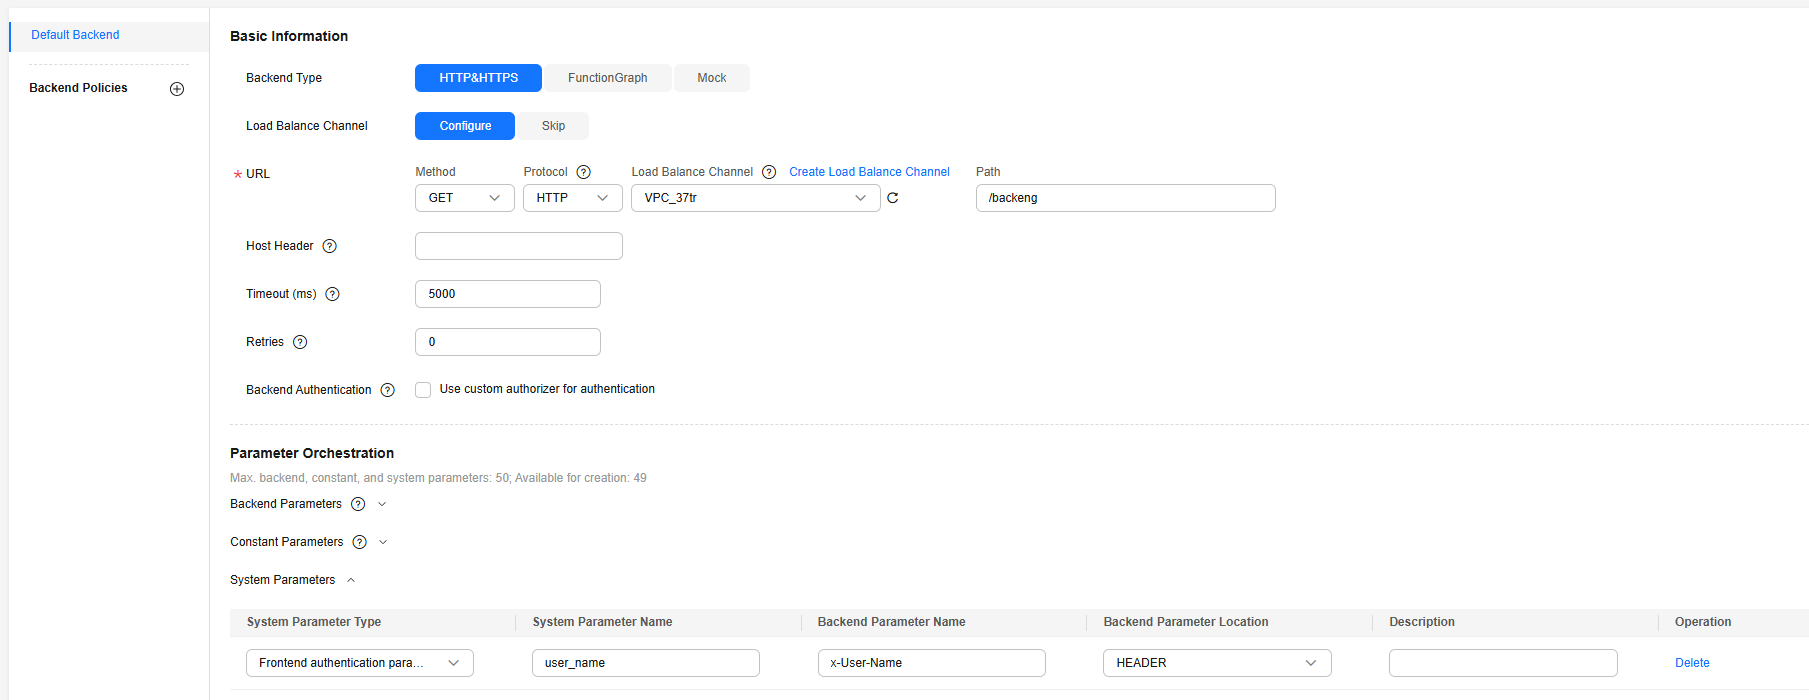
On the APIs page, choose More > Edit in the row that contains the API, and go to the Define Backend Request page. Add a system parameter, specify the parameter type as Frontend authentication parameter, set the parameter name to the content of the context field in the function response, and set the name and location of the backend parameter to which you want to the map the frontend authentication parameter.

Feedback
Was this page helpful?
Provide feedbackThank you very much for your feedback. We will continue working to improve the documentation.See the reply and handling status in My Cloud VOC.
For any further questions, feel free to contact us through the chatbot.
Chatbot


