Managing Workflows
On the agent development platform, you can copy and obtain workflow IDs, as well as delete, import, and export workflows.
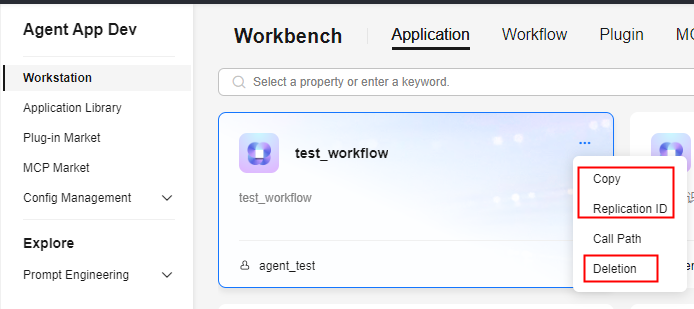
Obtaining a Workflow ID and Deleting a Workflow
- Log in to the agent development platform.
- In the navigation pane, choose Application Management. On the Workflow tab page, select the workflow application to be operated.
- Click
 > Copy to copy the current workflow.
 - Click
 > Copy ID to obtain the current workflow ID.
 - Click
 > Delete to delete the current workflow.
Figure 1 Obtaining a Workflow ID and Deleting a Workflow

Deletion is a high-risk operation. Before deleting a workflow, ensure that the workflow is no longer used.
Exporting and Importing Workflows
The platform supports workflow export and import. When a workflow is exported, the configurations such as plug-ins associated with the workflow are also exported.
- Log in to the agent development platform.
- In the navigation pane, choose Application Management. On the Workflow tab page, select the workflow application to be operated.
- Export a workflow.
- Click Export in the upper right corner of the page.
Figure 2 Export

- In the Exporting Workflows dialog box, select a workflow application and click Export. The workflow is downloaded to the local host as a JSONL file.
Figure 3 Exporting a workflow

- Click Export in the upper right corner of the page.
- Import a workflow.
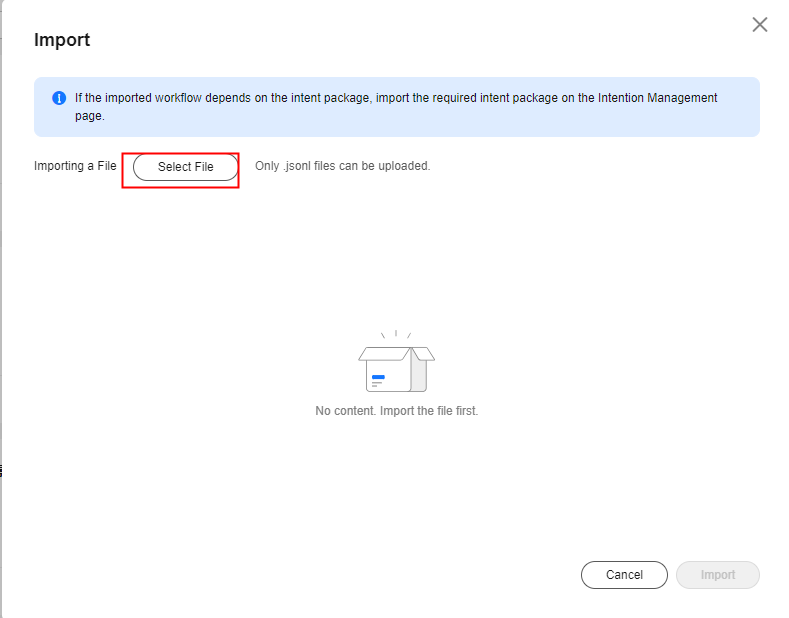
- Click Import in the upper right corner of the page.
Figure 4 Import

- In the Import dialog box, select a workflow application, click Select File, and select the JSONL file to be imported.
- Select the content to be parsed.
The platform automatically parses the JSONL file. If the file to be parsed already exists on the platform, this file will automatically overwrite the existing file on the platform.
- Click Import. The imported workflow is displayed on the Workflow Application tab page of the Workstation > Application Management page.
Figure 5 Import

- Click Import in the upper right corner of the page.
Feedback
Was this page helpful?
Provide feedbackThank you very much for your feedback. We will continue working to improve the documentation.See the reply and handling status in My Cloud VOC.
For any further questions, feel free to contact us through the chatbot.
Chatbot


