
Preparing for Adding a Host to a Host Cluster
Preparations
- A target host or an agent host is available. For details about how to apply for a host, see (Optional) Applying for an ECS. You may be charged during the process. For details, see ECS Billing.
- An EIP is available. You can create one when applying for an ECS or anytime by referring to Assigning an EIP. You may be charged during the process. For details, see EIP Billing.
- Configure a security group for the created ECS by referring to Configuring a Security Group.
- To ensure successful host connectivity, configure the host as follows:
- If your host is a newly applied ECS, configure the port by referring to Configuring a Security Group.
- If you use your own host, configure the port by referring to Configuring the Firewall.
Configuring a Security Group
Before verifying host connectivity, configure a security group and enable some ports. Otherwise, the connectivity verification may fail. (The following uses a Linux host as an example.)
- Go to the console, and choose Service List > Compute > Elastic Cloud Server. The Elastic Cloud Server page is displayed.
- Click the target ECS to go to its details page. Click the Security Groups tab. Choose Manage Rule > Inbound Rules of the corresponding target security group to configure inbound rules. Figure 1 Configuring rules

- Click Fast-Add Rules and set the parameters as follows: Figure 2 Fast-add rules

- For Linux hosts, enable port 22 in the inbound rule. For Windows hosts, enable ports 54, 5985, and 5986 in the inbound rule when adding the target host or agent host. Set the remote end to 0.0.0.0/0 (open the preceding ports for all IP addresses).

If you have high security requirements on the overall deployment process and the preceding ports cannot be opened to all IP addresses, add the following IP addresses (public IP addresses) to the security group and remove port restrictions. Otherwise, host connectivity verification cannot be performed.
These IP addresses above are open IP addresses in the official agent pool of CodeArts Deploy for communications with target hosts and agent hosts.
- Remove the inbound restriction on the port of the application deployed on the host (for example, port 8080 of the Tomcat application or all ports of other applications must be enabled in the inbound direction). Otherwise, the application cannot be accessed.
- Remove the restriction on the outbound direction or at least make ports 80 and 443 accessible.
- For Linux hosts, enable port 22 in the inbound rule. For Windows hosts, enable ports 54, 5985, and 5986 in the inbound rule when adding the target host or agent host. Set the remote end to 0.0.0.0/0 (open the preceding ports for all IP addresses).
Configuring the Firewall
Check the firewall configuration of the host to make sure that the firewall allows access to the SSH protocol. Otherwise, the connectivity verification may fail. The following part describes how to configure the firewall for different OSs.
| OS Series | Configuration Method |
|---|---|
| CentOS/EulerOS/UnionTechOS |
|
| Debian |
|
| Ubuntu |
|
This section uses Windows Server 2012 as an example.
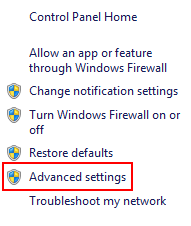
- Choose Windows Firewall on the control panel of the Windows host.

- Click Advanced settings.

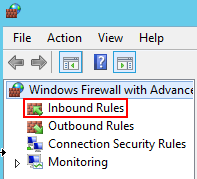
- Click Inbound Rules.

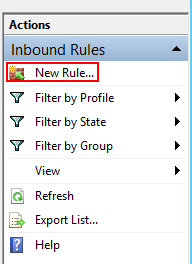
- Click New Rule.
- Set Rule Type to Port and click Next.

- Select TCP and Specific local ports, enter port 5986, and click Next.

- Select Allow the connection, and click Next.

- Select all the options for Profile and click Next.

- Enter a rule name and click Finish to complete the firewall configurations.

- To connect to the target host through an agent host, repeat step 1 to step 9 to configure the firewall for the agent host. Add an inbound rule for the listening port (example: port 54) of the agent by referring to step 4.
- (Optional) To meet higher security requirements, configure an IP address whitelist on the target host, instead of opening the preceding ports to all IP addresses.
- Choose Windows Firewall on the control panel of the Windows host.

- Click Advanced settings.
- Click Inbound Rules.
- Click New Rule.

- Set Rule Type to Custom and click Next.

- Set Program to All programs and click Next.
- Set Protocol type to TCP and Local port to Specific Ports, enter port 5986, and click Next.

- In the Scope area, select Any IP address for Which local IP addresses does this rule apply to? and select These IP addresses for Which remote IP addresses does this rule apply to? enter a whitelisted IP address and click Next.

- Select Allow the connection, and click Next.

- Select all the options for Profile and click Next.

- Enter a rule name and click Finish to complete the IP address access whitelist setting for the target host.

- To connect to the target host through an agent host, repeat step 1 to step 11 to configure the IP address access whitelist on the agent host and add an inbound rule for the listening port of the agent host, for example, port 54.
- Choose Windows Firewall on the control panel of the Windows host.
Feedback
Was this page helpful?
Provide feedbackThank you very much for your feedback. We will continue working to improve the documentation.See the reply and handling status in My Cloud VOC.
For any further questions, feel free to contact us through the chatbot.
Chatbot


