Encryption Table Management
For encrypted tables, functions such as Edit Index and Edit Non-encrypted Column are supported on the web page.
Editing Index
When the data volume is large (for example, more than 10 million rows), querying encrypted columns is time-consuming. You can add indexes to improve the efficiency. You can add an index on the database asset or on the system. This section describes how to add indexes to encrypted columns in the system.
- Log in to a database encryption and access control system as the sysadmin user.
- In the navigation tree on the left, choose .
- Choose .
- In the list, view the list of encrypted tables. You can search for the target encrypted table by schema and table name.
- Find the target encrypted table and click Edit Index. The index list page is displayed.
- Click Add Index.
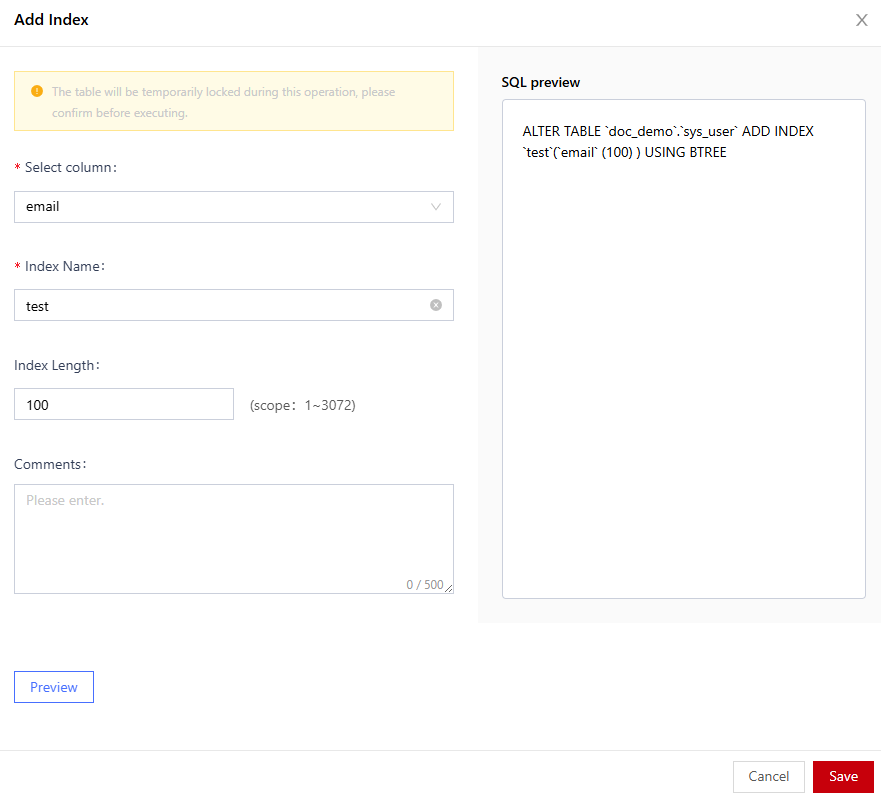
- In the displayed dialog box, set index parameters. Select a column, set the index name and index length, and click Preview to view the SQL statement for adding the index.
Figure 1 Adding an index

- Click Save.
Editing Non-encrypted Column
After database tables in data assets are encrypted, users cannot directly add columns to the database. You need to fully decrypt the encrypted table before adding columns. Services on the live network need to be stopped, which greatly affects user services.
With the function of editing non-encrypted columns, you can add columns without full decryption. The encrypted table is locked only when is executed, which has minimized impact on the live network.

If you want to modify a large number of columns in an encrypted table, you still need to decrypt all columns in the encrypted table before modifying them.
- Log in to a database encryption and access control instance as the sysadmin user.
- In the navigation tree on the left, choose .
- Choose .
- In the list, view the list of encrypted tables. You can search for the target encrypted table by schema and table name.
- Locate the target encrypted table and click Edit Non-encrypted Column.
- In the displayed page, click Add Column.
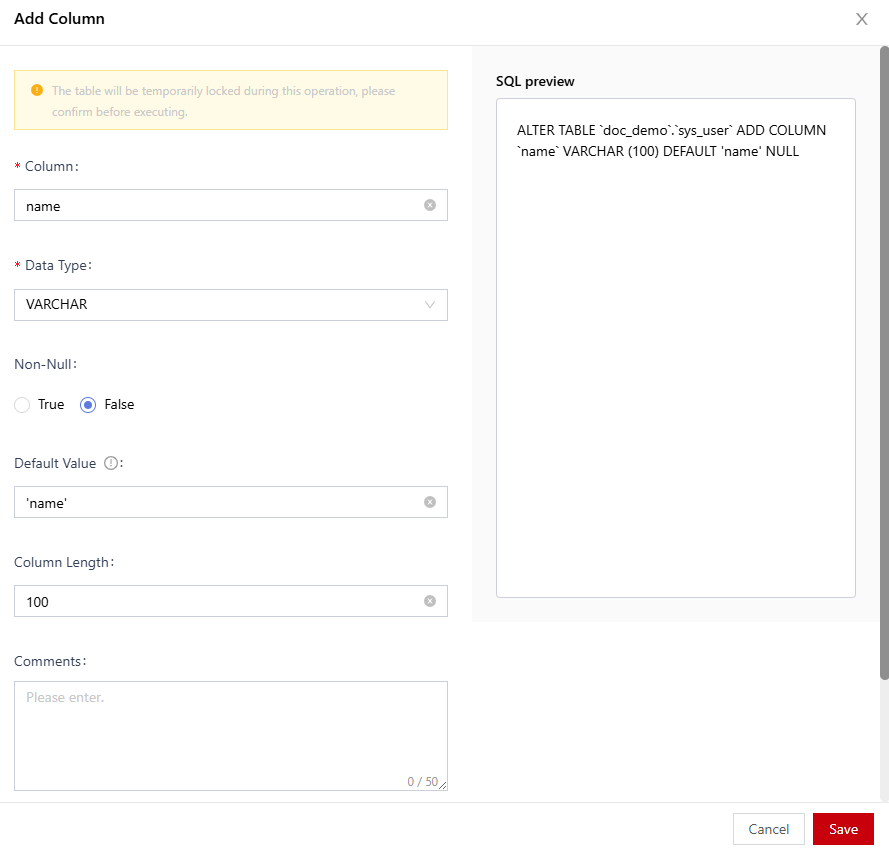
- In the Add Column dialog box, configure column parameters, including the Column, Data Type, Non-Null, Default Value, and Column Length. Click Preview to view the SQL statement for adding a column.

The default value cannot contain single or double quotation marks.
Figure 2 Adding a column
- Click Save.
Feedback
Was this page helpful?
Provide feedbackThank you very much for your feedback. We will continue working to improve the documentation.See the reply and handling status in My Cloud VOC.
For any further questions, feel free to contact us through the chatbot.
Chatbot


