
Uploading a File from a Local Path to JupyterLab
JupyterLab provides multiple methods for uploading files.
Methods for Uploading a File
- For a file no larger than 100 MB, directly upload it to the target notebook instance. Detailed information, such as the file size, upload progress, and upload speed are displayed.
- For a file that is larger than 100 MB but no larger than 50 GB, upload the file to OBS (an object bucket or a parallel file system), and then download the file from OBS to a notebook instance. After the download is complete, the file is deleted from OBS.
- For a file larger than 50 GB, upload it using the ModelArts SDK.
- For a file that shares the same name with an existing file in the current directory of a notebook instance, overwrite the existing file or cancel the upload.
- A maximum of 10 files can be uploaded at a time. The other files are in awaiting upload state. No folders can be uploaded. If a folder is required, compress it into a package, upload the package to notebook, and decompress the package in Terminal.
unzip xxx.zip # Directly decompress the package in the path where the package is stored.
For more details, search for the decompression command in mainstream search engines.
- When multiple files are uploaded in a batch, the total number of files to be uploaded and the number of files that have been uploaded are displayed at the bottom of the JupyterLab window. Figure 1 Uploading multiple files

Uploading a File
Method 1: Use JupyterLab to open a running notebook environment.
Method 2: Click  in the navigation bar on the top of the window. In the displayed dialog box, drag or select a local file and upload it.

Uploading a Local File Smaller Than 100 MB to JupyterLab
For a file no larger than 100 MB, directly upload it to the target notebook instance. Detailed information, such as the file size, upload progress, and upload speed are displayed.

A message is displayed after the file is uploaded.

Uploading a Local File That Is 100 MB to 50 GB to JupyterLab
For a file that is larger than 100 MB but no larger than 50 GB, upload the file to OBS (an object bucket or a parallel file system), and then download the file from OBS to the target notebook instance. After the download is complete, the file is automatically deleted from OBS.
For example, in the scenario shown in the following figure, upload the file through OBS.

To upload a large file through OBS, set an OBS path.


Set an OBS path for uploading local files to JupyterLab. After the setting, this path is used by default in follow-up operations. To change the path, click  in the lower left corner of the file upload window shown in Figure 11.
- Method 1: Enter a valid OBS path in the text box and click OK. Figure 8 Configuring an OBS path

- Method 2: Select an OBS path in OBS File Browser and click OK. Figure 9 OBS File Browser

- Method 3: Use the default path. Figure 10 Using the default path to upload a file


After the OBS path is set, upload a file.

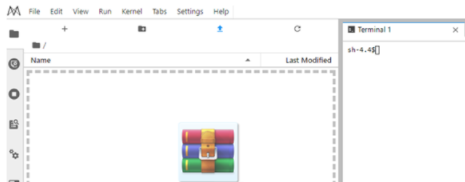
Decompressing a package
After a large file is uploaded to Notebook JupyterLab as a compressed package, you can decompress the package in Terminal.
unzip xxx.zip #Directly decompress the xxx.zip package in the path where the package is stored.
For more details, search for the Linux decompression command in mainstream search engines.
Uploading a Local File Larger Than 50 GB to JupyterLab
A file larger than 50 GB cannot be directly uploaded to JupyterLab.
To upload files larger than 50 GB, upload them to OBS. Then, call the ModelArts SDK API in the target notebook instance to read and write the files in OBS.

The procedure is as follows:
- Upload the file from a local path to OBS. For details, see Uploading a File to an OBS Bucket.
- Download the file from OBS to the notebook instance by calling the ModelArts SDK or MoXing API.
Call the ModelArts SDK for downloading a file from OBS.
Example code:
from modelarts.session import Session
session = Session()
session.obs.copy("obs://bucket-name/obs_file.txt","/home/ma-user/work/")
If a .zip file is downloaded, run the following command on the terminal to decompress the package:
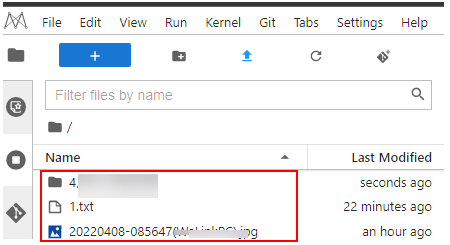
After the code is executed, open the terminal shown in Figure 14 and run the ls /home/ma-user/work command to view the file downloaded to the notebook instance. Alternatively, go to JupyterLab. In the navigation pane on the left, view the downloaded file. If the file is not displayed, refresh the page, as shown in Figure 15.

Troubleshooting
If you download a file from OBS to your notebook instance and the system displays error message "Permission denied", perform the following operations for troubleshooting:
- Ensure that the OBS bucket and notebook instance are in the same region. If they are in different regions, the access to OBS will be denied.
- Ensure that the notebook account has the permission to read data in the OBS bucket.
For details, see How Do I Handle OBS-related Errors Displayed in DataArts Studio.
Feedback
Was this page helpful?
Provide feedbackThank you very much for your feedback. We will continue working to improve the documentation.See the reply and handling status in My Cloud VOC.
For any further questions, feel free to contact us through the chatbot.
Chatbot


