
Help Center/
AI/
Getting Started with Intelligent Data Insight/
Implementation Procedure/
Getting Started
Updated on 2025-05-14 GMT+08:00
Getting Started
(Optional) Modifying Security Group Rules

- This solution uses port 80 to access Dify. By default, all traffic is allowed. Refer to Modifying Security Group Rules to configure the IP address whitelist.
- This solution uses port 22 to remotely log in to the cloud server over SSH. If you need to remotely log in to the cloud server, configure an IP address whitelist by referring to Modifying Security Group Rules so you can access the service properly.
- After the solution is successfully deployed, it takes approximately 5 minutes to initialize the environment. The deployment duration varies depending on the network and bandwidth. You can access the environment only after the deployment is complete.
A security group is a collection of access control rules for traffic to and from cloud resources, such as cloud servers, containers, and databases. Cloud resources associated with the same security group have the same security requirements and are mutually trusted within a VPC.
You can modify security group rules, for example, by adding, modifying, or deleting a TCP port, as follows:
- Adding a security group rule: Add an inbound rule and enable a TCP port if needed.
- Modifying a security group rule: Inappropriate security group settings may introduce serious security risks. You can modify security group rules to ensure the network security of instances like ECSs.
- Deleting a security group rule: If the source or destination IP address of an inbound or outbound security group rule changes, or a port needs to be disabled, you can delete the security group rule.
Logging In to the Dify Platform
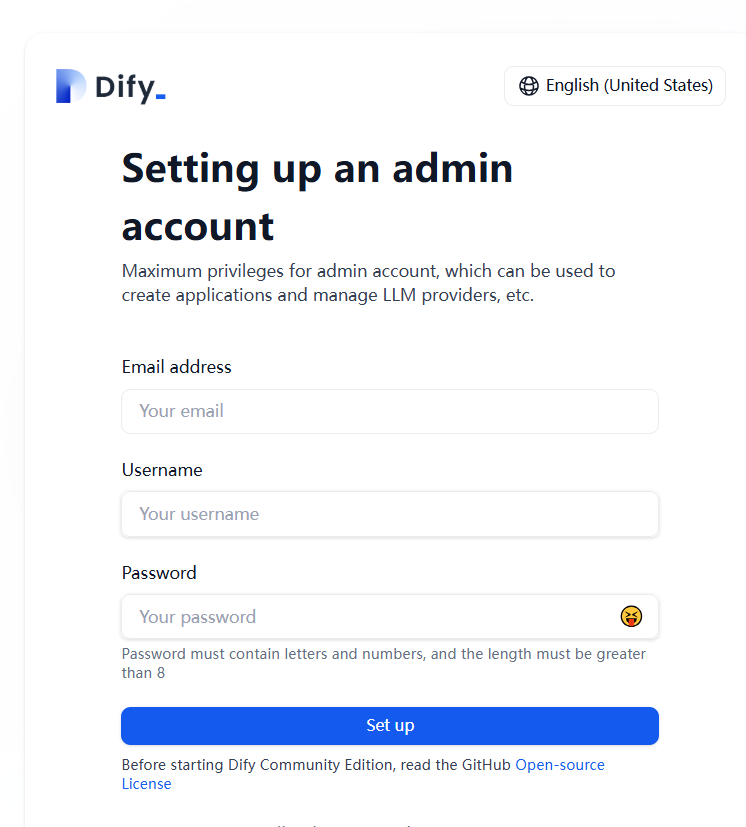
- Log in to the Dify platform: Enter the access address provided in step 10 of the quick deployment process to access Dify. Create an administrator account when you first log in by entering the email address, username, and password.
Figure 1 Creating an administrator account
- Open your browser, access the Dify platform page, and enter the email address and password you configured in step 1 to log in to the Dify platform.
Figure 2 Logging in to the Dify platform
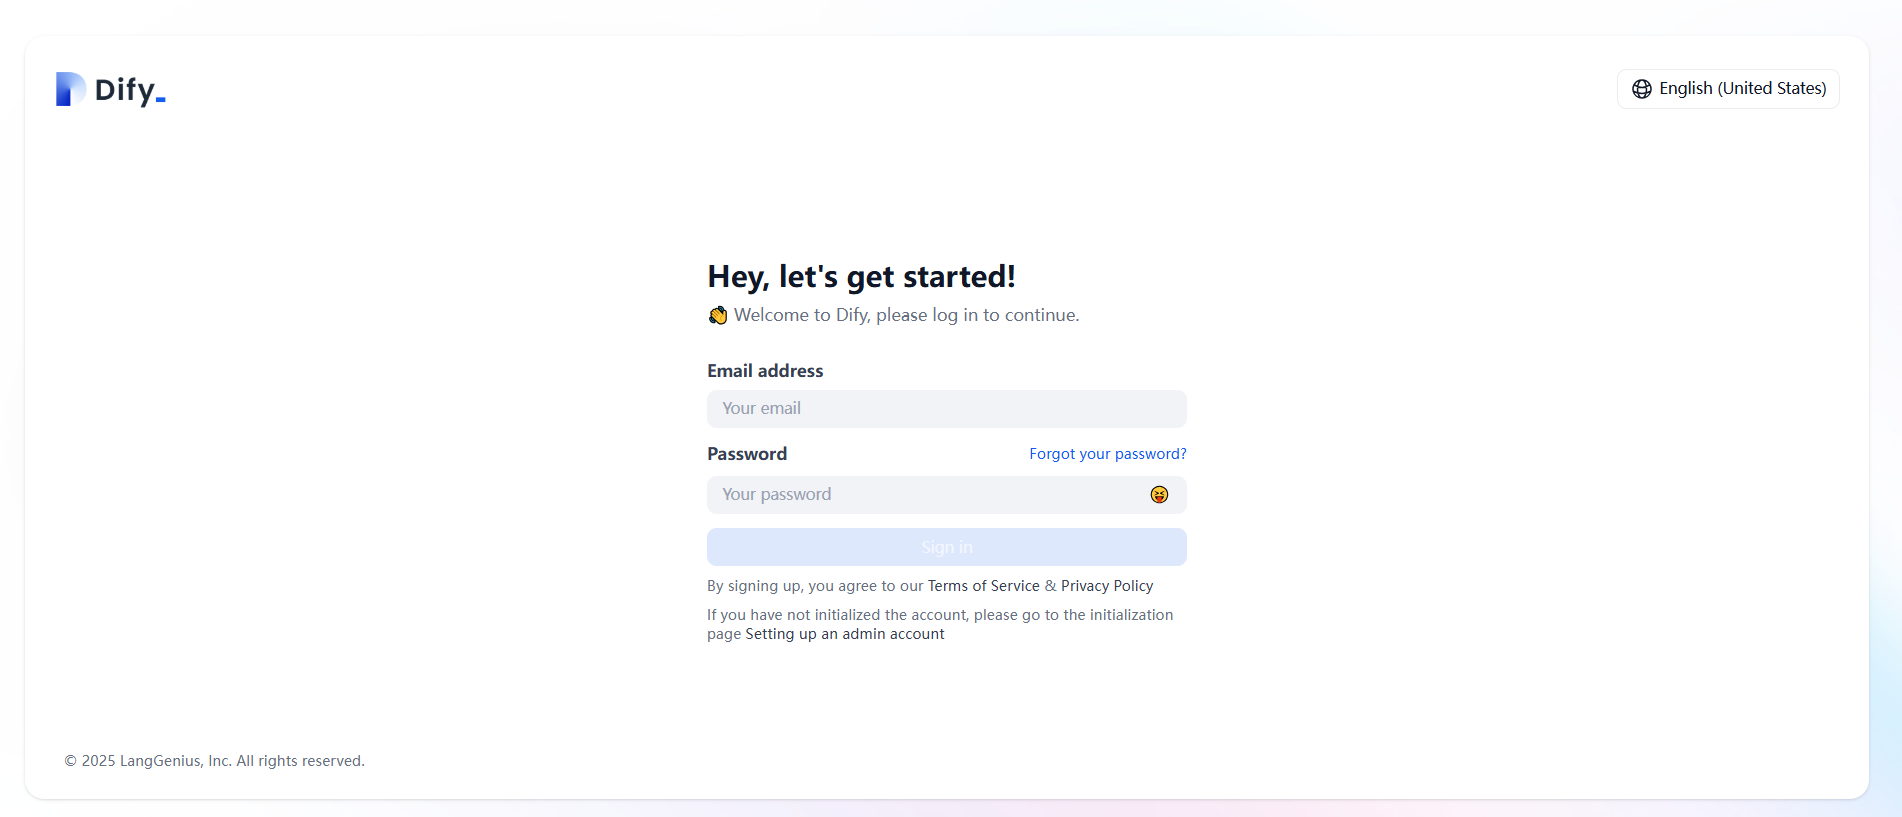 Figure 2 Dify platform
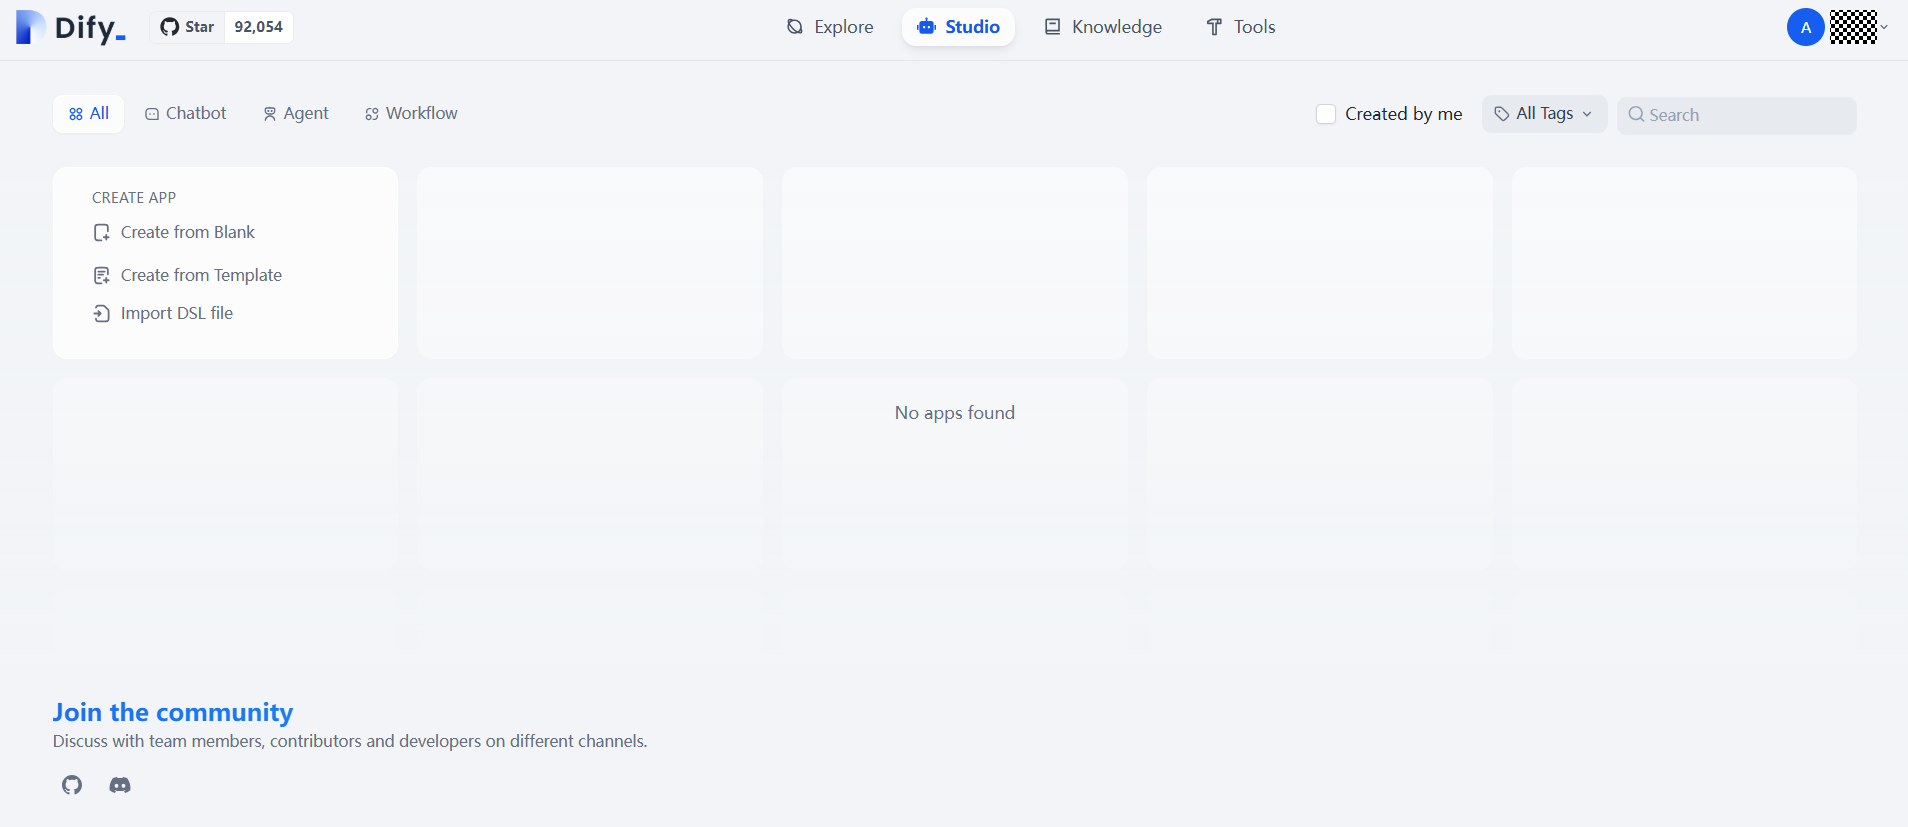
Interconnecting with DeepSeek Models
Refer to "Interconnecting with DeepSeek Models" in Getting Started.
Creating an Intelligent Data Insight Workflow
- Log in to the Dify platform and click Create from Blank under CREATE APP. On the displayed page, click Chatflow, set App Name & Icon, and click Create in the lower part.
Figure 4 Clicking Create from Blank
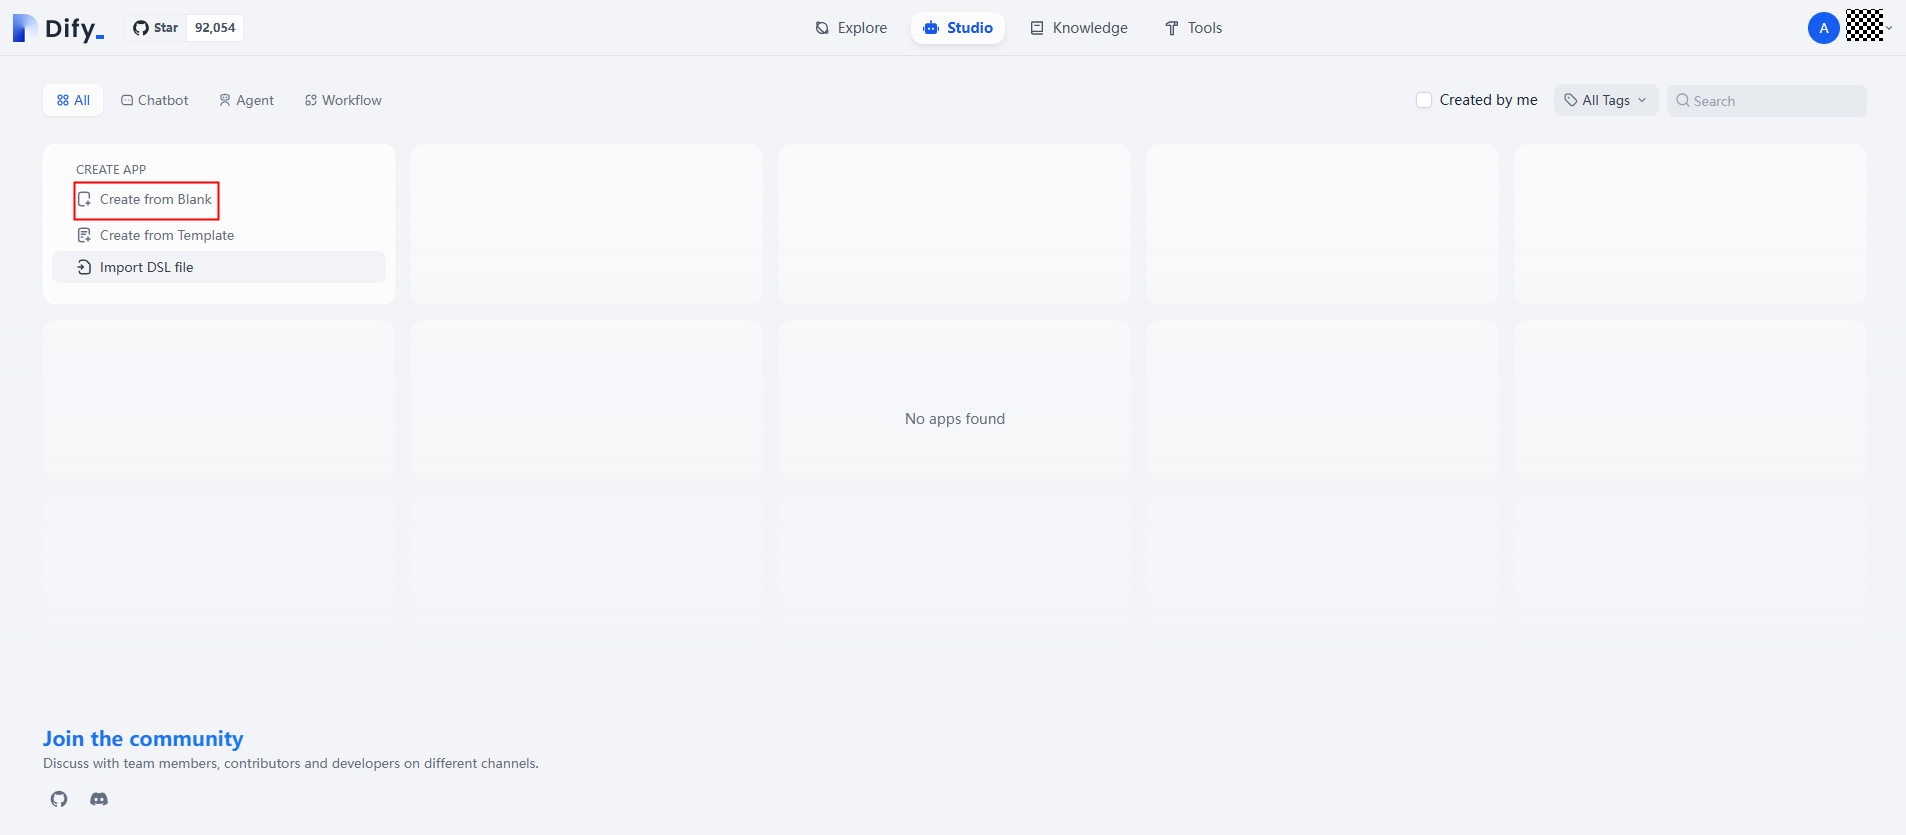 Figure 5 Creating a chat workflow
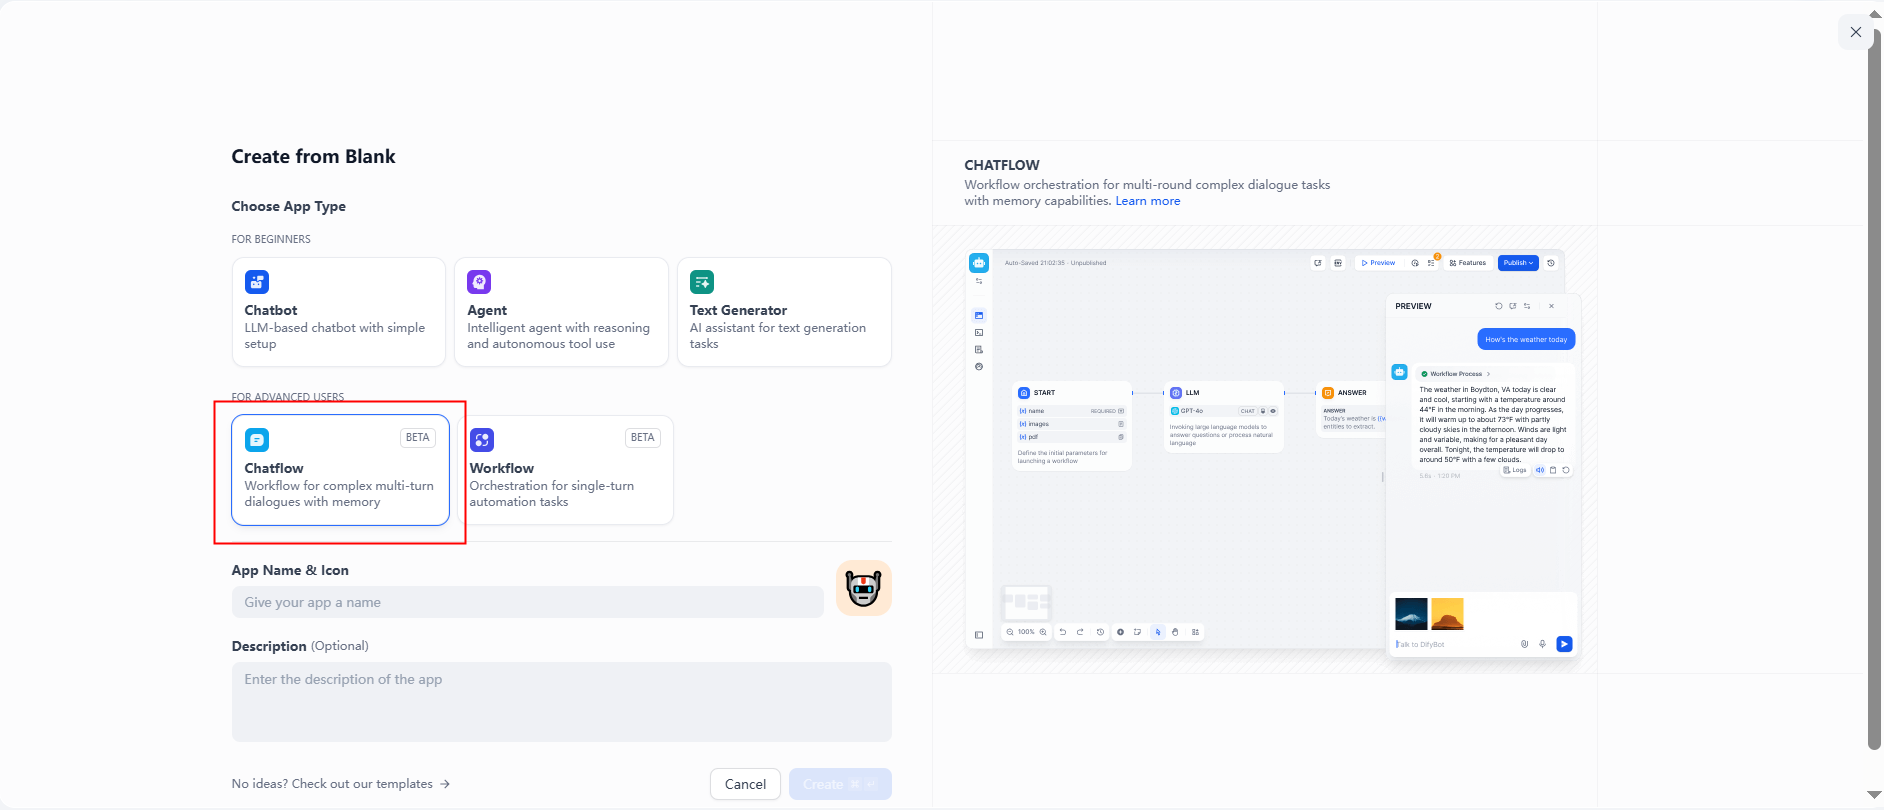
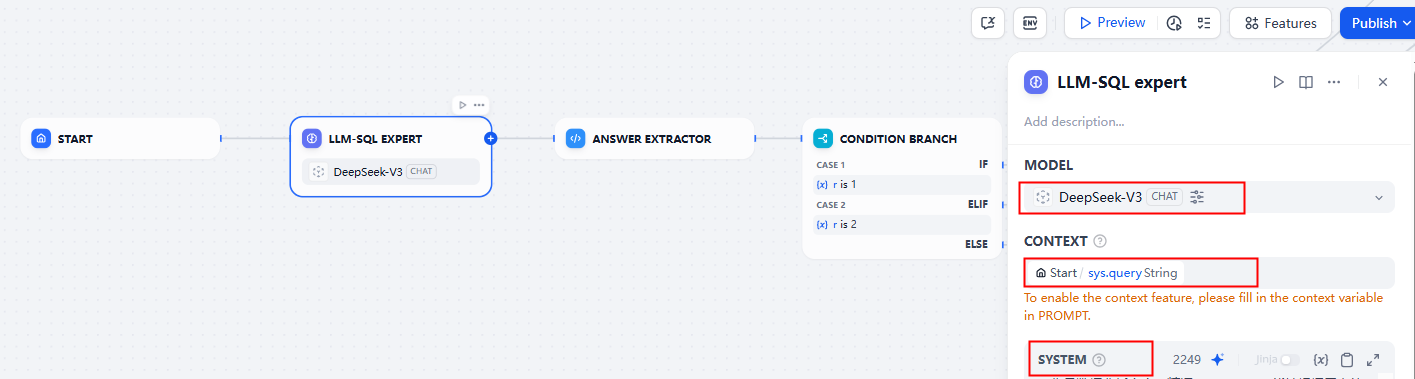
- Configure an LLM node: Select the connected model, set the context, and enter prompts in SYSTEM. You are advised to attach the database table structure and example SQL statements.
Figure 6 Configuring an LLM node
Connecting Dify to a Database
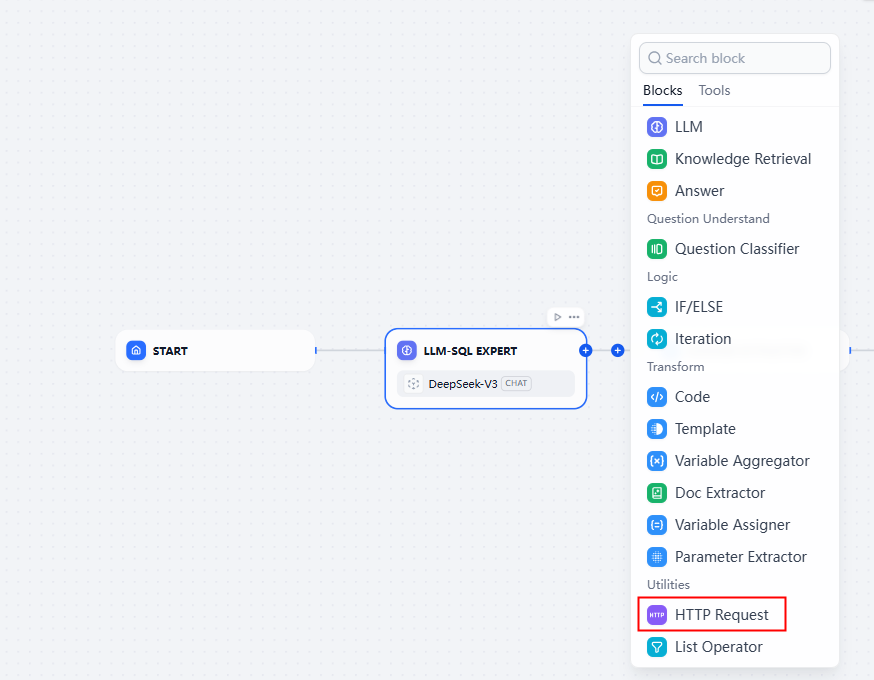
- Create an HTTP request node and enter the API address exposed by the database server provided in step 10 of the quick deployment process.
Figure 7 Creating an HTTP request node
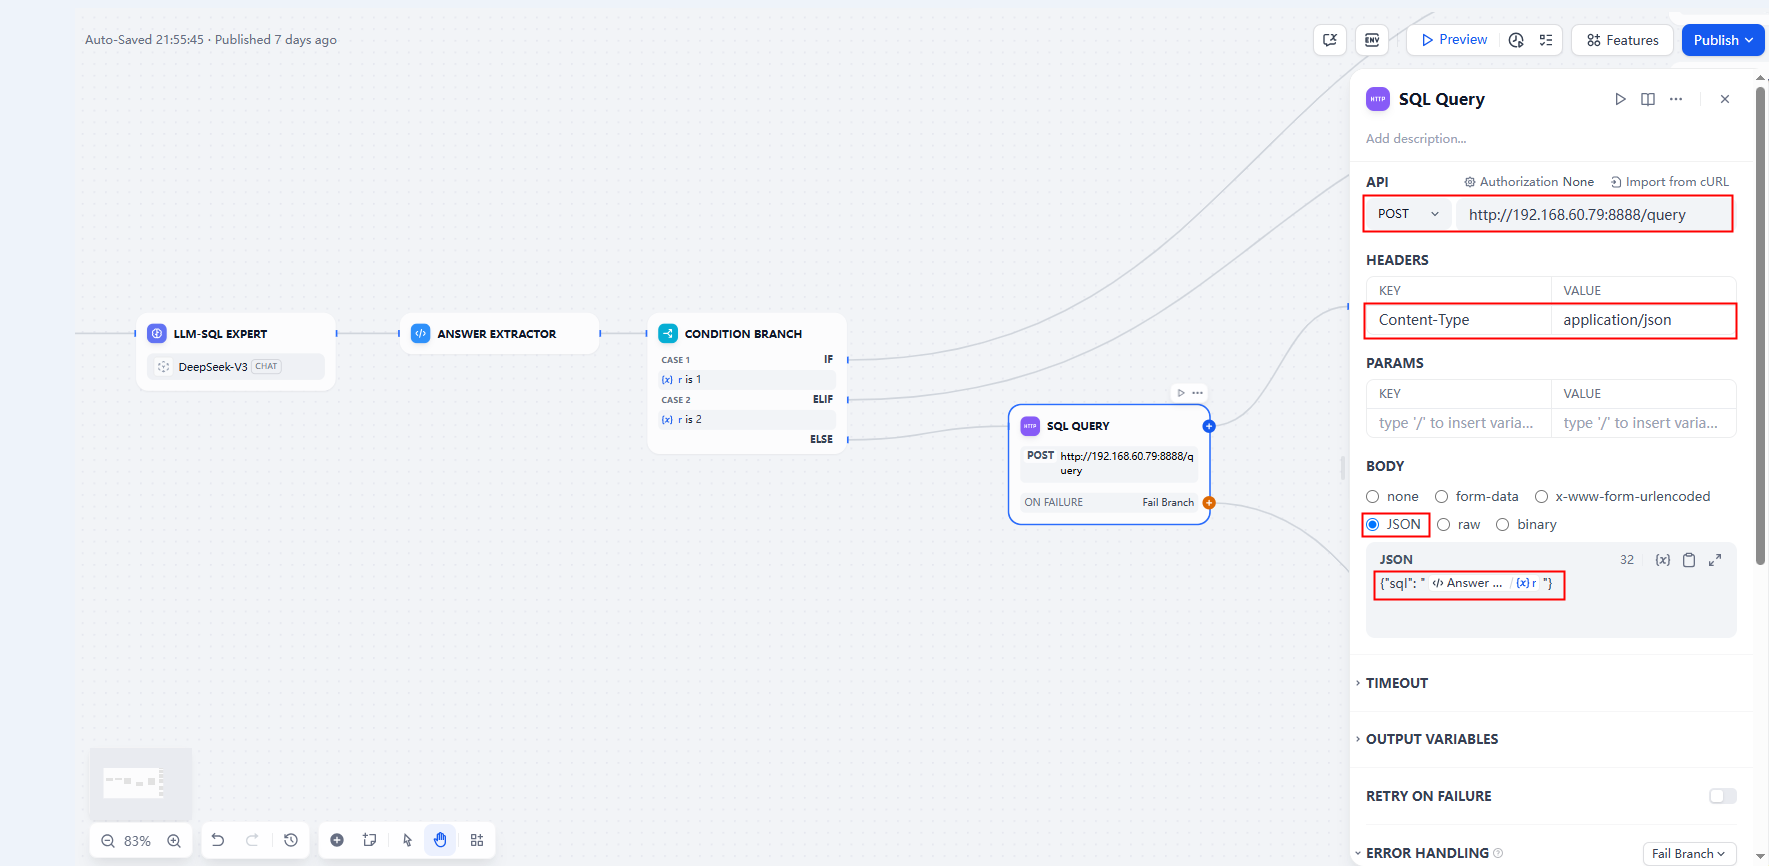
- Enter the API information of the database server: In API, select POST and enter the API address exposed by the database server; in HEADERS, set Key to Content-Type and Value to application/json; in BODY, select JSON and enter JSON information as shown in Figure 11.
Figure 8 Configuring the HTTP request node
Importing Data into the Database and Testing the Connectivity
- Log in to the RDS console. In the navigation pane on the left, choose Instances. On the displayed page, select the RDS for PostgreSQL instance created during one-click deployment and click Log In in its Operation column.
Figure 9 RDS console
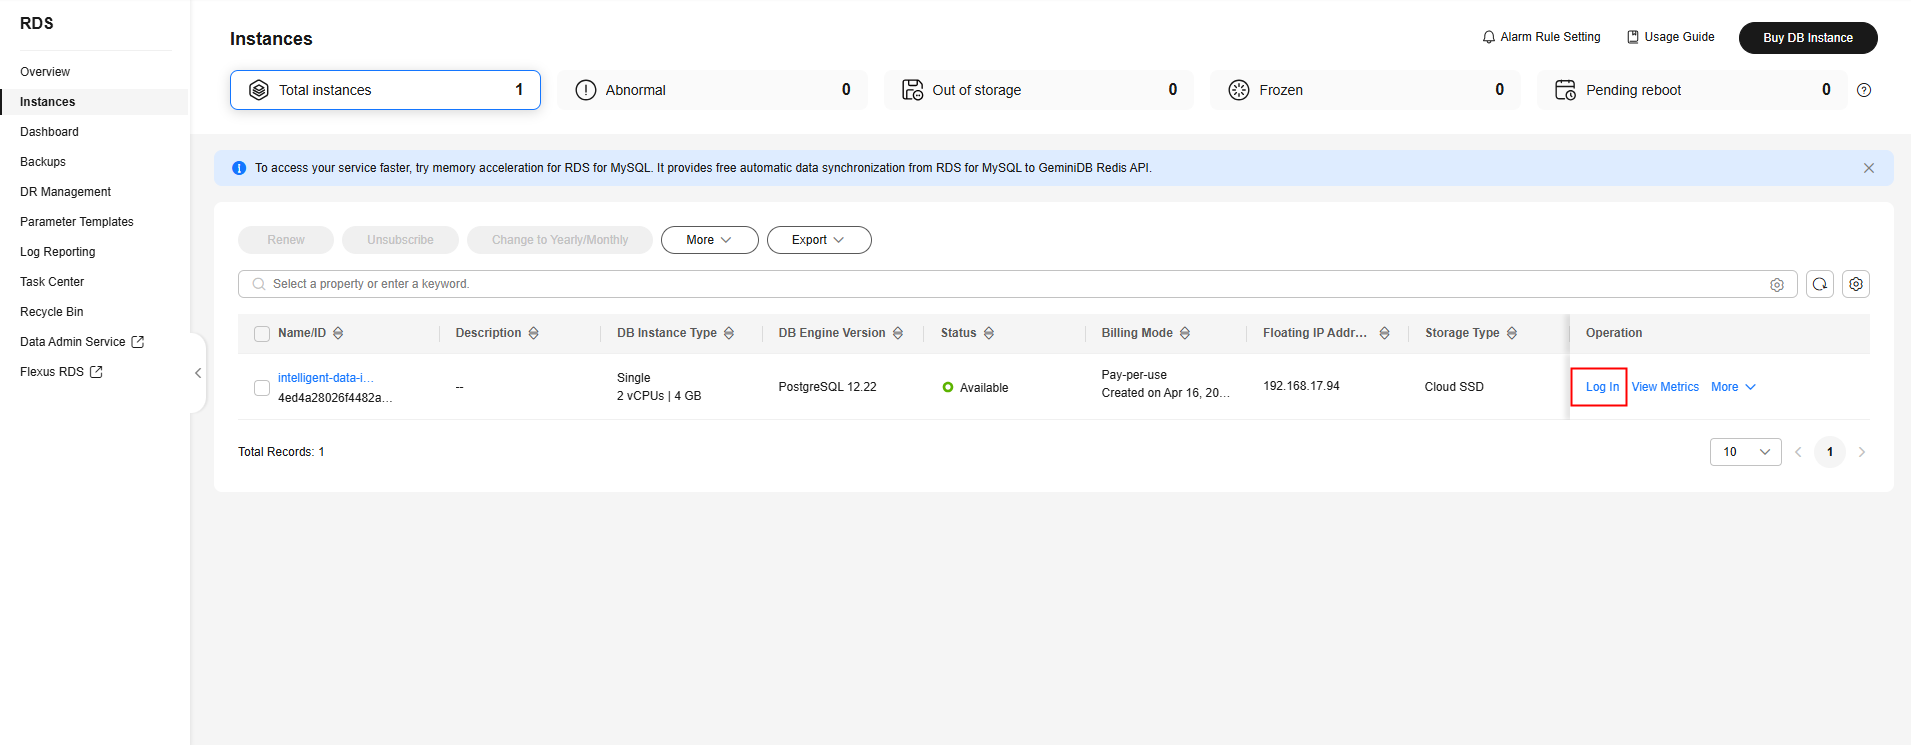 Figure 10 Logging in to the RDS for PostgreSQL instance as user root
- If PostgreSQL is selected, grant the read-only permission to user readonly_user. If MySQL is selected, skip this step.
Figure 11 Setting the default transaction of user readonly_user to read-only
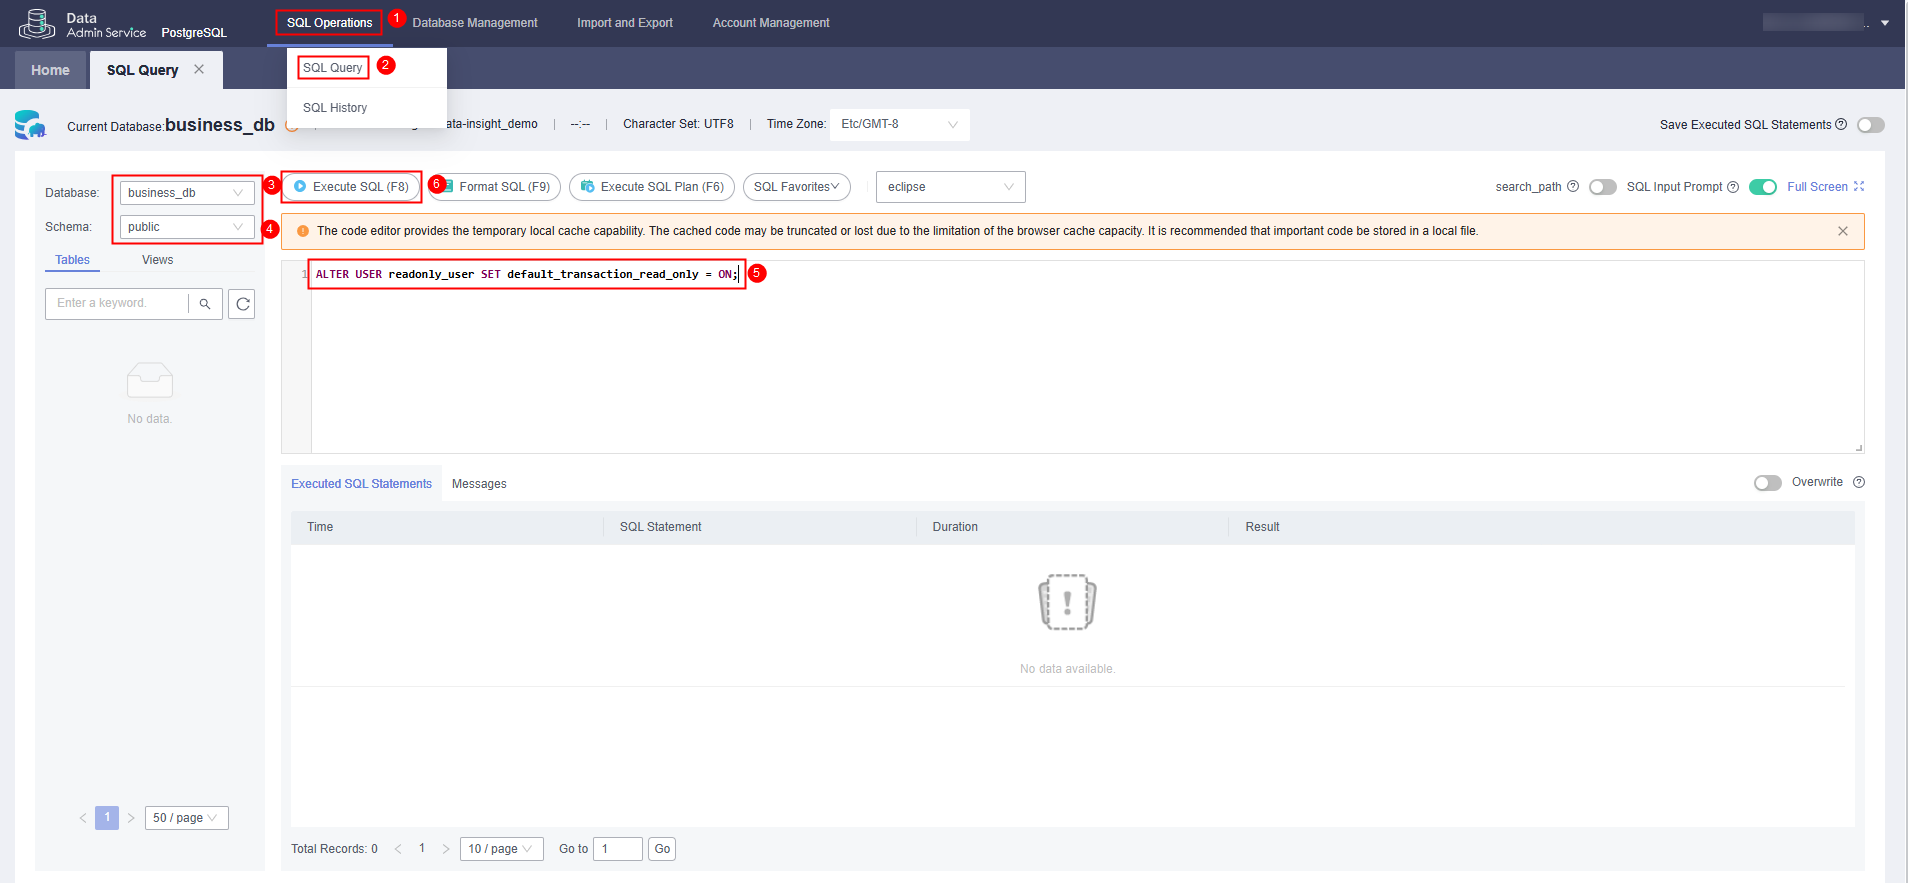 Figure 12 Checking whether root permissions have been optimized; if the following SQL statements do not report errors, optimization has been successful
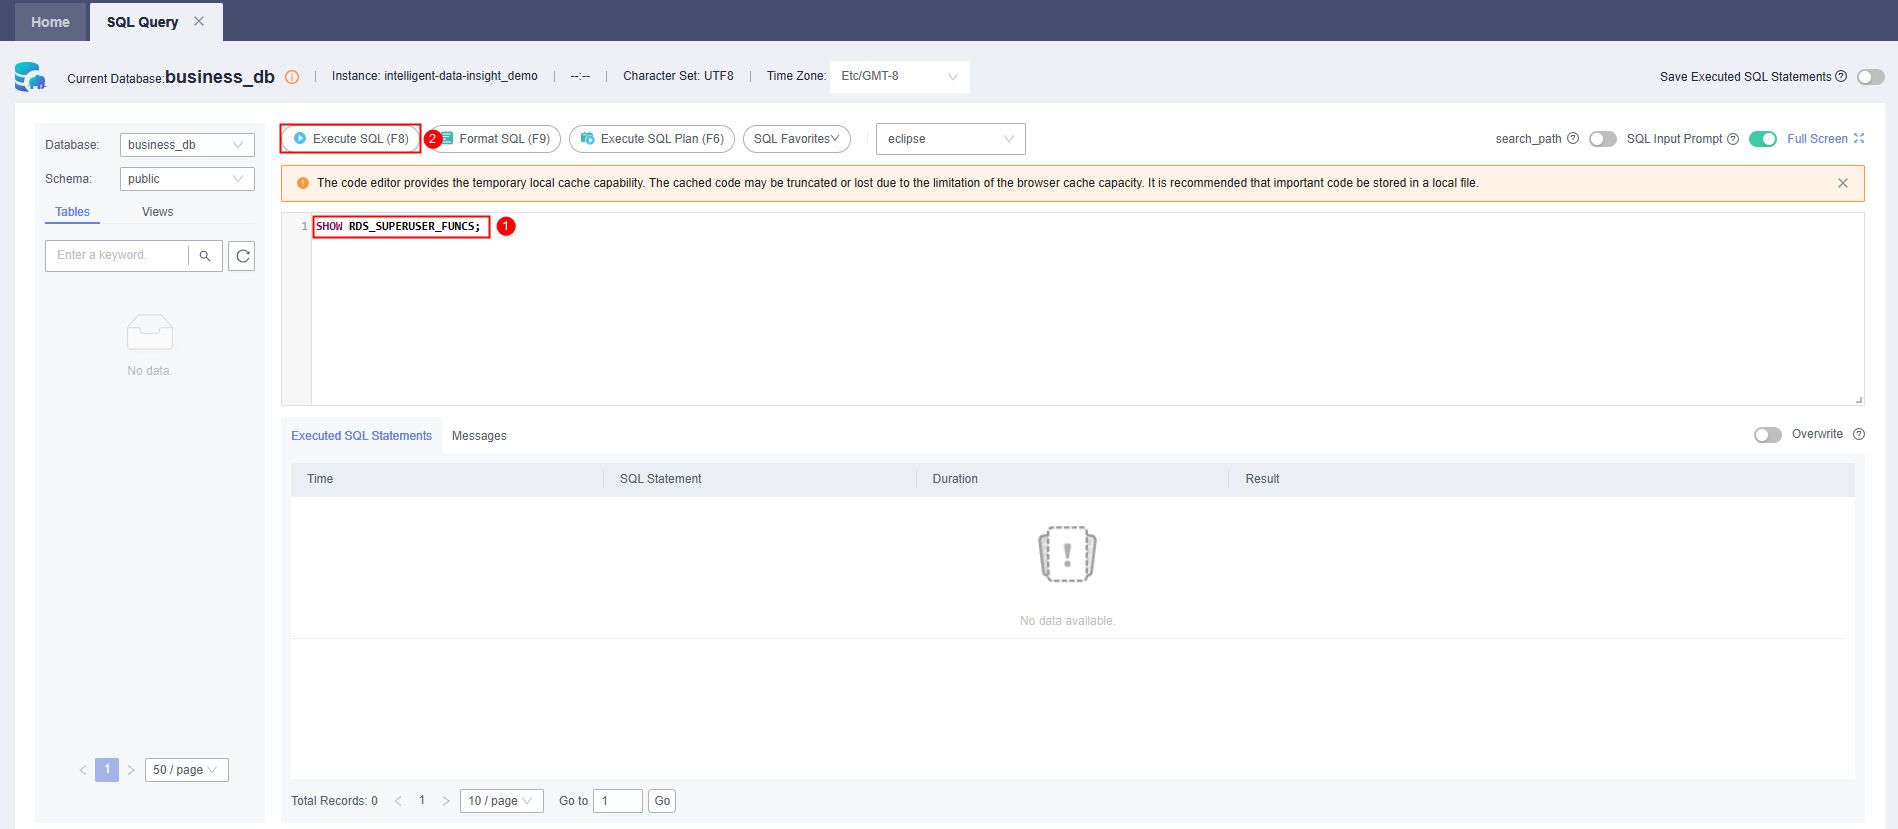 Figure 13 Performing this operation
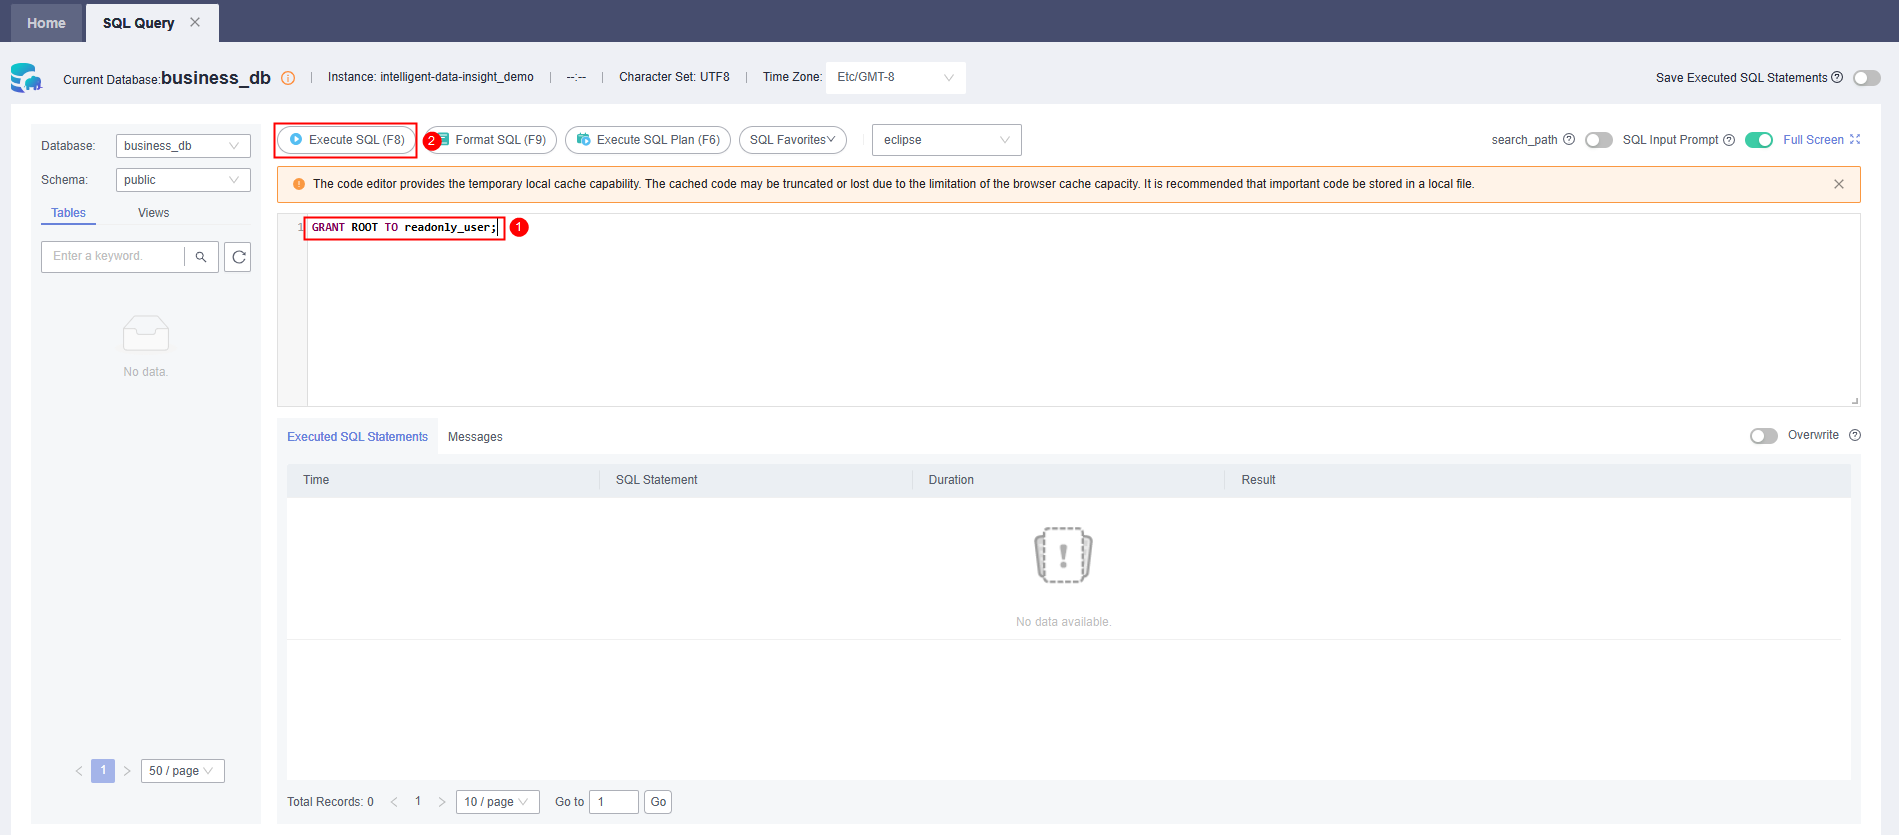
- Import the prepared SQL file into the preset database business_db. On the top menu, click Import and Export and select Import. On the displayed page, click Create Task. In the dialog box that appears, select an existing SQL file or a SQL file in an OBS bucket and click Create. (Note: You can also use DRS to transfer data to the database.)
Figure 14 Clicking Import and Export and selecting Import
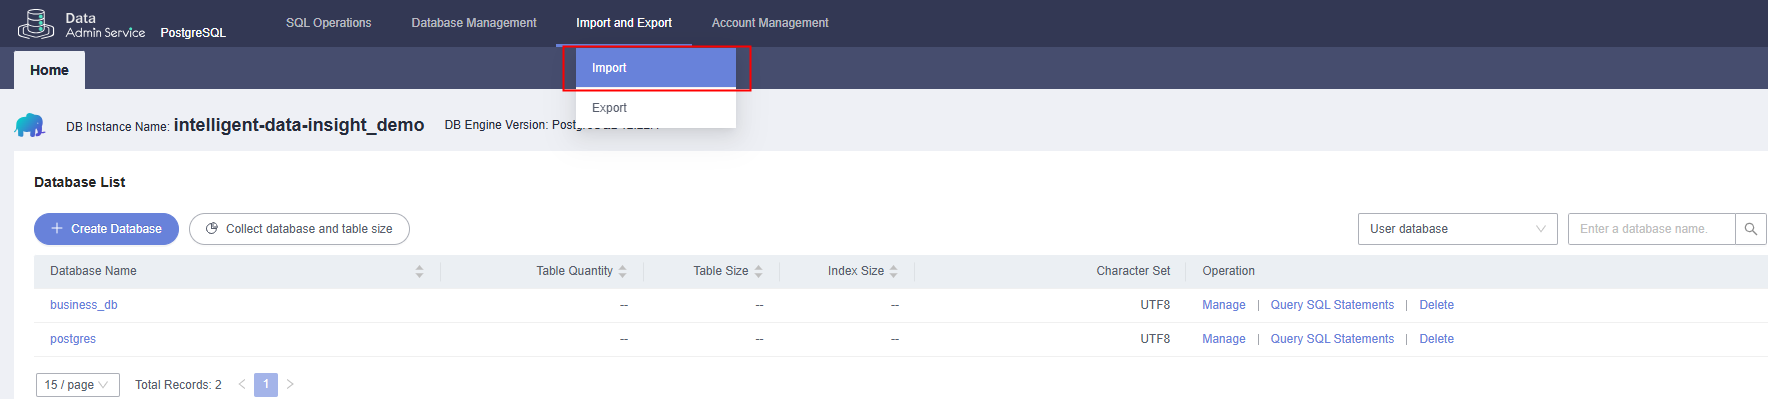 Figure 14 Importing the SQL file
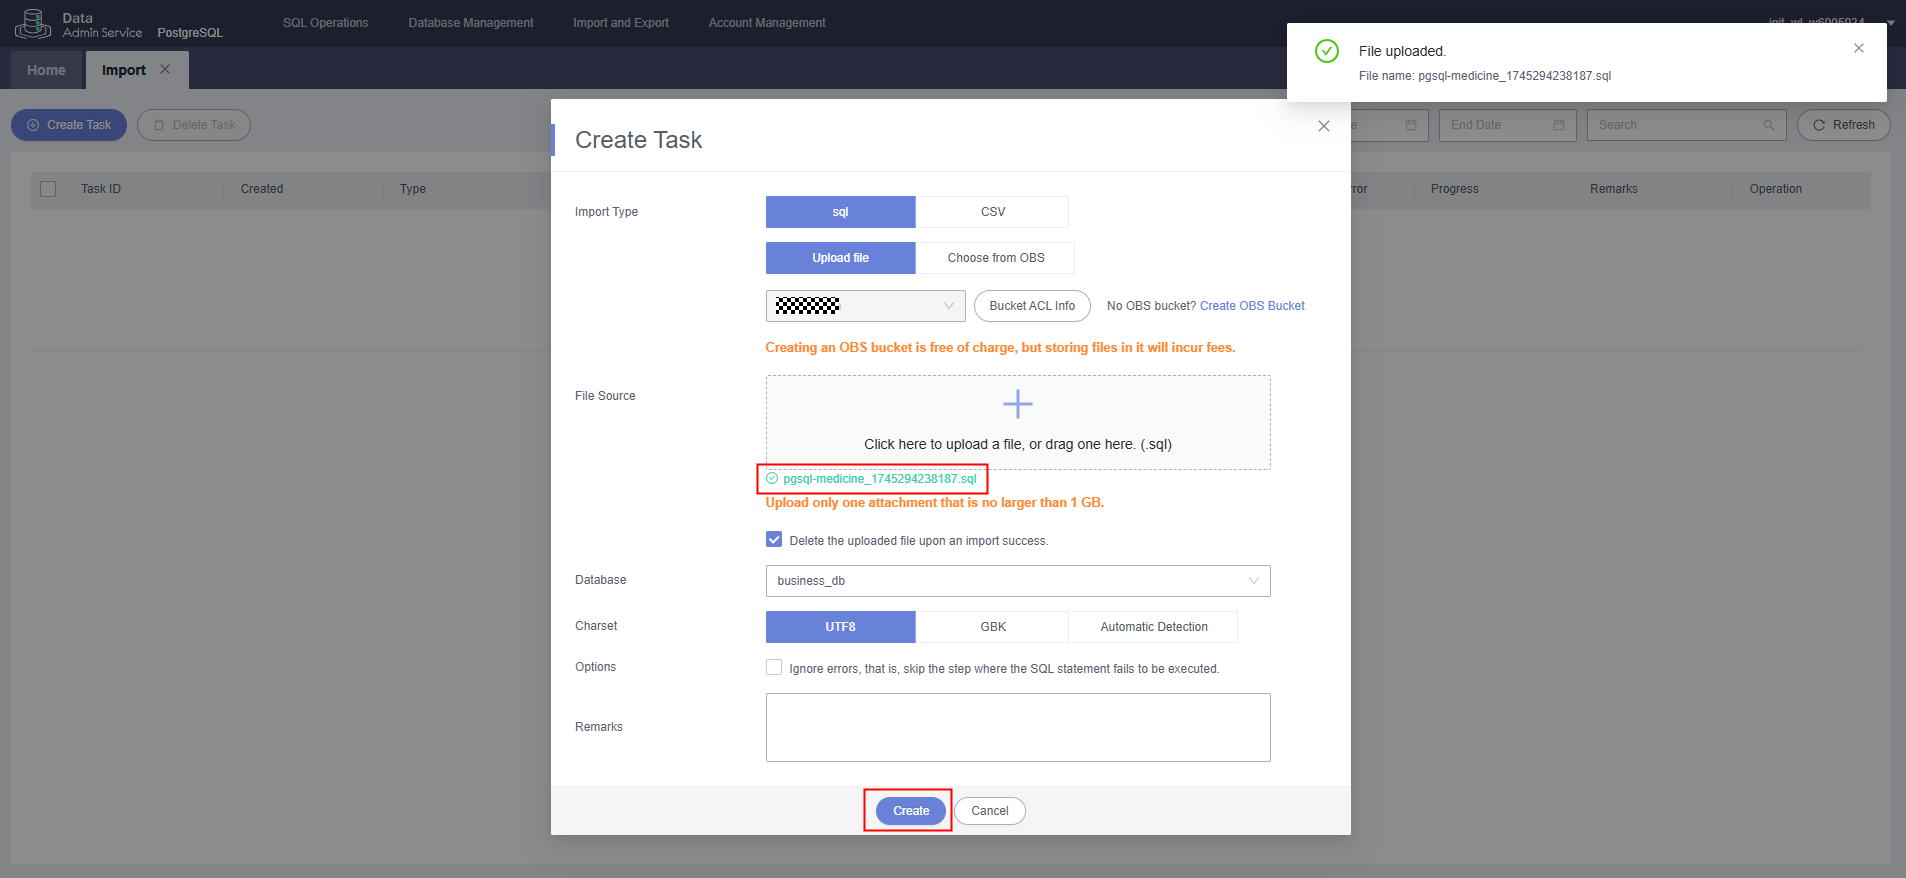 Figure 16 Data imported
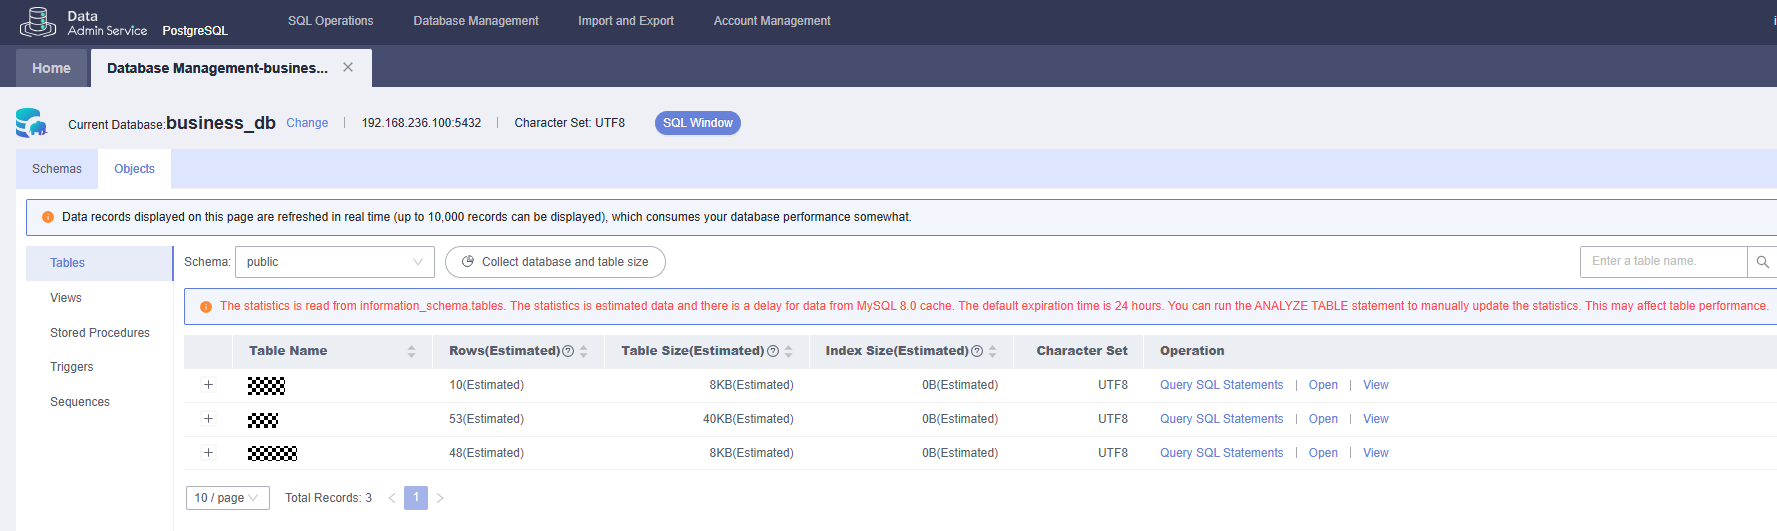
- Test the database connection on the HTTP request node of the Dify workflow. Click the button for testing the HTTP request node.
Figure 17 Clicking the button for testing the HTTP request node
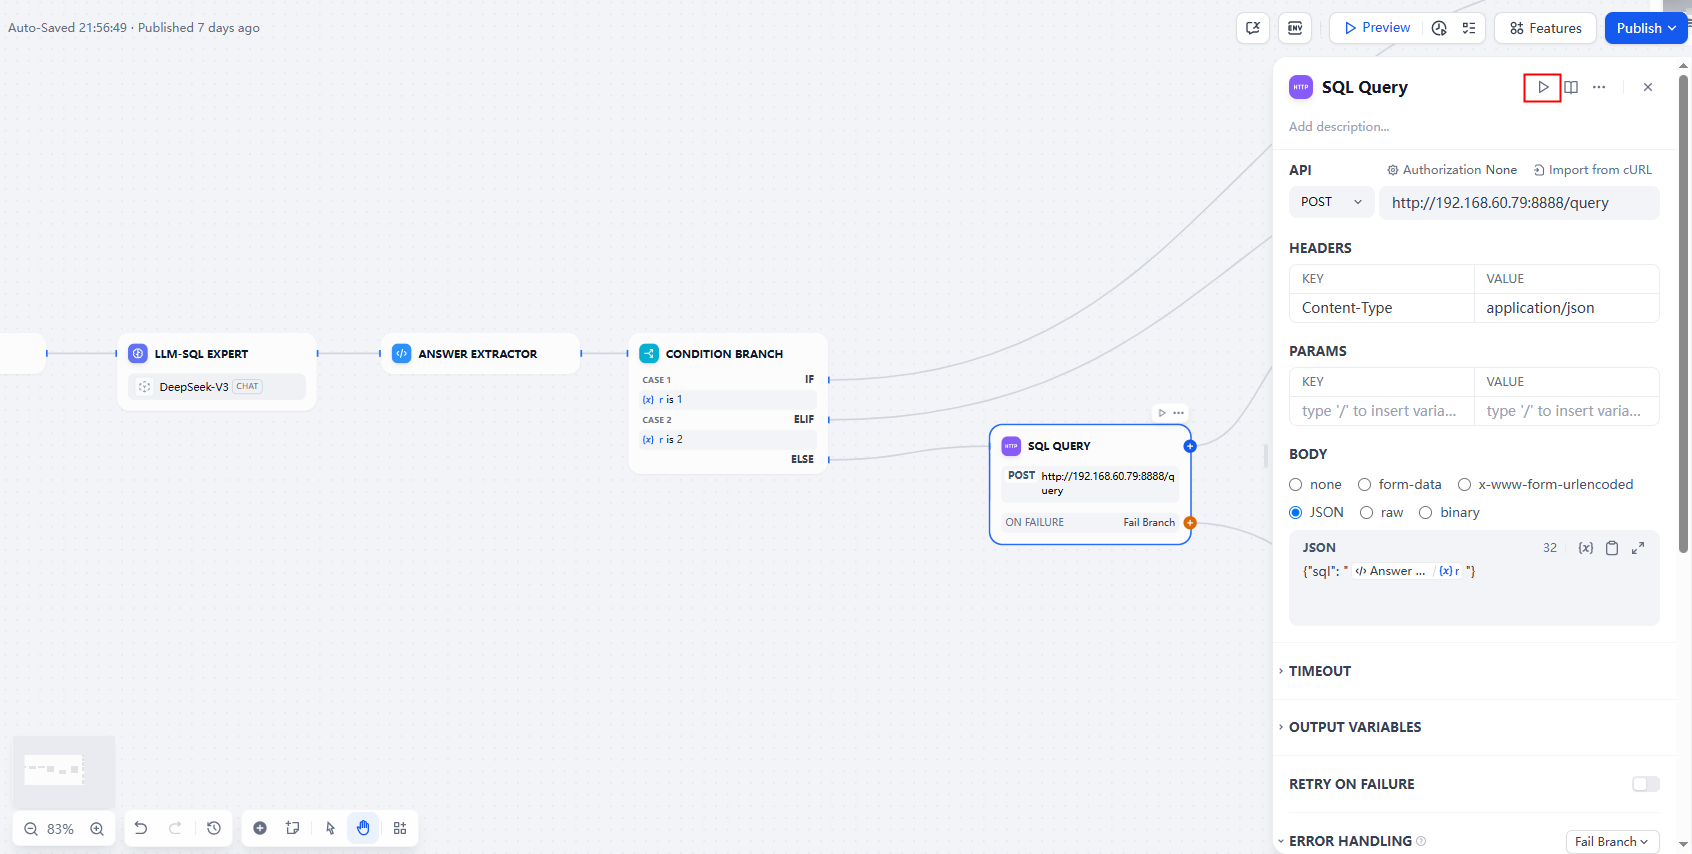 Figure 18 Entering and running test SQL statements
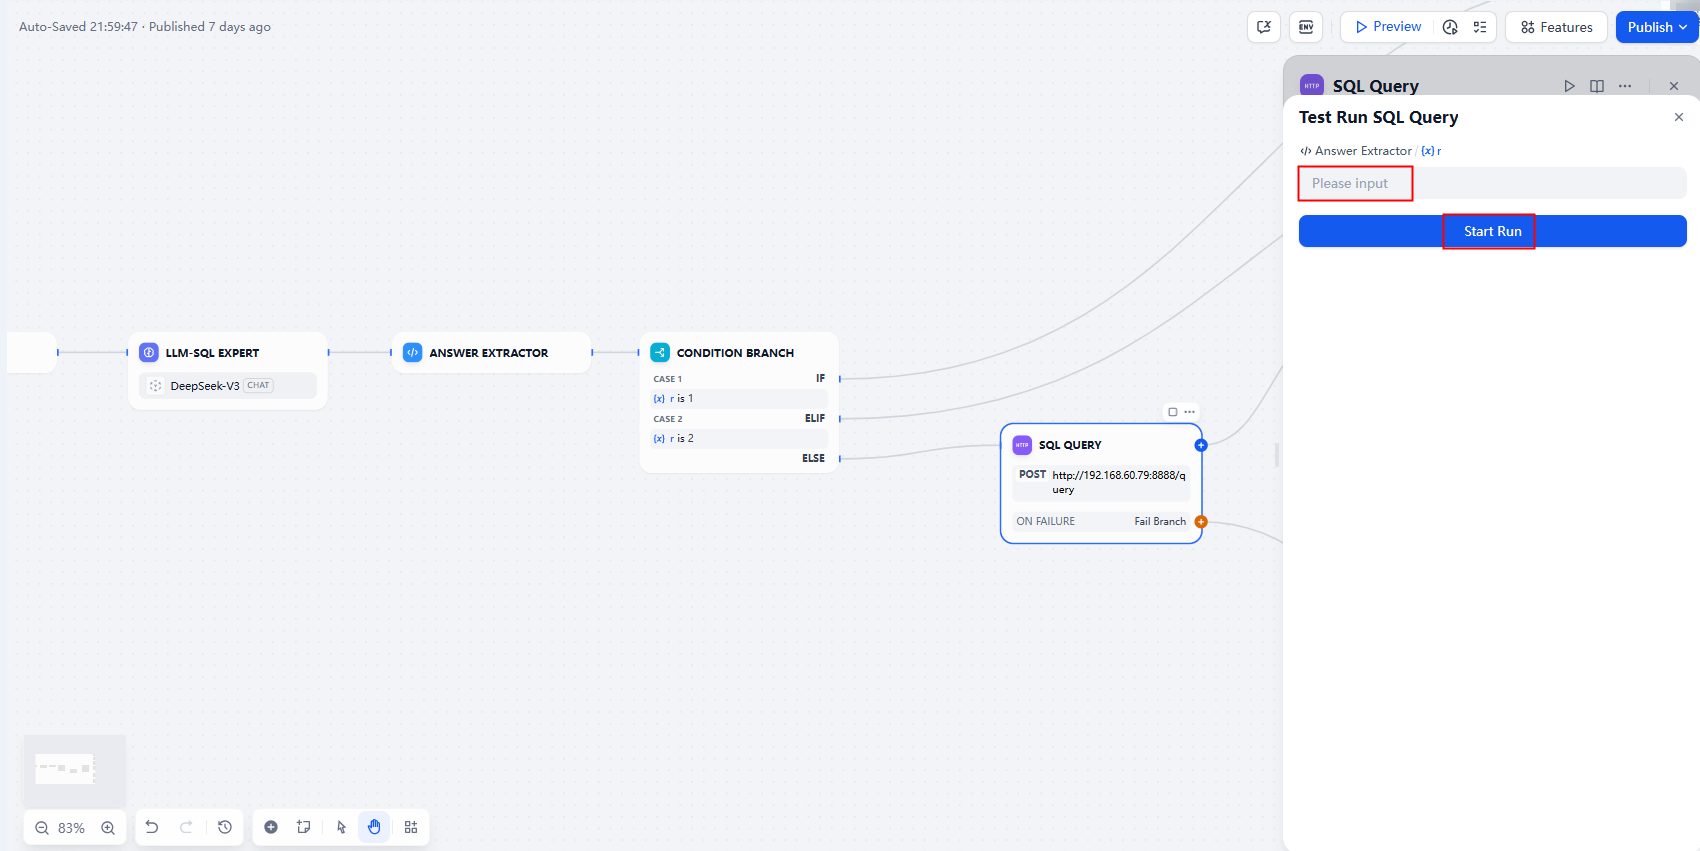
- Create a data analytics LLM node, configure the reply node content, and complete the setup of the entire intelligent data insight workflow.
Figure 19 Creating an LLM node
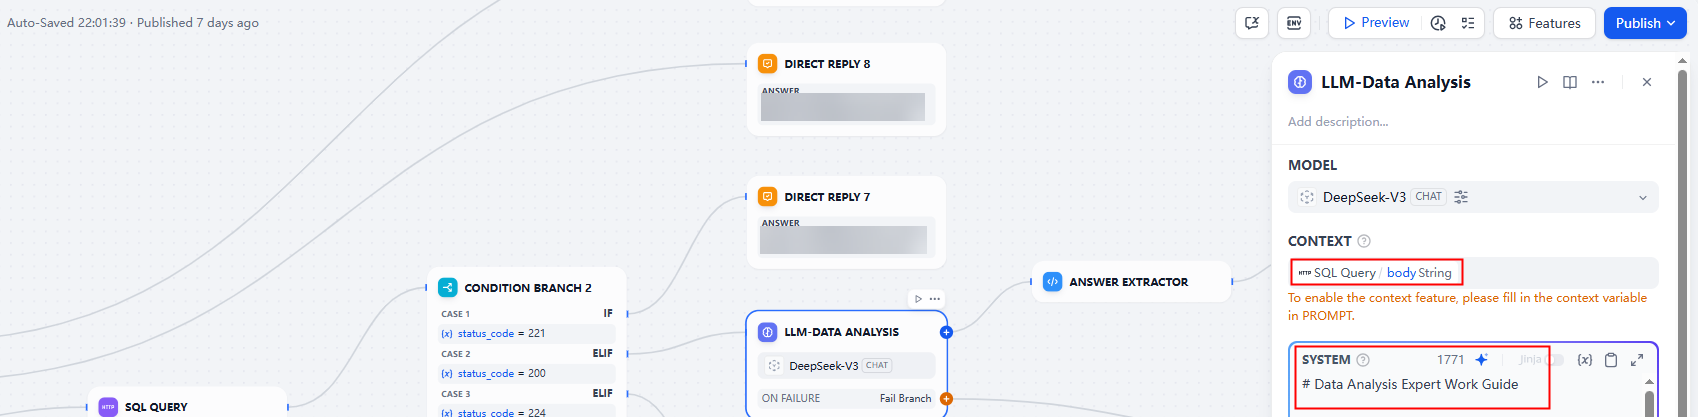 Figure 20 Configuring the reply node by selecting the output result of the data analytics LLM node
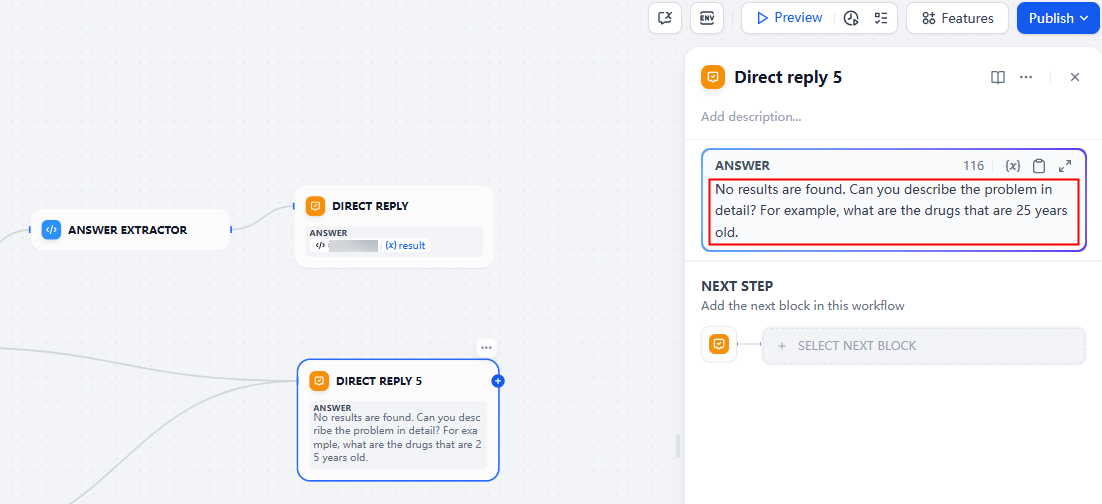
- Publish the workflow to launch the intelligent data insight dialog page.
Figure 21 Publishing a workflow
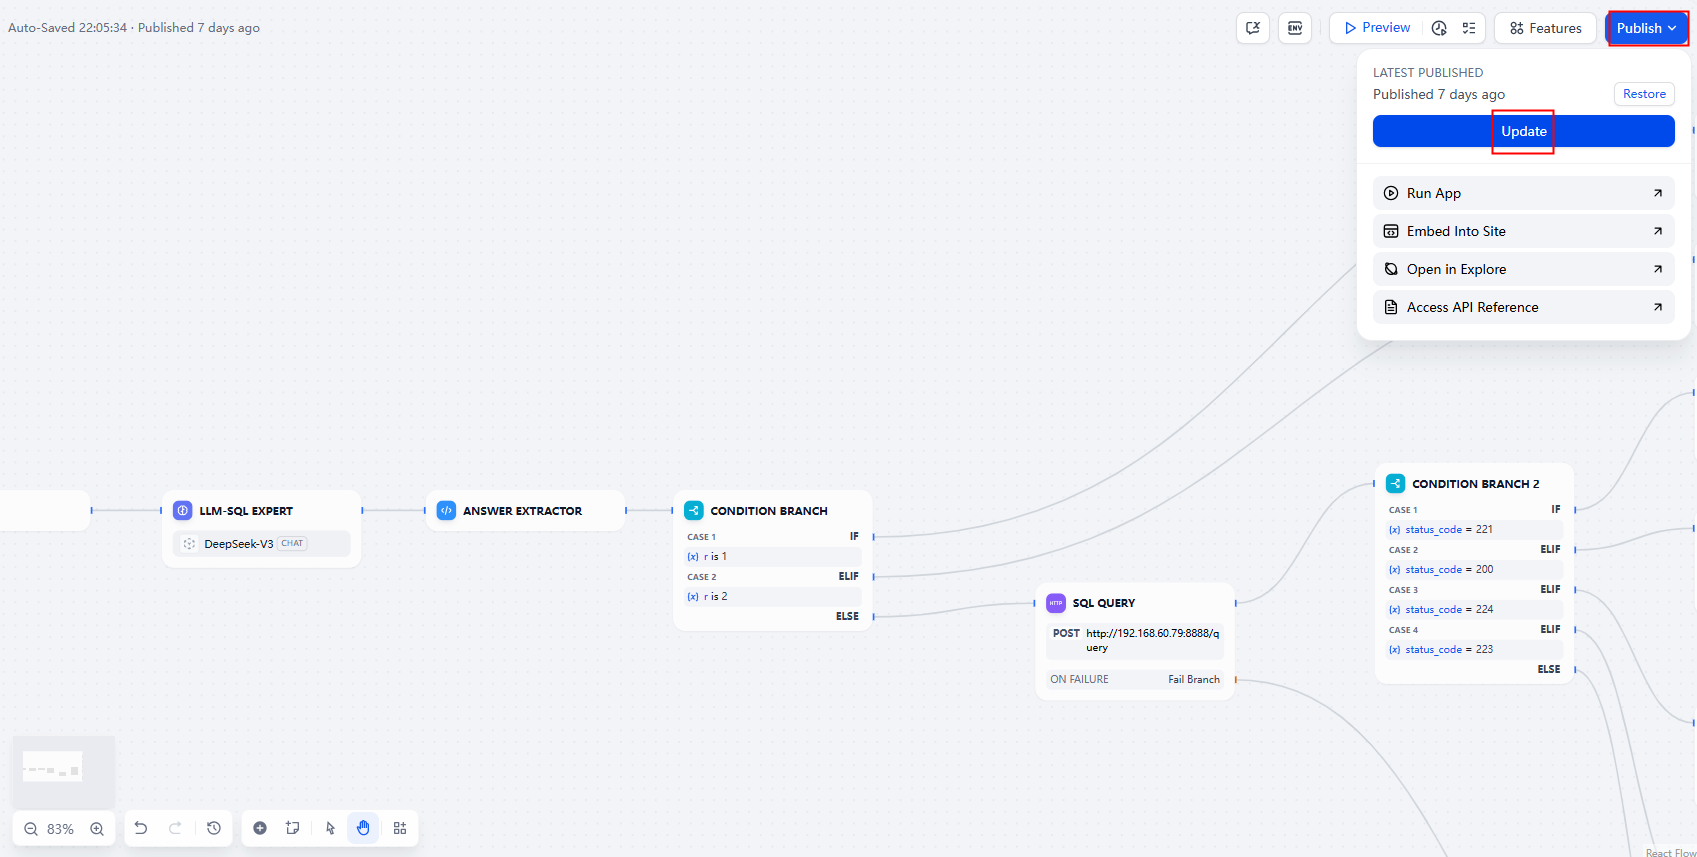 Figure 22 Gaining intelligent data insights
Parent topic: Implementation Procedure
Feedback
Was this page helpful?
Provide feedbackThank you very much for your feedback. We will continue working to improve the documentation.See the reply and handling status in My Cloud VOC.
The system is busy. Please try again later.
For any further questions, feel free to contact us through the chatbot.
Chatbot


