
E-Commerce Platform Test Driven by API Automation Test Cases and Keywords
Application Scenarios
With increasingly complex functions of cloud platforms, the same pre-steps or test logic is often used during test case design. If these steps are written in each test case, the workload is heavy and the maintenance is difficult. Through the auto API test function of CodeArts TestPlan, you can create test projects, compile test cases, and run automatic execution of test case scripts. URL test steps can be set as API keywords. The keyword library manages API keywords, combined keywords, and system keywords, and makes them easy-to-use, understandable, maintainable, and reusable in different test scenarios, such as component test and system test.
This section demonstrates the test steps of product management function of an e-commerce platform.
Adding URL Test Steps and Setting a Keyword
To query product information of an e-commerce platform, perform the following steps.
- Log in to the CodeArts TestPlan homepage, search for your target project, and click the project name to access the project.
- In the navigation pane, choose .
- Click the Auto API Test tab and click Create on the right.
- Enter the case name, configure other information as required, and click Save and Write Script. The Scripting page is displayed.
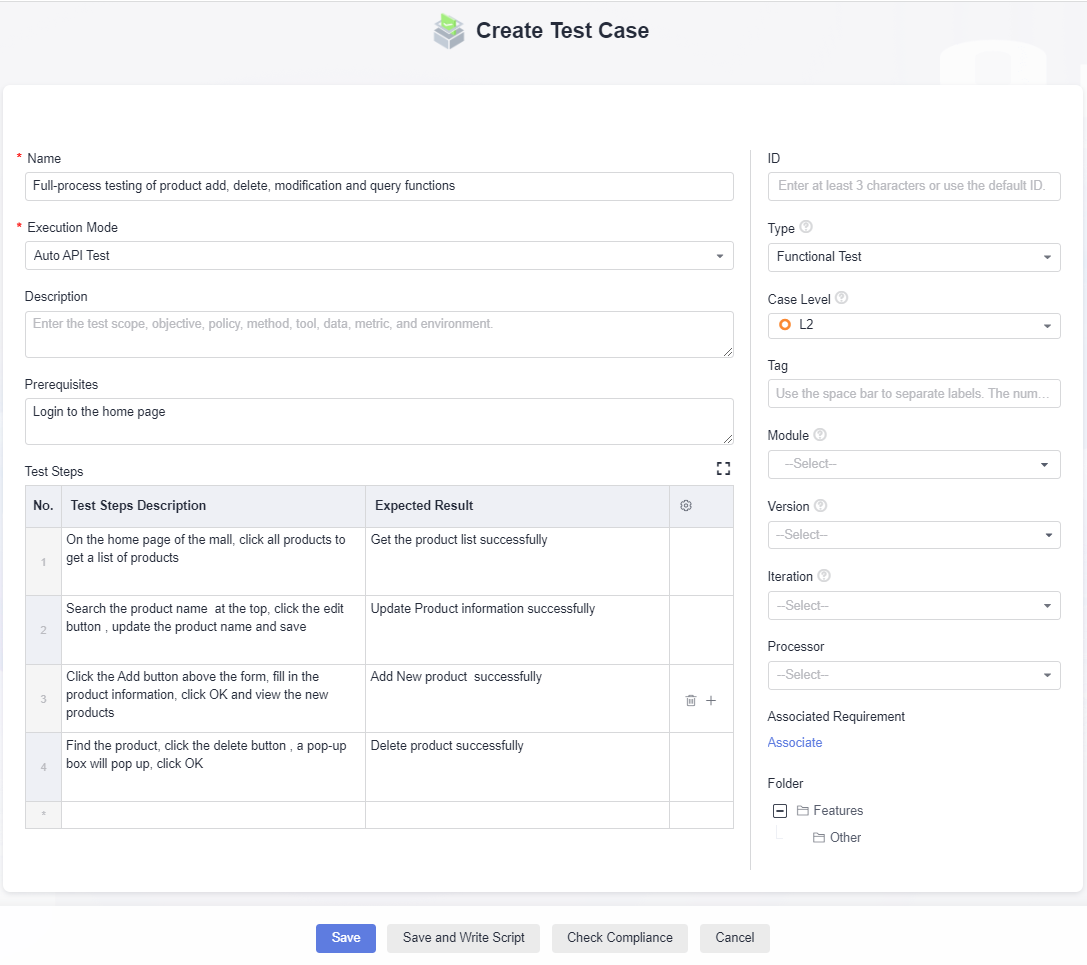
- Create a user login API. (Before managing product information, you need to log in to the e-shop homepage.) On the Scripting page, select the Pre-steps tab and click URL Request to generate a test step.
Select POST as the request method, enter the request URL of the tested service, and set request parameters (username and password).
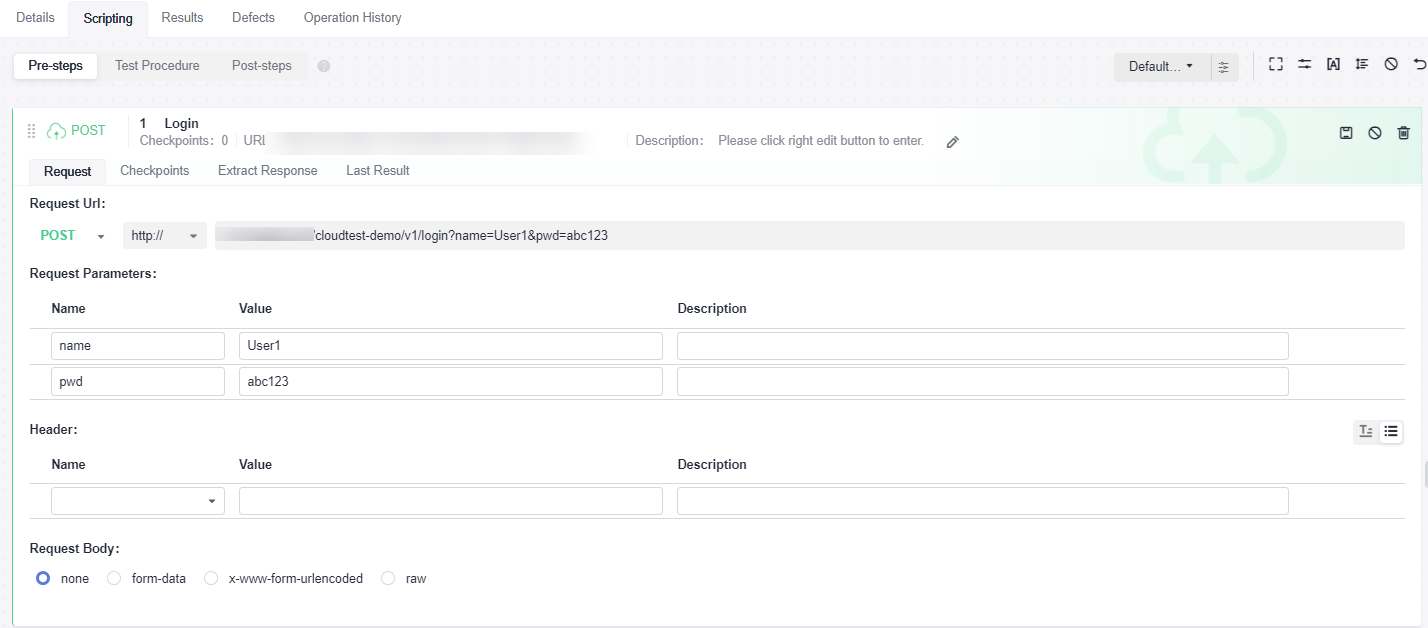
Click the Checkpoints tab and set the checkpoints based on the response code.

Click the Extract Response tab and set the response extraction parameters to extract parameters for subsequent test steps.

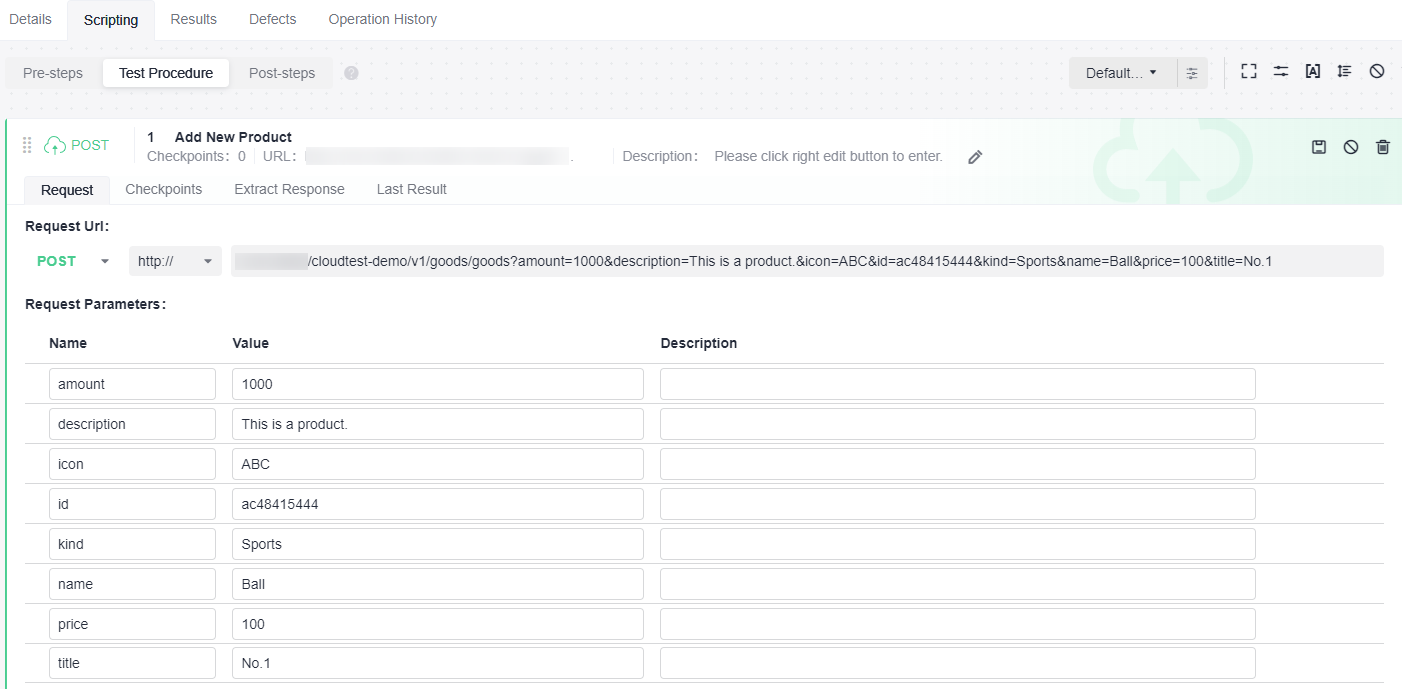
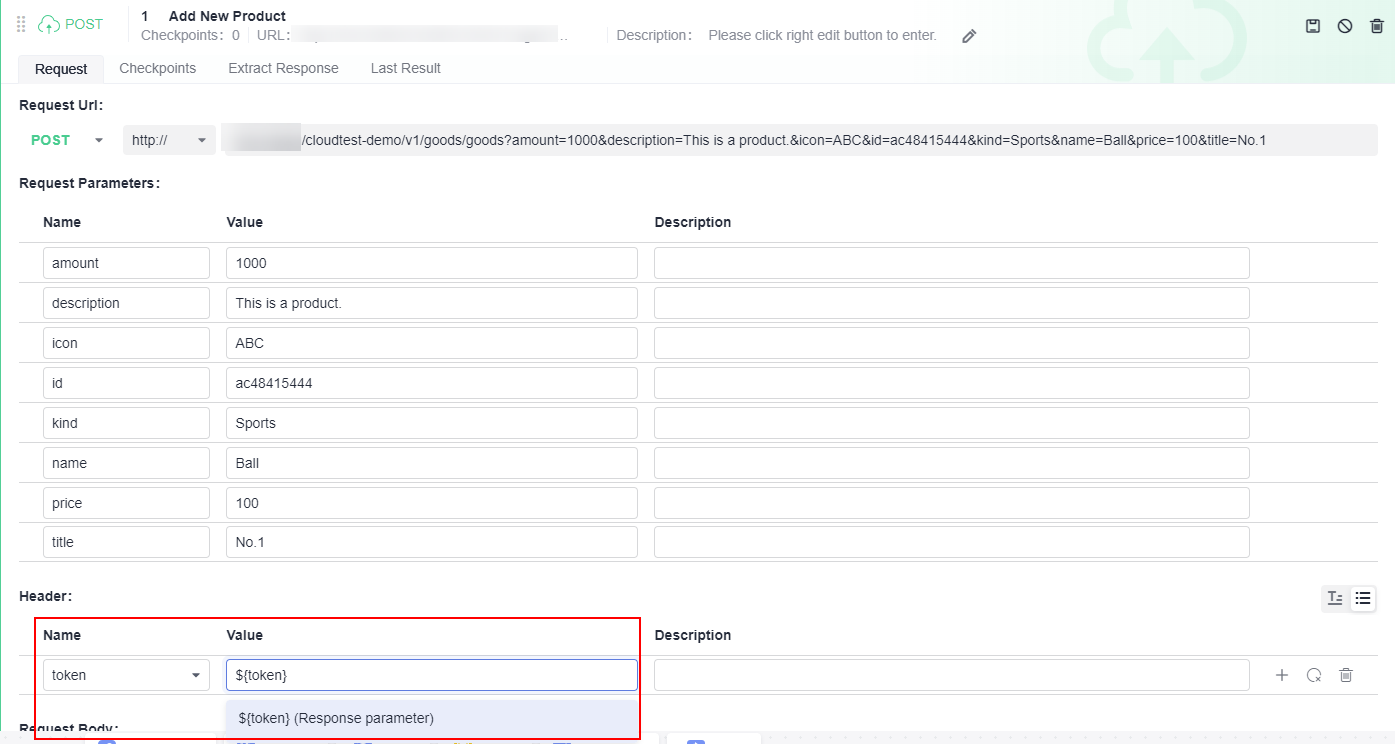
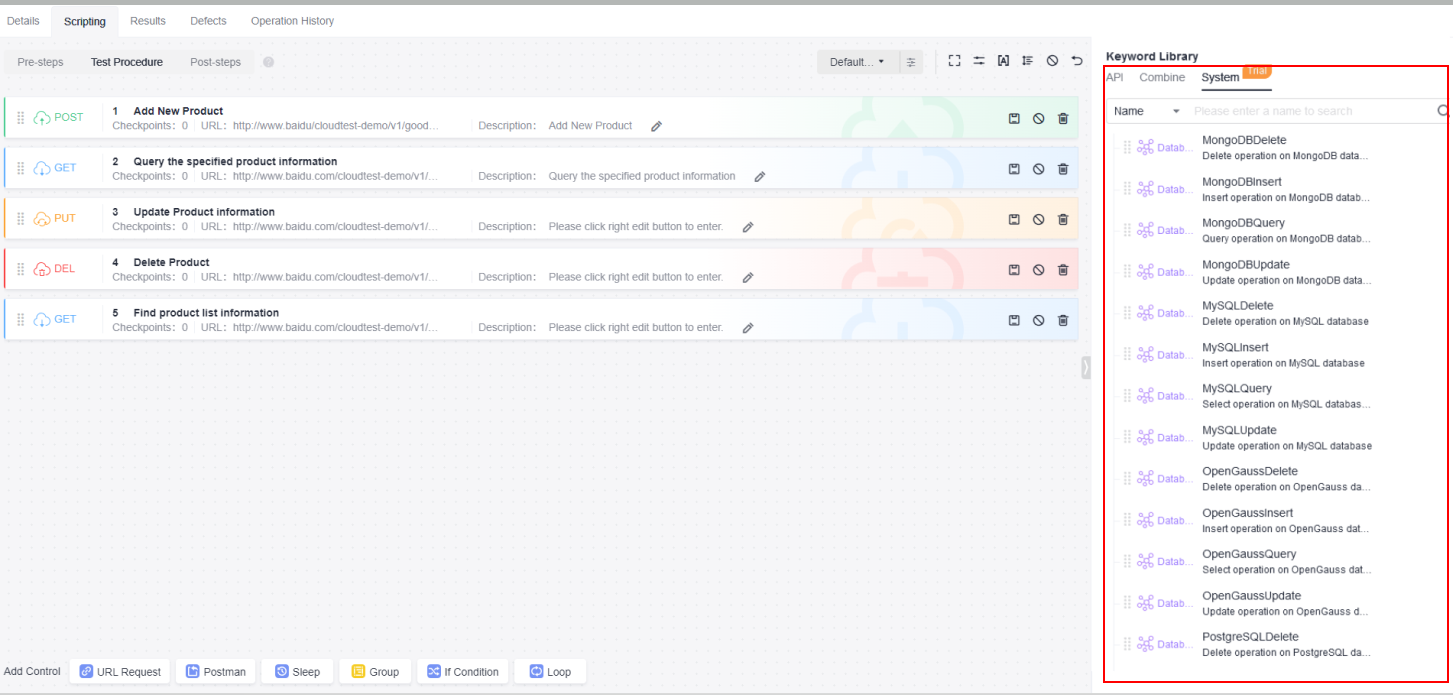
- Create an API for adding new products. On the Scripting page, select the Test Procedure tab and click URL Request to generate a test step.
Set the request method to POST, enter the request URL of the service to be tested, set the request parameters (inventory, description, icon, ID, category, name, price, and title) and request header parameters (using the response parameters extracted in the pre-steps).
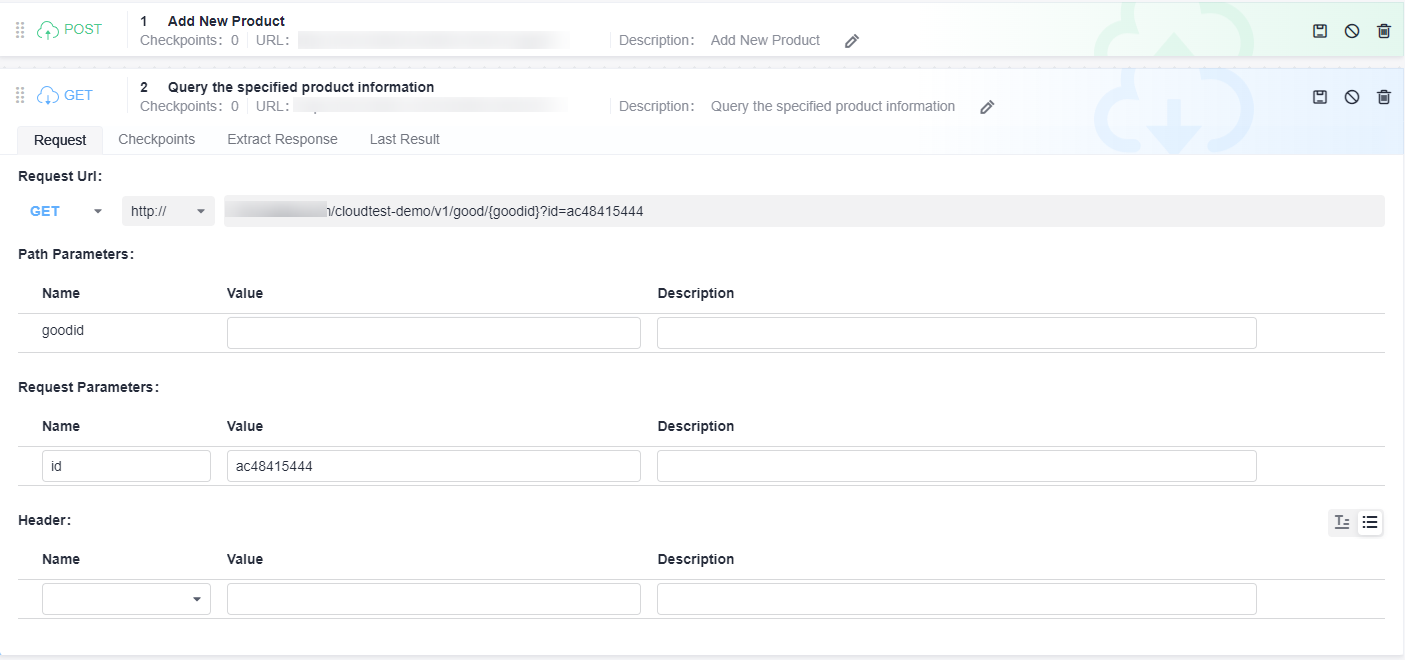
- Create an API for querying specified product information. On the Scripting page, select the Test Procedure tab and click URL Request to generate a test step.
Set the request method to GET, enter the request URL of the tested service, and set the request parameters (the product ID).
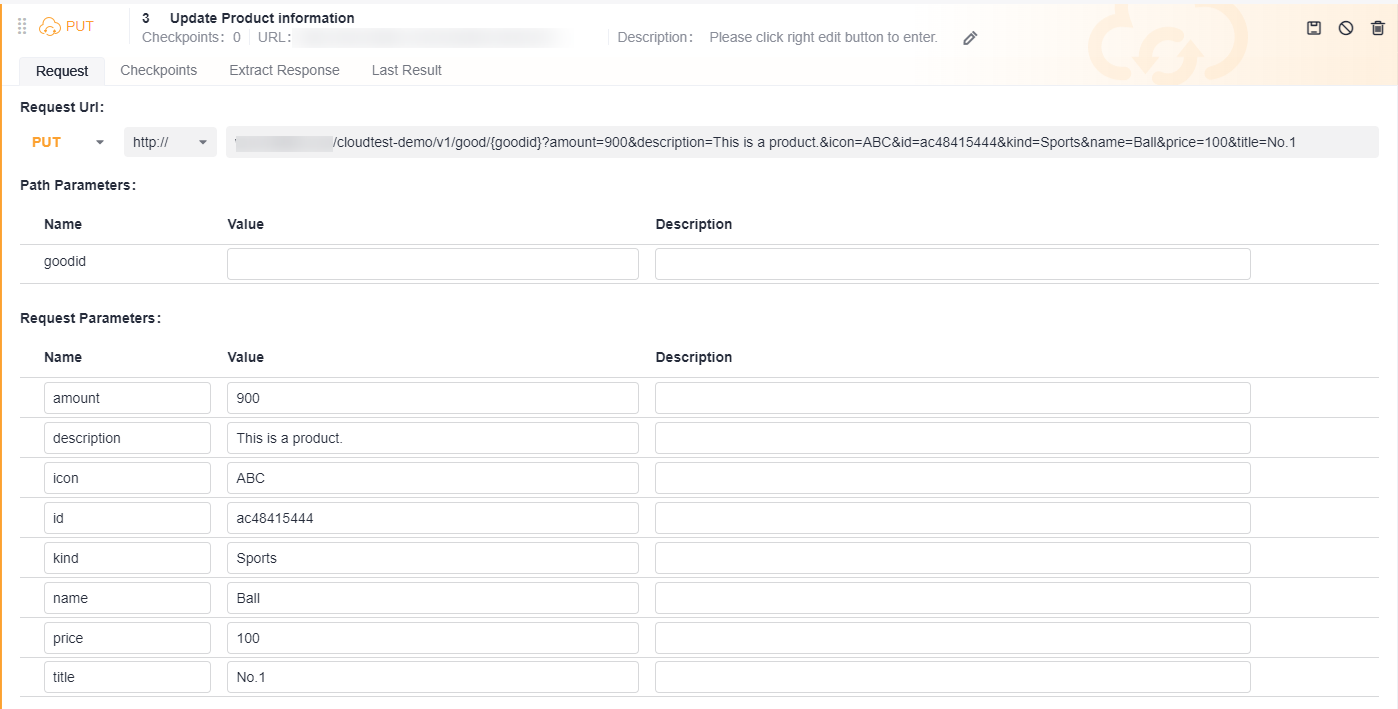
- Create an API for updating products. On the Scripting page, select the Test Procedure tab and click URL Request to generate a test step.
Select the request method to PUT, enter the request URL of the tested service, and set the request parameters (for updating the product information).
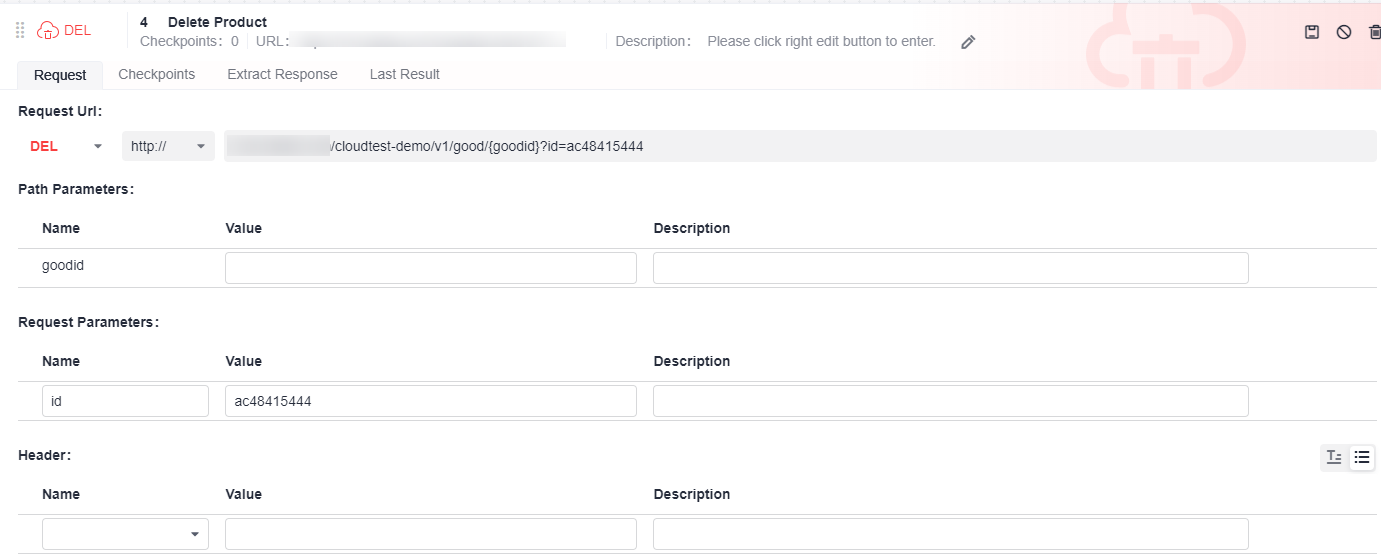
- Create an API for deleting products. On the Scripting page, select the Test Procedure tab and click URL Request to generate a test step.
Select the request method to DEL, enter the request URL of the tested service, and set the request parameters (ID of the product to be deleted).
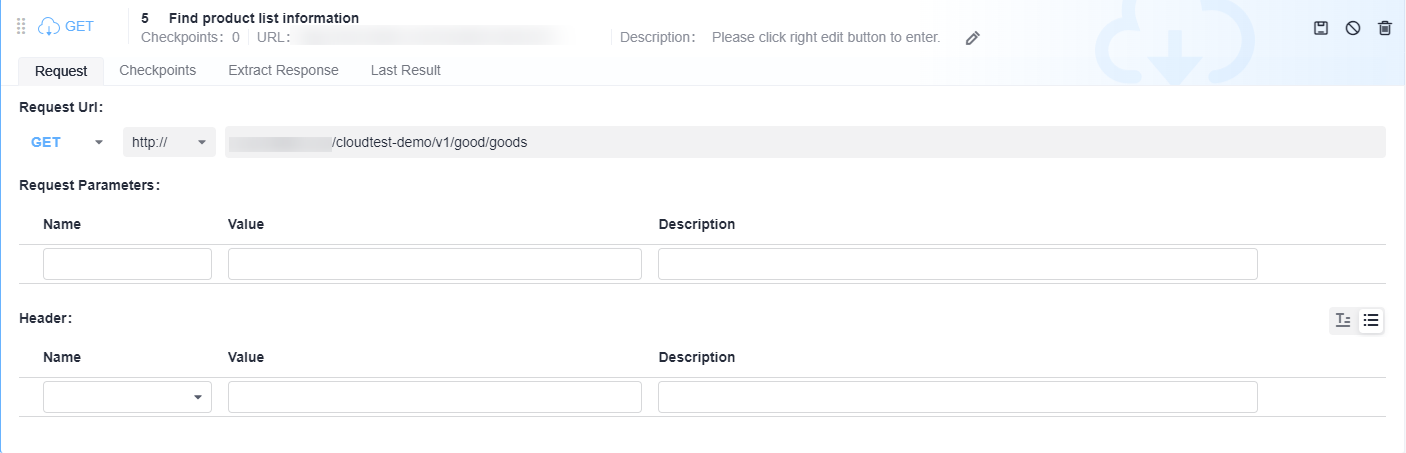
- Create an API for querying the product list. On the Scripting page, select the Test Procedure tab and click URL Request to generate a test step.
Set the request method to GET and enter the request URL of the tested service.
- You can add, delete, modify, and query system keywords based on the database type. Database operations are stored as system keywords in the keyword library so that the operations can be reused in multiple service scenarios. For details, see system keywords of API automation test cases.
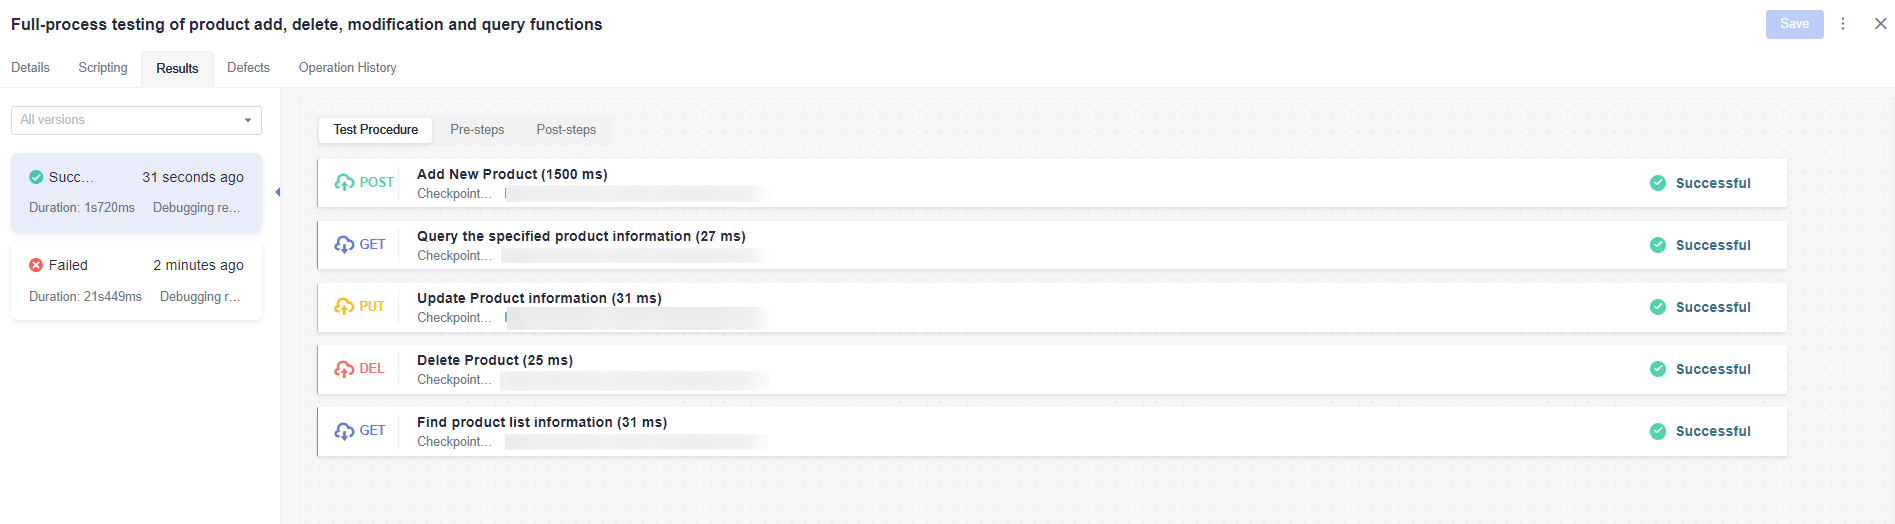
- After the script is edited, click Save and execute the test case. After the execution is complete, view the execution result on the Results tab page.
- Set test steps that may be reused in future script editing as API keywords.
Click the
 icon on the right of the URL request name. On the page that is displayed, set API Keyword and Description, and select the directory where the keyword is to be stored.
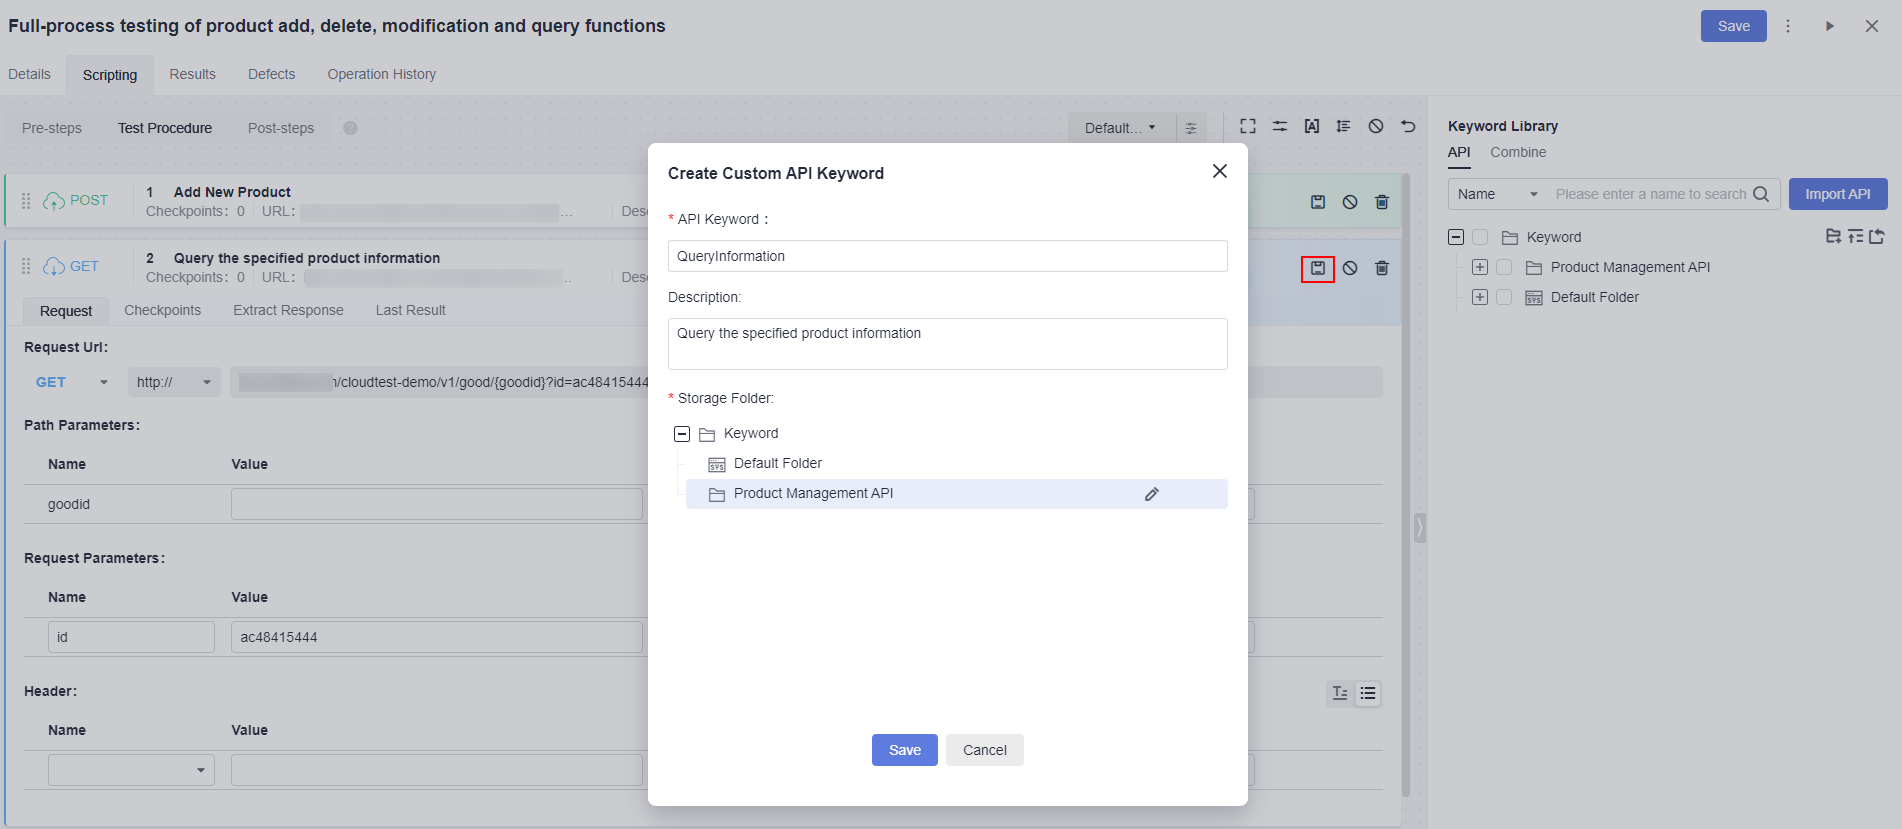
Setting Combined Keywords for a Full Process
- Scenario 1
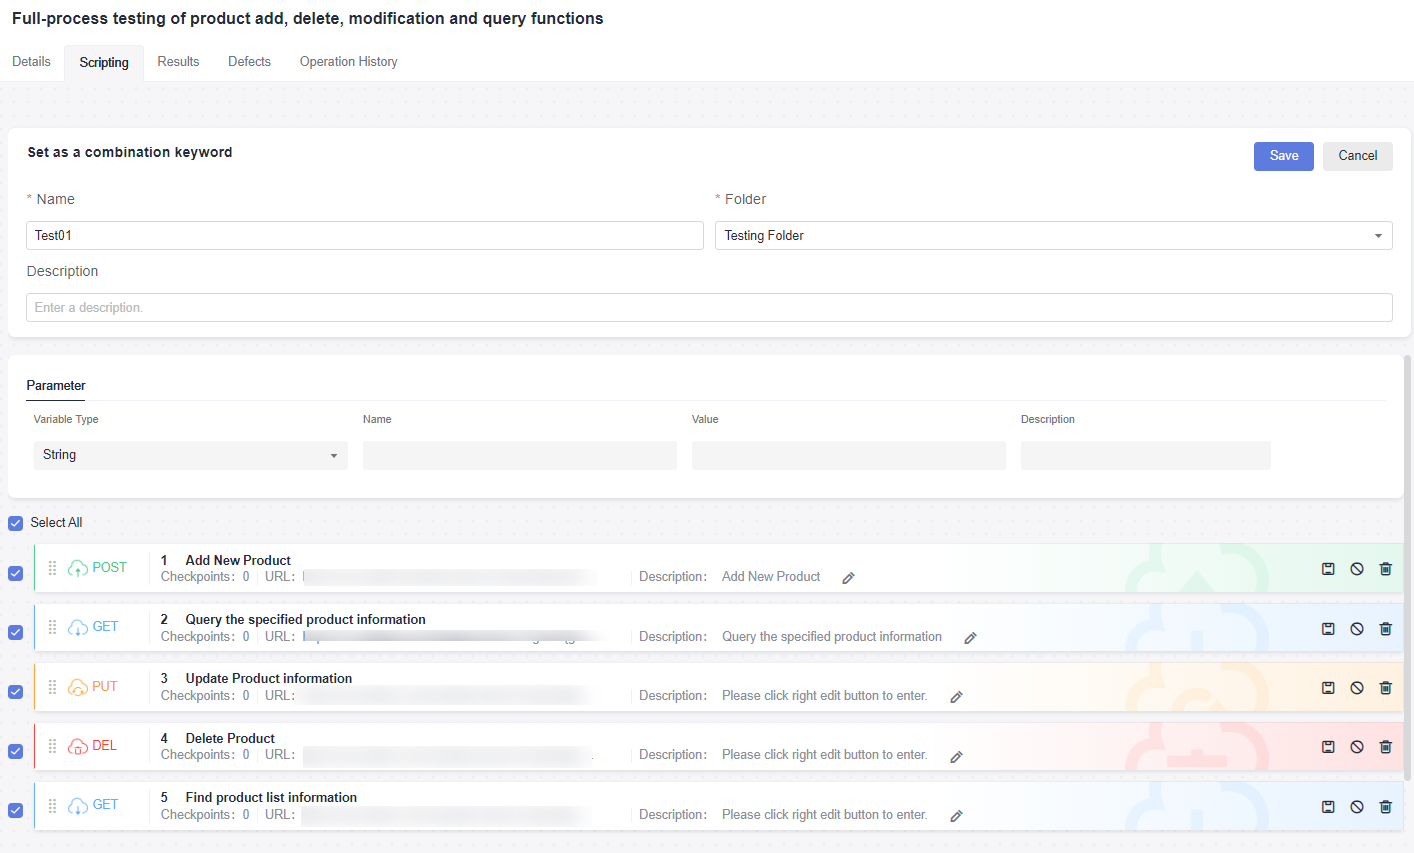
- Click
 in the upper right corner of the Scripting page.
 - Set Name and Description, select the directory where the keywords are to be stored, and set request parameters as required. Select the added URL Request and click Save.
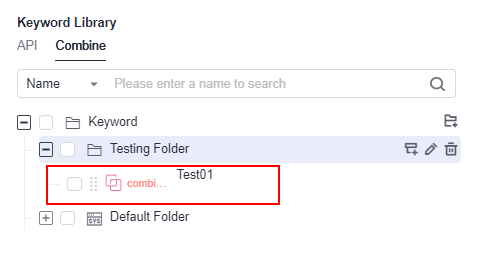
- Choose Keyword Library > Combine, and view the stored combined keywords.
- Scenario 2
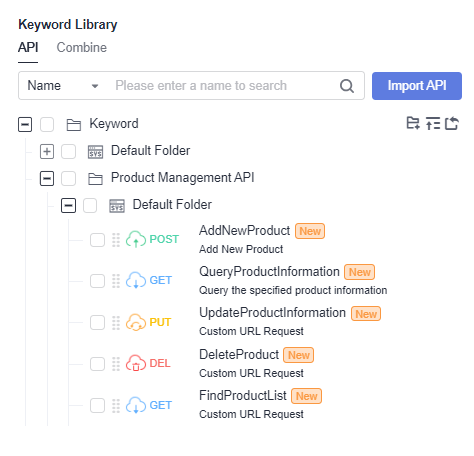
- Store the preceding test steps to the API of the keyword library by referring to the steps of setting API keywords.
- On the tab page, click
 next to the folder where the keywords are to be saved. Set Name and Description.
 - Click the API tab, select the folder where the keyword to be added is located, and click
 on the right of the keyword to be added or hover the cursor over the keyword area and drag the keyword to the test step area.
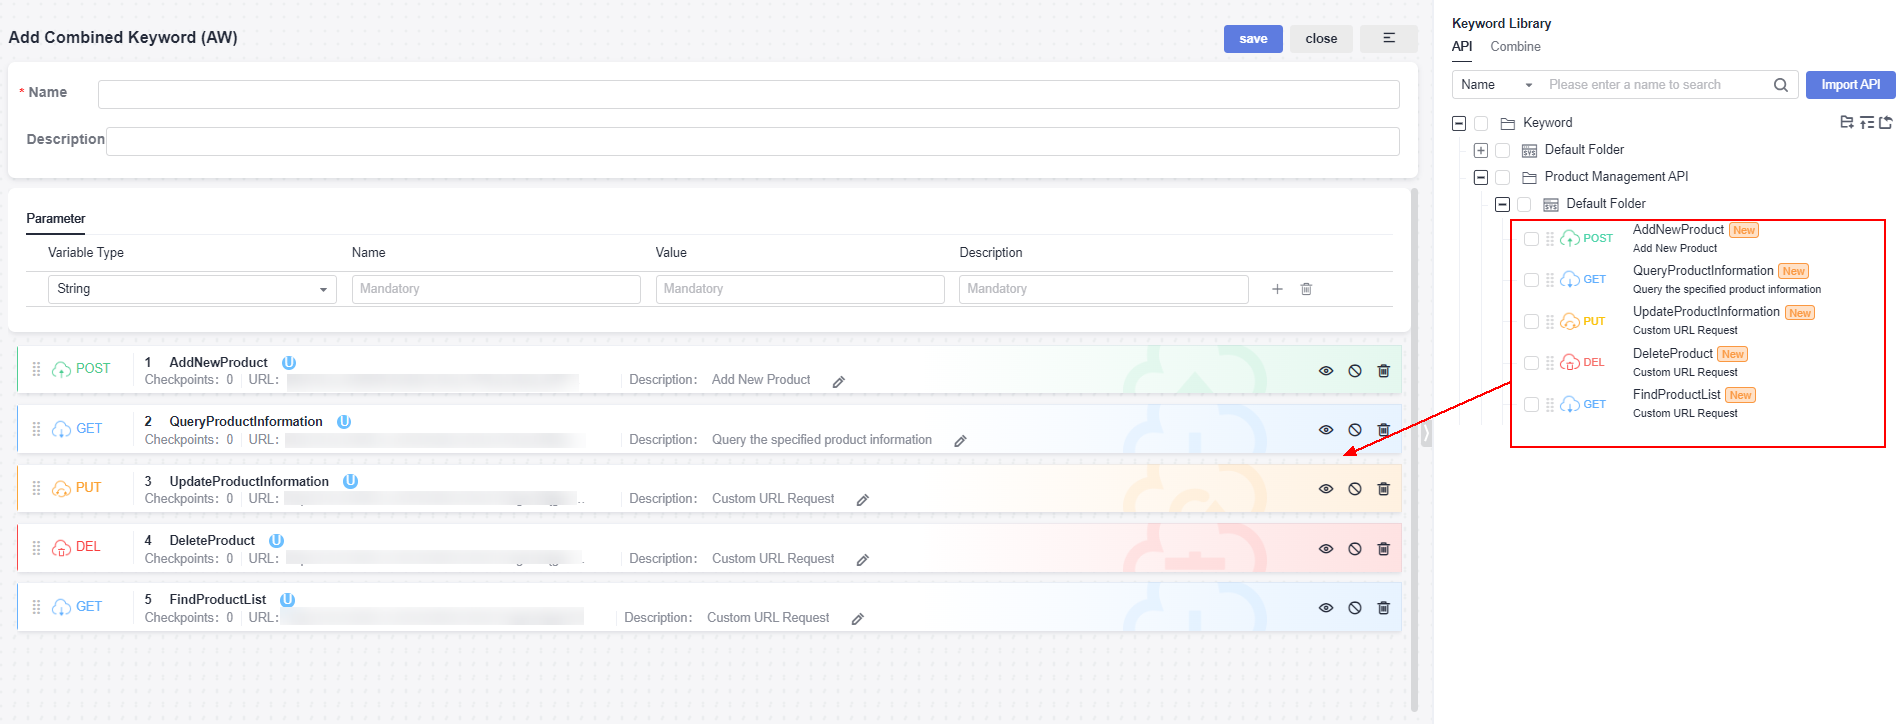
- Click Save.
Feedback
Was this page helpful?
Provide feedbackThank you very much for your feedback. We will continue working to improve the documentation.See the reply and handling status in My Cloud VOC.
For any further questions, feel free to contact us through the chatbot.
Chatbot


