Partitioning Disks and Rolling Back Data on a Windows ECS
Scenarios
If the data on a Windows ECS is lost due to deletion by mistake, formatting, or system breakdown, you can use specific tools or methods to restore the data.
Procedure
- Log in to the ECS.
- Partition disks.
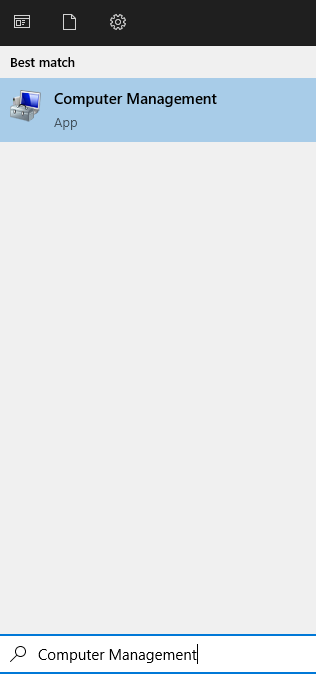
- In the lower left corner of the desktop, enter Computer Management in the search box.
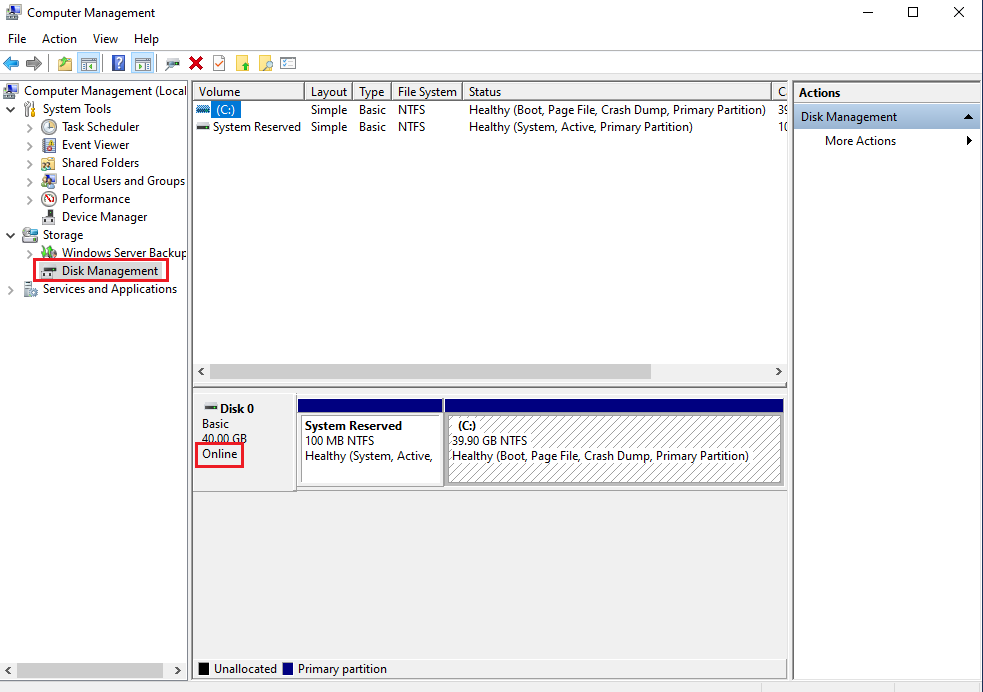
- Choose Storage > Disk Management.
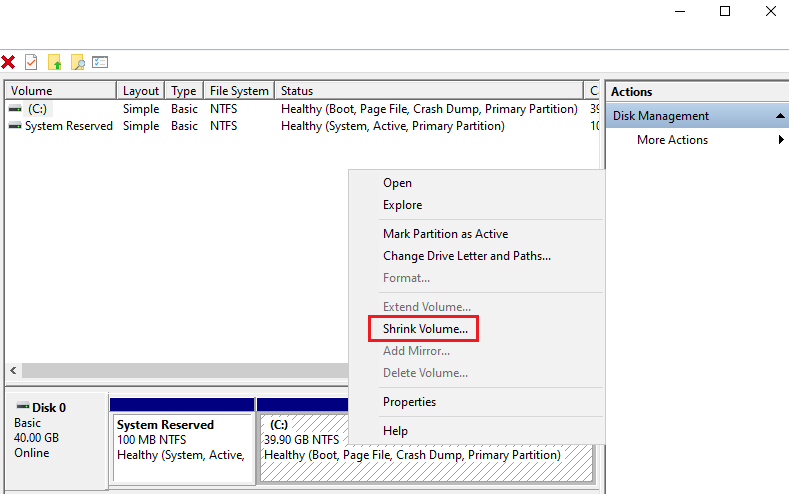
- Right-click the partition of the disk you want to compress and choose Shrink Volume...
- Enter the desired size of the partition after compression in the Enter the amount of space to shrink in MB text box.
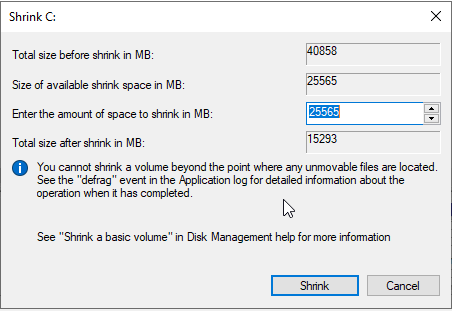
- Click Shrink. The unallocated space of the corresponding size is displayed for the disk.

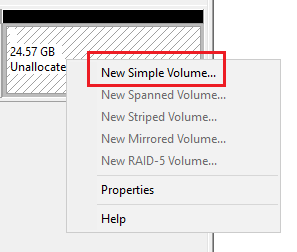
- In the Unallocated area of the disk, right-click the blank area and choose New Simple Volume...
The New Simple Volume Wizard window is displayed.
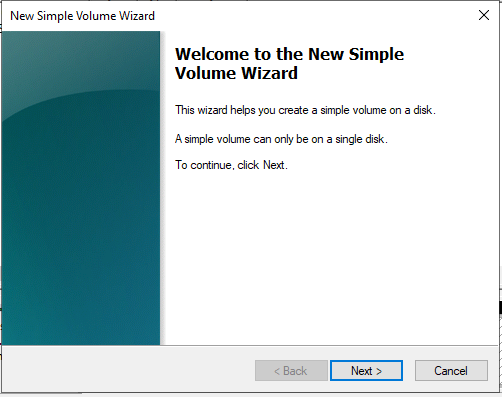
- Click Next to go to the Specify Volume Size page.
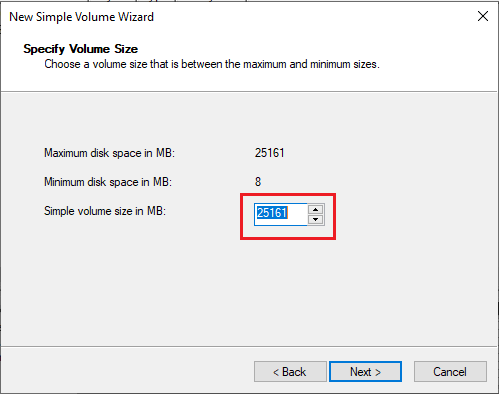
- Specify the volume size and click Next. The system selects the maximum volume size by default. You can specify the volume size as required. In this example, the default setting is used.
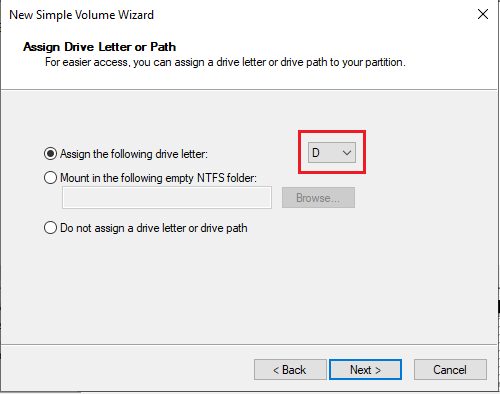
- Assign a drive letter or path to your partition and click Next. The system assigns drive letter D by default. In this example, the default setting is used.
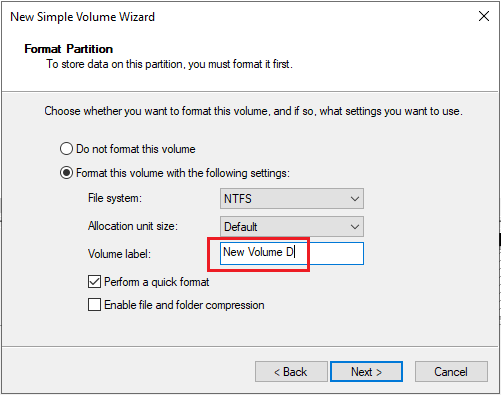
- Specify format settings and click Next. The system selects the NTFS file system by default. You can specify a file system format as required. In this example, the default setting is used.
- Click Finish.
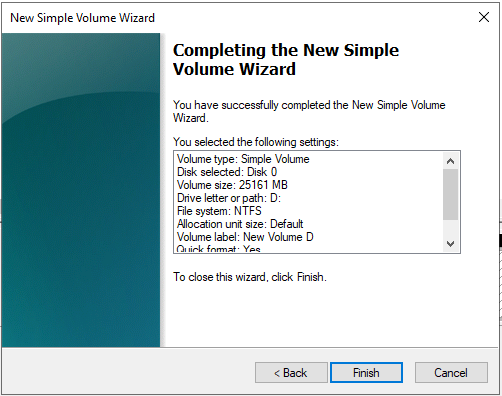
Wait for the initialization to complete. When the volume status changes to Healthy, the initialization has succeeded.

- In the lower left corner of the desktop, enter Computer Management in the search box.
- Create a snapshot.
For details, see Creating an EVS Snapshot in the Elastic Volume Service User Guide.
- Roll back disk data from a snapshot.
- Log in to the Elastic Volume Service console.
- In the navigation pane on the left, choose Elastic Volume Service > Snapshots.
The Snapshots page is displayed.
- In the snapshot list, locate the target snapshot and click Roll Back Disk in the Operation column.
- In the displayed dialog box, click OK.
The snapshot list is displayed. After the snapshot status changes from Rolling back to Available, the data rollback is successful.
Feedback
Was this page helpful?
Provide feedbackThank you very much for your feedback. We will continue working to improve the documentation.See the reply and handling status in My Cloud VOC.
For any further questions, feel free to contact us through the chatbot.
Chatbot


