Restoring Data of a Linux ECS
If an ECS cannot be started because files are deleted by mistake, that is, system disk data is lost, you can restore data using another Linux ECS that can be started properly or using a snapshot.
The detailed procedure is as follows:
- Stop the original ECS.
- Detach the system disk whose data needs to be restored. For details, see Detaching an EVS Disk.
Click OK. Wait until the system disk is detached from the original ECS. Then, go to the next step.
- Use a Linux ECS that can be started properly, attach the system boot disk of the original ECS to the normal ECS as the data disk, and then restore data. You can select either of the following methods to restore data:
Method 1: Use another Linux ECS that can be started properly.
- Attach the EVS disk detached in step 2 to the normal Linux ECS by referring to Attaching a Non-Shared Disk. Initialization is not required after the disk is attached.
- Log in to the Linux ECS.
Method 2: Restore data from a snapshot.- Create a snapshot for the system disk whose data needs to be restored. For details, see Creating an EVS Snapshot.
- Reinstall the OS on the original Linux ECS. For details, see Reinstalling the OS.
- Create a disk from the snapshot by referring to Creating a Disk from a Snapshot.
- After performing steps 3.b and 3.c, attach the EVS disk created in step 3.c to the original Linux ECS by referring to Attaching a Non-Shared Disk.
- Log in to the Linux ECS.

To ensure data security, create a snapshot for the original disk before restoring data. If data cannot be restored using the preceding methods, restore the disk using the snapshot and then use professional data recovery software to restore data.
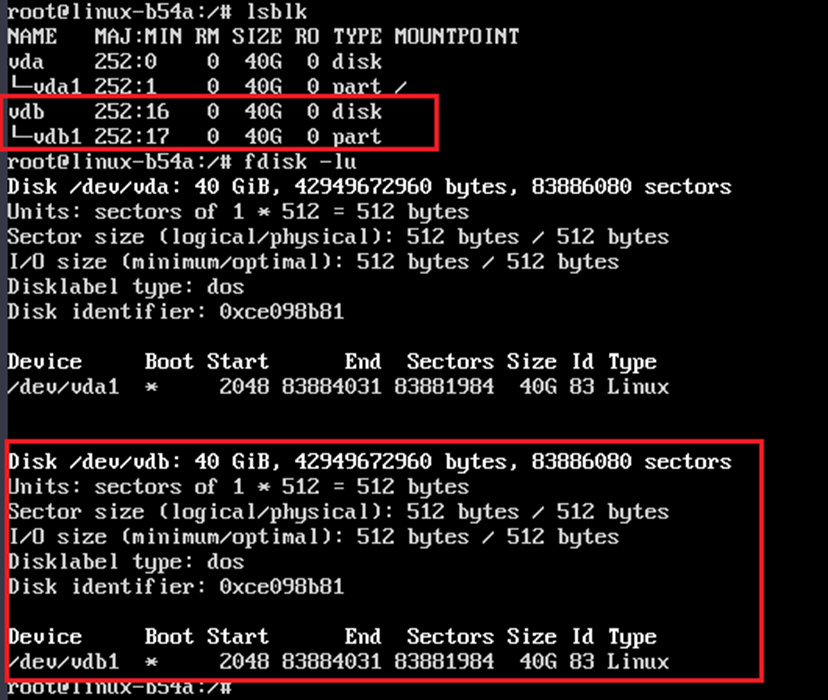
- Run the lsblk and fdisk -lu commands to view disk information. In the following figure, /dev/vdb is the EVS disk whose data needs to be restored. If /dev/vdb1 is displayed, the disk partition information is normal. The disk device name to be restored varies depending on the actual situation.
- Run the mount /dev/vdb1 /mnt command to attach the disk to the /mnt directory.

Run the cd /mnt command to view the data on the system disk of the original ECS. In the corresponding path, find the data to be restored and restore it as required.

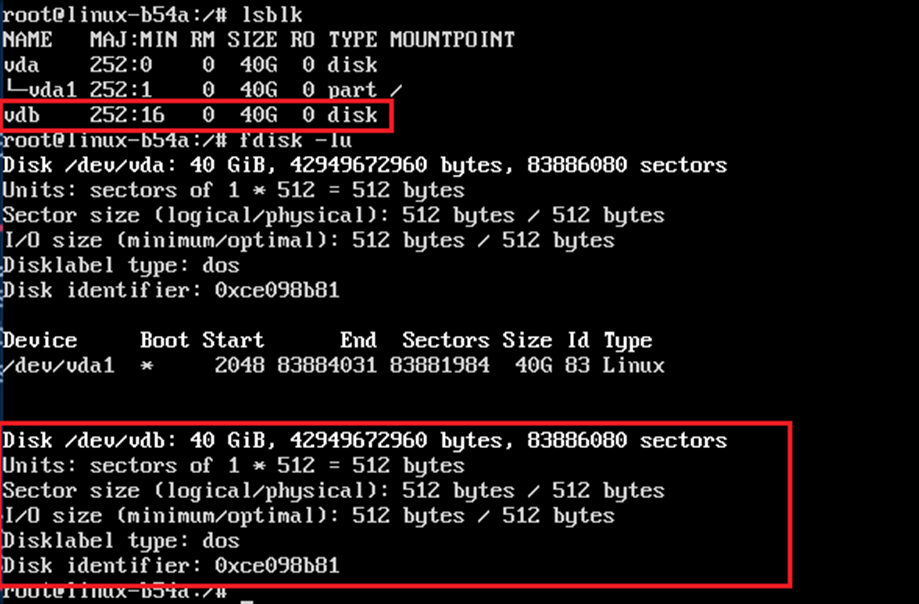
- Run the lsblk and fdisk -lu commands again to view the disk information. In the following figure, /dev/vdb is the disk to be restored. However, /dev/vdb1 cannot be displayed because the partition information is damaged or lost.
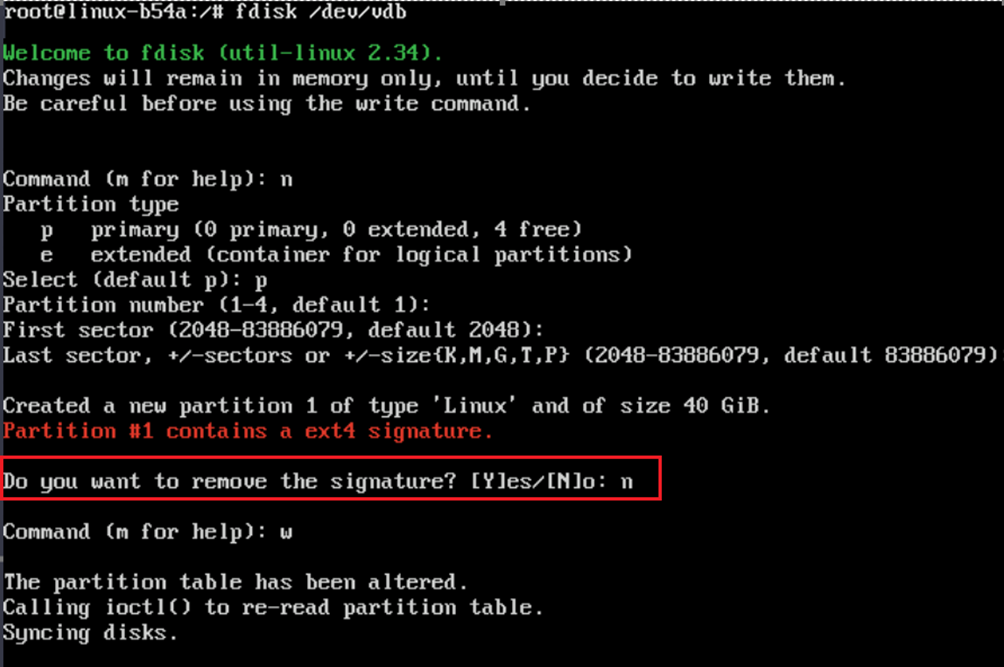
- Run the fdisk /dev/vdb command to partition the disk.

When the message "Do you want to remove the signature? [Y]es/[N]o" is displayed during disk partitioning, fdisk identifies an existing partition table.
- If you select No, the partition table will be retained. Then, enter w to save the partition table.
- If you select Yes, the partition table will be cleared and a new partition will be created. Although the data is not overwritten immediately, the original files may not be directly accessed.
- Run the mount /dev/vdb1 /mnt command to mount the EVS disk to the /mnt mount point.
- In the corresponding path, find the data to be restored and restore it as required.
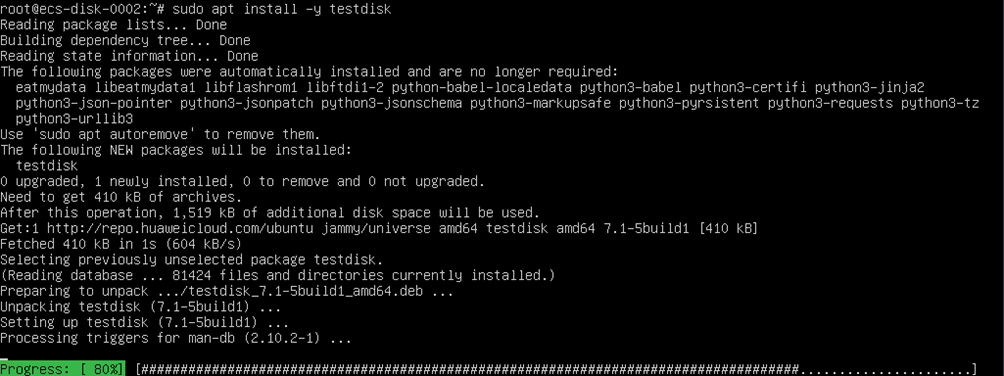
- Install testdisk.
- CentOS: sudo yum -y install testdisk
- Ubuntu: sudo apt install -y testdisk
- Go to the testdisk screen and run the testdisk /dev/vdb command. Replace the device name as required.


On the TestDisk screen, use the arrow keys to select the desired item and press Enter to confirm the selection. Other function keys are displayed in the lower part of the screen.
- Select [Proceed] and press Enter.
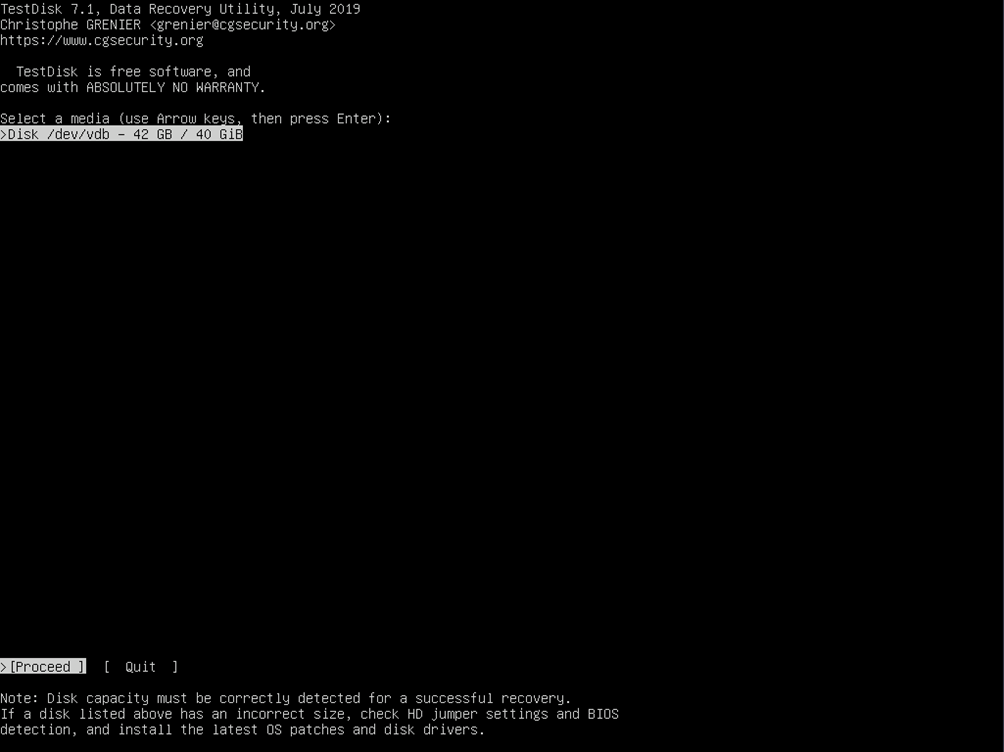
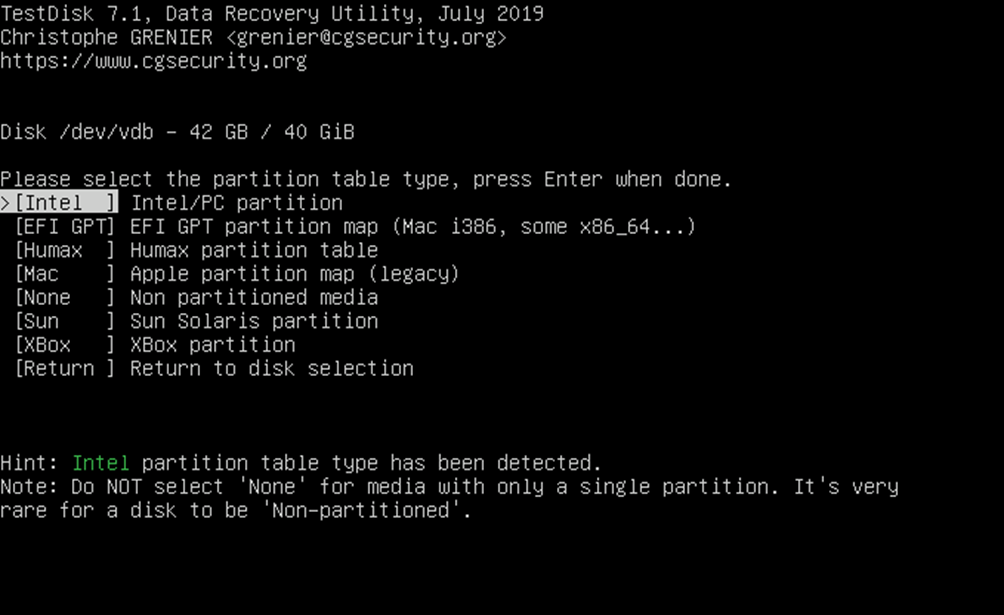
- Select the type of the partition tables to be scanned. Generally, select [Intel]. For GPT partitions, select [EFI GPT]. Then press Enter.
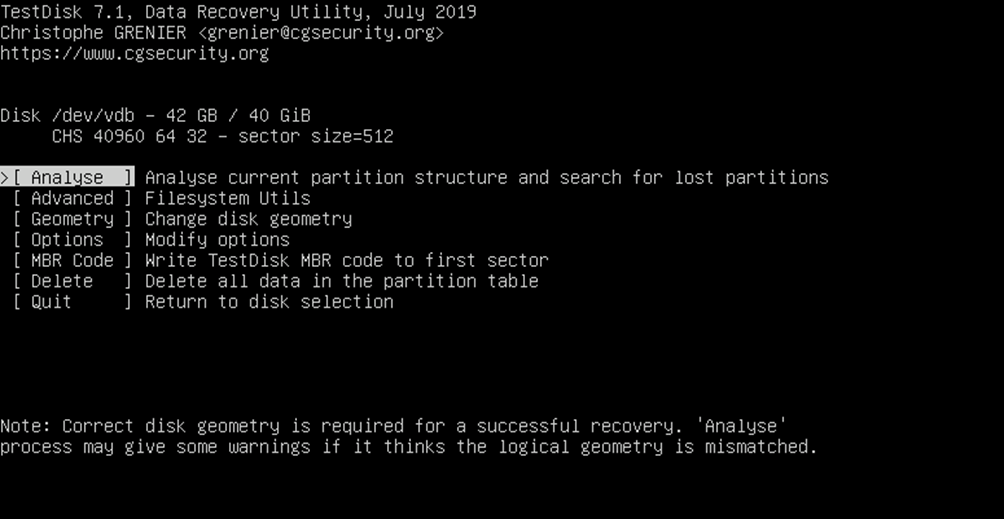
- Select [Analyse] and press Enter.
- If no partition information is displayed and the message "No partition is bootable" is displayed, select [Quick Search] and press Enter.
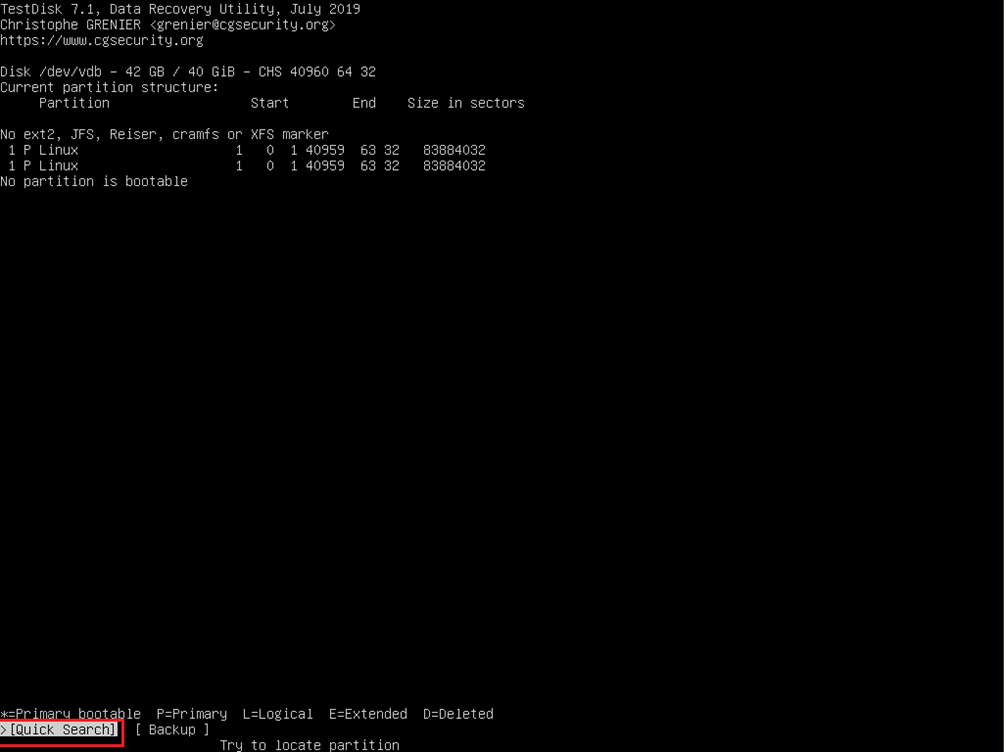
After the search is complete, you can view the partition information, as shown in the following figure. The partition is selected by default.
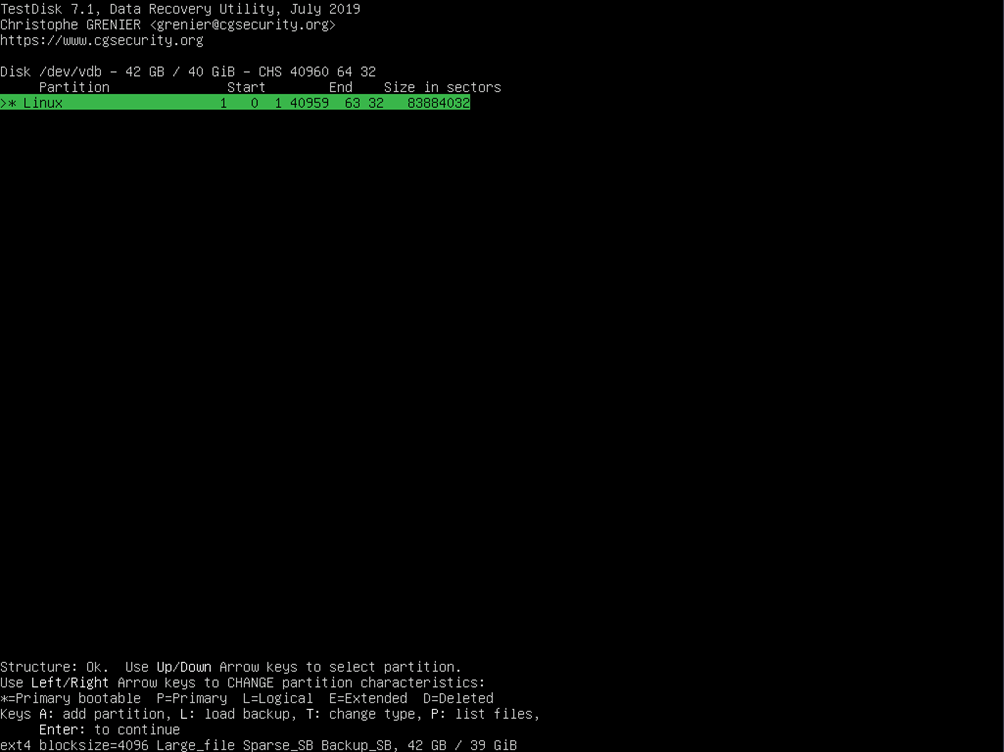
- Select [Write] and press Enter to save the partition.
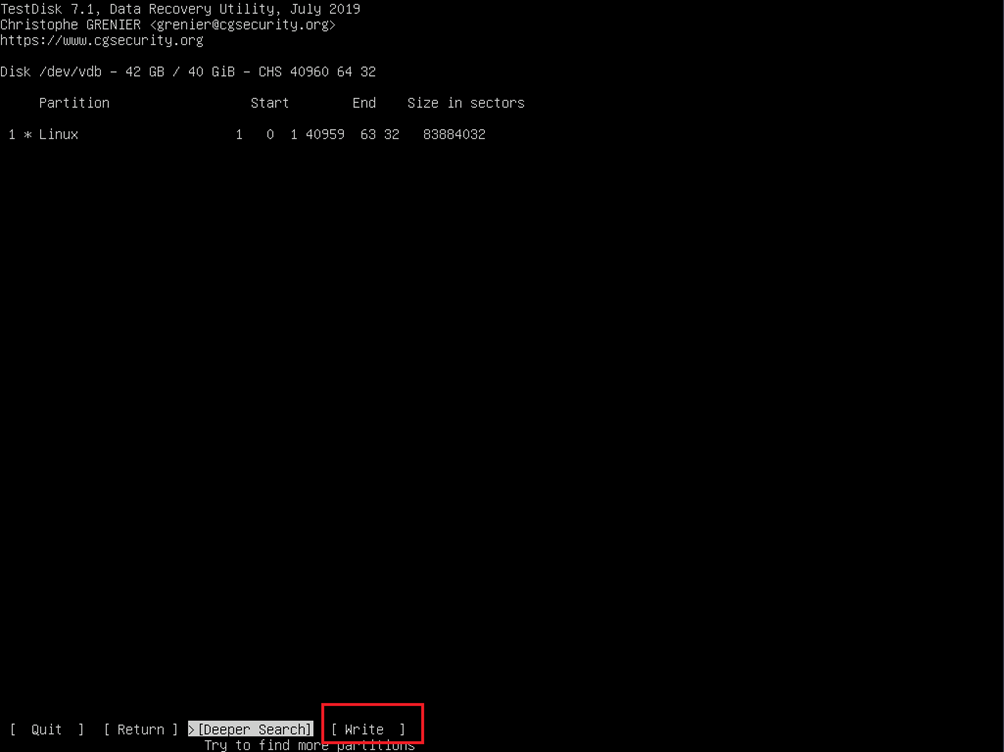
Press Y to save the partition as instructed.

Retain the default option [OK] and press Enter.
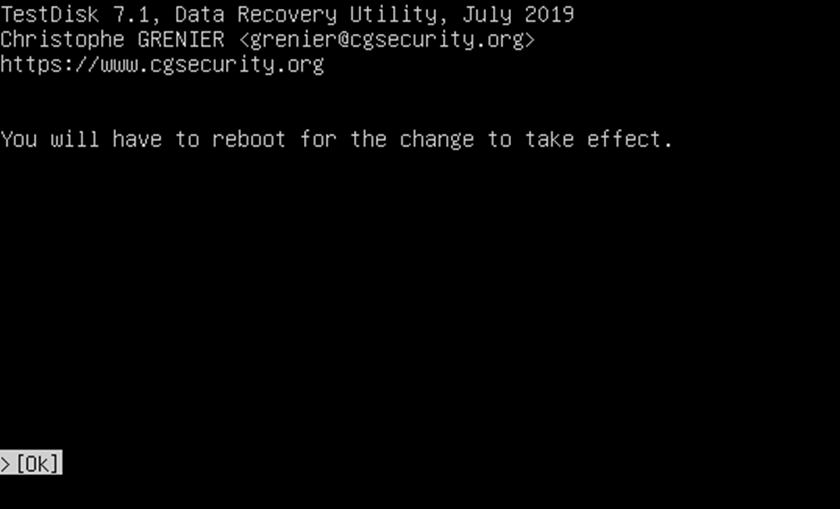
After exiting TestDisk, run partprobe /dev/vdb to update the partition table.

Remount the partition, view the disk data, and find files based on the path.

- Use the arrow keys to select the files or folders to be restored and press C to copy it.
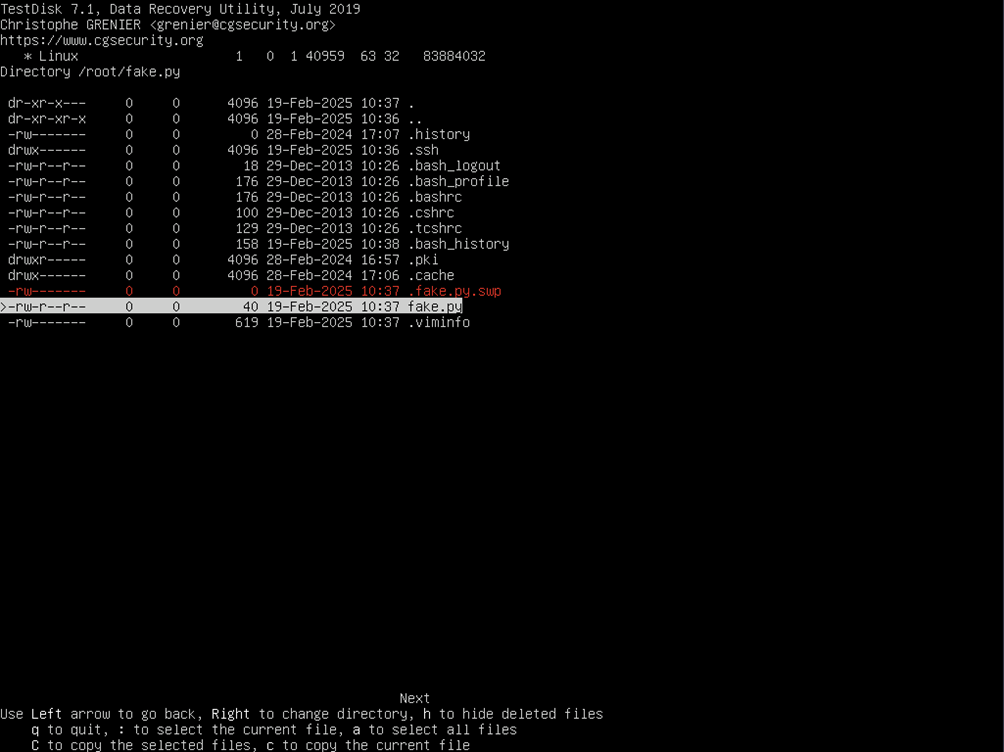
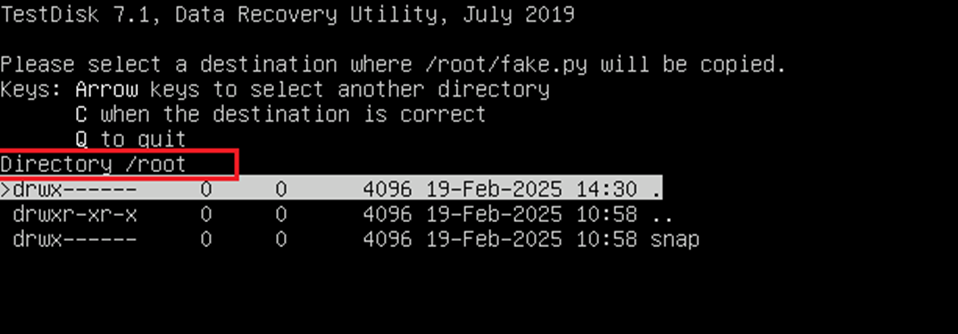
Use the arrow keys to select the target directory. The current path is displayed next to Directory. In this example, the files are restored to the /root directory. Press C in the /root directory.
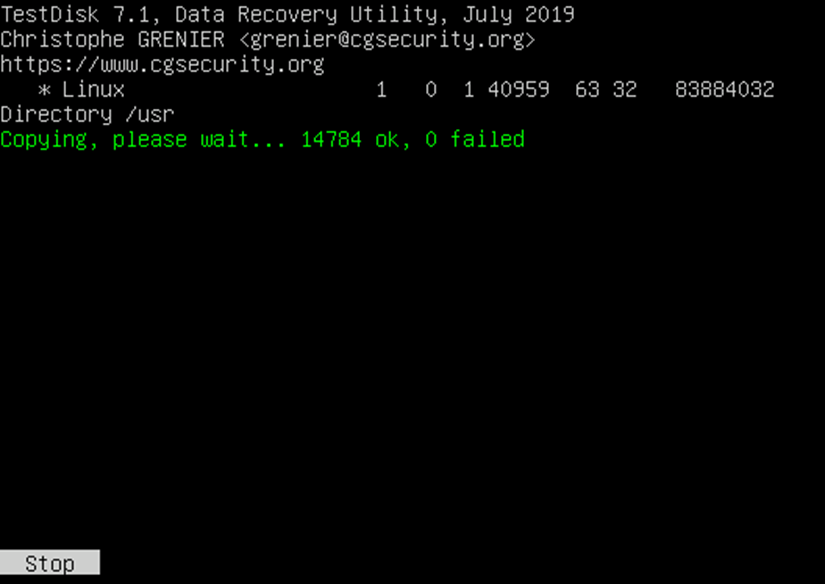
After the copy is successful, the message "Copy done!" is displayed. The number of files that are successfully copied and the number of files that fail to be copied are displayed. If a folder is copied, wait until the copy is complete.
Press Q multiple times until you exit the TestDisk screen. Go to the target path /root and check the data. The data has been restored.

When you paste the files or folders, the file structure is also copied to the target path. For example, if the root/fake.py file in the original disk file system is successfully copied to the /root directory, the fake.py file path changes to /root/root/fake.py.


If the OS can be started properly and only data on the data disk is deleted by mistake, perform operations from step 4 to subsequent steps based on the actual situation.
Feedback
Was this page helpful?
Provide feedbackThank you very much for your feedback. We will continue working to improve the documentation.See the reply and handling status in My Cloud VOC.
For any further questions, feel free to contact us through the chatbot.
Chatbot


