Setting Up Multiple Websites Using IIS
You can set up multiple websites on an ECS to reduce operating costs and manage multiple websites (including updating software, security settings, and backing up data) conveniently. You can flexibly adjust resource allocation based on the requirements of each website. This section describes how to use the IIS service to set up multiple websites on an ECS running Windows Server 2022 Standard 64-bit.
Prerequisites
- You have created an ECS. For details, see Purchasing an ECS in Custom Config Mode.
- You have installed the IIS service on the ECS. For details, see How Do I Install IIS on a Windows ECS?
Creating Test Websites
Set up two test websites page-one and page-two on an IIS server running Windows and configure different domain names for the same port to achieve website access.
- Remotely connect to the ECS where the web environment has been deployed.
For details, see Login Overview (Windows).
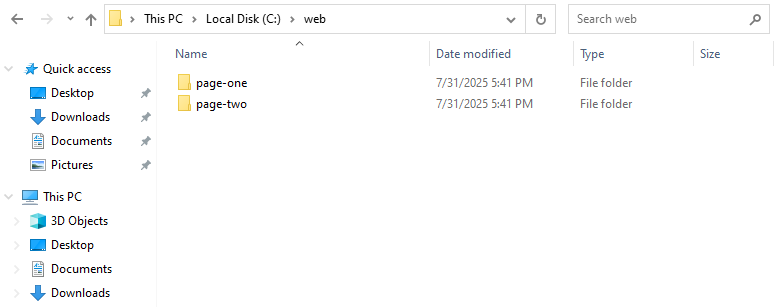
- Click the start icon in the lower left corner of the desktop and go to the root directory C:\web of the default website.
- Create the page-one and page-two folders.

- Go to the page-one folder, create the test file index.html, and add the following content to the file:
test page one
- Go to the page-two folder, create the test file index.html, and add the following content to the file:
test page two
Configuring the IIS Server
- On the taskbar at the bottom of the desktop, click the server manager icon
 .
. - On the top menu bar, choose Tools > Internet Information Services (IIS) Manager.
- In the navigation pane of the IIS Manager, double-click the server name and then double-click Sites.
- In the right pane, click Add Website...
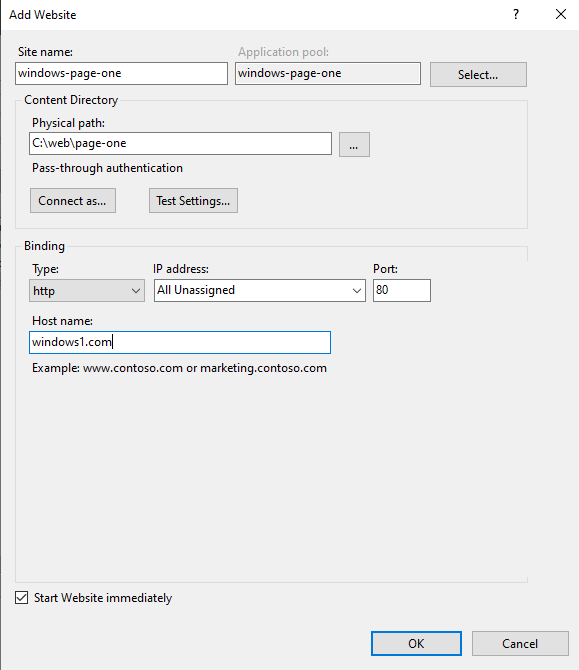
- Add the windows-page-one test website and click OK.
The following figure shows the parameters for configuring the website.

The parameters for configuring the website are described as follows:
- Site name: windows-page-one
- Application pool: windows-page-one
- Physical path: physical path of the test website page-one
- Host name: windows1.com
- In the right pane, click Add Website...
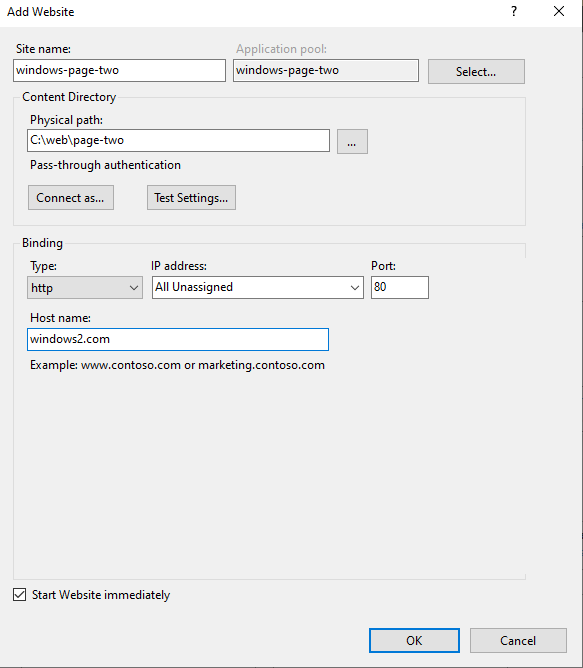
- Add the page-two test website and click OK.
The following figure shows the parameters for configuring the website.

The parameters for configuring the website are described as follows:
- Site name: windows-page-two
- Application pool: windows-page-two
- Physical path: physical path of the page-two test site
- Host name: windows2.com
After websites are added, the following page is displayed.

(Optional) Configuring the hosts File on the Local PC
If you use test domain names when configuring multiple websites, you need to configure the IP address mapping in the hosts file on the local PC. If you use real domain names, skip this step. In this tutorial, the local physical machine runs the Windows OS.
- Access the C:\Windows\System32\drivers\etc directory.
- Copy the hosts file for backup.
Retain the hosts - Copy file and use it to restore the hosts file after the test is complete.
- Modify the hosts file.
Add the following content to the end of the file, save the file, and exit:
<ECS instance public IP address> windows1.com
<ECS instance public IP address> windows2.com
- Return to the Windows desktop and press Win+R.
- In the Run dialog box, enter cmd and click OK.
- Run the following command in the CLI to apply the changes to the hosts file immediately:
ipconfig /flushdns
Verification
- Access windows1.com and view the content of the page-one site.
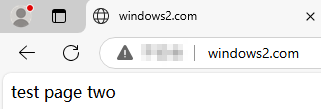
- Access windows2.com and view the content of the page-two site.
The websites have been set up. In actual website setup scenarios, you only need to configure the correct host name and physical path to achieve multi-website access.
Feedback
Was this page helpful?
Provide feedbackThank you very much for your feedback. We will continue working to improve the documentation.See the reply and handling status in My Cloud VOC.
For any further questions, feel free to contact us through the chatbot.
Chatbot


