Backing Up the CBH System Data
To prevent system data loss caused by possible change failures, back up important system data, including system configurations, resource accounts, and audit logs, before the change.
Backing Up System Configuration Data
You can back up CBH system configuration data and load it to the new CBH system, eliminating the need to repeat manual configurations.
The system configuration data contains all configuration data of the department, user, resource, policy, ticket, operation, audit, and system modules.
- Log in to the CBH system.
- Choose System > System Maintain > Backup&Restore.
- Click New, enter remarks, and click OK.
You can go to the task center page to check the task result. If the task is complete, go to the Backup&Restore page and check the generated backup file displayed in the backup list according to the task time.
Figure 1 Backup task completed
- Click Generate File in the row corresponding to the task time.
Figure 2 Generate File

- In the dialog box displayed, set the password and click OK.
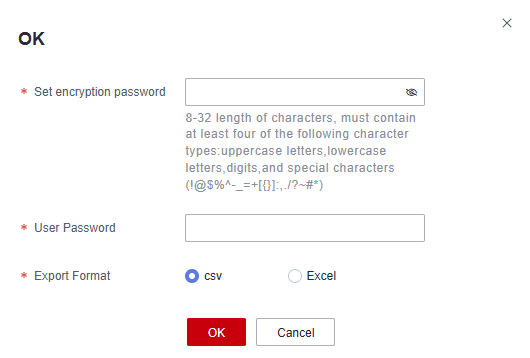
- Set the encryption password: Specify an encryption password for the backup file. In this way, the backup file cannot be accessed unless the password is provided.
- User password: Enter the password for logging in to the bastion host.
- Go to the Backup&Restore page and click Download File.
Figure 3 Download File

- Select a local path and save the backup configuration file.
Backing Up Managed Accounts
The authentication keys of different CBH systems are different. After the specification change, the managed accounts imported using the configuration file may fail to be used for system login. You are advised to back up managed accounts to prevent account information loss in case of specification change failure.
A managed account file contains all data of each account, including the username, password, login methods, sudo account, and names and addresses of associated resources.
- Log in to the CBH system.
- Choose and click
 in the upper right corner of the resource account list.
 - Configure the password and export format, and click OK.
You can go to the task center to check whether the task is complete.Figure 4 Configuring a password
- If the resource account export task is complete, click
 in the upper right corner to go to the download center.
 - On the Download Task page, click Download in the row where the target task is located.
Figure 5 Downloading the exported account file

- Select a local path and save the exported resource account information file.
Backing Up Audit Logs
CBH does not support migration of history audit logs. You need to back up system audit logs before the change.
Audit logs include history session records, session videos, system login logs, system operation logs, password change logs, and account synchronization logs.
- Log in to the CBH system.
- Export history session records.
- Choose Audit > History Session.
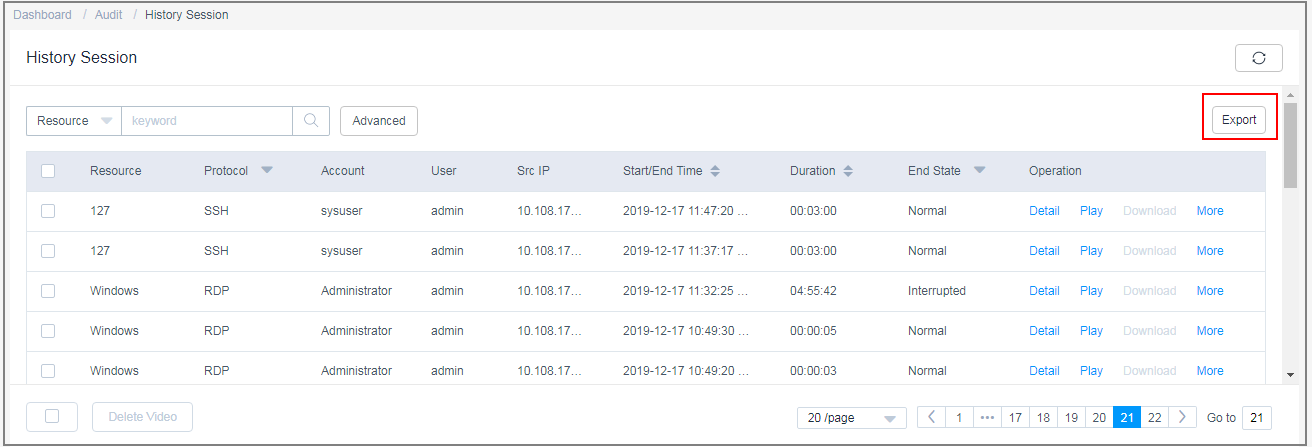
- Select all history sessions, click Export, and save exported text records locally.
Figure 6 Exporting history session records
- Download a session video.

Session videos cannot be generated or downloaded in batches. Only one video can be generated or downloaded at a time.
- Choose Audit > History Session.
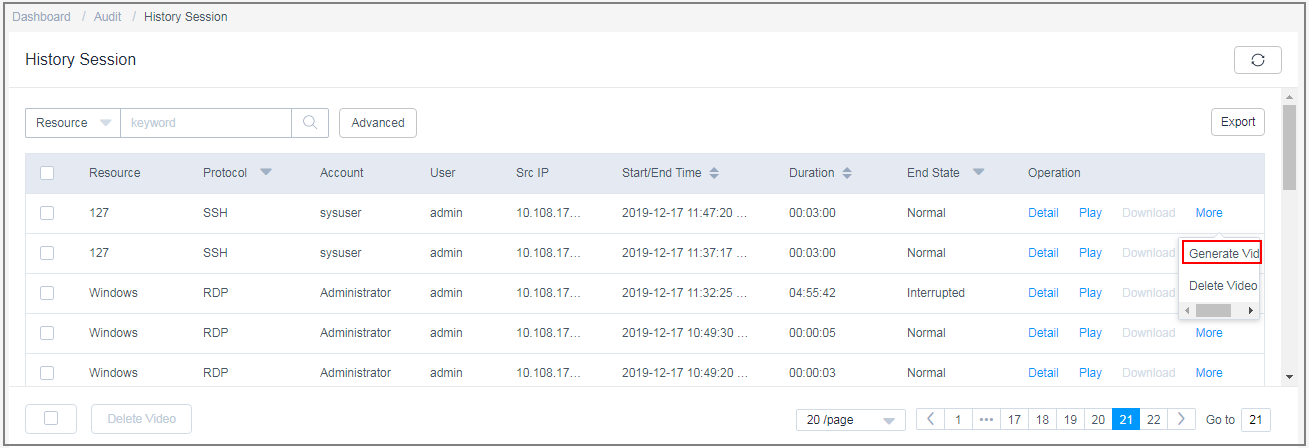
- Choose More > Generate Video in the Operation column of the target session row.
Figure 7 Generating a video
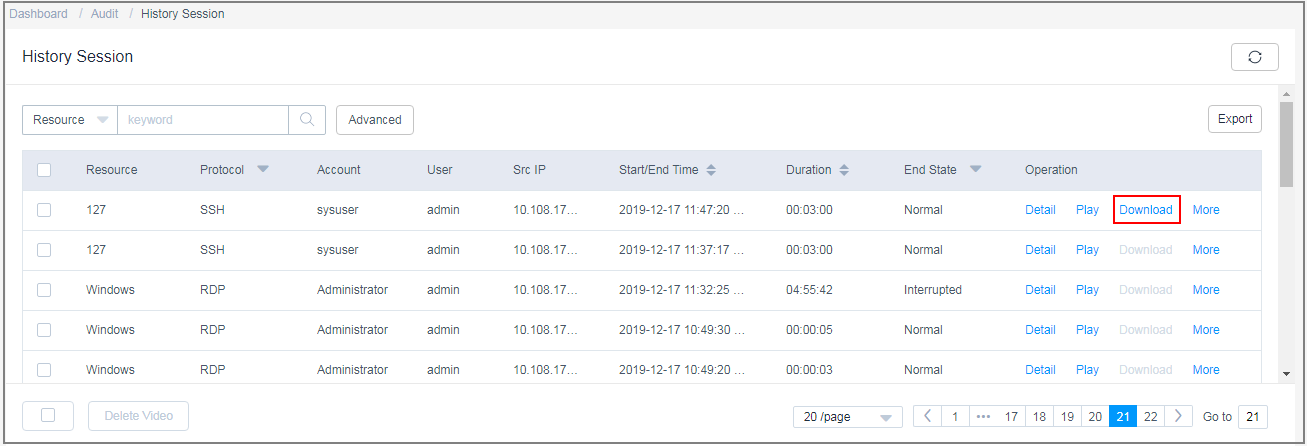
- After the video is generated, click Download and save the video locally.
Figure 8 Downloading a video
- Export system login logs.
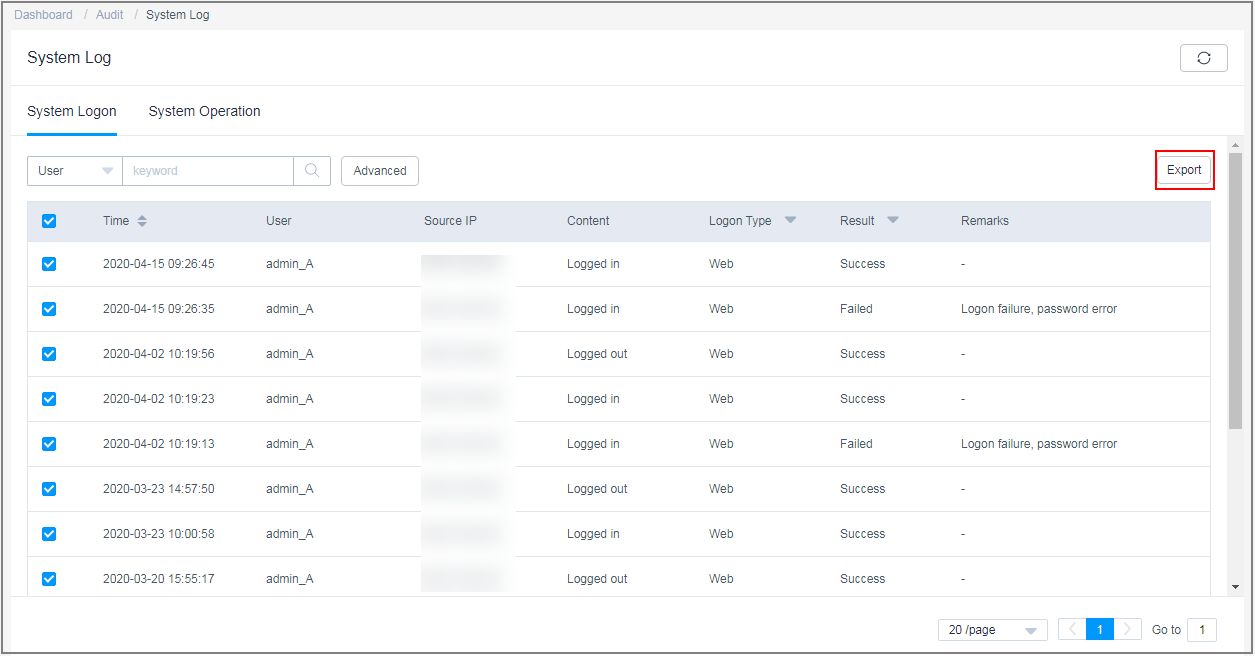
- Choose Audit > System Log > System Logon to switch to the system log page.
- Select all login logs, click Export, and save the exported text records locally.
Figure 9 Exporting system login logs
- Export system operation logs.
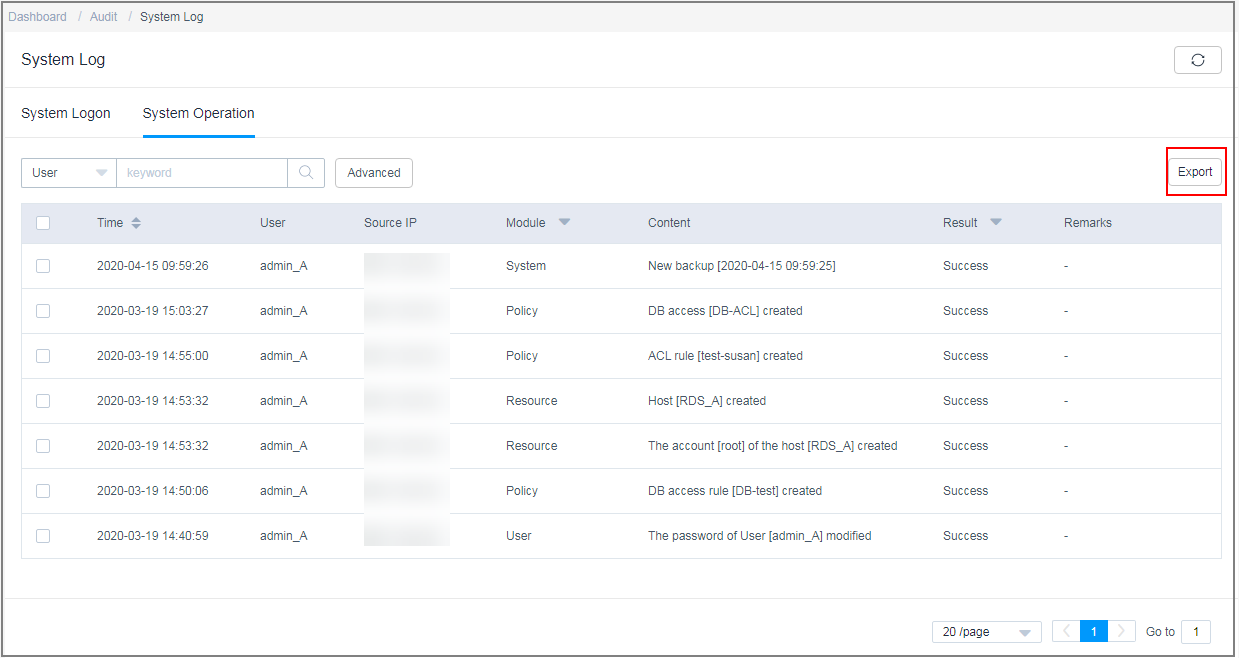
- Choose Audit > System Log > System Operation to switch to the system log page.
- Select all operation logs, click Export, and save the exported text records locally.
Figure 10 Exporting system operation logs
Feedback
Was this page helpful?
Provide feedbackThank you very much for your feedback. We will continue working to improve the documentation.See the reply and handling status in My Cloud VOC.
For any further questions, feel free to contact us through the chatbot.
Chatbot


