
Creating a Standard Dedicated Resource Pool
To meet unique service needs, separate resource pools are needed to guarantee resource availability, security, and optimal performance.
A dedicated resource pool is a set of resources reserved for specific users, services, or projects. It physically or logically isolates these resources from others to meet unique needs.
A ModelArts Standard dedicated resource pool provides compute resources required for AI development (including workflow creation, notebook instance creation, training job creation, and inference service creation) using ModelArts. For more information, see About ModelArts Standard Resource Pools.
To get dedicated compute resources, you must create dedicated resource pools within elastic clusters.
This section describes how to create a standard dedicated resource pool.
Billing
When creating a Standard dedicated resource pool, compute resources are billed for running development environments, training jobs, and deployed services. For details, see Table 1.
|
Billing Item |
Description |
Billing Mode |
Billing Formula |
|
|---|---|---|---|---|
|
Compute resource |
Dedicated resource pools |
Usage of compute resources. For details, see ModelArts Pricing Details. |
Pay-per-use |
Specification unit price x Number of compute nodes x Usage duration |
|
Yearly/Monthly |
Specification unit price x Number of compute nodes x Purchase duration |
|||
|
Storage resource |
EVS |
Container data disk mounted by the user. If an EVS disk is mounted when you create a Standard dedicated resource pool, the storage will be billed. |
Same as the billing mode of dedicated resource pool |
Specification unit price x Disk size x Number of disks x Usage duration or purchase duration |
Prerequisites
Ensure that you have enough resource quotas. If the current quota cannot meet your requirements, you can apply for a higher quota. For details, see Quotas.
Log in to the ModelArts console. In the navigation pane on the left, choose Standard Cluster under Resource Management. You can view the dedicated resource pool quota (available/total) in the upper right corner of the cluster list.
Step 1: Creating a Network
A ModelArts network connects nodes within a ModelArts resource pool over Huawei Cloud VPC. When creating a network, you only need to choose its name and CIDR block. To avoid CIDR block conflicts, ModelArts networks offer multiple options for selection.
A VPC provides a logically isolated virtual network for your instances. You can configure and manage the network as required. VPC provides logically isolated, configurable, and manageable virtual networks for cloud servers, cloud containers, and cloud databases. It helps you improve cloud service security and simplify network deployment.
Each user can create a maximum of 15 networks. To create a network, perform the following steps:
- Log in to the ModelArts console. In the navigation pane on the left, choose Network under Resource Management. On the displayed page, click Create Network.
- In the Create Network dialog box, set parameters.
- Network Name: Enter a custom name or use the default name.
- CIDR Block: Select Preset or Custom. Recommended CIDR blocks for a custom network: 10.0.0.0/8-24, 172.16.0.0/12-24, and 192.168.0.0/16-24. The subnet mask ranges from 8 to 28. If you want to use the inference service, ensure that the VPC CIDR block does not conflict with the reserved inference CIDR block (192.168.100.0/24 or 10.255.0.0/20).
Ensure that the network segment does not overlap with the CIDR block of the VPC that you want to access. The network segment cannot be modified once the network is created. Possible conflict CIDR blocks are as follows:
- Your VPC CIDR block
- Container CIDR block (fixed to 172.16.0.0/16)
- Service CIDR block (fixed to 10.247.0.0/16)
Figure 1 Creating a network
- Confirm the settings and click OK.
You can view the created network on the network management page.
(Optional) Step 2: Interconnecting with a VPC
To interconnect multiple VPCs, you need to establish network links between them or between a VPC and another network environment. This enables resource sharing and secure communication between VPCs.
With VPC interconnection, you can access resources across VPCs, share resources efficiently, improve data transfer speed, and maintain continuous services.
Before interconnecting a VPC, you need to create the VPC and subnet to be interconnected. For details, see Creating a VPC with a Subnet.
- On the Network page, locate the target network click Interconnect VPC in the Operation column.
Figure 2 Interconnecting the VPC

- In the displayed dialog box, click the button on the right of Interconnect VPC, and select an available VPC and subnet from the drop-down lists.

The peer network to be interconnected cannot overlap with the current CIDR block.
Figure 3 Parameters for interconnecting a VPC with a network
- If no VPC is available, click Create VPC on the right to create one on the console. For details, see Creating a VPC with a Subnet.
- If no subnet is available, click Create Subnet on the right to create one.
- A VPC can interconnect with at most 10 subnets. To add a subnet, click the plus sign (+).
- To enable a dedicated resource pool to access the public network through a VPC, create a SNAT in the VPC, as the public network address is unknown. After the VPC is interconnected, by default, the public address cannot be forwarded to the SNAT of your VPC. To add a default route, submit a service ticket and contact technical support. Then, when you interconnect with a VPC, ModelArts 0.0.0.0/0 is used as the default route. In this case, you do not need to submit a service ticket. Add the default route for network configuration.
Step 3: Creating a Standard Dedicated Resource Pool
To get dedicated compute resources, you must create dedicated resource pools within elastic clusters.
- Log in to the ModelArts console. In the navigation pane on the left, choose Standard Cluster under Resource Management.
- On the Standard Cluster page, click Buy Standard Cluster, and configure the parameters as follows on the displayed page.
Table 2 AI dedicated cluster parameters Parameter
Sub-Parameter
Description
Billing Mode
-
Select Yearly/Monthly or Pay-per-use.
- Yearly/Monthly is a prepaid billing mode in which your subscription is billed based on the required duration. This mode is more cost-effective when the usage duration is predictable.
- Pay-per-use is a postpaid billing mode. You are charged for how long you use each ECS. You can purchase or delete such an ECS at any time.
Cluster Flavor
Pool Name
Enter a name.
The name can contain 4 to 30 characters starting with a lowercase letter and not ending with a hyphen (-). Only lowercase letters, digits, and hyphens (-) are allowed.
Resource Pool Type
Select Physical.
A physical resource pool is a collection of hardware resources, including GPUs, NPUs, and CPUs. These resources ensure ModelArts runtime. Before creating a logical subpool, you need to create a physical resource pool first. Physical resource pools support different job types, such as training and inference.
Elastic resources are not supported in physical resource pools, which feature higher isolation, physical isolation, dedicated networks, and network connectivity.
Job Type
Standard resource pools provide compute resources required for AI development jobs using ModelArts.
Choose DevEnviron, Training Jobs, and Inference Service as needed.
Advanced Cluster Configuration
If Resource Pool Type is set to Physical, you need to configure the cluster specifications and controller node distribution.
- Cluster Specifications: Select Default or Custom. When customizing the specifications, you can set the cluster scale and enable HA for controller nodes.
- Configure the cluster scale based on the service scenario. The scale refers to the maximum number of instances that can be managed by a resource pool.
- Once HA is enabled for controller nodes, the system creates three control plane nodes for your cluster to ensure reliability. If there are 1,000 or 2,000 nodes in the cluster, HA must be enabled. If HA is disabled, only one control plane node will be created for your cluster. After a resource pool is created, the HA status of controller nodes cannot be changed.
- Service Node Provisioning: Select Automatic or Manual. Allocate controller nodes in different AZs for disaster recovery (DR).
- Automatic: The system randomly allocates controller nodes to AZs for better DR. If the number of available AZs is less than the number of nodes to be created, the nodes will be created in the AZs with abundant resources to preferentially ensure cluster creation. In this case, AZ-level DR may not be ensured.
- Manual: You can also specify an AZ for the controller nodes.
Network
ModelArts Network
Specify the network where the resource pool runs. The network can communicate with other cloud service resource instances on the network. The network needs to be set only for physical resource pools.
Select a network from the drop-down list. If no network is available, click Create on the right to create one. For details about how to create a network, see Step 1: Creating a Network.
If you need to use an inference service, do not use the following CIDR blocks to avoid conflicts between the VPC CIDR block and the CIDR block reserved for inference: 192.168.0.0/16, 172.16.0.0/16, 10.247.0.0/16, 10.255.0.0/16, 172.16.0.0/16, and 10.247.0.0/16.
IPv6
Whether to enable IPv6 networking. If enabled, you must enable IPv6 for the network bound to the resource pool. For details about how to enable IPv6, see Step 1: Creating a Network. Once enabled, this function cannot be disabled.
Node Pool Flavor
Node Type
- Common node: A physical or virtual server that provides independent basic compute, storage, and network resources.
- Supernode: A converged node that provides a large-scale compute resource pool and supports flexible allocation and high-density deployment Supernodes are specially designed to support large-scale model inference tasks. These servers are usually equipped with multiple compute cards (such as Huawei Cloud AI NPUs) to provide powerful computing capabilities to meet heavy–load inference requirements. Supernodes are available only in CN Southwest-Guiyang1, CN North-Beijing3, CN North-Ulanqab1, and CN East 2.
- Integrated rack: An entire physical server that provides exclusive resource access. It provides extremely high isolation, performance, and deterministic resource availability.
Resource Type
Select BMS or ECS as required.
- BMS: A BMS features both the scalability of Elastic Cloud Servers (ECSs) and high performance of physical servers, providing dedicated servers on the cloud for you and your enterprise.
- ECS: ECS provides secure, scalable, on–demand compute resources, enabling you to flexibly deploy applications and workloads.
CPU Architecture
CPU architecture of the resource type. Currently, the CPU supports x86 and Arm architectures, as well as heterogeneous scheduling for x86 and Arm. Set these parameters as required.
- x86: Select this if GPU resources are used. It applies to most general-purpose computing scenarios and supports a wide software ecosystem.
- Arm64: Select this if NPU resources are used. It applies to specific optimization scenarios, such as mobile applications and embedded systems, features low power consumption.
Instance Specifications Type
Choose CPU, GPU, or NPU as needed. Select a CPU architecture and then select instance flavors as required. The flavors vary by region. The actual flavors are displayed on the console.
- CPU: general-purpose compute architecture, featuring low computing performance and suitable for general tasks.
- GPU: parallel compute architecture, features high computing performance, is suitable for parallel tasks and scenarios such as deep learning training and image processing, and supports multi-PU distributed training.
- NPU: dedicated AI architecture, features extremely high computing performance, is suitable for AI tasks and scenarios such as AI model training and inference acceleration, and supports multi-node distributed deployment.
If Job Type is set to DevEnviron or Inference Service, heterogeneous resource pools are not supported.
Select multiple x86/Arm64-powered CPU-based instances or Snt9b/Snt9b23-powered NPU-based instances, homogeneous training tasks can be delivered. For a heterogeneous resource pool, the CPU architecture can only be either x86 or ARM64.
Instance Specifications
Select the required specifications from the drop-down list. Due to system loss, the available resources are fewer than specified.
Contact your account manager to request resource specifications (such as NPUs) in advance. They will enable the specifications within one to three working days. If there is no account manager, submit a service ticket.
AZ
Select Random or Manual as needed. An AZ is a physical region where resources use independent power supplies and networks. AZs are physically isolated but interconnected over an intranet.
- Random: AZs are automatically allocated.
- Manual: Specify AZs for resource pool nodes. To ensure system disaster recovery, deploy all nodes in the same AZ. You can set the number of instances in an AZ.
Instances
Select the number of instances in a dedicated resource pool. More instances mean higher computing performance.
If AZ is set to Manual, you do not need to configure Instances.
It is a good practice to create no more than 30 instances at a time. Otherwise, the creation may fail due to traffic limiting.
Storage Configuration - System Disk Storage Mode
After you select an instance flavor, you can view the system disk storage mode, system disk type, and capacity of each instance. The system disk storage mode can only be local disk or EVS disk and cannot be changed.
Some specifications do not contain system disks. You can set the system disk storage mode, system disk type, and capacity when creating a dedicated resource pool. In this case, the system disk storage mode can only be EVS (including general-purpose SSD, high I/O, and ultra-high I/O).
Storage Configuration - Container Disk Storage Mode
You can view the container disk storage mode, container disk type, capacity, and quantity of each instance. The container disk storage mode can only be local disk or EVS disk and cannot be changed.
Some specifications do not contain container disks. You can set the container disk storage mode when creating a dedicated resource pool. In this case, the container disk storage mode can only be local disk or EVS disk, which is subject to the actual display on the console. EVS disks include common SSD, high I/O, and ultra-high I/O disks.
Some flavors allow you to set the container disk write mode, which can be Linear or Stripe.
- Linear: A linear logical volume integrates one or more physical volumes. Data is written to the next physical volume when the previous one is used up.
- Striped: A striped logical volume stripes data into blocks of the same size and stores them in multiple physical volumes in sequence. This allows data to be concurrently read and written. A storage pool consisting of striped volumes cannot be scaled-out.
Storage Configuration - Add Container Disk
For some specifications, you can mount additional container disks to each instance in the dedicated resource pool. To do so, click the plus sign (+) before Add Container Disk. The attached disks are EVS disks, which will be charged independently.
You can set the type, capacity, and quantity of disks to be mounted. The actual values are displayed on the console.
Container Disk Advanced Configuration - Disk Space (%)
Container space: The data disk space is divided into two parts by default. One part is used to store the Docker/containerd working directories, container image data, and image metadata. The other is reserved for kubelet and emptyDir volumes. By setting Specify Disk Space, you can adjust the disk space for the container engine and its associated images. Any remaining space is then allocated to kubelet and emptyDir volumes.
The disk space allocated to the container engine directly impacts the maximum storage capacity available to it.
If the container disk is a local disk, Specify Disk Space is not supported.
Container Disk Advanced Configuration - Container Engine Space (GiB)
This parameter specifies the size of the space allocated to the pod container. You can specify the container engine space or set the space to unlimited.
The default and minimum values are 50 GiB. You must enter an integer for this parameter. The maximum value depends on the specifications, and can be found in the console prompt. Customizing the container engine space does not increase costs.
By specifying this parameter, you can limit the disk size used by a single pod job.
HA Redundancy
When you create a resource pool, this function is supported for certain instance flavors. For details, see the information on the console.
- After the function is enabled, the HA redundant node will be isolated, and workloads cannot be scheduled to the redundant node.
- An HA redundant node functions as the standby node for the fault detection function. This node will take over workloads if its active node becomes faulty.
Number of redundant instances: number of HA redundant instances set for this flavor.
Number of redundant nodes on a single supernode: number of redundant nodes on each supernode when Node Type is set to Supernode or Integrated rack. Current total redundant nodes: instances x redundant nodes per supernode.
Image Settings
After selecting Image Settings, you can set the OS of the preset image.
GPU/NPU Driver
Some GPU and NPU resource pools allow custom driver installation. The driver is automatically installed in the cluster by default. You only need to specify the driver version.
The value depends on the driver you choose.
Add Node Pool
Click Add Node Pool to create node pools. Configure each node pool as required.
If Flavor Type is set to CPU, Job Type is set to Training Jobs, and Snt9b1, Snt9b2, Snt9b3, or Snt9b23 is selected, a node pool can be added. If no node pool can be added, Add Node Pool becomes unavailable on the console.
Set Plug-in
Select Plug-in
ModelArts provides various plug-ins for you to selectively expand resource pool functions to meet service requirements.
The plug-ins installed by default are as follows:
- ModelArts Node Agent
ModelArts Node Agent is a plug-in for monitoring cluster node exceptions, also, a component for connecting to third-party monitoring platforms. It is a daemon that runs on each node to collect node problems from different daemon processes.
- ModelArts Metric Collector
A default built-in plug-in, which runs as a node daemon to collect monitoring metrics of nodes and jobs and report the metrics to AOM.
- AI Suite (NVIDIA GPU)
The AI suite, NV GPU, is a device management plug-in that supports GPUs in containers. To use GPU nodes in a cluster, this plug-in must be installed.
It is automatically installed when Instance Specifications Type is set to GPU.
- AI Suite (Ascend NPU)
Allows containers to use Huawei NPU devices.
It is automatically installed when Instance Specifications Type is set to NPU.
- Volcano Scheduler
Volcano is a batch scheduling platform based on Kubernetes. It provides a series of features required by machine learning, deep learning, bioinformatics, genomics, and other big data applications, as a powerful supplement to Kubernetes capabilities.
It is automatically installed when Job Type is set to Training Jobs.
Click View Details to view plug-in functions and version updates.
Advanced Options
CIDR Block
You can select Default or Custom.
- Default: The system randomly allocates an available CIDR block to you, which cannot be modified after the resource pool is created. For commercial use, customize your CIDR block.
- Custom: You need to customize Kubernetes container and Kubernetes service CIDR blocks.
- K8S Container Network: used by the container in a cluster, which determines how many containers there can be in a cluster. The value cannot be changed after the resource pool is created.
- Kubernetes Service CIDR Block: CIDR block for services used by containers in the same cluster to access each other. The value determines the maximum number of Services you can create. The value cannot be changed after the resource pool is created.
If you need to use an inference service, do not use the following CIDR blocks to avoid conflicts between the VPC CIDR block and the CIDR block reserved for inference: 192.168.0.0/16, 172.16.0.0/16, 10.247.0.0/16, 10.255.0.0/16, 172.16.0.0/16, and 10.247.0.0/16.
(Optional) Cluster Description
Enter the cluster description for easy query. The description can contain 0 to 100 characters.
Tags
Click Add Tag to configure tags for the standard resource pool so that resources can be managed by tag. You can also set tag information in the Tags tab of the details page after the standard resource pool is created. The tag information can be predefined in Tag Management Service (TMS) or customized.
Predefined TMS tags are available to all service resources that support tags. Customized tags are available only to the service resources of the user who has created the tags.
You can add at most 20 tags.
Required Duration
-
Select the time length for which you want to use the resource pool. This parameter is mandatory only when the Yearly/Monthly billing mode is selected.
Auto-renewal
Specifies whether to enable auto-renewal. This parameter is mandatory only when the Yearly/Monthly billing mode is selected. The fees generated by auto-renewal will be deducted from your account balance. For details, see Auto-Renewal.
- Monthly subscriptions renew each month.
- Yearly subscriptions renew each year.
- Click Buy Now. Confirm the information and click Submit.
- After a resource pool is created, its status changes to Running.
- Hover over Creating to view the details about the creation process. Click View Details to go the operation record page.
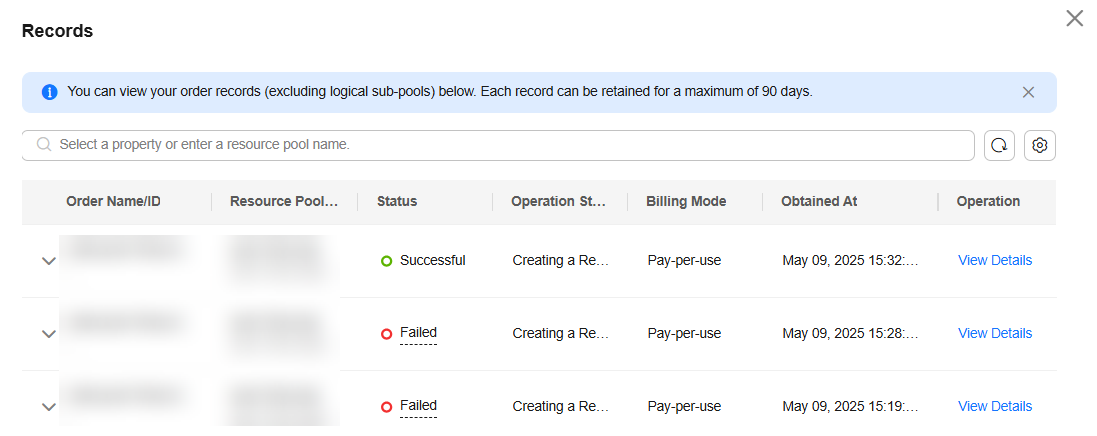
- You can view the task records of the resource pool by clicking Records in the upper left corner of the resource pool list.
Figure 4 Viewing the resource pool status
FAQ
Why is my dedicated resource pool creation failed, even though I have selected a flavor?
The flavors of dedicated resources change based on real-time availability. Sometimes, you might choose a flavor on the purchase page, but it is sold out before you pay and create the resource pool. This causes the resource pool creation to fail.
You can try a different flavor on the creation page and create the resource pool again.
Why cannot I use all the CPU resources on a node in a resource pool?
Resource pool nodes have systems and plug-ins installed on them. These take up some CPU resources. For example, if a node has 8 vCPUs, but some of them are used by system components, the available resources will be fewer than 8 vCPUs.
You can check the available CPU resources by clicking the Nodes tab on the resource pool details page, before you start a task.
Can I use ECSs to create a dedicated resource pool in ModelArts?
No. This operation is not allowed. When creating a resource pool, you can only select available node flavors provided on the console. These node flavors in dedicated resource pools are from ECSs. However, the ECSs purchased under the account cannot be used by the dedicated resource pools for ModelArts.
What are the differences between public resource pools and dedicated resource pool in ModelArts?
- Dedicated resource pool: It delivers more controllable resources and cannot be shared with other users. Create a dedicated resource pool and select it during AI development.
- Public resource pool: It provides large-scale public computing clusters, which are allocated based on job parameter settings. Resources are isolated by job. You can use ModelArts public resource pools to deliver training jobs, deploy models, or run DevEnviron instances and will be billed on a pay-per-use basis.
For details, see What Are the Differences Between Public Resource Pools and Dedicated Resource Pools in ModelArts?
What should I do if the resource pool fails to be created?
On the Standard Cluster page, click Records and Failed Records in the upper right corner to view the failure information and locate the failure cause. For details, see Failed to Create a Resource Pool.
Feedback
Was this page helpful?
Provide feedbackThank you very much for your feedback. We will continue working to improve the documentation.See the reply and handling status in My Cloud VOC.
For any further questions, feel free to contact us through the chatbot.
Chatbot


