Deleting RabbitMQ Queues
This section describes how to delete queues. Methods of deleting a queue:
- Deleting a Queue (Console)
- Deleting a Queue (RabbitMQ Management UI)
- Deleting Queues in Batches (RabbitMQ Management UI)
Notes and Constraints
- Deleting a queue removes all its configurations including exchange-queue bindings permanently.
- The three methods are supported for RabbitMQ 3.x.x. For RabbitMQ AMQP-0-9-1 instances, queues can only be deleted on the console.
Prerequisite
A queue has been created.
Procedure
The following describes how to delete a queue.
- Log in to the RabbitMQ console.
- Click
 in the upper left corner to select the region where your instance is located.
 - Click an instance name to go to the instance details page.
- In the navigation pane, choose Instance > Virtual Hosts.
- Click a virtual host name.
- On the Queue tab page, delete queues in either of the following ways:
- Select one or more queues and click Delete Queue in the upper left corner.
- In the row containing the desired queue, click Delete.

Deleting a queue removes all its configurations including exchange-queue bindings permanently.
- Click OK.
This queue is deleted when it is removed from the queue list.
- Log in to the RabbitMQ management UI.
- On the Queues tab page, click the name of the desired queue.
Figure 1 Queues

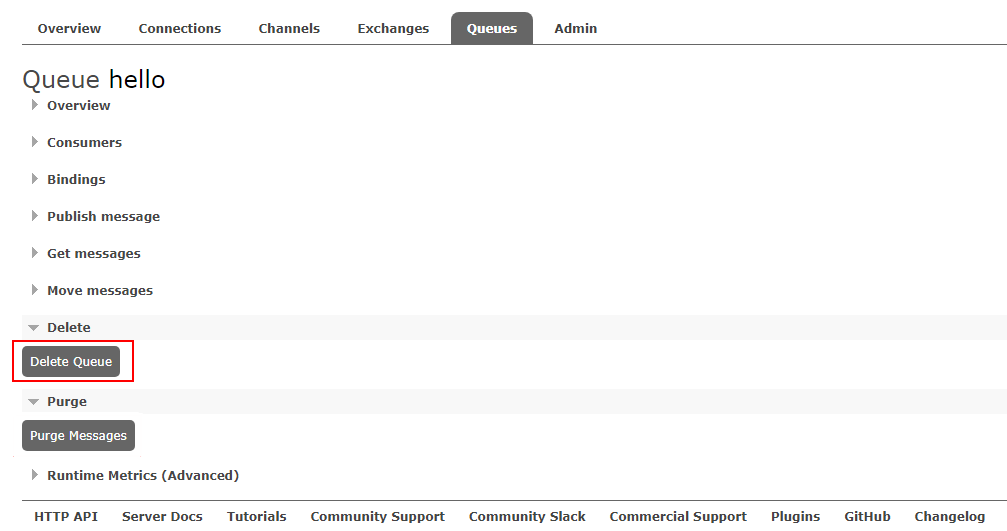
- Click Delete Queue.
Figure 2 Deleting a queue


Deleting a queue removes all its configurations including exchange-queue bindings permanently.
In the queue list in the Overview area, check that the deleted queue is removed.
Add a policy to delete multiple queues at a time. The policy has the same prefix as the queues to be deleted, and the queue TTL is 1 ms.
- Log in to the RabbitMQ management UI.
- On the Admin > Policies page, add a policy.
Figure 3 Adding a policy to delete queues in batches

Table 1 Policy elements Parameter
Description
Name
The policy name, which can be customized.
Pattern
Queue matching mode. Enter a queue name. Queues containing this queue name will be matched.
If this parameter is set to .*, all queues are matched. If this parameter is set to .*queue-name, all queues whose names contain queue-name are matched.
Apply to
Object to which the policy applies. Select Queues.
Priority
A larger value indicates a higher priority.
Definition
TTL, in milliseconds. Set expires to 1, indicating that the queue expiration time is 1 ms.

Deleting a queue removes all its configurations including exchange-queue bindings permanently.
- Click Add policy.
In the queue list in the Overview area on the Queues page, check that the deleted queue is removed.
- After the queues are deleted, choose Admin > Policies, locate the row containing the policy added in 2, and click Clear to delete the policy.
If this policy is retained, it will also apply to queues created later, and queues may be deleted by mistake.Figure 4 Deleting the policy

Related Document
To delete a queue by calling an API, see Deleting Specified Queues in Batches.
Feedback
Was this page helpful?
Provide feedbackThank you very much for your feedback. We will continue working to improve the documentation.See the reply and handling status in My Cloud VOC.
For any further questions, feel free to contact us through the chatbot.
Chatbot


