Input Node
The Input node is used to provide input information during workflow running.
In some complex workflow scenarios, certain nodes need additional user input during execution. If the upstream node does not obtain the information, you can add an Input node to collect the information. The workflow execution is temporarily interrupted when the workflow reaches the Input node until the node collects necessary user input.
The Input node is an optional node. If it does not need to be configured, skip this section.
To configure the Input node, perform the following steps:
- Click Add Node at the bottom of the canvas, drag the Input node from the node drawer to the canvas, and click the node to open the node configuration page.
- Configure the Input node by referring to Table 1.
Table 1 Input node configuration Configuration Type
Parameter Name
Description
Configuration Example (Scenario-based)
Parameter configuration
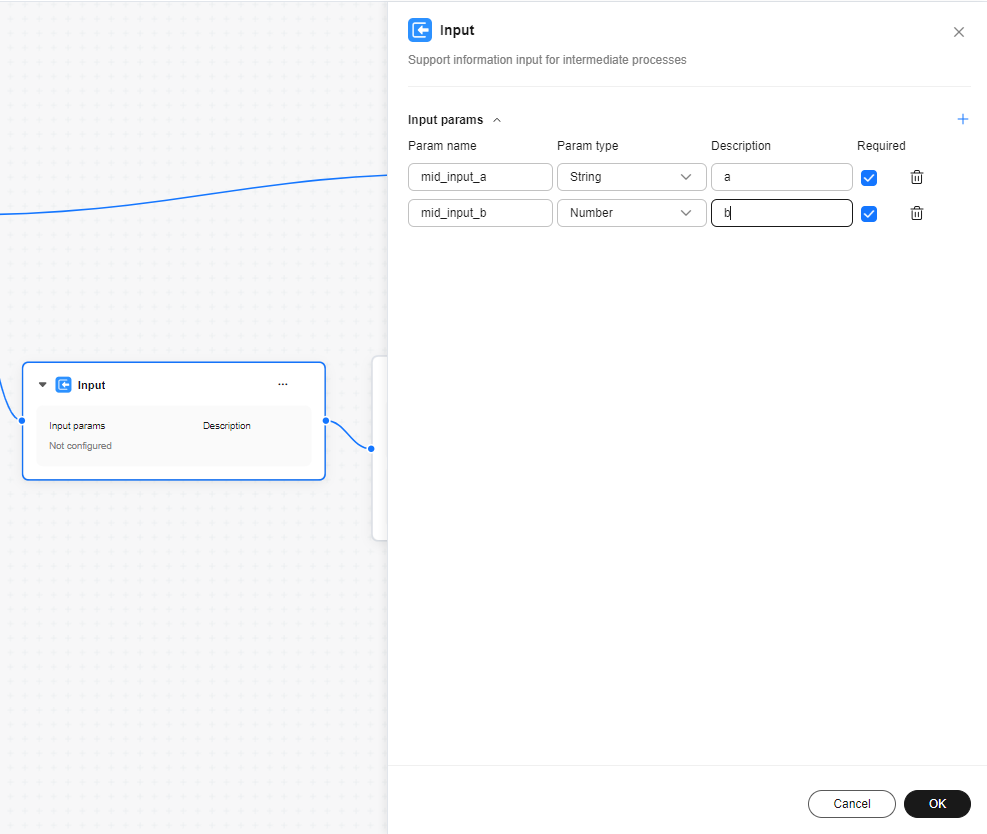
Input params
You can configure one or more input parameters, which can be referenced by subsequent nodes.
- Param name: The value can contain only letters, digits, and underscores (_), and cannot start with a digit.
- Param type: The value can be String, Integer, Number, Boolean, Object, Array, or File.
- Description: description of the input parameter.
After one or more input parameters are configured, the workflow is interrupted when the workflow runs to the node. The workflow continues only when all input parameters are set and each input parameter can be referenced by the downstream node.
For example, if a Plugin node needs an input parameter city, you can configure an Input node in the upstream node of the Plugin node to set the value of city, and then the Plugin node references the city parameter of the Input node.
Figure 1 Input node configuration example
- After completing the configuration, click OK.
- Connect the Input node to other nodes.
Feedback
Was this page helpful?
Provide feedbackThank you very much for your feedback. We will continue working to improve the documentation.See the reply and handling status in My Cloud VOC.
For any further questions, feel free to contact us through the chatbot.
Chatbot


