Managing Packages
Uploading a Package
- Access Release Repos.
- Click Upload.
- In the displayed dialog box, enter the required information and click Upload.
- Target Repository: current release repos.
- Version: set the version number for the package.
- Upload Mode: select Single file or Multiple files. Single file is selected by default here.
- Path: After you set the path name, a folder with that name is created in the Repo View, where the uploaded package will be stored.
- File: select the package from your local PC to upload.
- The uploaded package is saved in the file list of release repos.
Click
 in the Operation column of a package to change its name.
Click
 in the Operation column of a package to download it to the local PC.
Click
 in the Operation column of a package to delete it.
Viewing/Editing a Package in release repos
On the release repos page, you can view or edit the package details, including basic information, build information, and build packages.
Access the release repos homepage and click the name of a package. A drawer is displayed, showing the package details. The release repos details are displayed on the Basic Information, Build Information, and Build Packages tab pages.
- The Basic Information tab page displays the package name, version, size, path, download address, creator, creation time, checksum, and other information.
You can click
 in the upper-right corner to change the name and release version of the package. (The release version archived by CodeArts Build is the build sequence number by default.)
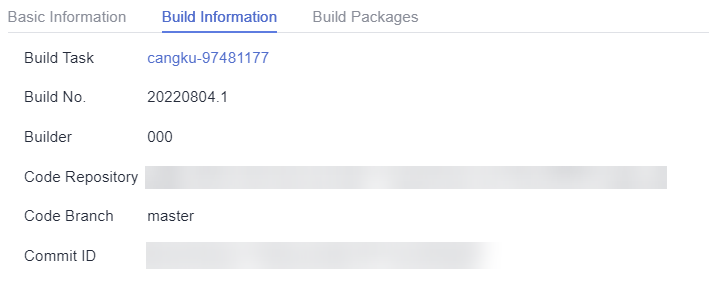
- The Build Information tab page displays the build task, build No., builder, code repository, code branch, and commit ID of the generated package. Click Build Task to link to the task in CodeArts Build.

- The Build Packages tab page displays the archiving records of the package uploaded through build tasks. You can click
 to download a package.

Feedback
Was this page helpful?
Provide feedbackThank you very much for your feedback. We will continue working to improve the documentation.See the reply and handling status in My Cloud VOC.
For any further questions, feel free to contact us through the chatbot.
Chatbot


