
Configuring the Navigation Bar Menu of an Application
After developing an application, you can set navigation menus for the application to improve user experience and enhance application usability and functionality. One or more navigation menu tabs can be configured for an application.
Configuring the Navigation Bar Menu
- Log in to the application designer by referring to Logging In to the Application Designer.
- On the Home page, click Application Navigation Settings.
- Set the main navigation.
- On the Main Navigation tab page, click New and select Group for Menu Property. Figure 1 Creating a group directory

Table 1 Parameters for creating a group Parameter
Description
Name
Set the name of the group directory.
Value: 1–80 characters.
Unique ID
Unique ID of a group directory in the system.
Value: 1–64 characters.
Group Icon
Click Change to set the group icon. In the Select Icon page, select the required group logo. You can also click Upload to use a local image as the group logo.
- After the setting is complete, click Save.
- Select the directory for which a group has been created, click New, set Menu Property to Menu Item, set other parameters, and click Save. Figure 2 Creating a menu item

Table 2 Parameters for creating a menu item Parameter
Description
Name
Name of a new menu item.
Value: 1–80 characters.
Unique Code
Unique ID of a menu item in the system. The naming requirements are as follows:
- The value cannot exceed 64 characters, including the prefix namespace.
To prevent duplicate data names among different tenants, each tenant must define a unique namespace when first creating an application. A tenant can create only one namespace. After being created, the namespace cannot be modified.
- Start with a letter and can contain only letters, digits, and underscores (_). It cannot end with an underscore (_).
Description
Enter the description of the menu item as required.
Value: 1–255 characters.
Icon
Click Change to set the icon. You can select a preset icon from Select Icon. You can also click Upload to use a local image as the menu icon.
Link To Target
Type of the navigation tab, which corresponds to the page content rendered by the menu item.- None: The default page in the application is displayed, which is used to display information about personal tasks.
- Page: Associates and displays a standard page, advanced page, report, or others. For details about how to create a page, see Standard Pages and Advanced Pages.
- Process: Associates and displays enabled BPMs. For details about how to create a BPM, see BPMs.
- External Link: A URL can be entered for association. The web page or page corresponding to the URL is displayed.
Displayed Forb
Whether to display the created menu item in the Desktop or Mobile application.
Visible To
This menu item cannot be configured. By default, all users can view this menu item.
- The value cannot exceed 64 characters, including the prefix namespace.
- After configuring the navigation menu of the application, click Run > Run Now on the top of the page to preview the effect.
- On the Main Navigation tab page, click New and select Group for Menu Property.
- Set other settings of the main navigation.
- On the Main Navigation tab page, click More Settings to set the initial page of the application and select the resident menu at the bottom of the mobile application. Figure 3 More Settings

- Sets the initial page of an application, which is used to load the initial page of the application and is not a page in the navigation menu.
- First menu: This parameter is selected by default.
- Custom initial page: You can specify a standard or advanced page as the initial page. For details about how to create a page, see Standard Pages and Advanced Pages.
- Initial Page Opening Mode: If you select Custom initial page, you need to specify the opening mode, that is, opening the initial page by accessing the application navigation or opening the initial page as an independent page.
- Set the menu items on bottom bar of the mobile view.
- Default: This parameter is selected by default.
- Custom: If this parameter is selected and no customized configuration is available in the configuration box, the menus are displayed in sequence.
- After the setting is complete, click Save.
- On the Main Navigation tab page, click More Settings to set the initial page of the application and select the resident menu at the bottom of the mobile application.
- Customize the setting menu of an application. Figure 4 Application setting menu

- On the Operations Menu tab page, click New and set Menu Property to Group to create a group directory. Figure 5 Creating a group directory

Table 3 Parameters for creating a group Parameter
Description
Name
Set the name of the group directory.
Value: 1–80 characters.
Unique ID
Unique ID of a group directory in the system.
Value: 1–64 characters.
Group Icon
Click Change to set the group icon. In the Select Icon page, select the required group logo. You can also click Upload to use a local image as the group logo.
- After the setting is complete, click Save.
- Select the directory for which a group has been created, click New, set Menu Property to Menu Item, set other parameters, and click Save. For details about the parameters for adding menu items to a group, see Table 2.Figure 6 Creating a menu item

- On the Operations Menu tab page, click New and set Menu Property to Group to create a group directory.
- Customize the user menu in the upper right corner of an application.
- On the System Menu tab page, choose a menu item, for example, User Settings.
- On the right of the page, select Hide System Menu and click Confirm.
After the setting is successful, the User Settings menu bar is hidden. (The system menu bar of the application can only be hidden and cannot be deleted.)
Figure 7 System menu settings
- On the main menu, choose Run > Run Now to preview the effect.
On the preview page, click the username in the upper right corner. The User Settings menu bar is not displayed.
Figure 8 Preview effect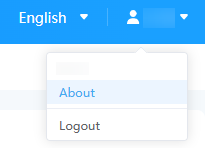
Feedback
Was this page helpful?
Provide feedbackThank you very much for your feedback. We will continue working to improve the documentation.See the reply and handling status in My Cloud VOC.
For any further questions, feel free to contact us through the chatbot.
Chatbot


