Getting Started
This section describes how to use Pulsar. For details, see Pulsar Overview.
- 9527 for the Pulsar manager node
- 2181, 2888, and 3888 for Pulsar ZooKeeper nodes
- 8000, 3181, 4181 for Pulsar bookie nodes
- 6650, 6651, 8080, 8443 for Pulsar broker nodes

- By default, this solution uses Pulsar 3.1.0 and deploys Java JDK-21 and Pulsar Manager 0.4.0.
- A cluster named pulsar-cluster has been created in Pulsar by default.
A security group is a collection of access control rules for traffic to and from cloud resources, such as cloud servers, containers, and databases. Cloud resources associated with the same security group have the same security requirements and are mutually trusted within a given VPC.
You can modify security group rules, for example, by adding, modifying, or deleting a TCP port, as follows:
- Adding a security group rule: Add an inbound rule and enable a TCP port if needed.
- Modifying a security group rule: Inappropriate security group settings may introduce serious security risks. You can modify security group rules to ensure the network security of your ECSs.
- Deleting a security group rule: If the source or destination IP address of an inbound or outbound security group rule changes, or a port needs to be disabled, you can delete the security group rule.
Procedure
- Log in to the ECS console to check whether the ECSs have been successfully created and check the EIP of the manager node.
Figure 1 Checking ECSs and the EIP (marked as Manager-ip) of the Pulsar manager node

- Log in to the Pulsar Manager.
After ECSs are created, the environment starts to be deployed in the background. About 20 minutes later, the Pulsar cluster is created. Then, you can log in to the Pulsar Manager at http://manager-ip:9527.

- Before logging in, ensure that port 9527 has been enabled on the Pulsar manager node for the client. If it is not enabled, modify security group rules.
- By default, admin is configured as the administrative user of the Pulsar cluster, and JSON Web Token (JWT) authentication is enabled.
- The default username and password are used for login.
- Default username: admin
- Default password: password used for creating ECSs
Figure 2 Pulsar Manager login page
- (Optional) Check whether the Pulsar cluster has been deployed.
Figure 3 Logging in to any ZooKeeper node and connecting to the ZooKeeper server
 Figure 4 Checking whether the active ZooKeeper node is the same as the existing ZooKeeper node
 Figure 5 Checking whether the active bookie node is the same as the existing bookie node
 Figure 6 Checking whether the active broker node is the same as the existing broker node
- Add the new environment to Pulsar Manager.
Figure 7 Adding the new environment with any broker or bookie node

- View Pulsar details.
Figure 8 Viewing Pulsar details (built-in cluster name: pulsar-cluster)

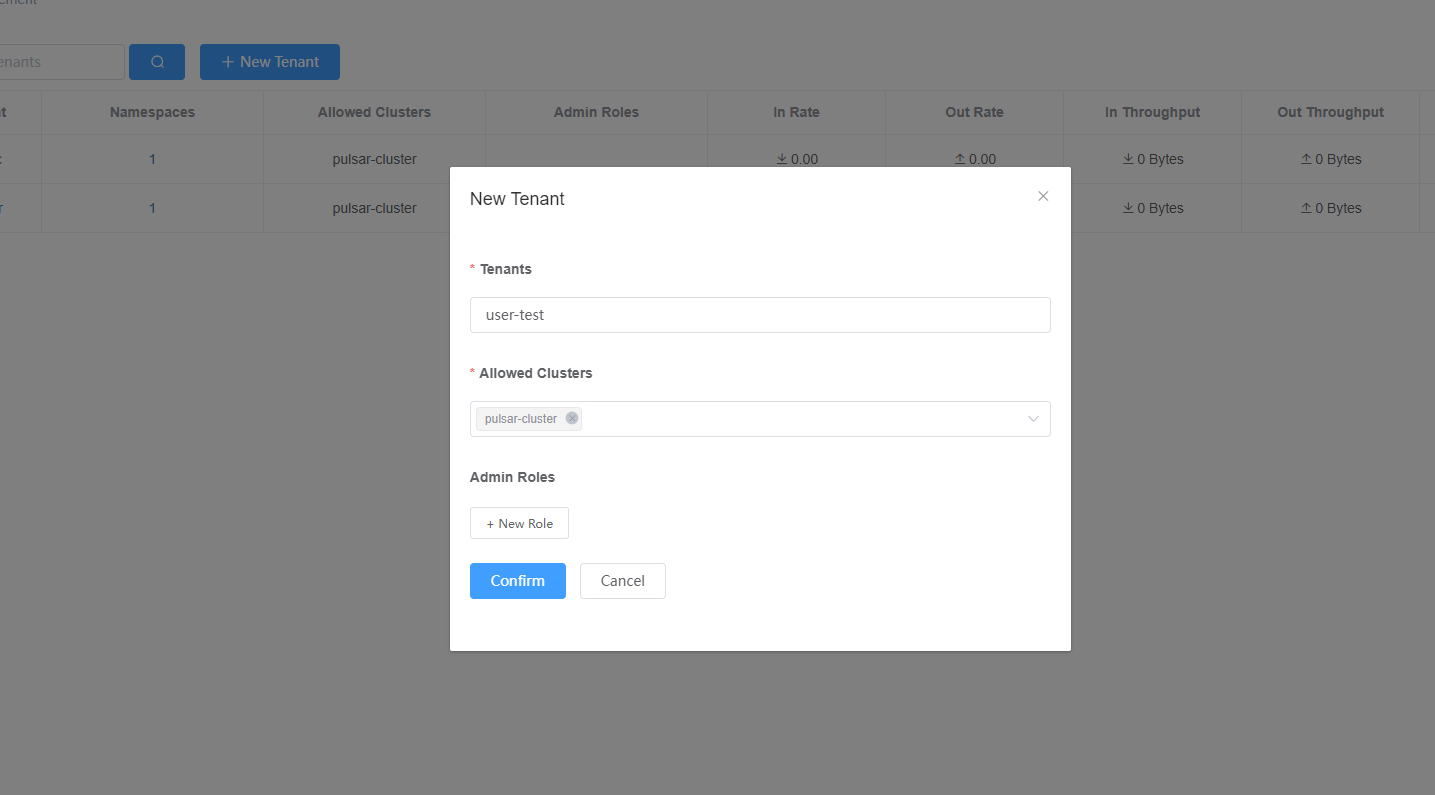
- Add a new tenant.
Figure 9 Adding a new tenant

- Create a namespace.
Figure 10 Creating a namespace

- Add a topic.
Figure 11 Adding a topic

- Generate a token.
Figure 12 Generating a token

The Pulsar cluster has been deployed. You can now integrate the Pulsar applications into your applications.
Feedback
Was this page helpful?
Provide feedbackThank you very much for your feedback. We will continue working to improve the documentation.See the reply and handling status in My Cloud VOC.
For any further questions, feel free to contact us through the chatbot.
Chatbot


