Customizing an Application-Level Role
You can create application-level custom roles for each application. These roles are valid only for that application. You can use them to let users check or use certain pages in the application.
The following uses the application editor role as an example to show how to customize an application-level role. An application editor has the following permissions:
- App permissions: View and edit applications.
- App item permission: Access the "Supplier List" form and "Supplier Annual Assessment View" in the application, but cannot view the All view.
- Role members: Add user like Zhang San as an application editor. Zhang San is an enterprise user.
Procedure
- Log in to the no-code workbench by referring to Logging In to the No-Code Workbench.
- In All Apps, hover over the target application's … and choose Edit.
- On the right of the page, click App Security.
- Add a custom role to the application.
- Click
 next to Custom Roles, set the role name, description, and role permissions.
Figure 1 Customizing an application-level role
- Click Save. The custom role is created.
You can view the created role in the custom role list on the left.
Figure 2 Viewing the created custom role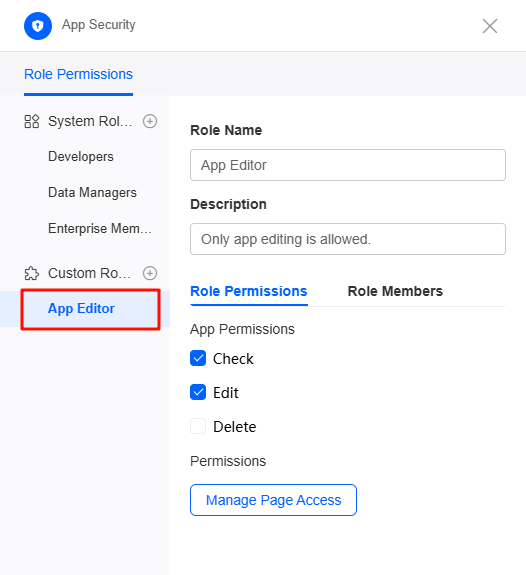
- Click
- Set the application item permission for the role.
You can give role members permission to access specified pages in an application by setting it up in the Permissions area.
- Click the custom role (for example, "Application editor") and click the Role Permissions tab on the right.
- Click Manage Page Access under Permissions.
- In the Navigation Pane tab page, set the permissions to view navigation items on the homepage of the current application.
Figure 3 Setting the permissions to view navigation items
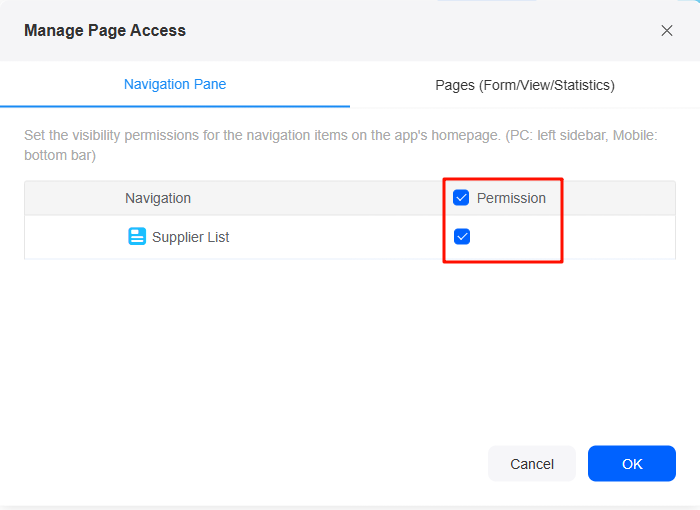
- In the Pages (Form/View/Statistics) tab page, set the permission to view and edit forms, views, and statistics, and click OK.
For example, the application editor can view only the "Supplier Annual Assessment" view in the application, but cannot view the All view. Under Data Permission, click Settings to set what the role can do with the data.Figure 4 Setting the permission to view a single page

- Add a user to the role.
The users added here are portal users created in the configuration center. A portal user is an application user. On the platform, you can give a portal user developer permission so they can help with application development.
- On the Role Members tab page, click Add.
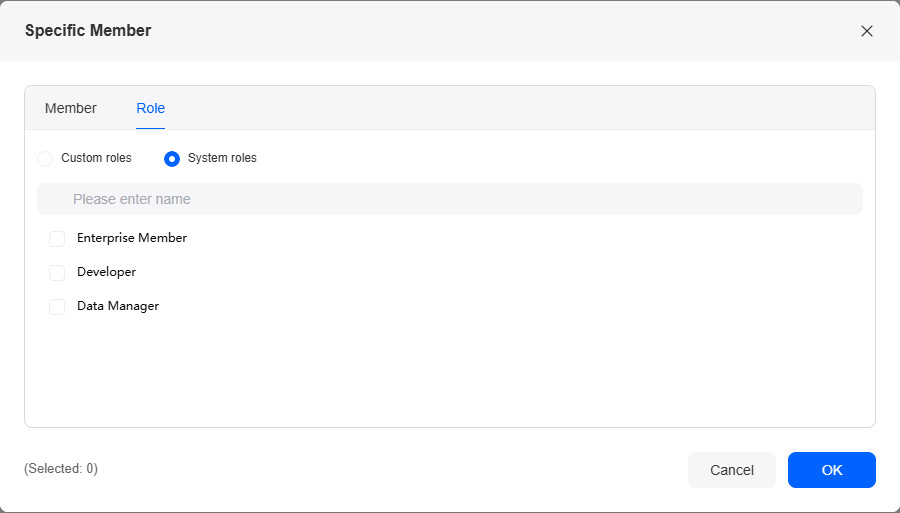
- Select the target user by member or role and clik OK to return to the roles and members page.
Members and roles to be added must be created in the configuration center in advance. For details, see Customizing a System-Level Role and Adding Users to a System-Level Role.Figure 5 Selecting a user by member
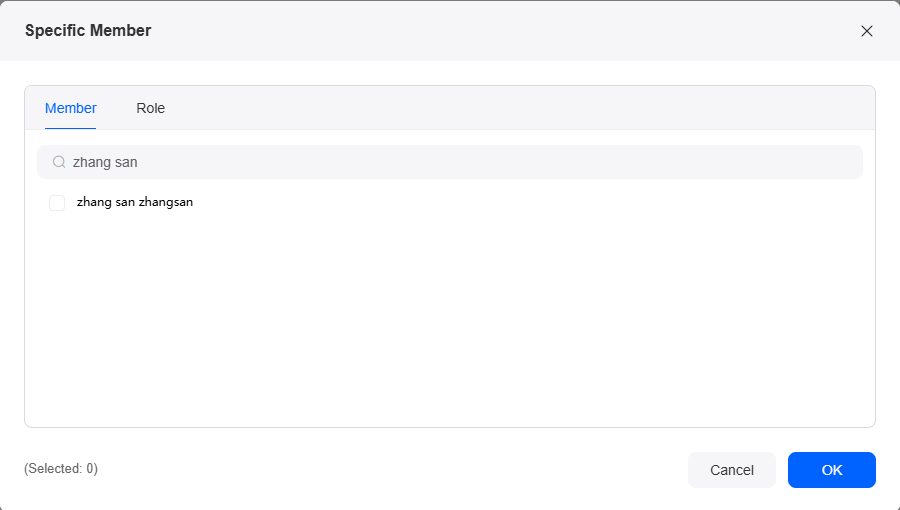 Figure 6 Selecting a user by role
- In the user list, click Save.
Figure 7 Adding a user

- Check whether the application-level role is added.
- Log in to the no-code workbench as a member of the role (for example, Zhang San) by referring to Logging In to the No-Code Workbench.
Figure 8 Entering the account name and password

- Click . On the All tab page, you can view the target application.
Figure 9 Viewing the supplier list application

- Move the cursor to the application and click
 . The View and Edit buttons are displayed.
Figure 10 View button
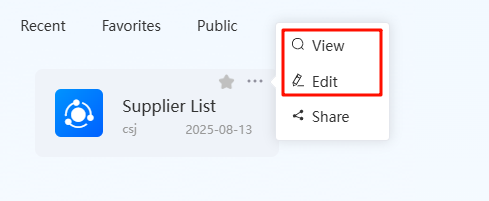
- Click Edit. The application editing page is displayed, and only the "Supplier Annual Assessment View" can be viewed.
Figure 11 Application editing page

- Log in to the no-code workbench as a member of the role (for example, Zhang San) by referring to Logging In to the No-Code Workbench.
Feedback
Was this page helpful?
Provide feedbackThank you very much for your feedback. We will continue working to improve the documentation.See the reply and handling status in My Cloud VOC.
For any further questions, feel free to contact us through the chatbot.
Chatbot


