Managing Test Projects
After a test project is created, you can modify, delete, import or export it.
Modifying a Test Project
- Log in to the CodeArts PerfTest console and choose PerfTest Projects in the navigation pane.
- In the PerfTest project list, choose
 , enter the project name or description, and click OK.
Deleting a Test Project
- Log in to the CodeArts PerfTest console and choose PerfTest Projects in the navigation pane.
- In the PerfTest project list, choose
 > Delete Project. Delete the project as prompted.
 - You can also select one or more test projects, click Delete, and delete them as prompted.

Modifying a Tag
- Log in to the CodeArts PerfTest console and choose PerfTest Projects in the navigation pane.
- In the PerfTest project list, choose
 > . The Resource Tags page is displayed. For details, see Configuring Resource Tags.
Exporting a Test Project
You do not need to write a test project from scratch. Instead, find a project similar to the service model, export the test project, slightly modify it, and import the test project.
- Log in to the CodeArts PerfTest console and choose PerfTest Projects in the navigation pane.
- Select one or more projects to be exported from the PerfTest project list, and click Export. Then save the exported test project file ProjectList(Serial number).json to the local host.
- If SLA rules have been configured for a project, the SLA rules will not be exported when you export the project.
- If a file with global variables has been uploaded to a project, this file will not be exported with the project.
- If a test project contains encrypted global variables, the project cannot be imported after being exported.
- Projects that use the MQTT protocol cannot be exported.
- Modify parameters and the project name (the name must be unique) in the file as required, and save the file. Do not change the format of the ProjectList(Serial number).json file.
Importing a Test Project
Test projects of PerfTest and JMeter can be imported to CodeArts PerfTest.
- Log in to the CodeArts PerfTest console, choose PerfTest Projects in the navigation pane, and click Import.
- Import a PerfTest project. Currently, projects that use the MQTT protocol cannot be imported.
- Set Project Type to PerfTest project.
- Click Select File, select a project file in JSON format, and click Import.
The name of the imported project must be unique in CodeArts PerfTest. Otherwise, the project cannot be imported.
- Import a JMeter project.
- Set Project Type to JMeter project.
- Click Select File, select a project file in .jmx format, and click Import.
Pay attention to the following points when importing a JMeter project:
- Ensure that the fields in the JMeter script are supported in CodeArts PerfTest. For details, see Mapping Between JMeter and PerfTest Fields.
- JMeter parses the following contents: thread group, HTTP request, HTTP header manager, regular expression extractor, user parameter, user-defined variable, default HTTP request value, and fixed timer.
- Random variables are not supported.
- To ensure the accuracy of data import, do not use variables with the same name.
- A JMeter script cannot exceed 5 MB.
- After the project is imported, click Close. You can modify the test project by referring to Modifying a Test Project and Managing Transaction Request Information.
Viewing a Test Project
You can view the existing projects.
- Log in to the CodeArts PerfTest console and choose PerfTest Projects in the navigation pane.
- Enter a test project name in the search box
 in the upper right corner to search test projects.
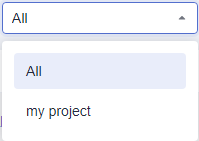
You can also select a range to view test projects from the drop-down list
 .
.- All: Displays all projects within the current user's permission scope, including projects created by subaccounts.
- my project: Displays only projects created by the current account.
Feedback
Was this page helpful?
Provide feedbackThank you very much for your feedback. We will continue working to improve the documentation.See the reply and handling status in My Cloud VOC.
For any further questions, feel free to contact us through the chatbot.
Chatbot


