Configuring a Cold Table
This section describes how to configure a cold table for a TaurusDB instance, including enabling cold and hot data separation, creating a cold table, and (optional) migrating back a cold table.
After migrating back a cold table, you can view its statistics, including the cold table name, validity period, and retention period. If the retention period is longer than or equal to the validity period, you can delete the cold data remaining in OBS after migration.
You can configure a cold table in either of the following ways:
- On the console: You can enable cold and hot data separation, and create and migrate back a cold table on the console.
- Using SQL statements: You can enable cold and hot data separation, and create, query, and migrate back a cold table using SQL statements. If there are more than 100,000 tables in your DB instance, you can create and migrate back a cold table only using SQL statements.
Creating and Migrating Back a Cold Table
- Log in to the TaurusDB console.
- On the Instances page, click the instance name.
- In the navigation pane, click Cold and Hot Data Separation.
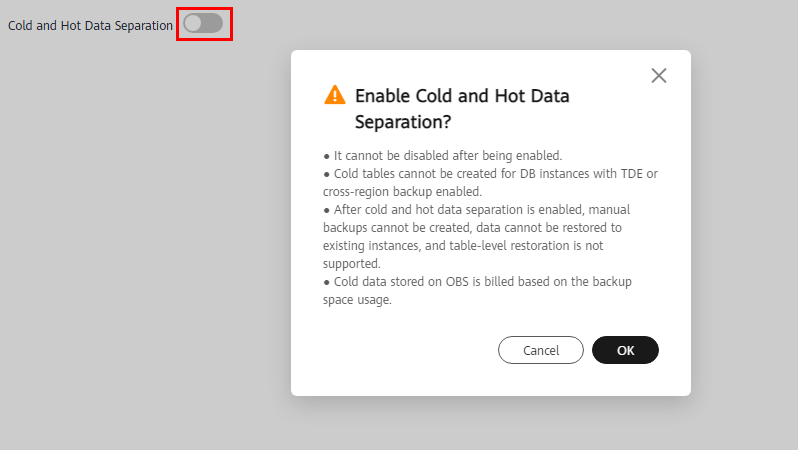
- Click
 on the right of Cold and Hot Data Separation. In the displayed dialog box, click OK.
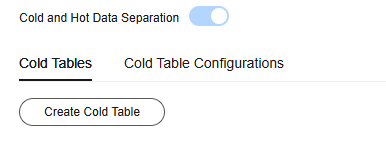
Figure 1 Enabling cold and hot data separation
- On the Cold Tables tab, click Create Cold Table.
Figure 2 Creating a cold table

- In the displayed dialog box, search for the name of the database, table, or partition to be archived as cold data.
- Select the tables or partitions to be archived as cold data.
Figure 3 Selecting the tables to be archived

- Click OK.
- After the cold table is created, view its details.
Figure 4 Viewing details about a cold table

- If you need to modify a cold table or frequently query the table, click Migrate Back in the Operation column to migrate the table back to the DB instance.

You are advised to migrate back cold tables during off-peak hours because this operation can take a long time.
Figure 5 Migrating back a cold table
- Confirm the task and click OK.
When configuring a cold table using SQL statements, you need to use DAS or a client (such as the mysql client) to connect to your TaurusDB instance and then run the corresponding SQL statements. The following procedure uses DAS as an example.
- Log in to the TaurusDB console.
- On the Instances page, click the instance name.
- In the navigation pane, click Cold and Hot Data Separation.
- Click
 on the right of Cold and Hot Data Separation. In the displayed dialog box, click OK.
Figure 6 Enabling cold and hot data separation
- On the Basic Information page, click Log In in the upper right corner.
Alternatively, return to the Instances page, locate the instance, and click Log In in the Operation column.
Figure 7 Logging in to an instance
- On the displayed page, enter the username and password and click Test Connection. After the connection is successful, click Log In.
Figure 8 Login page

- Choose SQL Operations > SQL Query.
Figure 9 SQL Operations

- Configure a cold table using SQL statements.
- Creating a cold table
CALL dbms_schs.make_io_transfer("start", "database_name", "table_name", "partition_name", "", "obs");Example:
CALL dbms_schs.make_io_transfer("start", "test", "table1", "", "", "obs");Figure 10 Creating a cold table
- Creating a cold table
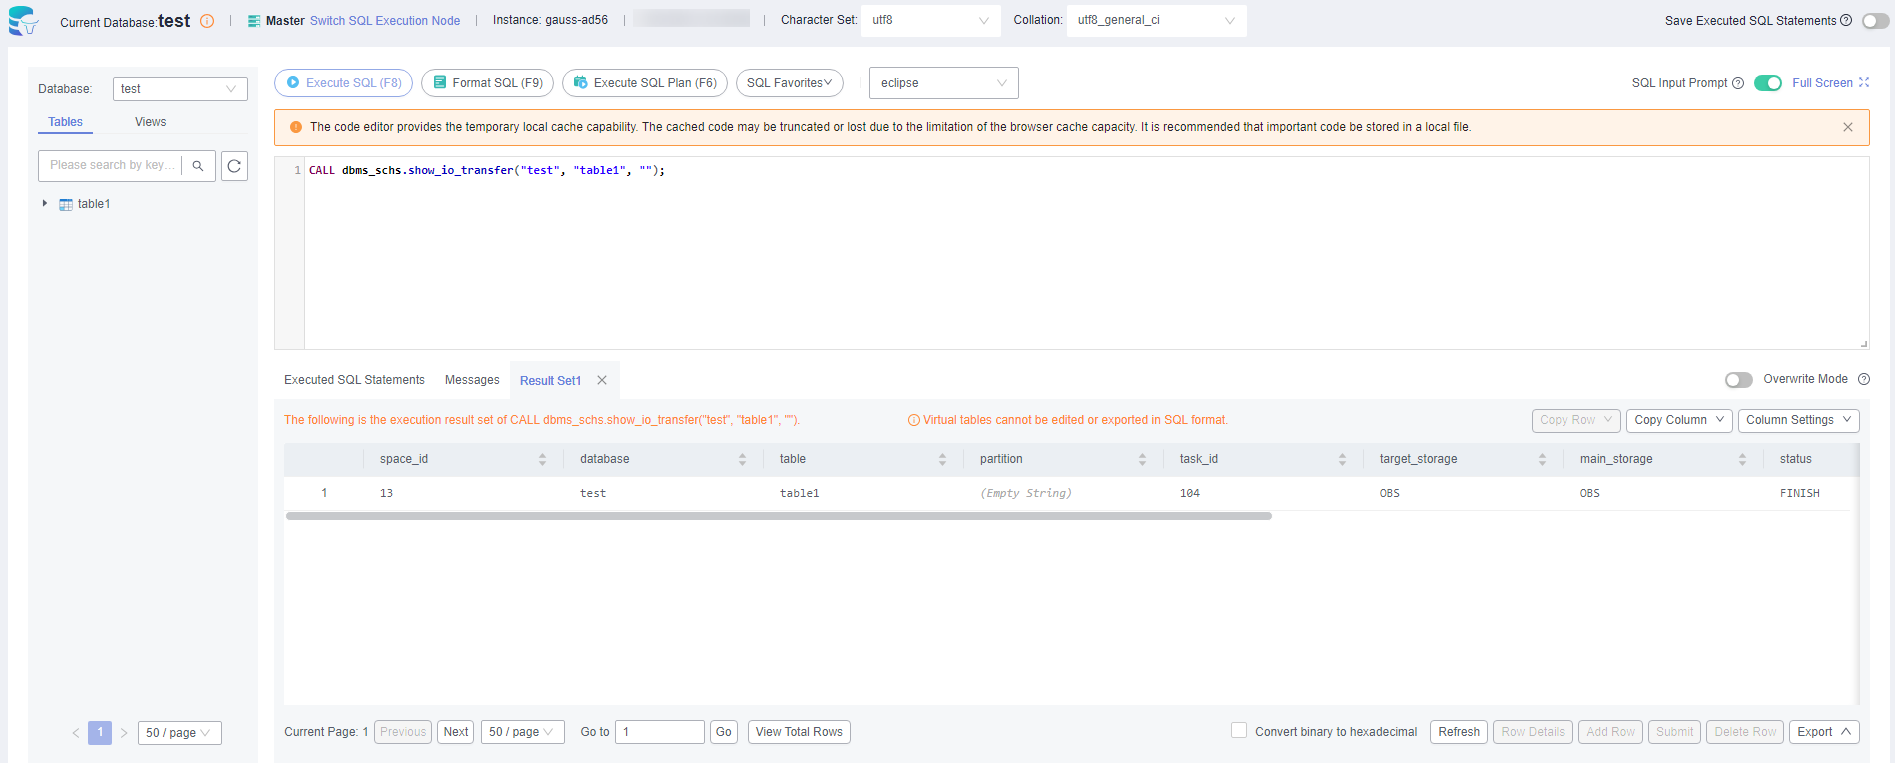
- Query the archiving or migration status.
CALL dbms_schs.show_io_transfer("database_name", "table_name", "partition_name");Example:
CALL dbms_schs.show_io_transfer("test", "table1", "");Figure 11 Querying the archiving or migration status
- (Optional) Query all cold tables on an instance as user root.
CALL sys.schs_show_all( "database_name", "table_name", "partition_name");
Examples:
- Querying all cold tables on an instance
CALL sys.schs_show_all( "", "", "");
- Querying all cold partitions or cold tables whose database name is test
CALL sys.schs_show_all( "test", "", "");
- Querying cold partitions or cold tables whose database name is test and table name is table1
CALL sys.schs_show_all( "test", "table1", "");
- Querying all cold tables on an instance
- Migrate back a cold table.
CALL dbms_schs.make_io_transfer("start", "database_name", "table_name", "partition_name", "obs", "");Example:
CALL dbms_schs.make_io_transfer("start", "test", "table1", "", "obs", "");Figure 12 Migrating back a cold table
Collecting Cold Table Statistics
- Log in to the TaurusDB console.
- On the Instances page, click the instance name.
- In the navigation pane, click Cold and Hot Data Separation.
- Click Cold Table Configurations and then Collect Statistics.
- When the instance status changes from Collecting cold table data... to Available, the statistics collection is complete. The list displays information about the current cold table, including the cold table name, validity period, and retention period.
Figure 13 Cold table information

Table 1 Parameter description Parameter
Description
spaceId
Specifies the tablespace ID.
ddId
Specifies the table ID.
Name
Specifies the database, table, and partition names.
Validity Period (s)
Specifies how many seconds a cold table needs to be retained after being migrated back.
The validity period is related to the retention period in the same-region backup policy. The value is calculated as (Backup retention days + Maximum backup interval) x 24 x 3,600.
Examples:
If the backup cycle is Monday to Sunday (data is backed up every day), the validity period is (Backup retention days + 1) x 24 x 3,600.
If the backup cycle is Monday, Tuesday, Friday, Saturday, and Sunday, the validity period is (Backup retention days + 3) x 24 x 3,600.
If the backup cycle is Sunday, the validity period is (Backup retention days + 7) x 24 x 3,600.
Retained (s)
Specifies how many seconds a cold table has been retained after being migrated back.
- If the cold table has been retained for as long as or longer than the validity period, click Delete in the Operation column to remove the cold data remaining in OBS after migration.
Feedback
Was this page helpful?
Provide feedbackThank you very much for your feedback. We will continue working to improve the documentation.See the reply and handling status in My Cloud VOC.
For any further questions, feel free to contact us through the chatbot.
Chatbot


