Automatic Renaming of Alert Names
Playbook Overview
This built-in playbook can automatically rename alerts. You can customize alert names with this playbook to meet your needs.
The Auto Alert Renaming playbook has matched the Auto Alert Renaming workflow. To configure this playbook, you need to configure the matched workflow and plug-ins the workflow uses.
The Auto Alert Renaming workflow has four plug-in nodes, one for obtaining alert type IDs, one for obtaining alert details, one SecMasterBiz node, and one for updating alert names. In this workflow, you only need to configure the SecMasterBiz node. This node is used to customize alert names.
Limitations and Constraints
Currently, only names for web shell attack alerts can be modified.
Configuring and Enabling the Playbook
This topic walks you through on how to configure the SecMasterBiz node, enable the Auto Alert Renaming workflow, and enable the Auto Alert Renaming playbook.
- Log in to the SecMaster console.
- In the navigation pane on the left, choose Workspaces > Management. In the workspace list, click the name of the target workspace.
Figure 1 Workspace management page

- Configure and enable the workflow.
- Copy a workflow version.
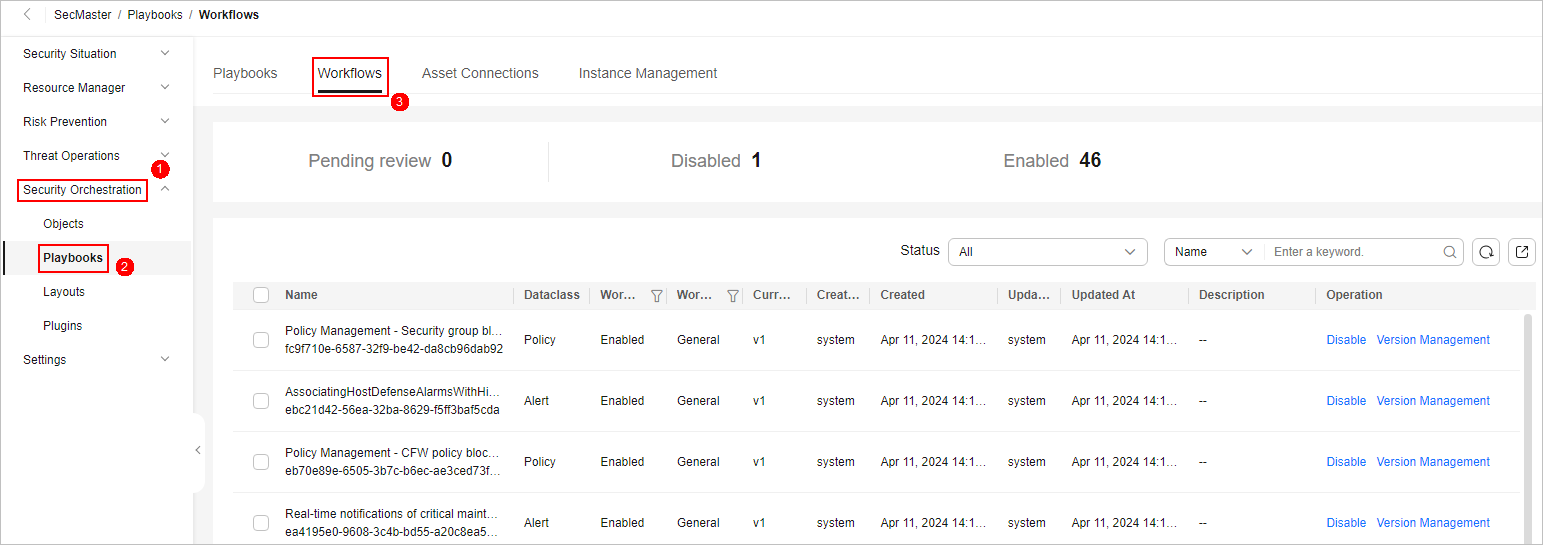
- In the navigation pane on the left, choose Security Orchestration > Playbooks. On the displayed page, select the Workflows tab.
Figure 2 Workflows tab

- Locate the row containing the Auto Alert Renaming workflow. In the Operation column, click Version Management.
Figure 3 Version Management page

- On the Version Management page displayed, go to the Version Information area, locate the row where the initial version (v1) is listed, and click Clone in the Operation column.
- In the displayed dialog box, click OK.
- In the navigation pane on the left, choose Security Orchestration > Playbooks. On the displayed page, select the Workflows tab.
- Edit and submit the workflow version.
- On the Version Management slide-out panel for the Auto Alert Renaming workflow, go to the Version Information area, locate the row containing the copied workflow version, and click Edit in the Operation column.
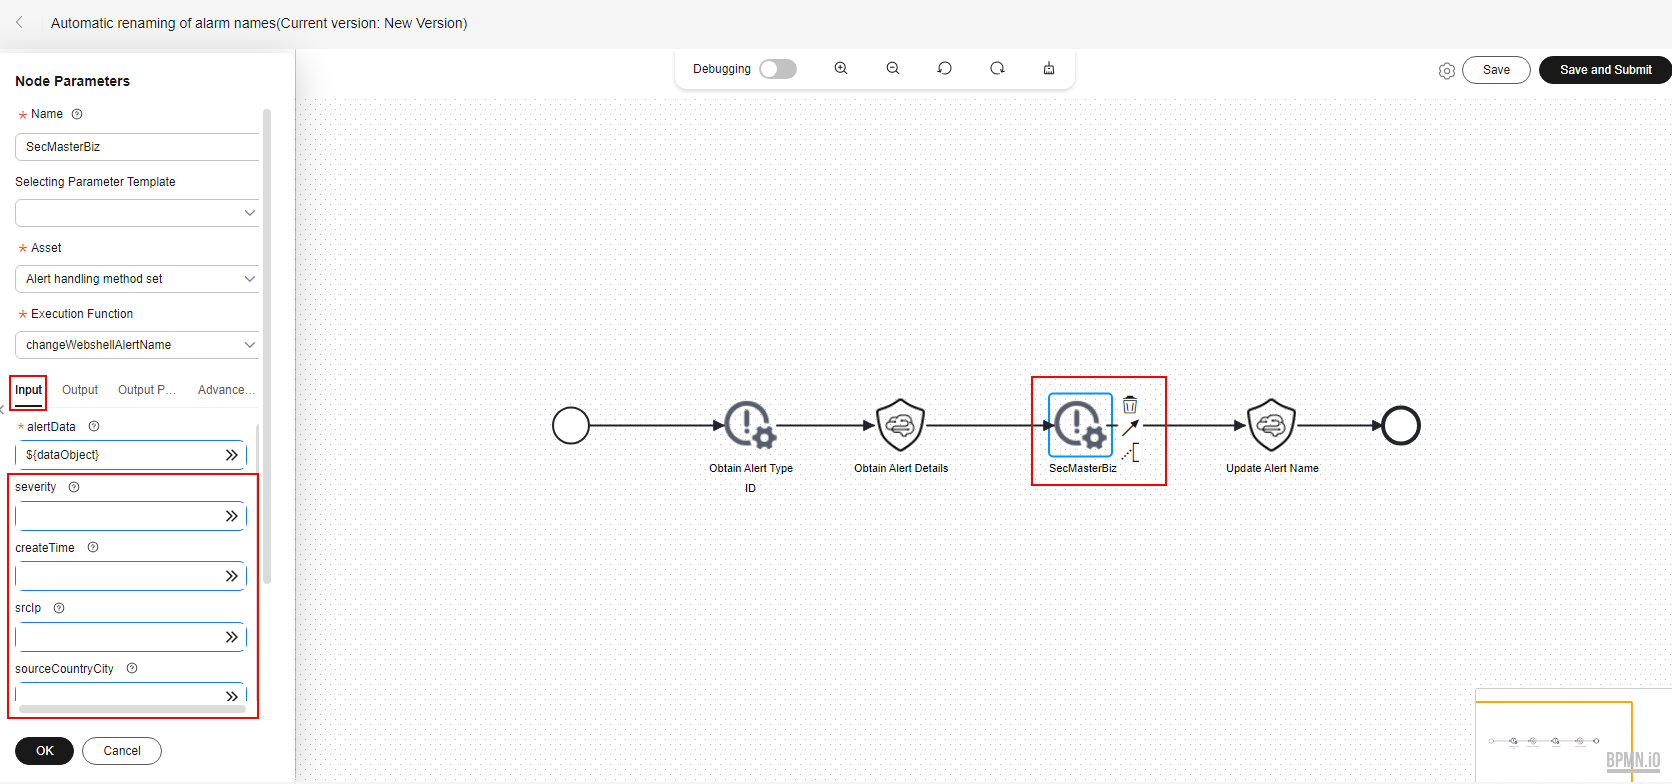
- On the drawing page, click the SecMasterBiz plug-in and configure Input parameters on the pane displayed from the left.
Details about SecMasterBiz plug-in parameters are listed below.
Figure 4 SecMasterBiz plug-in
SecMasterBiz is a plug-in used in the workflow for automatically renaming alert names. It analyzes and processes web shell alert names. You can combine alert names in the way you want and let the system return the alert names as you configured.
The SecMasterBiz plug-in contains multiple actions. The changeWebshellAlertName action provides several input parameters for you to customize. Each input parameter indicates an analysis dimension.
You can select different dimension parameters as required to combine alert names. If a parameter is not selected, then it will not be returned in alert names by default. If you enter y, this parameter is selected. If you enter n, this parameter is not selected. If you leave this parameter blank, this parameter is not selected.
Table 1 Parameter configuration description Parameter
Description
Value Range
severity
Alert severity.
y/n
createTime
Time the alert was created.
y/n
srcIp
Attack source IP address.
y/n
sourceCountryCity
Country or city from where the attack source IP address originated.
y/n
destinationIp
IP addresses attacked.
y/n
destinationCountryCity
Country or city where the attacked object locates.
y/n
- After the configuration is complete, click Save and Submit in the upper right corner. In the dialog box displayed, click OK.
- Review the workflow version.
- On the Workflows page, locate the Auto Alert Renaming workflow and click Version Management in the Operation column.
- On the displayed Version Management page, locate the row that contains the edited workflow version, and click Review in the Operation column.
- In the displayed dialog box, set Comment to Passed and click OK.
- Activate the workflow version.
- On the Version Management page, locate the row that contains the reviewed workflow version and click Activate in the Operation column.
- In the displayed dialog box, click OK.
After a workflow version is activated, the workflow is enabled by default.
- Copy a workflow version.
- Configure and enable the playbook.
- In the navigation pane on the left, choose Security Orchestration > Playbooks.
Figure 5 Accessing the Playbooks tab

- On the Playbooks, locate the row that contains the playbook for automatically renaming alert names, and click Enable in the Operation column.
- In the dialog box displayed, select the initial playbook version v1 and click OK.
- In the navigation pane on the left, choose Security Orchestration > Playbooks.
Verifying the Playbook
If the playbook for Automatic renaming of alarm names is enabled, you can verify the playbook status.
This topic describes how to verify a playbook.
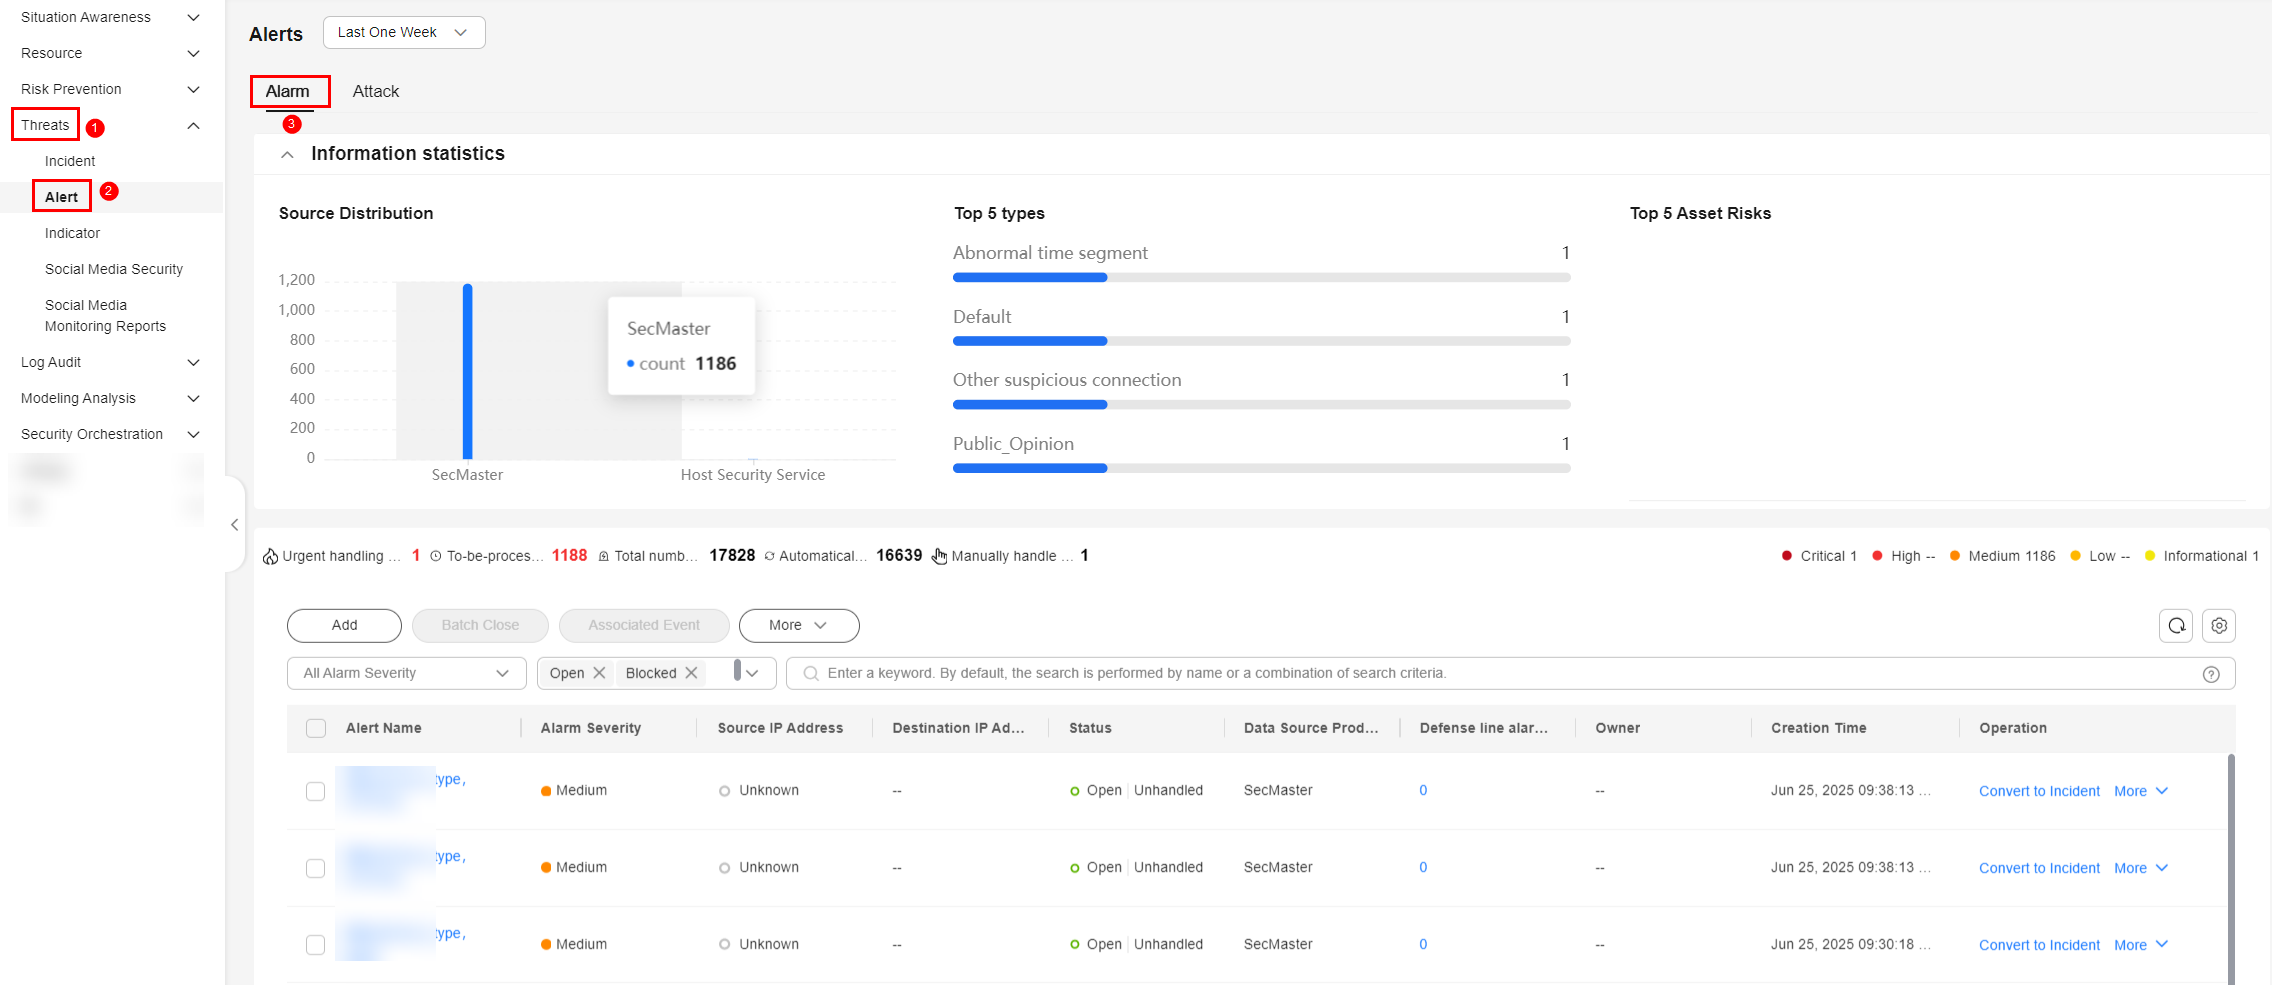
- In the navigation pane on the left, choose .
Figure 6 Alerts

- Click Add. Configure parameters in the Add slide-out panel.
- Alert Name: Enter a name for the alert.
- Alert Type: Select Web attacks and then Web shell.
- First Occurrence Time: Set the time when the alert occurs for the first time.
- Debugging data: Select Yes.
- Description: Description of the custom alert.
- Retain default values for other parameters.
- Click OK.
- Refresh the page and check whether alert names have been updated.
If the playbook is enabled, the playbook automatically processes new alerts and displays new alert names.
Figure 7 Output when no parameters are selected (default) Figure 8 Output when only severity is selected
Implementation Effect
The following figure shows default alert names.

The following figure shows customized alert names.

Feedback
Was this page helpful?
Provide feedbackThank you very much for your feedback. We will continue working to improve the documentation.See the reply and handling status in My Cloud VOC.
For any further questions, feel free to contact us through the chatbot.
Chatbot


