Example: Using Preset Components to Create a Containerized Data Access Application
In this example, preset components are used to save data to and read data from a container. This helps users understand the functions and usage of the preset components. This example shows the orchestration and connection capabilities of the components to help users get familiar with the canvas orchestration function.
- Log in to ModelArts Studio and access the required workspace.
- In the navigation pane, choose Application Development > Industrial Application Orchestration. On the Industrial Application Orchestration page, click Create Canvas in the upper right corner.
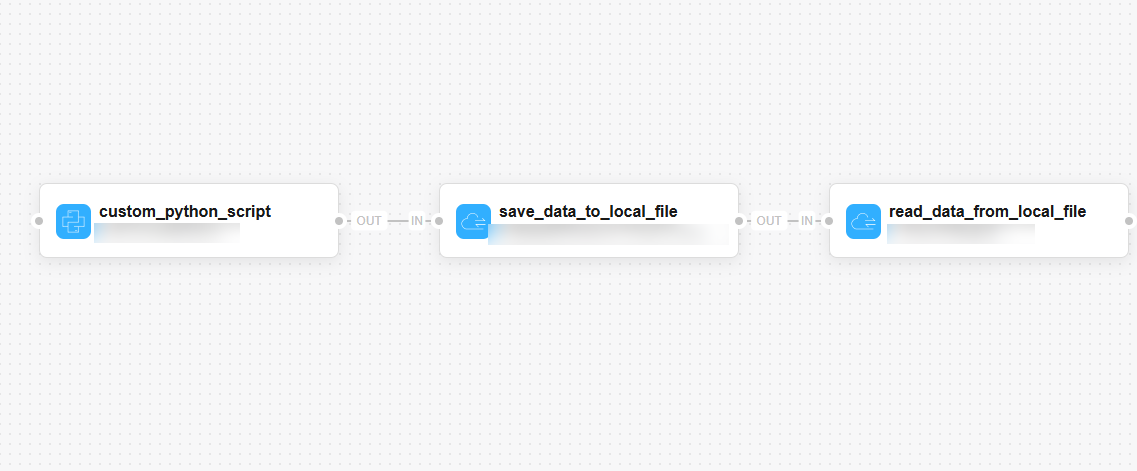
- Drag the custom_python_script, save_data_to_local_file and read_data_from_local_file components to the canvas in sequence and configure the connection as shown in the following figure.
Figure 1 Canvas overview
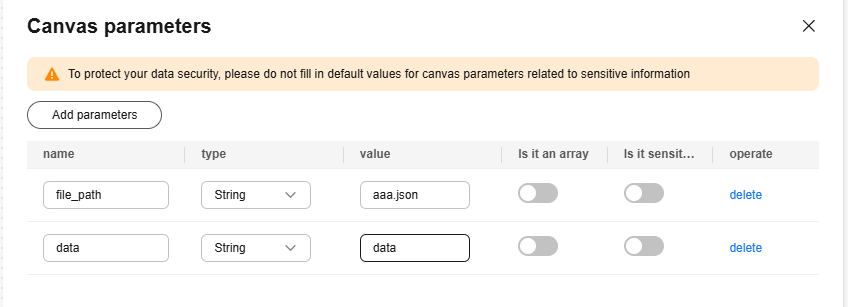
- Click Canvas parameters in the upper right corner of the canvas and set the file_path and data parameters, as shown in the following figure.
Figure 2 Setting canvas parameters
- Click the custom_python_script component and associate it with the canvas input parameters set in the previous step.
Figure 3 Configuring the custom_python_script component
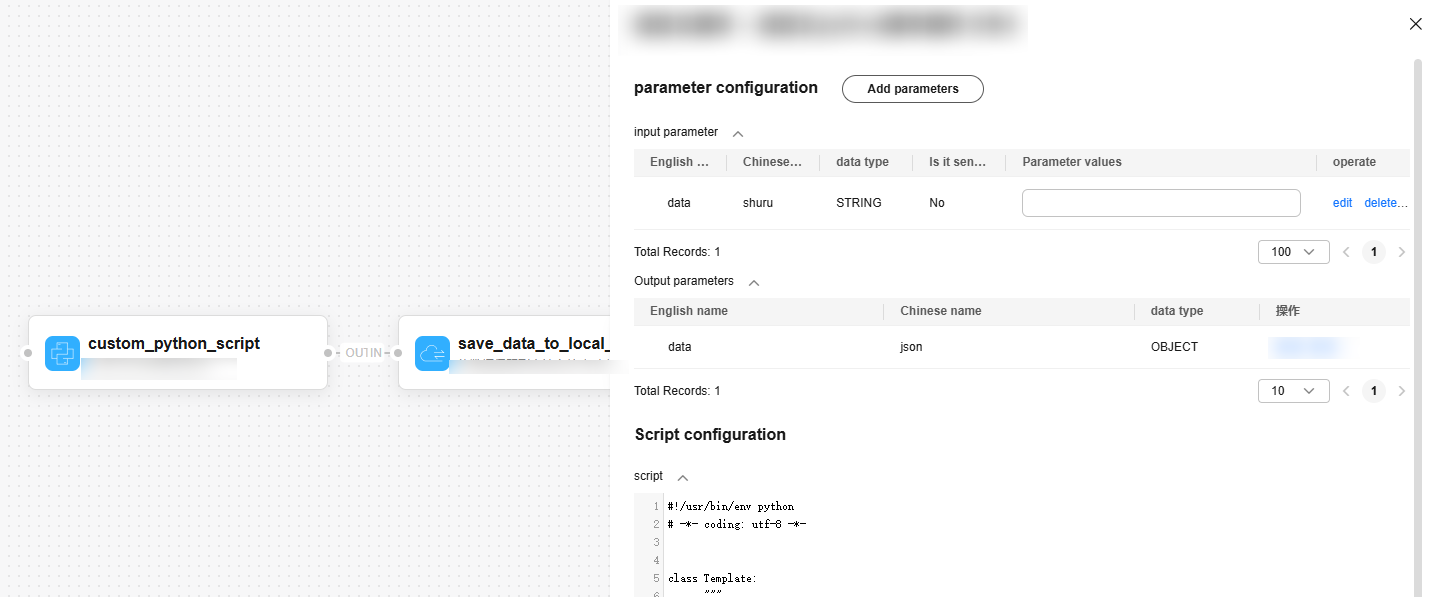
The code of custom_python_script is as follows:
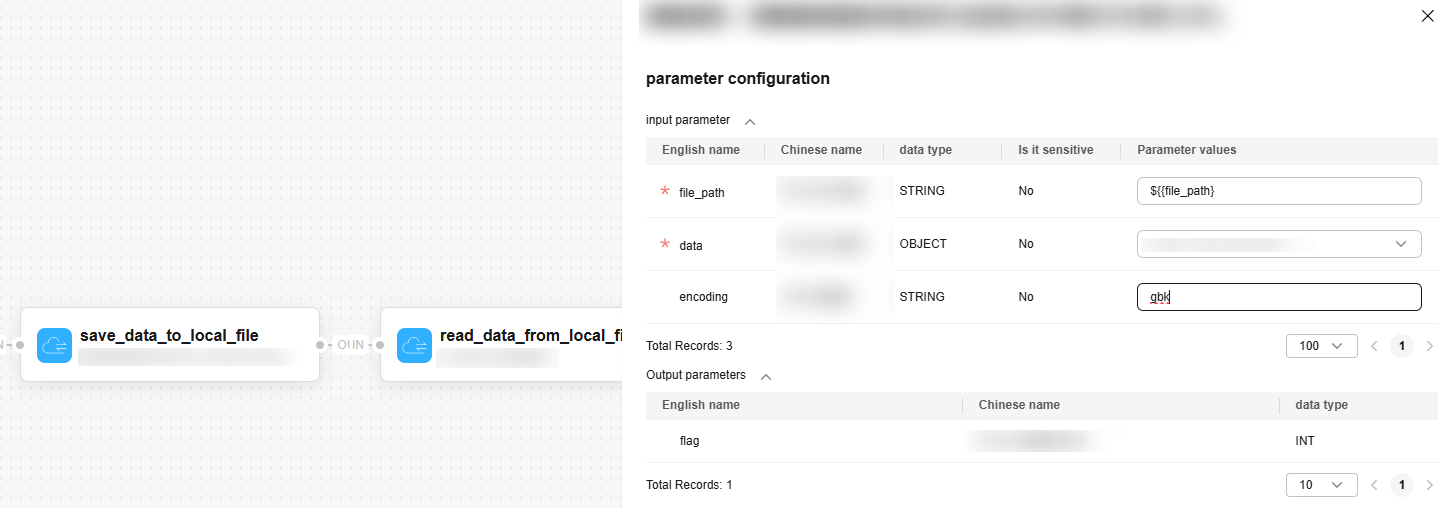
#!/usr/bin/env python# -*- coding: utf-8 -*-import base64import jsonclass Template: """ Python component template class. """ def __init__(self): """ Class initialization """ pass def process(self, params_dict: dict): data_input = params_dict.get("data_input") data = json.loads(data_input) return {"data": data} - Click the save_data_to_local_file component and associate the input parameters of the component with the output parameters of the previous node.
Figure 4 Configuring the save_data_to_local_file component
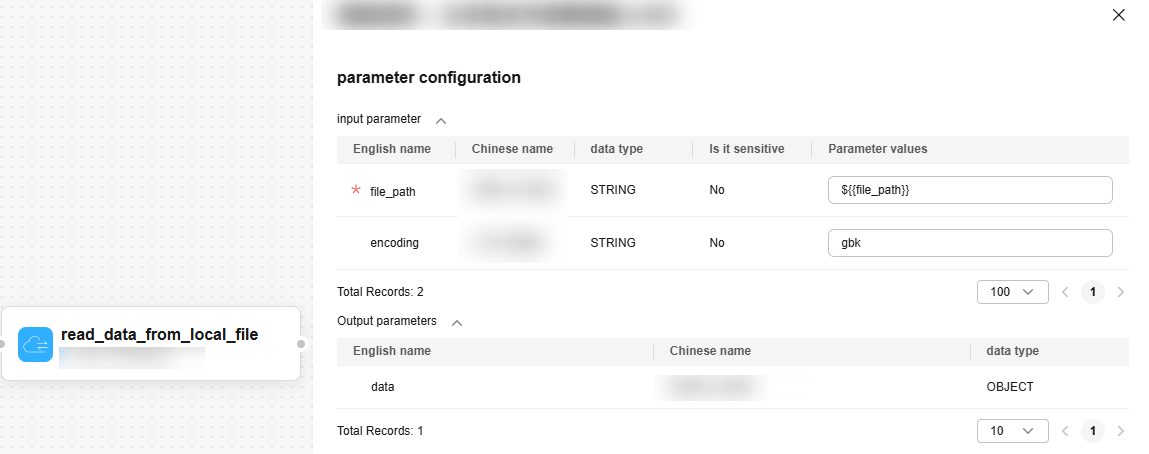
- Click the read_data_from_local_file component and associate it with the canvas parameters.
Figure 5 Configuring the read_data_from_local_file component
- Drag the custom_python_script, save_data_to_local_file and read_data_from_local_file components to the canvas in sequence and configure the connection as shown in the following figure.
- After the canvas is configured, click Canvas release in the upper right corner to save and release the canvas.
Figure 6 Canvas release

- Click Canvas deployment in the upper right corner of the current page to deploy the canvas.
- After the deployment is successful, click Canvas service to obtain the access address required for calling the canvas.
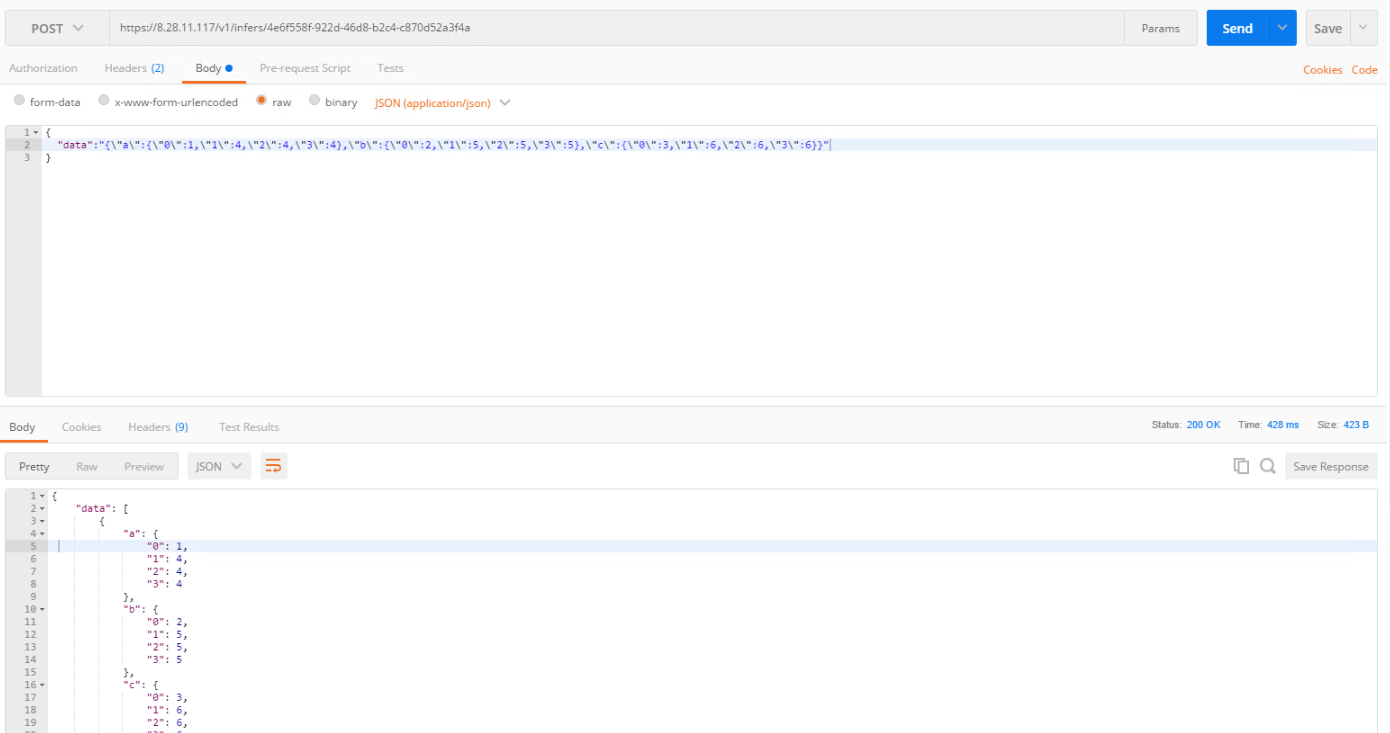
- Based on the access address in the service details, transfer the parameters required by the canvas and call the canvas to obtain the canvas execution result.
Figure 7 Calling the canvas
Feedback
Was this page helpful?
Provide feedbackThank you very much for your feedback. We will continue working to improve the documentation.See the reply and handling status in My Cloud VOC.
For any further questions, feel free to contact us through the chatbot.
Chatbot


