
Deploying the MgC Agent
Before using the big data functions, you need to deploy the MgC Agent on a server that can access your metadata source.

The MgC Agent does not support automatic restart. Do not restart the MgC Agent during task execution, or tasks will fail.
Preparations
- Prepare a Linux server for installing the MgC Agent in the source intranet environment. The Linux server must:
- Be able to access the Internet and the domain names of MgC, IoTDA, and other cloud services. For details about the domain names to be accessed, see Domain Names.
- Allow the ports required by the MgC Agent (formerly Edge). For details about the required ports, see Communication Matrix.
- Allow outbound traffic on port 8883 if the server is in a security group.
- Run CentOS 8.
- Have at least 4 CPUs and 8 GB of memory. If you want to perform big data verification, the server must have at least 8 CPUs and 16 GB of memory.
- Have at least 20 GB of available space on the disk for installing the MgC Agent.
Do not install the MgC Agent on a source server to be migrated.
- High resource consumption: The MgC Agent consumes CPU and memory resources during collection and migration. If a large number of migration tasks are performed by the MgC Agent, services on the source server may be affected.
- Port occupation: The MgC Agent occupies some ports on the server, which may affect services running on it.
- Have an entropy greater than 1,000. You can run the following command to check the server entropy:
cat /proc/sys/kernel/random/entropy_avail
If the server has insufficient entropy, install rng-tools or Haveged to increase the entropy. For details, see What Can I Do If Installing the MgC Agent on a Linux Server Fails Due to Insufficient Entropy?
- Not have any antivirus or protection software enabled. This type of software may stop the MgC Agent from executing migration commands, resulting in migration failures.
- Prepare a Windows server used for logging in to the MgC Agent console.
- Allow inbound TCP traffic on port 27080. You can do that by adding an inbound rule to the security group of the Linux server. For the rule, set Source to the IP address of the Windows server you use to remotely access the MgC Agent console.

Downloading and Installing the MgC Agent
- Sign in to the MgC console from the Linux server you prepared.
- In the navigation pane, choose MgC Agent.
- In the Application Migration (Manual Installation) area, choose Download > Download Linux Version to download the MgC Agent installation program to the Linux server.
- Decompress the MgC Agent installation package.
tar zxvf MgC-Agent.tar.gz
- Go to the scripts directory in the MgC Agent installation directory.
cd MgC-Agent/scripts/
- Run the MgC Agent installation script.
./install.sh
- Enter the EIP bound to the NIC of the Linux server. The IP address will be used for accessing the MgC Agent console.

To ensure secure access, configure a firewall or security group to allow only specified IP addresses to access the MgC Agent.
If the entered IP address is not used by the Linux server, the system will prompt you to use a public IP address of the Linux server as the MgC Agent access address.

- Check if the message shown in the following figure is displayed. If it is, the MgC Agent for Linux has been installed. The port in the following figure is for reference only. Note the actual port returned. Generally, the port is 27080.

Update environment variables.
source /opt/cloud/MgC-Agent/scripts/setenv.sh
- On the Windows server for which an inbound rule is added to the security group of the server where the MgC Agent is installed, open a browser and enter https://<IP-address-entered-in-step-7>:<port-obtained-in-step-8> in the address box to open the MgC Agent login page. For example, if the IP address entered in step 7 is 192.168.x.x and the port returned in step 8 is 27080, the MgC Agent access address is https://192.168.x.x:27080.

If there are access problems, check the IP address entered in the address box and the inbound rule settings of the security group of the Linux server with the MgC Agent installed.
Logging In to the MgC Agent Console
You can log in to the MgC Agent console using any of the modes below. Choose your login mode carefully because data cannot be exchanged between different login modes. If you change the login mode or credentials, any data associated with your previous login mode and credentials will be lost.
This mode is designed for local collection using the MgC Agent. After login, you can determine whether to connect to MgC. A username and password must be set up. It is essential to keep them secure.
- On the login page, select Local Account.
- On the Register page, set a username and password, confirm the password, and click Privacy Statement.
- Read the privacy statement carefully before selecting I have read and agree to the Privacy Statement, and click Register.
You are advised to change your password every three to six months.
- After the registration is successful, enter the registered username and password, and click Log In to access the Overview page of the MgC Agent console.
This mode is intended for migration scenarios. You do not need to create a local account, but the network conditions for accessing MgC must be met.
- On the login page, select Huawei Cloud Access Key.
- Enter an AK/SK pair of your Huawei Cloud account, and select the region where you create migration projects on MgC from the drop-down list.
- Click Privacy Policy, read the policy carefully, and select I have read and agree to the Privacy Policy.
- Click Log In to access the Overview page of the MgC Agent console.
This mode is applicable to migration scenarios. The MgC Agent must be deployed on a Huawei Cloud ECS that has been granted MgC permissions through an agency. If metadata access is enabled for the ECS and Metadata Version is set to Only V2 (Token), the MgC Agent version must be 25.4.2 or later.
- Create a custom policy in JSON view. Specify a policy name and copy the following content to the Policy Content box:
{
    "Version": "1.1",
    "Statement": [
        {
            "Action": [
                "mgc:*:query*",
                "mgc:*:discovery",
                "mgc:*:assess",
                "mgc:*:migrate",
                "iam:agencies:listAgencies",
                "iam:roles:listRoles",
                "iam:quotas:listQuotas",
                "iam:permissions:listRolesForAgency"
            ],
            "Effect": "Allow"
        }
    ]
}
If you need to use MgC migration workflows to migrate servers, you also need to create a project-level and a global-level SMS custom policy. For details, see SMS Custom Policies.
- Create a cloud service agency and grant permissions. Set Agency Type to Cloud service and select Elastic Cloud Server (ECS) and Bare Metal Server (BMS) from the Cloud Service drop-down list. After the agency is created, click Authorize and select the custom policy created in 1. If server migration is required, select the SMS custom policies created in 1 at the same time.
- Return to the MgC Agent login page and select Huawei Cloud ECS Agency for Login Mode.
- Select the region where you create migration projects on MgC from the drop-down list.
- Click Privacy Policy, read the policy carefully, and select I have read and agree to the Privacy Policy.
- Click Log In to access the Overview page of the MgC Agent console.
Connecting the MgC Agent to MgC
- Sign in to the MgC Agent console.
- On the Overview page, click Connect to MgC in the upper right corner.
- In the Step 1: Select Connection Method area, select Huawei Cloud Access Key. Select the region where the project is created on MgC, enter an AK/SK pair of your Huawei Cloud account, and click List Migration Projects. After the MgC Agent is authenticated using the entered AK/SK pair, you can go to the next step. If the system displays a message indicating that the AK/SK pair is incorrect, try to rectify the fault by following the instructions in What Can I Do If the AK/SK Verification Fails?
If your source servers need to be migrated, the entered AK/SK pair must have permissions to use SMS. For details, see SMS Custom Policies.
- In Step 2: Select MgC Migration Project, select a migration project from the project drop-down list. The MgC Agent will report the collected information about your source resources to this project.
- In Step 3: Preset MgC Agent Name, specify a name for the MgC Agent, which will be displayed on the MgC console, and click Connect. Confirm the connection to MgC, and click OK.
After the MgC Agent is connected to MgC, the name you specified here cannot be modified.
- If Connected shows up on the overview page, the connection to MgC is successful.

Adding Resource Credentials
You can add credentials of the following types of resources to the MgC Agent: private clouds, servers, big data clusters, and containers. For details about the authentication methods supported for each resource type, see Table 1.
|
Resource Type |
Authentication Method |
Description |
|---|---|---|
|
Public cloud |
|
|
|
Private cloud |
Username/Password |
Enter the username and password for logging in to the source private cloud. |
|
Databases |
Username/Password |
Enter the username and password of the database. |
|
Big data - Executor |
Username/Password |
Enter the username and password for logging in to the server deployed as an executor. Then specify Network Range, which can be a single IP address or an IP address range. The value can be:
|
|
Big data - Hive Metastore |
Username/Key |
Upload the core-site.xml, hivemetastore-site.xml, hive-site.xml, krb5.conf, and user.keytab files. For details about how to obtain the certificate files, see How Do I Obtain the Hive Metastore Credential Files? |
|
Big data - Data Lake Search (DLI) |
AK/SK |
Enter the AK/SK pair of the Huawei Cloud account. For details about how to obtain an AK/SK pair, see How Do I Obtain the AK/SK and Project ID? |
|
Big data - MaxCompute |
AK/SK |
Enter the AK/SK pair of the source Alibaba Cloud account. For details about how to obtain the key pair, see Viewing the Information About AccessKey Pairs of a RAM User. |
|
Big data - Doris |
Username/Password |
Enter the username and password of the Doris database. |
|
Big data - HBase |
Username/Key |
The preceding configuration files are usually stored in the conf subdirectory of the Hadoop and HBase installation directories. |
|
Big data - ClickHouse |
Username/Password |
Enter the username and password of the ClickHouse database. |
|
Windows servers |
Username/Password |
Enter the username and password for logging in to the server. Then specify Network Range, which can be a single IP address or an IP address range. The value can be:
|
|
Linux servers |
|
Then specify Network Range, which can be a single IP address or an IP address range. The value can be:
|
|
Containers |
Configuration file |
The configuration file must be a .json or .yml file. |
- Sign in to the MgC Agent console.
- In the navigation pane, choose Credentials.
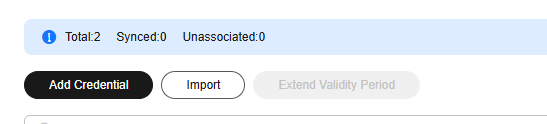
- Click Add Credential above the list.
Figure 1 Adding a credential
- Select a resource type and authentication method, specify a credential name, and enter your credentials.
- Set a credential validity period. The options for setting the validity period include:
- Custom: Set the number of days the credential remains valid. The validity period starts when you click OK to save the credential. After this period ends, the credential becomes invalid. The default period is 60 days. You can specify an integer ranging from 1 to 365. If needed, you can extend the validity period for the credential when it is in the Unexpired, Expire soon, or Expired state.
- Unlimited: The credential remains valid permanently. You can manually delete the credential when it is no longer needed.
- Click OK to save the credential.
Feedback
Was this page helpful?
Provide feedbackThank you very much for your feedback. We will continue working to improve the documentation.See the reply and handling status in My Cloud VOC.
For any further questions, feel free to contact us through the chatbot.
Chatbot


