
Binding an MFA Device
You must have physical access to the user's MFA device so that you can add it. For example, you might configure MFA for a user who will use an MFA device running on a smartphone. In this case, you must have the smartphone available in order to finish the wizard. For this reason, you might want to let users configure and manage their own MFA devices. For details, see Allowing Users to Bind Their Own MFA Devices.
Binding an MFA Device
- Log in to the Huawei Cloud management console.
- Click
 in the upper left corner of the page and choose Management & Governance > IAM Identity Center.
 - In the navigation pane, choose Users.
- In the user list, click a username to go to the user details page.
Figure 1 Selecting a user

- On the MFA Devices tab, and click Bind MFA Device.
Figure 2 Binding an MFA device

- On the displayed page, select one of the following MFA device types and perform operations as instructed:
- Authenticator app
On the Bind Virtual MFA Device page, the configuration information, including the QR code, of the new MFA device is displayed. Follow the prompts to bind a virtual MFA device.
- Install a compatible virtual MFA device (authenticator app) on your mobile phone.
- Bind the virtual MFA device by scanning the QR code or manually entering the secret key.
- Scan the QR code
Open the virtual MFA device and scan the QR code displayed on the Bind Virtual MFA Device page. Then the user is added to the virtual MFA device.
- Manually entering the secret key
Open the MFA application on your mobile phone, and enter the secret key.

The user can be manually added only using time-based one-time passwords (TOTP). You are advised to enable automatic time setting on your mobile phone.
- Scan the QR code
- View the dynamic code of the virtual MFA deviceon the MFA application. The code is automatically updated every 30 seconds.
- In the Bind Virtual MFA Device dialog box, enter the dynamic code.
- Click OK.
- Security key
In the Add Security Key dialog box, follow the instructions displayed on the browser or platform.
- The experience may vary in different operating systems and browsers, so follow the instructions displayed by your browser or platform.
- If you bind all of the MFA device types, the security key and built-in authenticator take precedence over the authenticator app when users log in to the user portal.
- Built-in authenticator
Use your fingerprint, face, or PIN code to authenticate your identity following the instructions displayed on the browser or platform.
Figure 3 Binding an MFA device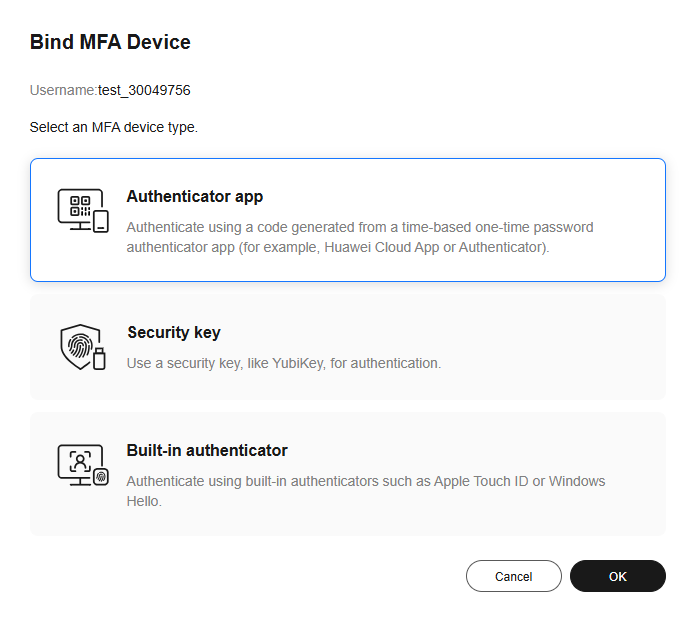
- Authenticator app
- View the bound MFA device in the list.
Feedback
Was this page helpful?
Provide feedbackThank you very much for your feedback. We will continue working to improve the documentation.See the reply and handling status in My Cloud VOC.
For any further questions, feel free to contact us through the chatbot.
Chatbot


