
Security Key
This section describes how to add and unbind a security key. For details, see Adding a Security Key and Unbinding a Security Key.
FIDO2 Overview
Fast IDentity Online 2 (FIDO2) is an open standard for user authentication, aiming to enhance security and trust during user login. FIDO2 is composed of the WebAuthn API of the World Wide Web Consortium (W3C) and the Client to Authenticator Protocol (CTAP) of the FIDO Alliance. CTAP is an application layer protocol that enables communication between a client or platform (such as a browser or operating system) and an external authenticator. FIDO2 authentication relies on cryptographic algorithms to generate a private-public key pair—long, random numbers that are mathematically related. The key pair is used for authentication on the user's device, such as a desktop, laptop, mobile device, or security key.
You can use the supported configurations to set FIDO2 devices (also called security keys) as a multi-factor authentication (MFA) method in IAM. Supported devices include FIDO2-compliant hardware keys and FIDO2-compatible browsers. Before registering a FIDO2 device, ensure that your browser and OS are of the latest versions. Note that different browsers, authenticators, and OS clients may support this function differently. If you cannot complete the registration in one browser, try another browser.
Browsers That Support FIDO2
FIDO2 security keys are available in web browsers only if the browsers and operating systems support them. The following table shows you whether typical browsers support FIDO2 security keys.
|
Browser |
MacOS 15.6.1+ |
Windows 10 |
Windows 11 |
iOS 18.6.2+ |
Android 9+ |
|---|---|---|---|---|---|
|
Chrome |
Supported |
Supported |
Supported |
Supported |
Supported |
|
Safari |
Supported |
Not supported |
Not supported |
Supported |
Not supported |
|
Edge |
Supported |
Supported |
Supported |
Supported |
Supported |
|
Firefox |
Supported |
Supported |
Supported |
Supported |
Supported |

On Android (version 9 or later), if the Google Play service (version 24 or later) is installed on the device, FIDO2 is supported.
For more information on browsers that support FIDO2 authentication, see Operating system and web browser support for FIDO2 and U2F.
Notes and Constraints
An IAM user can have a maximum of eight security keys added.
Adding a Security Key
After you add an MFA device for an account or IAM user, login protection is automatically enabled with the verification method set to the MFA authentication. The following uses Windows as an example.
- Log in to the new IAM console and choose Users in the navigation pane.
- Click a username to go to the user details page.
- Click the Security Settings tab and find Multi-factor Authentication (MFA).
- Click Add MFA Device.
- On the displayed page, enter a device name. Only letters, digits, hyphens (-), and underscores (_) are allowed.
- Select an MFA device. Select Security key for Device Type.
- Click Next.
- Select an authentication method for Windows Hello, such as PIN, face, or fingerprint.
Figure 1 Setting up Windows Hello

If your Windows device does not support enabling facial recognition and fingerprint, options such as Face and Fingerprint will not appear. FIDO2 will show you the options according to the authentication types supported by your device.
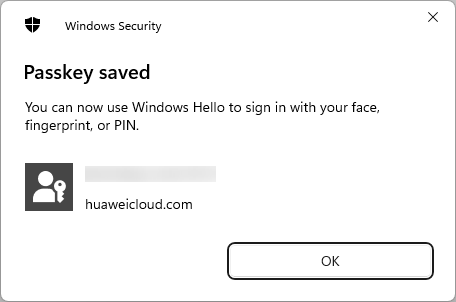
- Enter the PIN (or recognize the face or fingerprint). After the system authentication is successful, a dialog box is displayed, indicating that the binding is successful. Click OK. The security key will be displayed in the MFA device list.
Figure 2 MFA device added
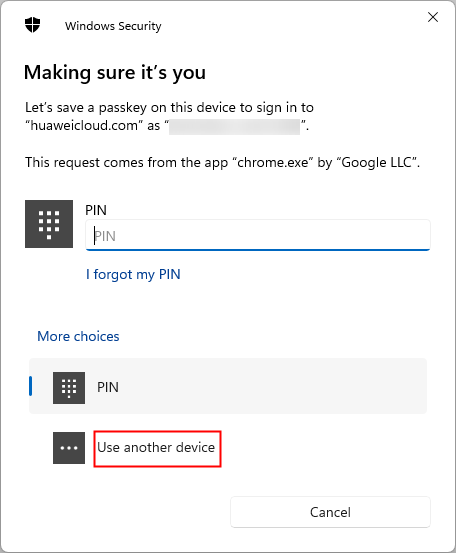
- To set up a FIDO2 security key, select Use another device in the dialog box and plug the security key into the USB port of your computer.
Figure 3 Using another device
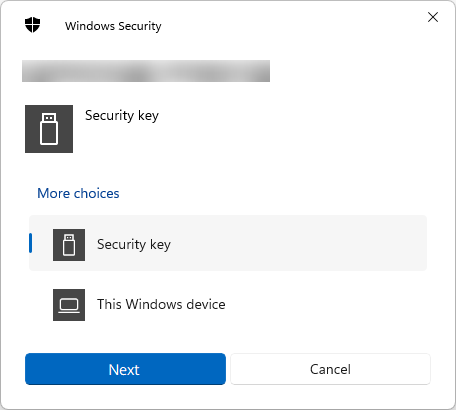
- In the displayed dialog box, select Security key and click Next.
Figure 4 Selecting the security key
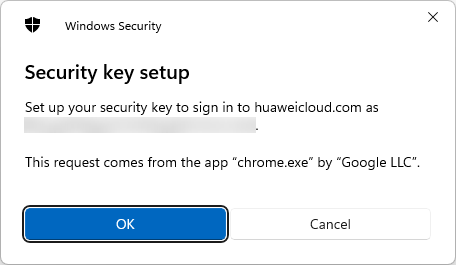
- Click OK to confirm the settings.
Figure 5 Confirming the settings
- Click OK to install the security key.
Figure 6 Installing the security key

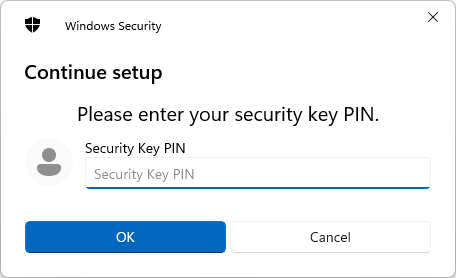
- Enter the PIN of the security key and click OK.
Figure 7 Entering the PIN
- Touch the security key.
Figure 8 Touching the security key

- Click OK in the displayed dialog box indicating that the hardware MFA device is added. The security key will be displayed in the MFA device list.
Figure 9 MFA device added

Unbinding a Security Key
- Log in to the new IAM console and choose Users in the navigation pane.
- Click a username to go to the user details page.
- Click the Security Settings tab and find Multi-factor Authentication (MFA).
- Click Unbind in the Operation column of the target security key.
- In the displayed dialog box, enter YES.
Figure 10 Confirming unbinding

- Click OK.
Feedback
Was this page helpful?
Provide feedbackThank you very much for your feedback. We will continue working to improve the documentation.See the reply and handling status in My Cloud VOC.
For any further questions, feel free to contact us through the chatbot.
Chatbot


