Virtual MFA Device
This section describes how to add and unbind a virtual MFA device.
Adding a Virtual MFA Device
Install an authenticator app (such as Google Authenticator or Microsoft Authenticator) on your mobile device.
After you add an MFA device for an account or IAM user, login protection is automatically enabled with the verification method set to the MFA authentication. IAM users can add virtual MFA devices on the IAM console by themselves.
- Log in to the new IAM console and choose Users in the navigation pane.
- Click a username to go to the user details page.
Figure 1 Entering the user details page

- Click the Security Settings tab and find Multi-factor Authentication (MFA).
- Click Add MFA Device.
Figure 2 Adding an MFA device

- On the displayed page, enter a device name. Only letters, digits, hyphens (-), and underscores (_) are allowed.
- Select a device type. For this example, select Virtual MFA and click Next.
Figure 3 Adding a virtual MFA device

- Add a virtual MFA device to your MFA application.
- Add a virtual MFA device by scanning the QR code or entering the secret key.
- Scan the QR code
Open the MFA application on your mobile phone, and use the application to scan the QR code displayed on the Add MFA Device page. Then, the MFA application automatically adds the virtual MFA device.
- Enter the secret key
Open the MFA application on your mobile phone, and enter the secret key.

TOTP-based virtual MFA devices can only be manually added. You are advised to enable automatic time setting on your mobile device.
- Scan the QR code
- View the dynamic verification codes on the home page of the MFA application. The codes are updated every 30 seconds.
- On the Bind Virtual MFA Device page, enter two consecutive verification codes and click OK.
Obtaining an MFA Verification Code
After a virtual MFA device is added, you need to enter an MFA verification code when logging in to the console.
You can open the virtual MFA device on your mobile phone and get the verification code displayed for the target account or user. Then enter the code on the login page.
Unbinding a Virtual MFA Device
- Log in to the new IAM console and choose Users in the navigation pane.
- Click a username to go to the user details page.
- Click the Security Settings tab and find Multi-factor Authentication (MFA).
- Locate the virtual MFA device and click Unbind in the Operation column.
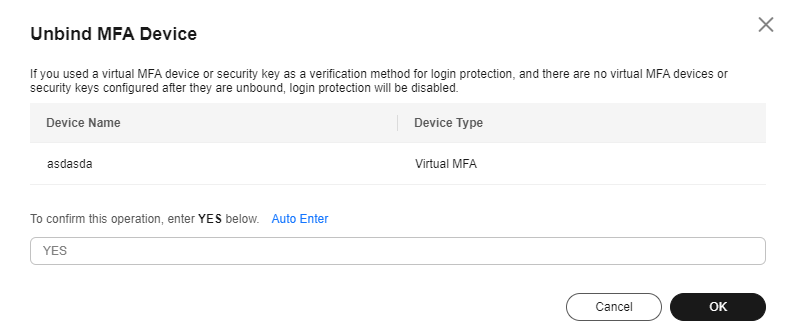
- In the displayed dialog box, enter YES.
Figure 4 Confirming unbinding

- Click OK.
Feedback
Was this page helpful?
Provide feedbackThank you very much for your feedback. We will continue working to improve the documentation.See the reply and handling status in My Cloud VOC.
For any further questions, feel free to contact us through the chatbot.
Chatbot


