Quick Start
- Log in to HPC.
Visit the EIP associated with the master node of the cockpit to switch to the login page. Then, use admin/admin for login.

- Add a partition.
On the partition management page, choose Cluster Management > Partition Management.
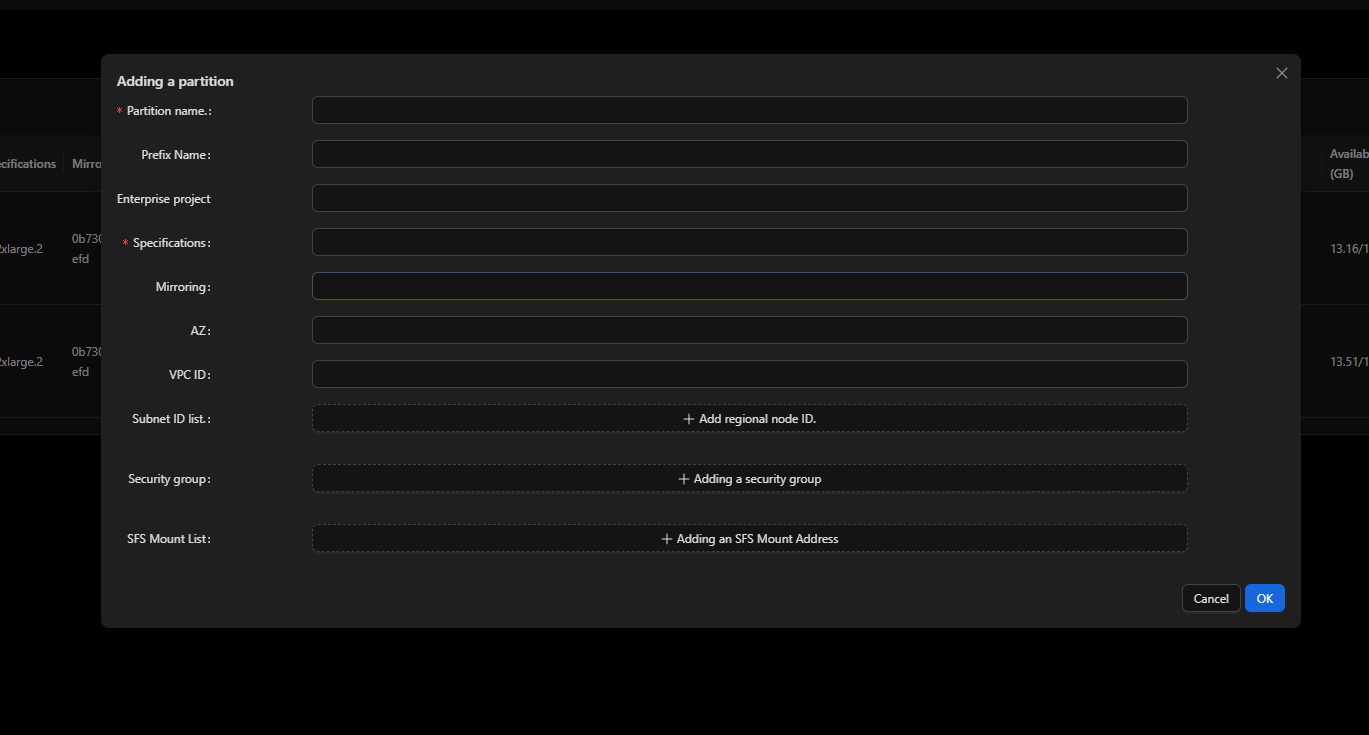 The parameters are described as follows.
Parameter
Description
Specifications
Compute node flavor, for example, c6s.xlarge.2
Mirroring
ID of the private image of the compute nodes
AZ
AZ where compute nodes are located, for example, cn-southwest-2a
VPC ID
ID of the VPC where compute nodes are located. It is recommended that the VPC ID be the same as that of the master node.
Subnet ID list
ID of the subnet where compute nodes are located. It is recommended that the subnet ID be the same as that of the master node.
Security group
ID of the security group where compute nodes are located. It is recommended that the security group ID be the same as that of the master node.
SFS Mount List
Mount address of the SFS Turbo file system. For example, if xxx.sfsturbo.internal:/ is the sharing path, you need to mount xxx.sfsturbo.internal:/ to /mnt/sfs_turbo_1 and mount xxx.sfsturbo.internal:/home to /home.
- Create a compute cluster.
Go to the Resource Management page and click Add Compute Node.
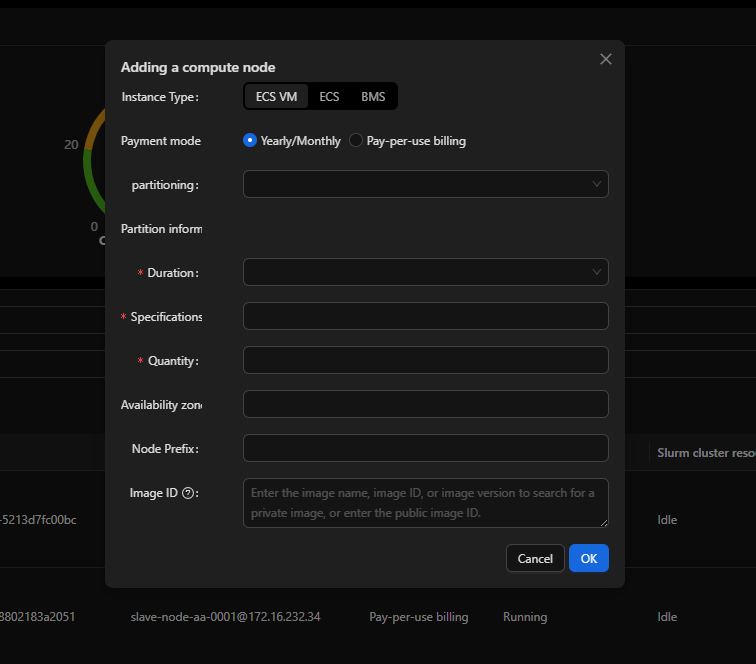 The parameters are described as follows.
Parameter
Description
Payment mode
Billing mode of compute nodes, which can be Yearly/Monthly or Pay-per-use.
Partitioning
Partition where nodes are located
Specifications
Compute node flavor
Quantity
Number of compute nodes to create
Availability zone
(Optional) AZ where the compute nodes are located. If this parameter is not set, the AZ set for the partition will be used.
Node Prefix
(Optional) Compute node prefix. If this parameter is not set, the prefix set for the partition will be used.
Image ID
(Optional) Image used by compute nodes. If this parameter is not set, the image set for the partition will be used.
- Create a template.
On the template management page, choose System Management > Job Template Management.
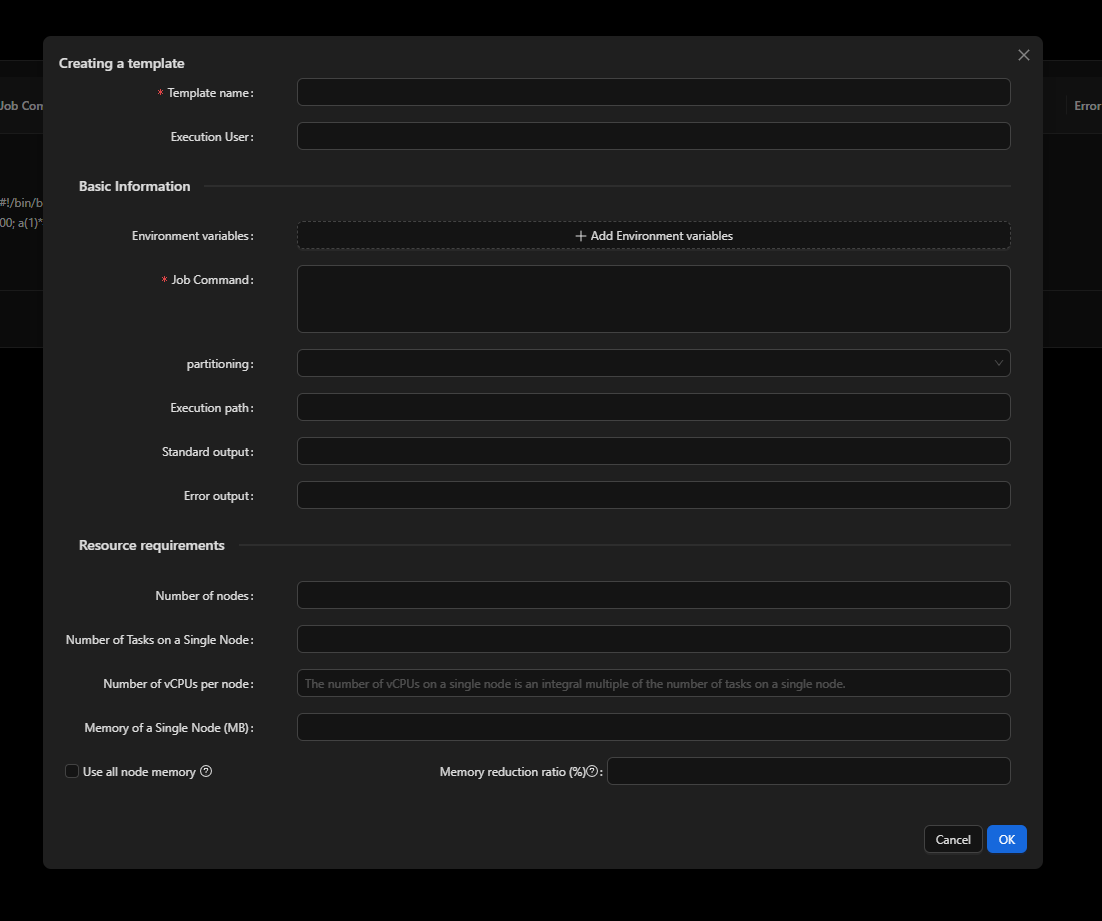
- Submit a job.
On the service management page, submit a job.
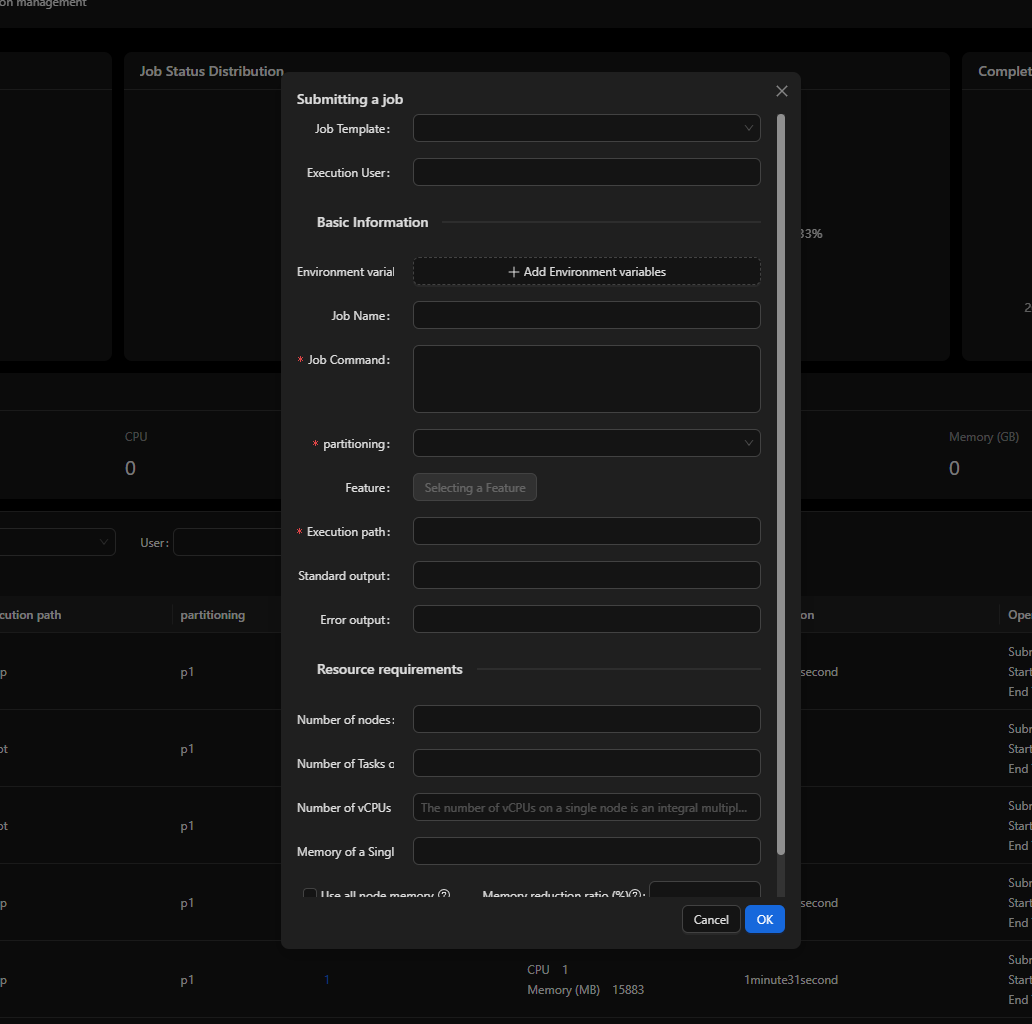 The parameters are described as follows.
Parameter
Description
Job Template
Choose a template from the drop-down list.
Execution User
User who executes tasks. By default, the current user is used.
Environment variables
Environment variables that need to be transferred to Slurm
Job Command
Task script
partitioning
Partition to which tasks are submitted
Feature
Features can be added to compute nodes. When tasks are submitted, they can be scheduled based on the features.
Execution path
Path where the script is executed. The path must be a mounted public path.
Standard output
(Optional) Name of the log file generated by the job
Error output
(Optional) Exception log file of a job
Number of nodes
Number of nodes required by a job
Number of Tasks on a Single Node
Number of tasks running on each node
Number of vCPUs on a Single Node
Number of vCPUs on each node
Memory of a Single Node
Single-node memory required by tasks
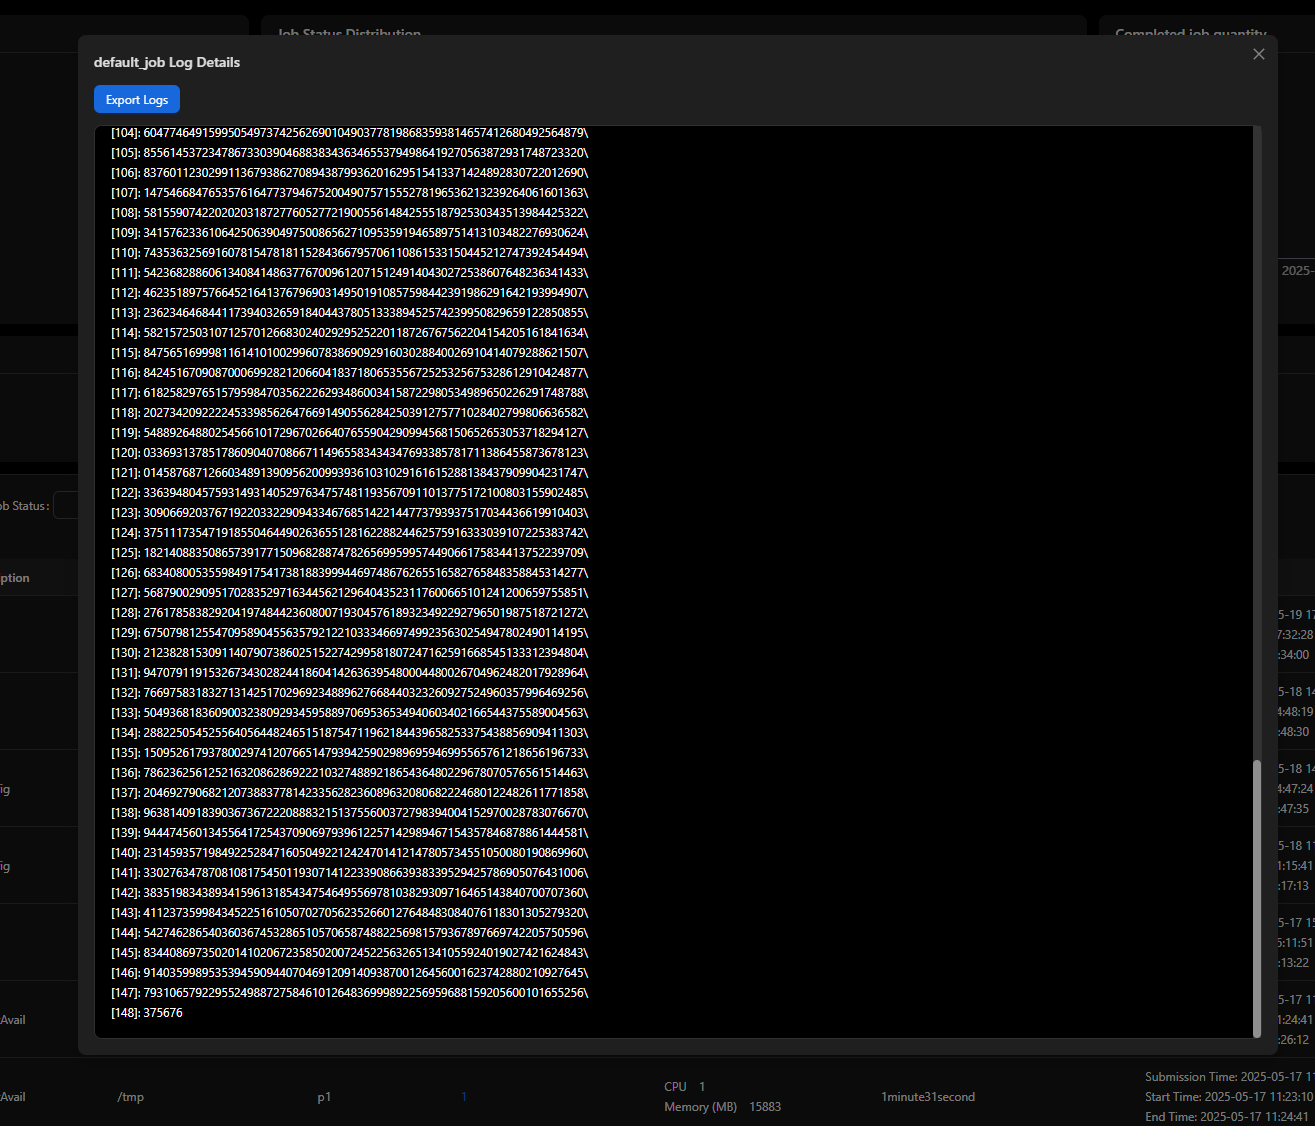
After a job is submitted, you can check job logs in real time.
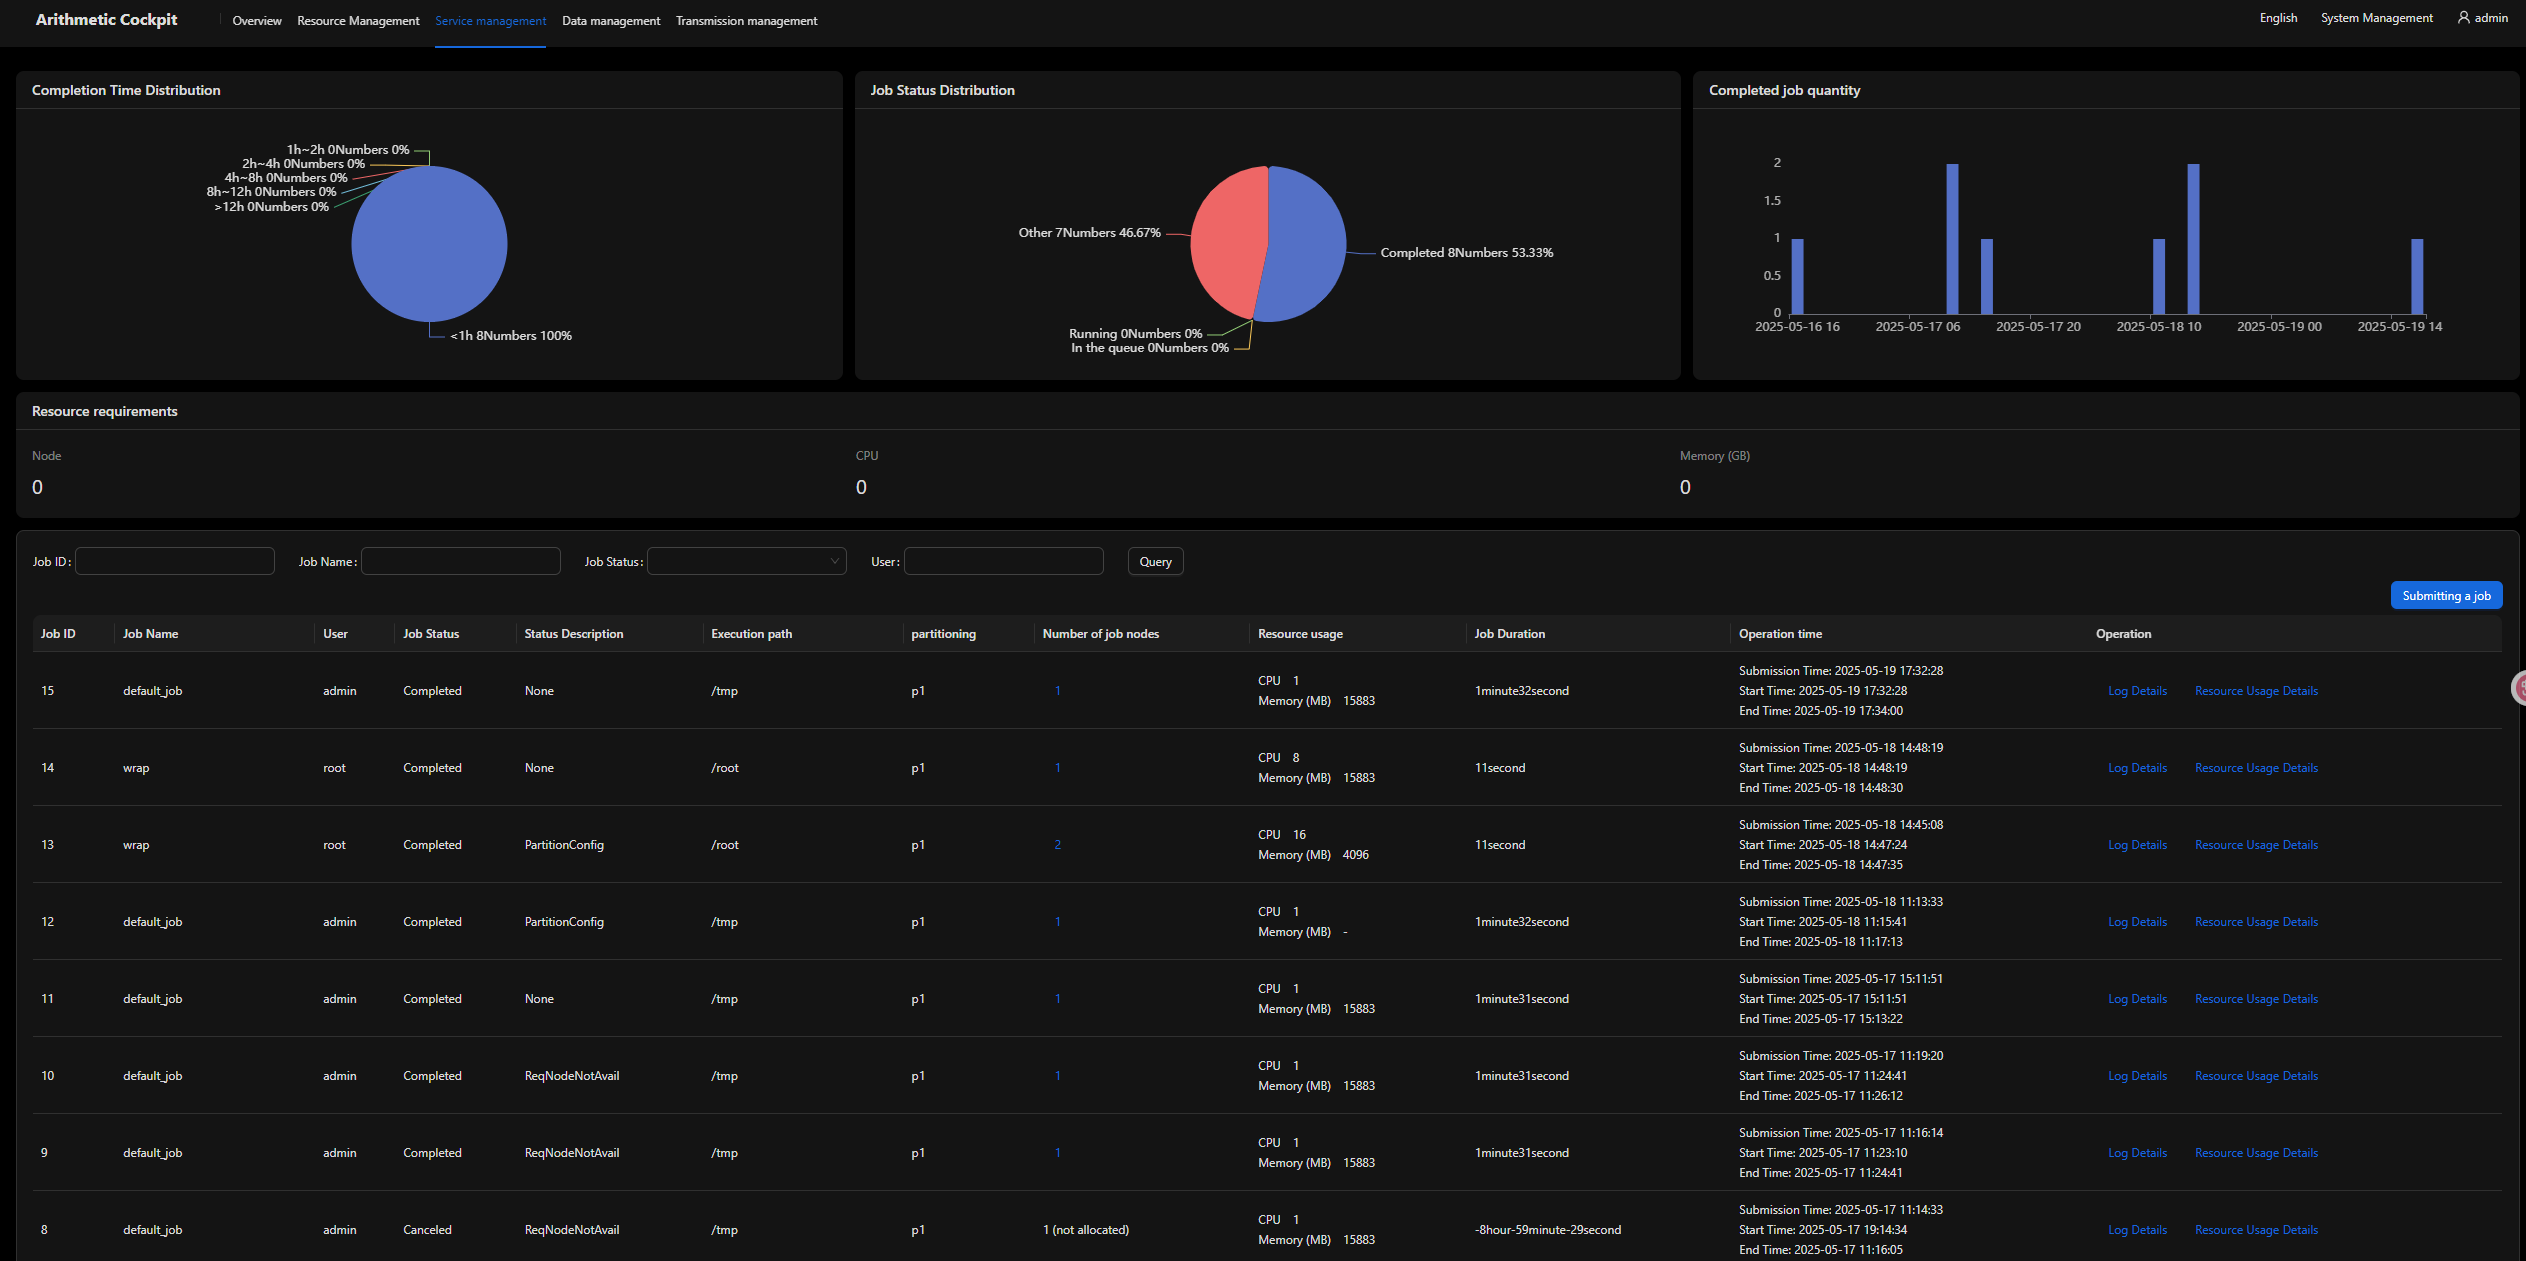
After the job is complete, you can check the job list, statistics, and resource usage.
Feedback
Was this page helpful?
Provide feedbackThank you very much for your feedback. We will continue working to improve the documentation.See the reply and handling status in My Cloud VOC.
For any further questions, feel free to contact us through the chatbot.
Chatbot


