
Attaching EVS Disks to a FlexusX Instance
Scenarios
If the disks of a FlexusX instance cannot meet service requirements, for example, there is not enough disk space, you can attach more available disks to the FlexusX instance.
Constraints
- EVS disks can only be attached to FlexusX instances in the same region.
- Non-shared disks can be only attached when they are in the Available state.
Shared disks can be attached when they are in the In-use or Available state.
- A FlexusX instance must be in the Running or Stopped state before EVS disks can be attached to it.
- A frozen EVS disk cannot be attached to a FlexusX instance.
- A SCSI EVS disk cannot be attached as the system disk to a FlexusX instance.
- A detached system disk can be used as a data disk for any FlexusX instances, but can only be used as a system disk for the FlexusX instance where it was attached before.
- A detached data disk that is purchased together with a FlexusX instance can only be used as a data disk for this instance.
For more details about attaching disks, see Attaching a Non-Shared EVS Disk and Attaching a Shared EVS Disk.
Prerequisites
- EVS disks are available.
For instructions about how to purchase an EVS disk, see Purchasing an EVS Disk.
Procedure
- Log in to the FlexusX console, in the upper left corner, click
 , and select a region and project.
 - Click the name of the target FlexusX instance you want to attach a disk to.
- Click the Disks tab. Then, click Attach Disk.
- Select the target disk and set disk function as prompted.
Figure 1 Attaching an EVS disk
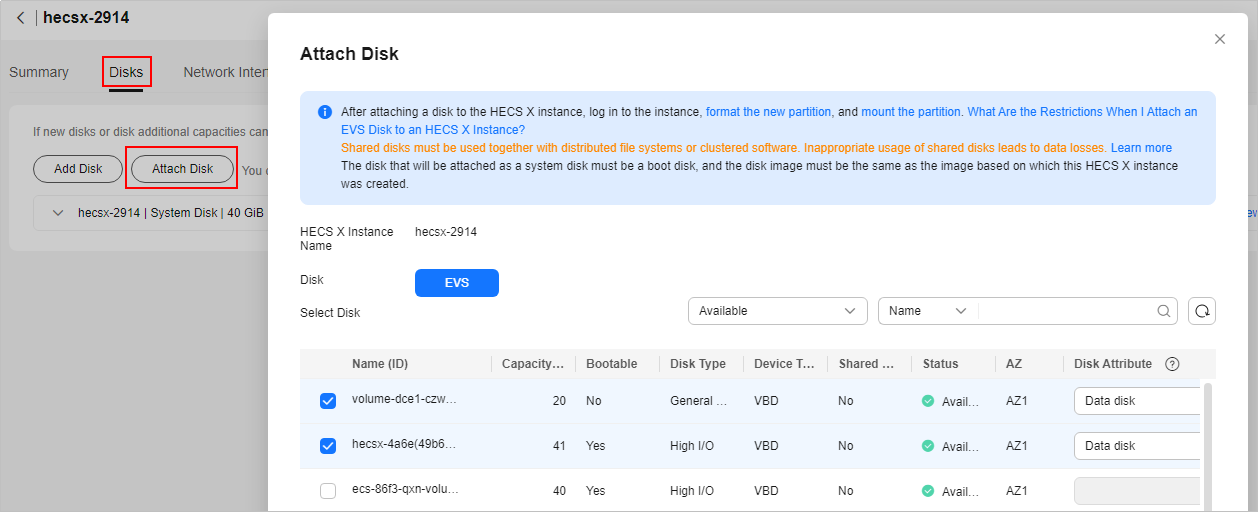
- Click OK.
After the disk is attached, you can view the disk information on the Disks tab.
Follow-Up Operations
If the attached disk is newly created, you must log in to the FlexusX instance and initialize the EVS disks before you can use them. For details, see Initializing an EVS Data Disk.
Feedback
Was this page helpful?
Provide feedbackThank you very much for your feedback. We will continue working to improve the documentation.See the reply and handling status in My Cloud VOC.
For any further questions, feel free to contact us through the chatbot.
Chatbot


