
Help Center/ Graph Engine Service/ User Guide/ Analyzing a Graph Using the Graph Editor/ Saving and Restoring Canvas Display Information
Updated on 2025-08-14 GMT+08:00
Saving and Restoring Canvas Display Information
In the graph editor, you can use the snapshot feature to create a snapshot for a graph displayed on the canvas and then restore it from the snapshot.
Creating a Snapshot
- In the graph editor, click
 in the upper right corner of the canvas to create a snapshot for the graph displayed on the canvas.
 - Once the snapshot is created, the system will show a message as depicted in the figure below: Figure 1 Snapshot generated


- Since the data is stored in the browser cache, switching browsers will result in the snapshot data being cleared.
- The more snapshots you generate, the more likely your browser is to lag, so please use snapshots in moderation.
Checking a Snapshot
- On the left of the graph editor, click the Snapshot tab. The snapshot information is displayed. Figure 2 Snapshot page

- Thumbnail: snapshot thumbnail. When you hover over the thumbnail, the snapshot is automatically zoomed in.
- Name/ID: snapshot name and ID. The name can be changed, but the ID cannot. The system generates the ID to differentiate between saved files when importing the snapshot. If files with the same ID are imported, they will be overwritten.
- Graph Information: displays the graph data saved in the current snapshot.
- Theme Color: theme color of the canvas when the snapshot is saved.
- Created: time when the snapshot is created.
- Modified: time when the snapshot is modified.
- The Operation column offers the following functions:
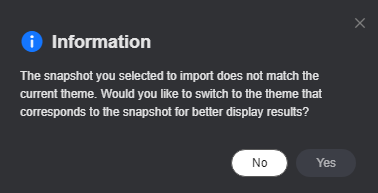
- View: Check the snapshot on the canvas. If the current theme color does not match that when the snapshot is saved, the system will display a prompt message. Clicking Yes will switch to the theme used when the snapshot was saved, while clicking No will keep using the current canvas theme color. Figure 3 Theme change
- Delete: Delete the snapshot. Confirm the deletion information, enter DELETE in the field box (or click Auto Enter), and click OK. Figure 4 Deleting a snapshot

- More: includes Download and Download Thumbnail.
- Download: Download the snapshot as a JSON file and save it to the local host.
- Download Thumbnail: Download the snapshot as an image and save it to the local host.
Deleting a graph will also delete the stored snapshots. Download the snapshots before deleting the graph.
- View: Check the snapshot on the canvas. If the current theme color does not match that when the snapshot is saved, the system will display a prompt message. Clicking Yes will switch to the theme used when the snapshot was saved, while clicking No will keep using the current canvas theme color.
Importing a Snapshot
Import downloaded snapshots one by one.
- In the upper left corner of the snapshot page, click Import. The Import Snapshot page is displayed on the right. Figure 5 Importing a snapshot

- Click Select File, select the snapshot's JSON file, and click OK. When importing a JSON file with the same snapshot ID, a prompt message similar to the one shown in Figure 6 will appear. You will need to determine whether to overwrite the existing data.

Batch Downloading or Deleting Snapshots
Download or delete the created snapshots in batches.
- Batch download:
On the snapshot page, select multiple snapshots and click Download in the upper left corner.
Figure 7 Batch download
- Batch deletion:
- On the snapshot page, select multiple snapshots and click Delete in the upper left corner.
- In the displayed dialog box, confirm the deletion information, enter DELETE (or click Auto Enter), and click OK.
Figure 8 Batch deletion
Parent topic: Analyzing a Graph Using the Graph Editor
Feedback
Was this page helpful?
Provide feedbackThank you very much for your feedback. We will continue working to improve the documentation.See the reply and handling status in My Cloud VOC.
The system is busy. Please try again later.
For any further questions, feel free to contact us through the chatbot.
Chatbot


