Configuring Time Limits
A time limit defines a specific time range or time point. By configuring a time limit, abstract time concepts like "recently" and "this week" can be converted into precise time intervals. Additionally, you can customize time ranges according to your needs, making it easier to obtain more accurate data when using the intelligent analysis assistant.
Procedure
- Log in to the DataArts Insight console.
- Click
 in the upper left corner of the management console to select a region. Then, select an enterprise project in the upper right corner.
 - On the top menu of the console, click Project. On the displayed My Projects page, click the name of the desired project.
- In the navigation pane on the left, choose Q&A Management > Time Limit. On the displayed page, click New Time Limit. In the dialog box that appears, set parameters according to Table 1.
Figure 1 Creating a time limit
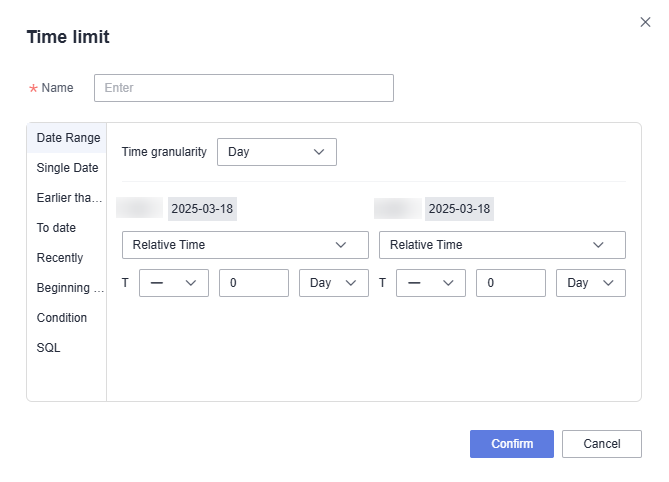
Table 1 Parameters for creating a time limit Parameter
Description
Name
Name of a time limit. Only letters, numbers, commas (,), periods (.), parentheses, greater-than signs (>), less-than signs (<), underscores (_), hyphens (-), and slashes (/) are allowed.
Date Range
Custom date range. It is described as follows:
- Time granularity: The options are Year, Quarter, Month, Week, and Day. For example, "the past two years" can have the time granularity set to Year.
- Relative Time: - indicates a time period before the current time, and + indicates a time period after the current time.
- Absolute Time: Select a specific time, independent of the current time.
Single Date
Custom single date, for example, the same day of the previous week.
Earlier than later than
Set the time limit to be earlier or later than XX, for example, earlier than last week or later than last year.
To date
Set the time range from XX to the current day, excluding the current day, for example, "from the beginning of last month to the current day" or "from the beginning of the current month to the current day".
Recently
Set the time range from XX to the current day and from the current day to XX, including the current day, for example, "from the past month to the current day" or "from the current day to the next week".
Beginning or end of the period
Set the start and end times within the specified time range, for example, the first month of the current quarter.
Condition
Set the time range by specifying conditions, for example, "greater than 2025-01-01".
SQL
Use SQL statements to limit the time range, for example, "the last day of the previous month" can be expressed as "SELECT DATE_TRUNC('month', CURRENT_DATE) - INTERVAL '1 day'".
- After a time limit is created, it can be used in the following two scenarios:
- In the navigation pane on the left, choose Data Management > Datasets. On the displayed page, click the name of the desired dataset. On the dataset editing page, move the cursor to the field whose field type is time, click
 , and select Edit. In the dialog box that appears, you can set Default Filter to the created time limit.
 - In the navigation pane on the left, choose Data Management > Indicator. On the displayed page, click Create Indicator in the upper right corner. In the Create Indicator slide-out panel, you can select the created time limit in Time limit in the Panel Editing area.

- After the intelligent analysis assistant associates fields in a dataset with a time limit, if the question does not include time-related information, it will automatically return data within the specified time range. For more details, refer to Example Scenario.
- If a time limit is associated with a field on the dashboard, the data within the specified time range is automatically displayed. Click
 in the upper right corner of the chart and select View SQL to see the SQL statement corresponding to the time limit.
- In the navigation pane on the left, choose Data Management > Datasets. On the displayed page, click the name of the desired dataset. On the dataset editing page, move the cursor to the field whose field type is time, click
Example Scenario
Creating a time limit ensures that data within this time range is returned during Q&A with the intelligent analysis assistant.
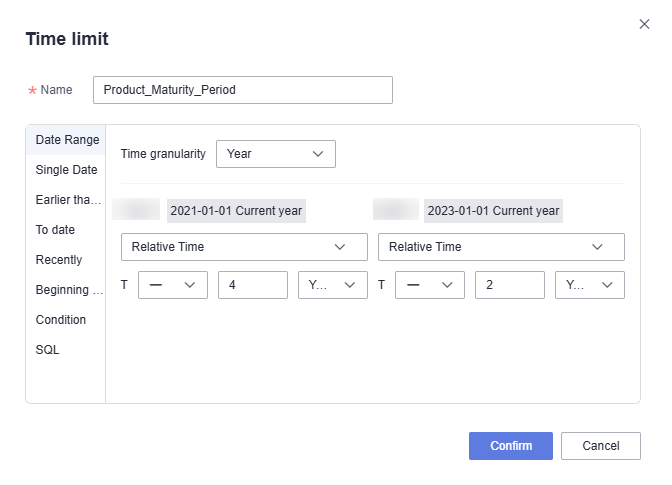
- In the navigation pane on the left, choose Q&A Management > Time Limit. On the displayed page, click New Time Limit in the upper right corner. In the dialog box that appears, create a time limit named Product Maturity and set the time range to 2021-01-01 to 2023-01-01 (see Figure 2).
- In the navigation pane on the left, choose Data Management > Datasets. On the displayed page, locate the desired dataset and click its name.
- Move the cursor to the field whose type is time, click
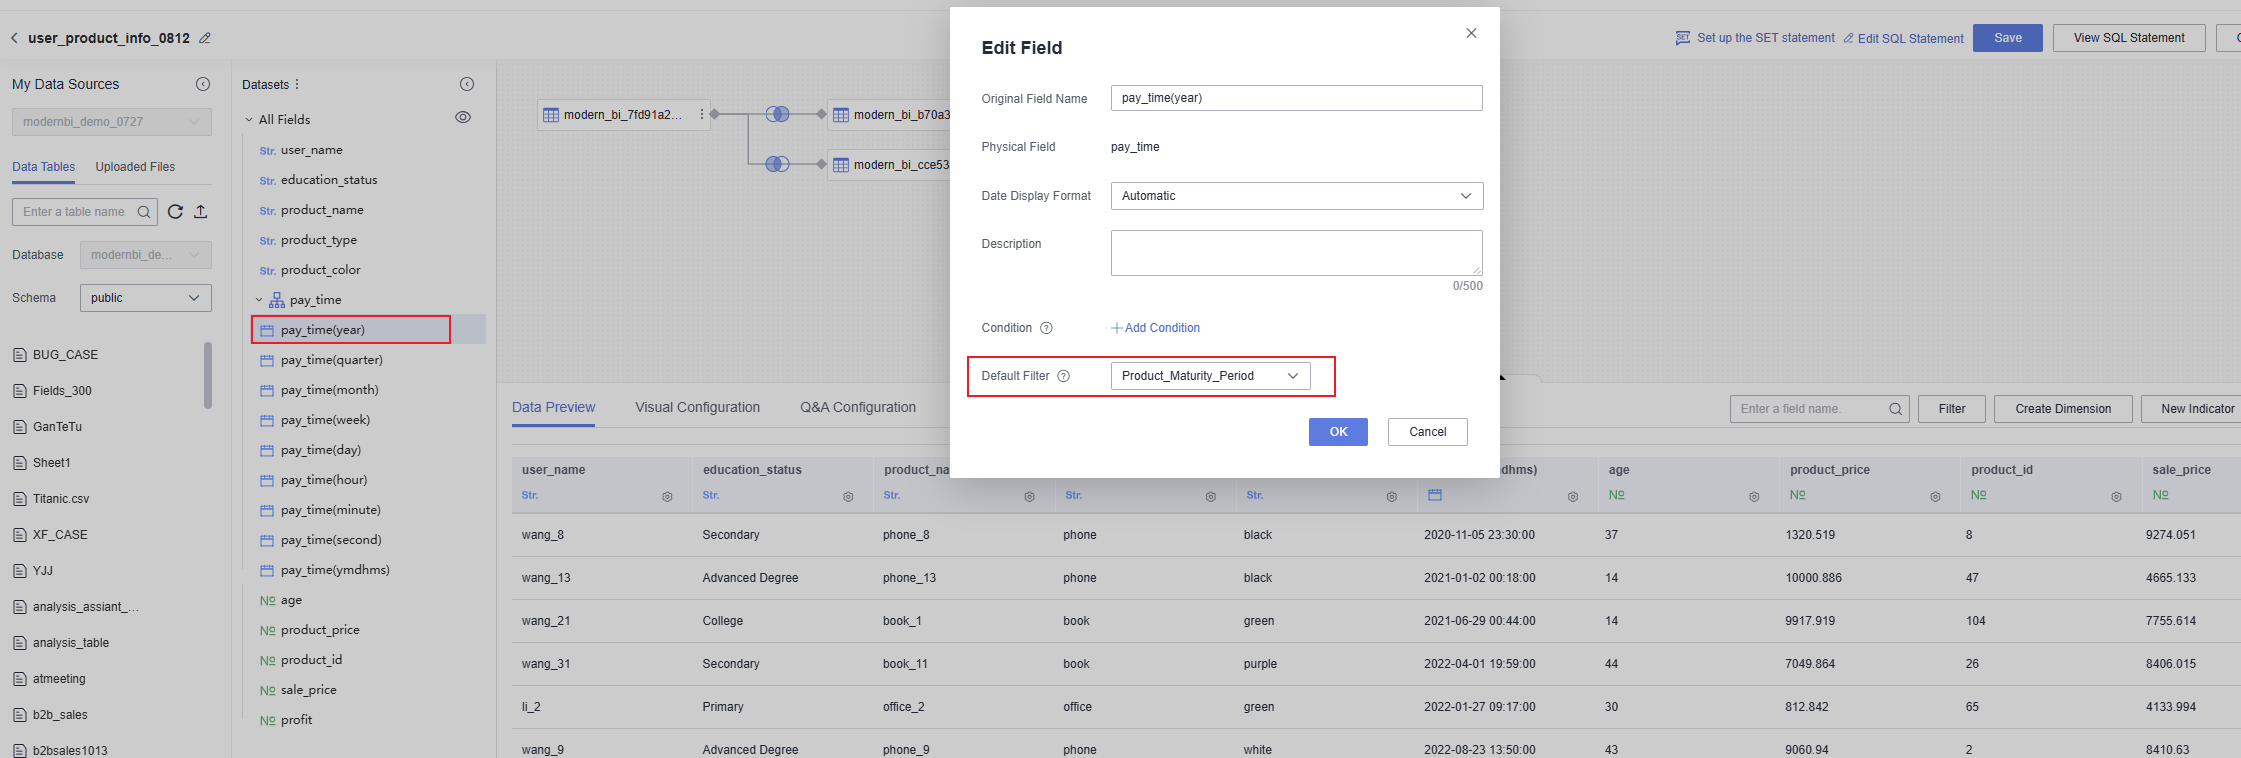
 , and select Edit. In the dialog box that appears, set Default Filter to the time limit created in Step 1 and click OK. See Figure 3.
 - Click Save in the upper right corner of the dataset page.
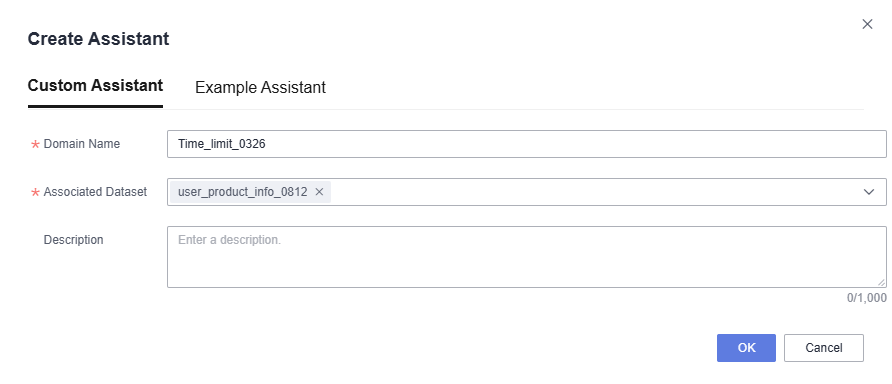
- In the navigation pane on the left, choose Q&A Management > Intelligent Analysis Assistants. On the displayed page, click Create Domain. In the dialog box that appears, set parameters. Select the dataset edited in Step 3 for Associated Dataset. See Figure 4.
- Click Synchronization in the Operation column of the intelligent analysis assistant. After the synchronization is complete, click Q&A. The intelligent analysis assistant's Q&A page is displayed.
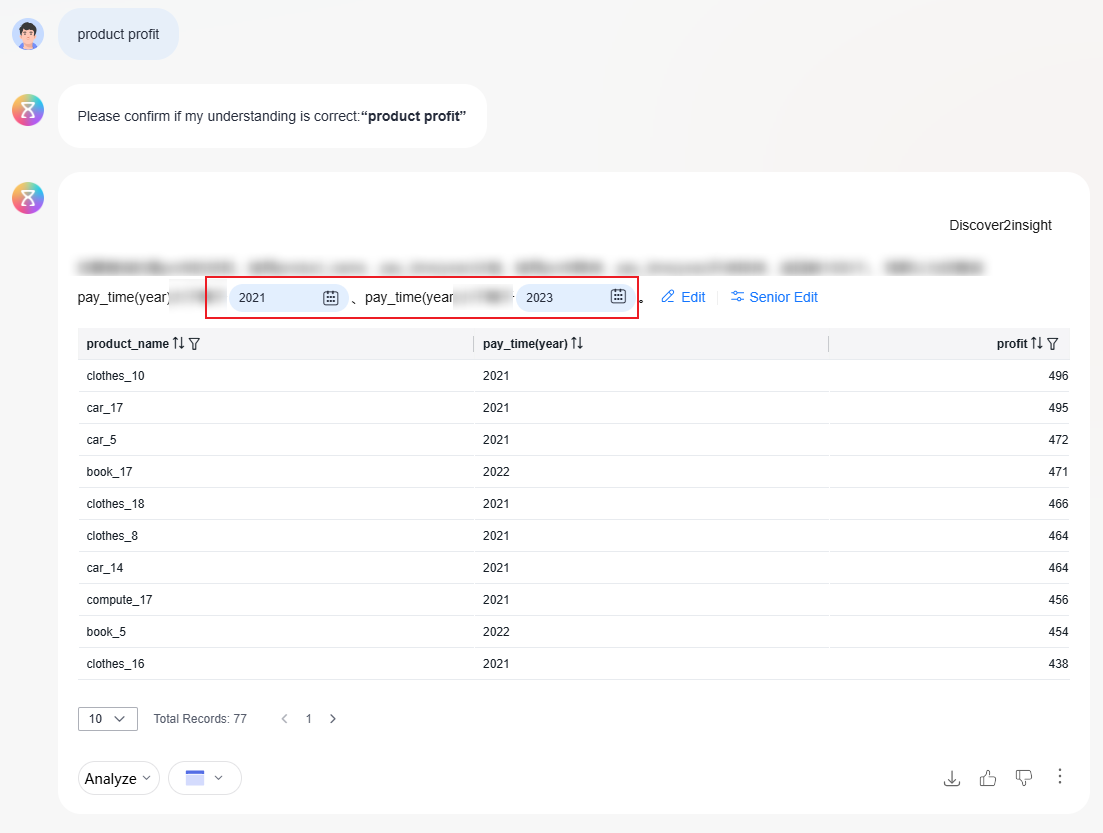
In this example, the question is "product profit", and the intelligent analysis assistant automatically returns the product profit data within the range from 2021-01-01 to 2023-01-01. See Figure 5.
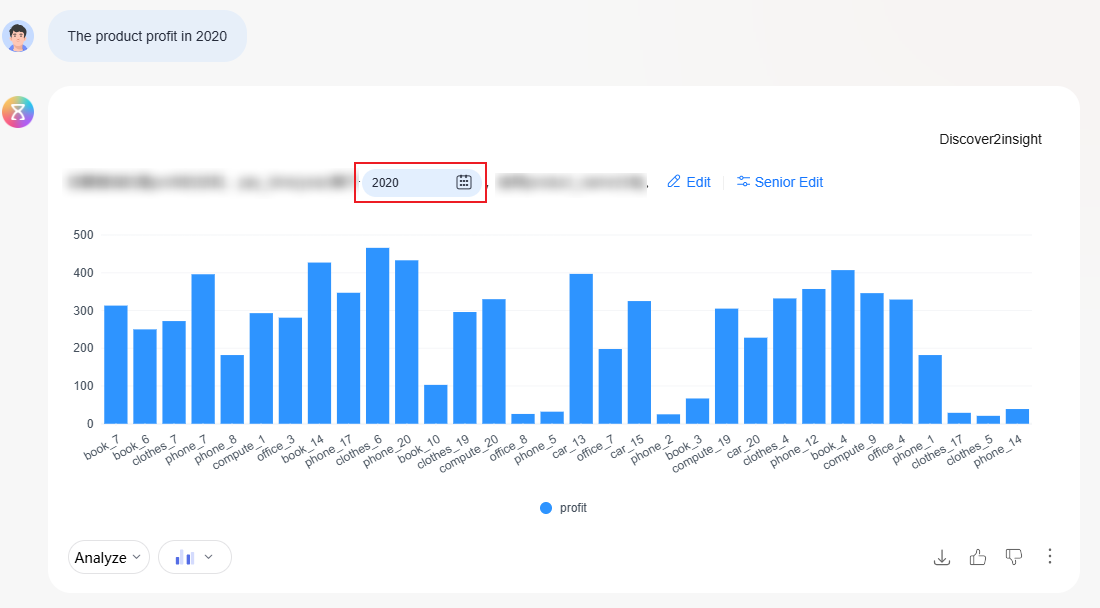
If the question includes time information, the time limit set in the default filter in Step 3 will become invalid, and the time specified in the question will be used. See Figure 6.
Feedback
Was this page helpful?
Provide feedbackThank you very much for your feedback. We will continue working to improve the documentation.See the reply and handling status in My Cloud VOC.
For any further questions, feel free to contact us through the chatbot.
Chatbot

