

Updated on 2025-09-23 GMT+08:00
Managing Tags
Scenarios
Tag Management Service (TMS) enables you to use tags on the management console to manage resources. TMS works with other cloud services to enable tag management. TMS manages tags globally, and other cloud services use these tags to manage their specific tasks. If you need to manage a lot of cloud resources, use TMS.
- You are advised to set pre-defined tags on the TMS console.
- A tag consists of a key and value. You can add only one value for each key.
- Each instance can have up to 10 tags.
Modifying a Tag
- Log in to COC.
- In the navigation pane, choose Resources > Application and Resource Management.
- Click
 on the right of the filter column and select Tag.
 - Select the target instance, click
 in the label column, and then click Tag Management.
Figure 1 Managing tags
in the label column, and then click Tag Management.
Figure 1 Managing tags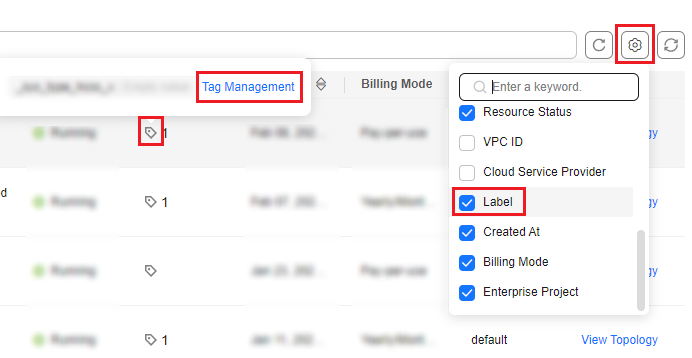
- Click Add Tag.
- When you enter a tag key and value, the system automatically displays all predefined tags associated with the current user.
- The tag key cannot start or end with a space, or start with _sys_. It can contain letters, digits, spaces, and the following special characters: _.:=+-@. A maximum of 128 characters are allowed.
- The tag value cannot start or end with a space. It can contain letters, digits, spaces, and the following special characters: _.:=+-@. A maximum of 256 characters are allowed.
You can modify an existing tag. Click the key or value of a tag and enter a new key or value.
- Click OK.
The tag is modified.
Deleting a Tag
- Log in to COC.
- In the navigation pane, choose Resources > Application and Resource Management.
- Click
 on the right of the filter column and select Tag.
 - Select the target instance, click
 in the label column, and then click Tag Management.
Figure 2 Managing tags
in the label column, and then click Tag Management.
Figure 2 Managing tags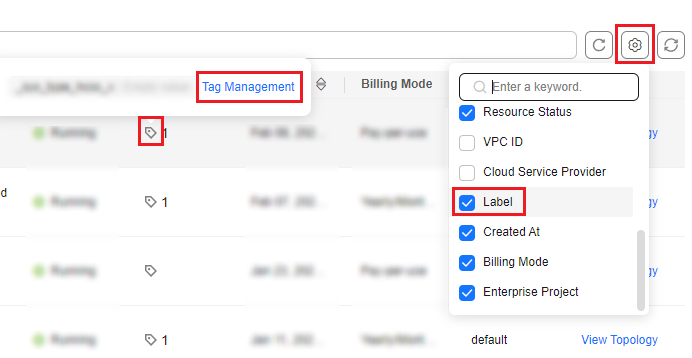
- Select the tag to be deleted and click
 .
. - Click OK.
The tag is deleted.
Feedback
Was this page helpful?
Provide feedbackThank you very much for your feedback. We will continue working to improve the documentation.See the reply and handling status in My Cloud VOC.
The system is busy. Please try again later.
For any further questions, feel free to contact us through the chatbot.
Chatbot


