Configuring the Lite Cluster Environment
Configure the Lite Cluster environment by following this section, which applies to the accelerator card environment setup.
Prerequisites
- You have purchased and enabled cluster resources. For details, see Enabling Lite Cluster Resources.
- To configure and use a cluster, you need to have a solid understanding of Kubernetes Basics, as well as basic knowledge of networks, storage, and images.
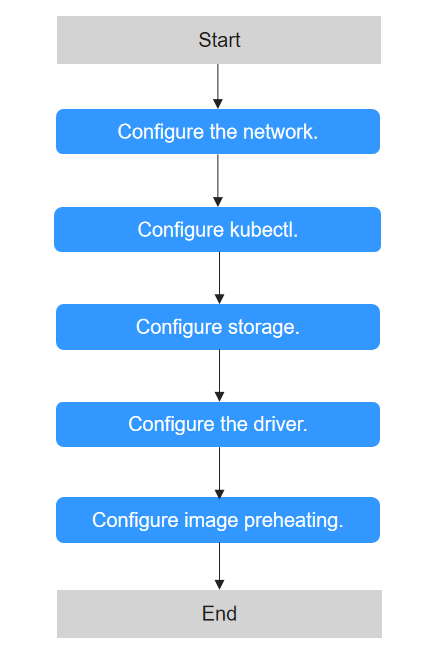
Configuration Process
|
Step |
Task |
Description |
|---|---|---|
|
1 |
After purchasing a resource pool, create an elastic IP (EIP) and configure the network. Once the network is set up, you can access cluster resources through the EIP. |
|
|
2 |
With kubectl configured, you can use the command line tool to manage your Kubernetes clusters by running kubectl commands. |
|
|
3 |
The available storage space is determined by dockerBaseSize when no external storage is mounted. However, the accessible storage space is limited. It is recommended that you mount external storage to overcome this limitation. You can mount storage to a container in various methods. The recommended method depends on the scenario, and you can choose one that meets your service needs. |
|
|
4 |
Configure the corresponding driver to ensure proper use of GPU/Ascend resources in nodes within a dedicated resource pool. If no custom driver is configured and the default driver does not meet service requirements, upgrade the default driver to the required version. |
|
|
5 |
Lite Cluster resource pools enable image pre-provisioning, which pulls images from nodes in the pools beforehand, accelerating image pulling during inference and large-scale distributed training. |
Quick Configuration of Lite Cluster Resources
This section shows how to configure Lite Cluster resources quickly to log in to nodes and view accelerator cards, then complete a training job. Before you start, you need to purchase resources. For details, see Enabling Lite Cluster Resources.
- Log in to a node.
(Recommended) Method 1: Binding an EIP
Bind an EIP to the node and use Bash tools such as Xshell and MobaXterm to log in to the node.
- Log in to the CCE console.
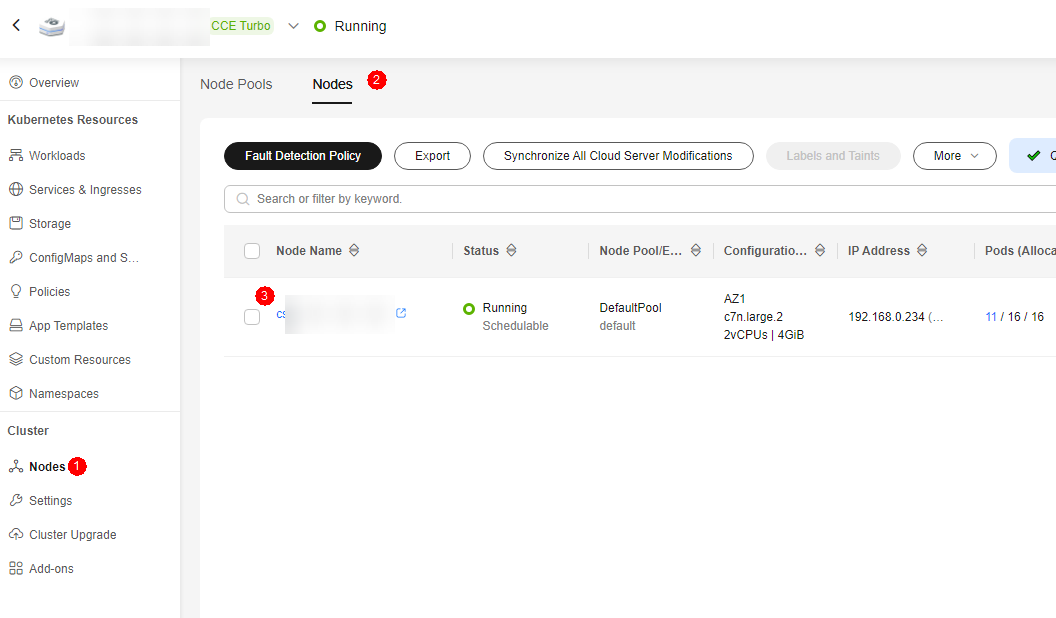
- On the CCE cluster details page, click Nodes. In the Nodes tab, click the name of the target node to go to the ECS page.
Figure 2 Node management
- Bind an EIP.
Click Buy EIP.Figure 4 Binding an EIP
 Figure 5 Buying an EIP
Refresh the list on the ECS page after completing the purchase.
Select the new EIP and click OK.Figure 6 Binding an EIP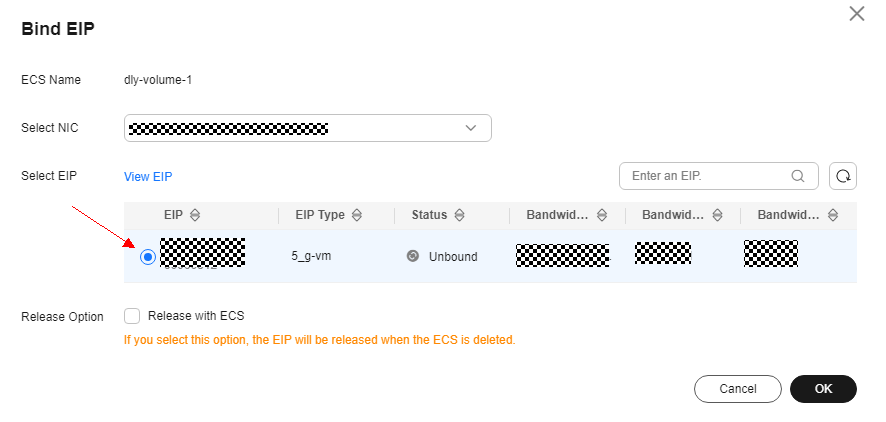
- Log in to the node using MobaXterm or Xshell. To log in using MobaXterm, enter the EIP.
Figure 7 Logging in to a node

Method 2: Using Huawei Cloud Remote Login
- Log in to the CCE console.
- On the CCE cluster details page, click Nodes. In the Nodes tab, click the name of the target node to go to the ECS page.
Figure 8 Node management

- Click Remote Login. In the displayed dialog box, click Log In.
Figure 9 Remote login

- After setting parameters such as the password in CloudShell, click Connect to log in to the node. For details about CloudShell, see Logging In to a Linux ECS Using CloudShell.
- Configure the kubectl tool.
Log in to the ModelArts console. From the navigation pane, choose AI Dedicated Resource Pools > Elastic Clusters.
Click the new dedicated resource pool to access its details page. Click the CCE cluster to access its details page.
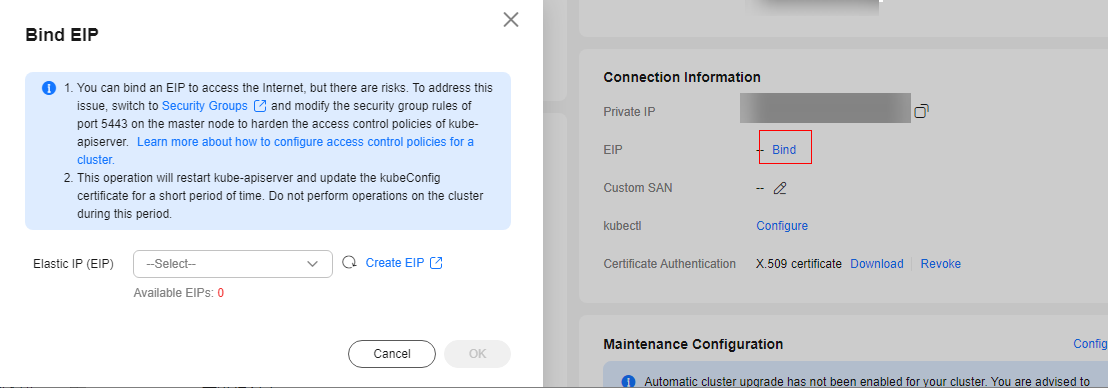
On the CCE cluster details page, locate Connection Information in the cluster information.Figure 10 Connection Information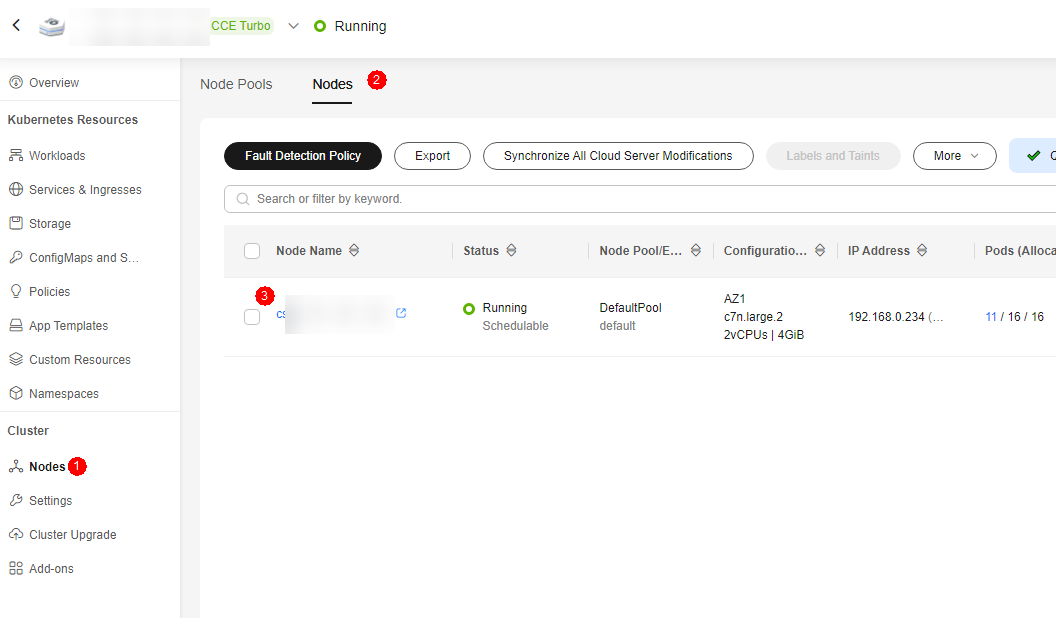 Use kubectl.
- To use kubectl through the intranet, install it on a node within the same VPC as the cluster. Click Configure next to kubectl to use the kubectl tool.
Figure 11 Using kubectl through the intranet

- To use kubectl through an EIP, install it on any node that associated with the EIP.
Select an EIP and click OK. If no EIP is available, click Create EIP to create one.
After the binding is complete, click Configure next to kubectl and use kubectl as prompted.
- To use kubectl through the intranet, install it on a node within the same VPC as the cluster. Click Configure next to kubectl to use the kubectl tool.
- Start a task using docker run.
Snt9B clusters managed in CCE automatically install Docker. The following is only for testing and verification. You can start the container for testing without creating a deployment or volcano job. The BERT NLP model is used in the training test cases.
- Pull the image. The test image is bert_pretrain_mindspore:v1, which contains the test data and code.
docker pull swr.cn-southwest-2.myhuaweicloud.com/os-public-repo/bert_pretrain_mindspore:v1
docker tag swr.cn-southwest-2.myhuaweicloud.com/os-public-repo/bert_pretrain_mindspore:v1 bert_pretrain_mindspore:v1
- Start the container.
docker run -tid --privileged=true \
-u 0 \
-v /dev/shm:/dev/shm \
--device=/dev/davinci0 \
--device=/dev/davinci1 \
--device=/dev/davinci2 \
--device=/dev/davinci3 \
--device=/dev/davinci4 \
--device=/dev/davinci5 \
--device=/dev/davinci6 \
--device=/dev/davinci7 \
--device=/dev/davinci_manager \
--device=/dev/devmm_svm \
--device=/dev/hisi_hdc \
-v /usr/local/Ascend/driver:/usr/local/Ascend/driver  \
-v /usr/local/sbin/npu-smi:/usr/local/sbin/npu-smi \
-v /etc/hccn.conf:/etc/hccn.conf \
bert_pretrain_mindspore:v1 \
bash
Parameter descriptions:
- --privileged=true //Privileged container, which can access all devices connected to the host.
- -u 0 //root user
- -v /dev/shm:/dev/shm //Prevents the training task from failing due to insufficient shared memory.
- --device=/dev/davinci0 //NPU card device
- --device=/dev/davinci1 //NPU card device
- --device=/dev/davinci2 //NPU card device
- --device=/dev/davinci3 //NPU card device
- --device=/dev/davinci4 //NPU card device
- --device=/dev/davinci5 //NPU card device
- --device=/dev/davinci6 //NPU card device
- --device=/dev/davinci7 //NPU card device
- --device=/dev/davinci_manager //Da Vinci-related management device
- --device=/dev/devmm_svm //Management device
- --device=/dev/hisi_hdc //Management device
- -v /usr/local/Ascend/driver:/usr/local/Ascend/driver //NPU card driver mounting
- -v /usr/local/sbin/npu-smi:/usr/local/sbin/npu-smi //npu-smi tool mounting
- -v /etc/hccn.conf:/etc/hccn.conf //hccn.conf configuration mounting
- Access the container and view the card information.
docker exec -it xxxxxxx bash    //Access the container. Replace xxxxxxx with the container ID.
npu-smi info    //View card information.
Figure 13 Viewing card information
- Start the training task:
cd /home/ma-user/modelarts/user-job-dir/code/bert/
export MS_ENABLE_GE=1
export MS_GE_TRAIN=1
bash scripts/run_standalone_pretrain_ascend.sh 0 1 /home/ma-user/modelarts/user-job-dir/data/cn-news-128-1f-mind/
Figure 14 Training process
Check the card usage. The card 0 is in use, as expected.
npu-smi info //View card information.
Figure 15 Viewing card information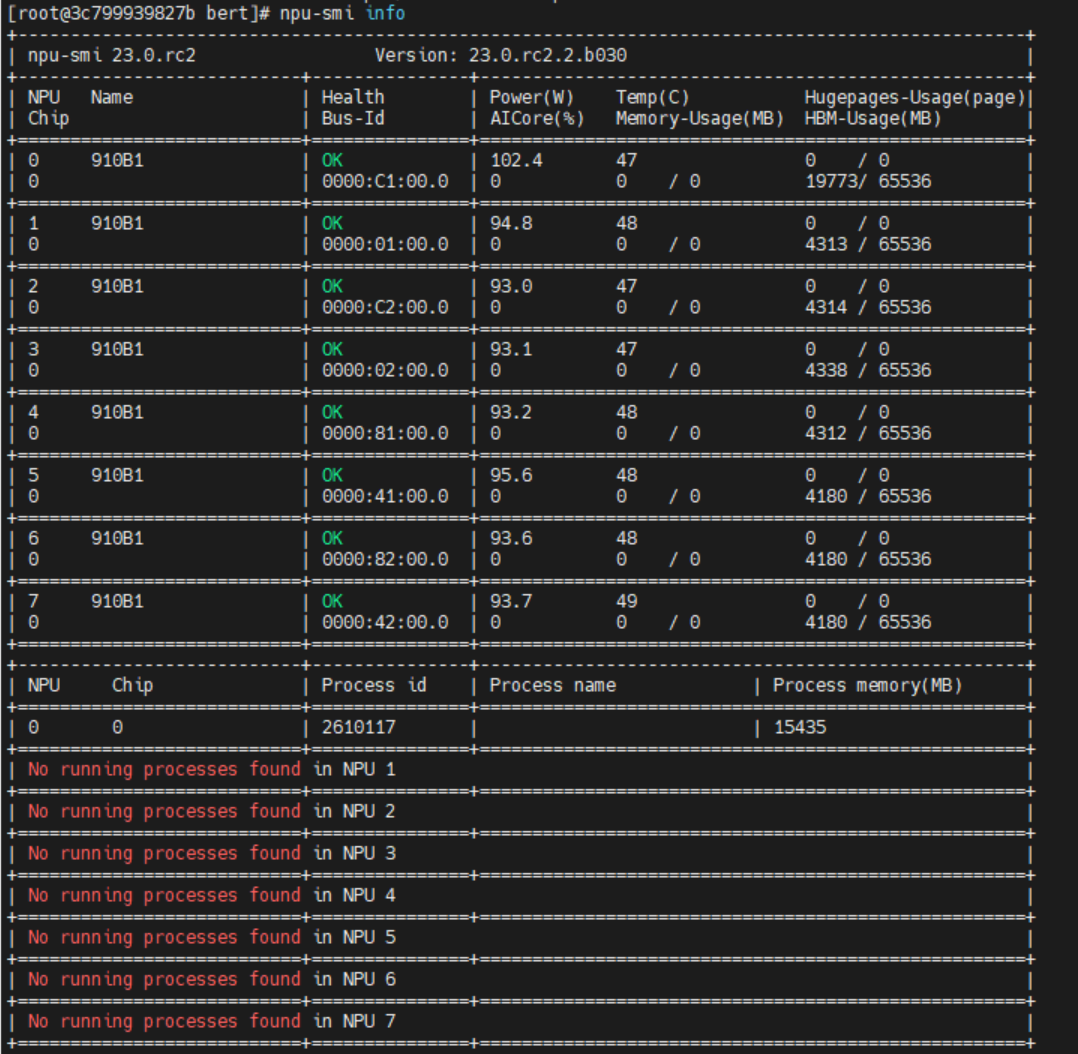
The training task takes about two hours to complete and then automatically stops. To stop a training task, run the commands below:
pkill -9 python
ps -ef
Figure 16 Stopping the training process
- Pull the image. The test image is bert_pretrain_mindspore:v1, which contains the test data and code.
Feedback
Was this page helpful?
Provide feedbackThank you very much for your feedback. We will continue working to improve the documentation.See the reply and handling status in My Cloud VOC.
For any further questions, feel free to contact us through the chatbot.
Chatbot


