Changing Security Groups
A security group is a logical group. It provides access control policies for the ECSs and CBH instances that are trustful to each other and have the same security protection requirements in a VPC.
To ensure CBH instance security and reliability, configure security group rules to allow specific IP addresses and ports to access the resources. However, if you select an inapplicable security group when purchasing a bastion host, you cannot allow access from these IP addresses and ports by configuring security group rules. In this case, change the security group to meet your O&M requirements.
Constraints
- A CBH instance can be added to a maximum of five security groups.
- The CBH instances must be in the Running status.
- If a CBH instance is added to multiple security groups, rules of all security groups are applied to the instance.
Procedure
- Log in to the CBH console.
- Click
 in the upper left corner on the displayed page and select a region.
 - Locate the row that contains the target instance. In the Operation column, choose More > Configure Network > Change Security Group.
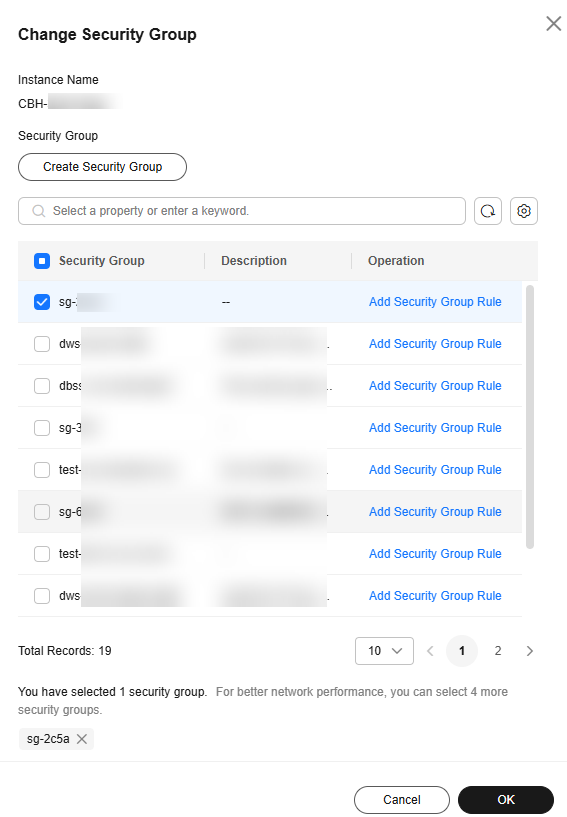
- In the displayed dialog box, select the security group you want to configure for the instance.
Figure 1 Change Security Group

- Click OK. The security group is modified.
Feedback
Was this page helpful?
Provide feedbackThank you very much for your feedback. We will continue working to improve the documentation.See the reply and handling status in My Cloud VOC.
For any further questions, feel free to contact us through the chatbot.
Chatbot


