Creating a Custom Event
An event in a BPM marks a significant change. Once an event is defined, you can send it out, receive it, and then analyze and handle the data associated with that event. For example, create an event to record the status change of whether a candidate is hired.
Creating a Custom Event
- Log in to the application designer by referring to Logging In to the Application Designer.
- In the navigation pane, choose Data.
- (Optional) Click
 next to Event to add a folder.
By default, events are stored in the root folder. Before creating an event, you can create a folder for storing the event. You can drag the event to a specified folder.
- Click
 of an event. The page for adding an event is displayed.
If no event category is created, click
 next to Event. The page for adding an event is displayed.
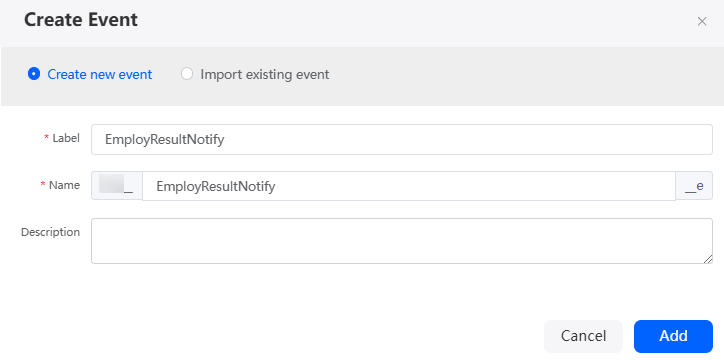
 - Select Create new event, set basic information, and click Add.
Figure 1 Adding an event
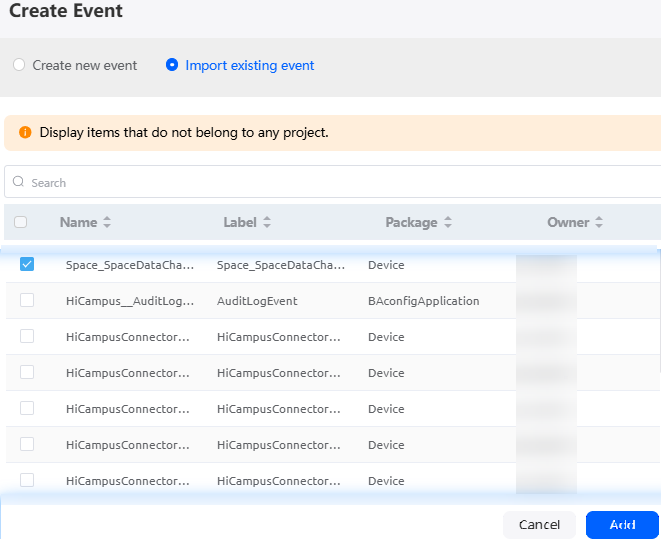
 If an event exists in the system, you can select Import existing event and add an event based on the selected event.Figure 2 Importing an existing event to create an event
- On the event details page, click the Custom Parameters tab to add custom parameters.
Custom parameters are used to record meaningful event state changes. You can create custom parameters as required. For example, in this section, an event that records hiring status changes is created. You need to add two parameters: EmployName (candidate's name) and Result (hiring result).
- In the Custom Parameters area, click New.
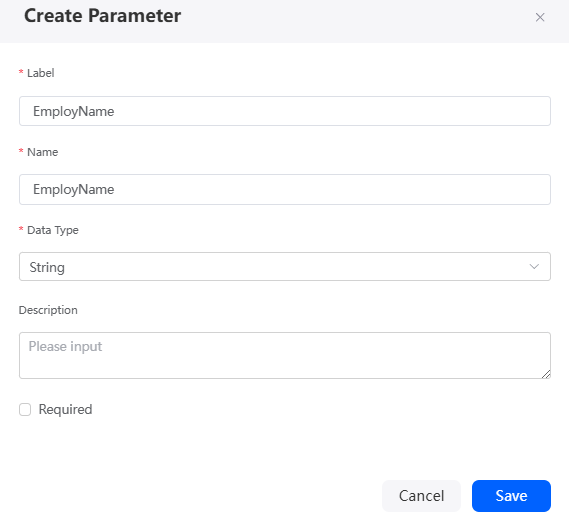
- Set Label and Name to EmployName, set Data Type to String, and click Save.
Figure 3 Setting parameters

Table 2 Parameter description Parameter
Description
Label
Label of the new parameter, which is displayed on the page.
Value: 1–80 characters.
Name
Unique ID of the new parameter in the system, which cannot be changed after being created. The following requirements must be met:
- The name contains 1 to 64 characters.
- Start with a letter and can contain only letters, digits, and underscores (_). It cannot end with an underscore (_).
Data Type
Select a type from the drop-down list. Options: Number, Date, Date Time, Boolean, and String.
Description
Enter the description of the parameter.
Value: 1–255 characters.
Is Required
Indicates whether the parameter is mandatory. If this parameter is selected, the parameter is mandatory.
By default, this parameter is not selected. That is, this parameter is optional.
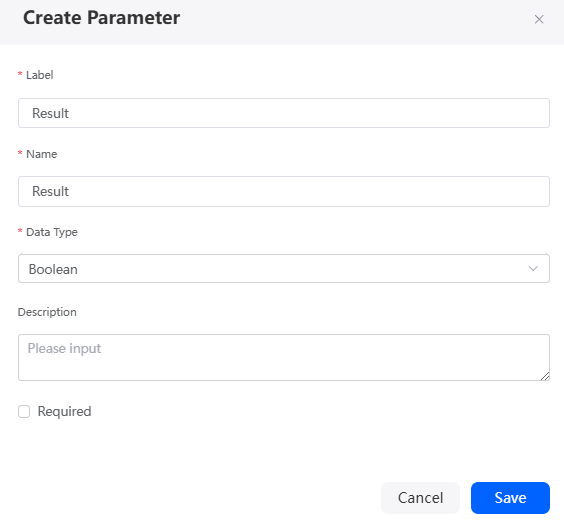
- Repeat the preceding operations to create a parameter whose Name and Label are Result and Data Type is Boolean.
Figure 4 Creating a Result parameter
 Figure 5 Custom parameter table
- On the Basic Information tab page, click Enable to enable this event.
An event can be used in flows and business processes only after it is enabled. Otherwise, the event cannot be selected.
Feedback
Was this page helpful?
Provide feedbackThank you very much for your feedback. We will continue working to improve the documentation.See the reply and handling status in My Cloud VOC.
For any further questions, feel free to contact us through the chatbot.
Chatbot


