
Creating a Blank Application
An application is an executable program that runs certain services. Creating an application is the first step in project development and the entry for building an E2E software application. Before developing your project, create an application, and then perform frontend development, backend development, and integration development in the application.
You can create frontend pages, arrange and configure logical modular elements, and create different function applications by drag and drop. This section describes how to quickly create a blank application.
Creating a Blank Application
- Go to the Huawei Cloud Astro Zero console.
- On the homepage, click Access Homepage. The application development page is displayed.
If the system shows a message indicating that you do not have the developer permission, contact the administrator to add it, see How Do I Grant Developer Permissions to a Subuser After Authorization Fails?
- In the navigation pane, choose Applications. On the displayed page, click Low-Code or
 .
. - In the displayed dialog box, choose Standard Applications and click Confirm. Figure 1 Selecting an application type

- Define a dedicated namespace before creating your first application. Figure 2 Information

In the displayed dialog box, click the create button, enter a namespace (for example, CNAME), and click Create. The system returns to the application development page. Perform 3 and 4 again.
- Data can be packaged and shared between tenants. To avoid duplicate names of data (such as objects, applications, and flows), define a namespace before creating an application. The namespace of each tenant is unique, and only one namespace can be created by each tenant.
- Once a namespace is created, it cannot be modified or deleted. Before creating a namespace, confirm related information. You are advised to use the abbreviation of the company or team as the namespace.
Figure 3 Entering a namespace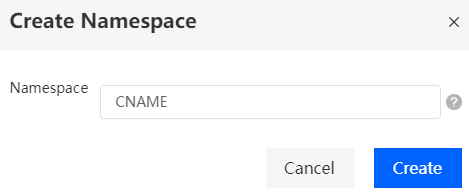
Table 1 Parameters for creating a namespace Parameter
Description
Namespace
Name of the namespace to be created, which cannot be modified or deleted after being set. The naming requirements are as follows:
- Enter up to 15 characters.
- Start with a letter and can contain only letters, digits, and underscores (_). Avoid using two underscores (_) in a row or ending with an underscore (_).
The system automatically adds the namespace before the name of an application or application element (such as an object, script, flow, or page) that you create. For example, if your namespace is CNAME, the names of all applications and application elements (such as objects, scripts, and pages) that you create later will start with CNAME__.
- Set basic information about the new application and click the confirm button. Figure 4 Creating a blank application

- Select a scenario. Figure 5 Selecting a scenario

- Backend development
- Objects: An object is similar to a table in a database of a traditional service system. Each object corresponds to a database table for storing the configuration data and service data required by a service system.
- BPMs: A Business Process Management (BPM) system, built on BPMN 2.0 industry specifications, is designed for modeling business processes. The function within the platform that drives the execution of processes is known as the BPM engine.
- Scheduled Tasks: You can create a scheduled task to automatically execute a script or a flow for specific service functions. For example, a scheduled task in the system suspends expired offerings at 03:00 every day.
- Frontend development
- Standard Pages: You can drag widgets to a canvas to quickly develop frontend services through low- or no-code configurations. Common service applications like leave e-flow, business trip reimbursement, and online voting primarily perform basic operations: adding, deleting, modifying, and querying service data. These applications feature straightforward frontend page designs. You can use the standard pages provided by the platform.
- Advanced Pages: Advanced pages are highly customizable, packed with a variety of powerful widgets. They support a range of frameworks and coding options, making them perfect for complex page design needs.
- Reports: A report is a visual summary of internal data, offering an easy way to understand and analyze information. With reports, you can better understand the existing issues and opportunities of your services.
- Integration development
- Open APIs: By defining service APIs, you can quickly customize required service APIs and register the API services with the gateway for third parties to use.
- Integrating Message Data into Huawei Cloud Astro Zero Through the Data Access Function: When data needs to be obtained from external data sources, the system processes the data, converts the data into internal events, and sends the internal events to Kafka or ROMA Connect. In this case, you can configure data access.
- Using Connectors to Interconnect with Cloud Services: You can incorporate third-party systems into Huawei Cloud Astro Zero using connectors. In this way, third-party functions can be used by applications' flows or scripts.
- Backend development
- After the application is developed, choose Run > Run Now to preview and experience the application.
If the effect is not as expected, return to for modification.
Related Documents
- Huawei Cloud Astro Zero supports collaborative development. For details, see How Do I Enable Collaborative Development?
- In collaborative development, you can assign each developer different permissions to view, build, or manage an application. For details, see How Do I Control User Permissions During Collaborative Development?
Feedback
Was this page helpful?
Provide feedbackThank you very much for your feedback. We will continue working to improve the documentation.See the reply and handling status in My Cloud VOC.
For any further questions, feel free to contact us through the chatbot.
Chatbot


