
How Do I Enable a Local Storage Device to Copy Files to an APS?
Administrators can configure the following policies to copy application files from a local storage device to an APS. You only need to configure one of the following policies.
Clipboard Redirection
- Log in to the Workspace Application Streaming console as an administrator.
- In the navigation pane, click Policy Groups. The Policy Groups page is displayed.
- Click Create Policy Group in the upper right corner. The Create Policy Group page is displayed.
- Configure the Policy Name, Description, and Creation Mode, and click Next: Configure Policy.
- The Policy Name must contain digits, letters, and underscores (_), and cannot contain more than 55 characters, for example, workspace2storage_Clipboard_c2b.
- The description contains up to 255 characters. For example, clipboard redirection is used when an external device copies a file to an APS.
- Retain the default creation mode.
Figure 1 Creating a policy group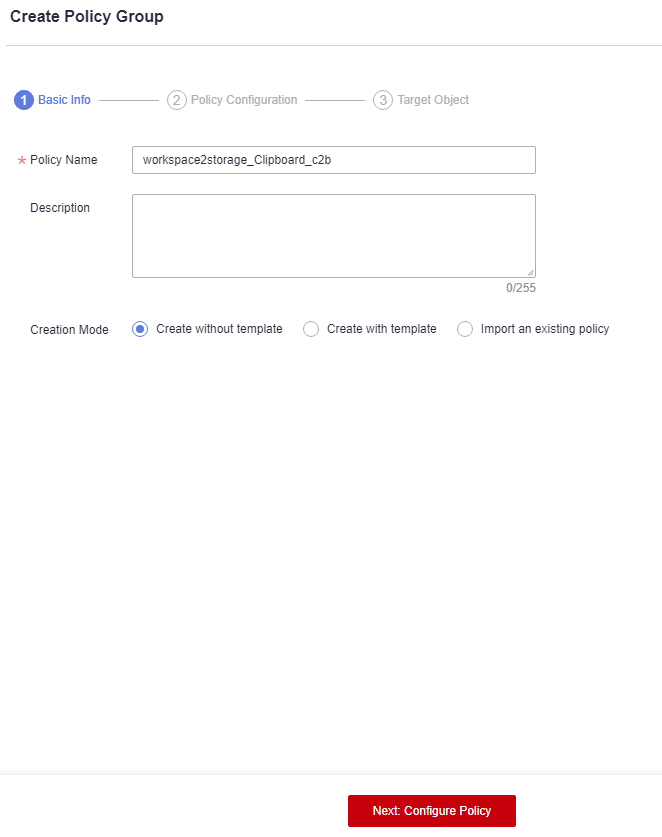
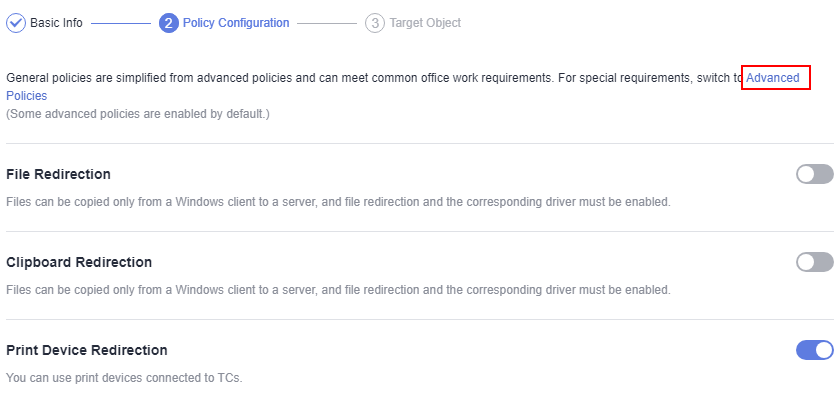
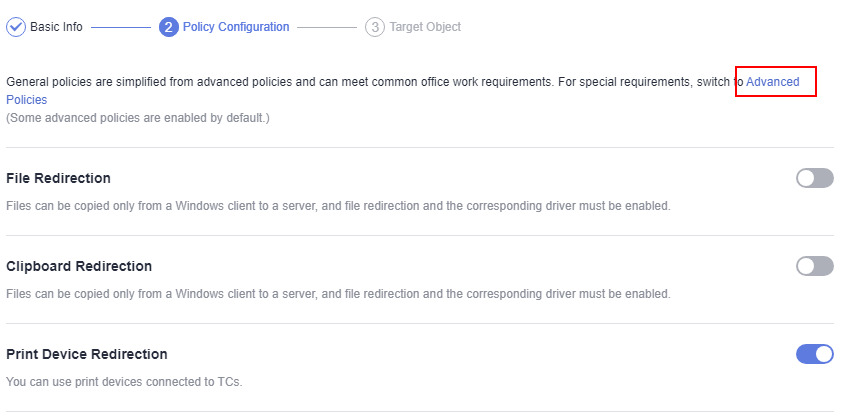
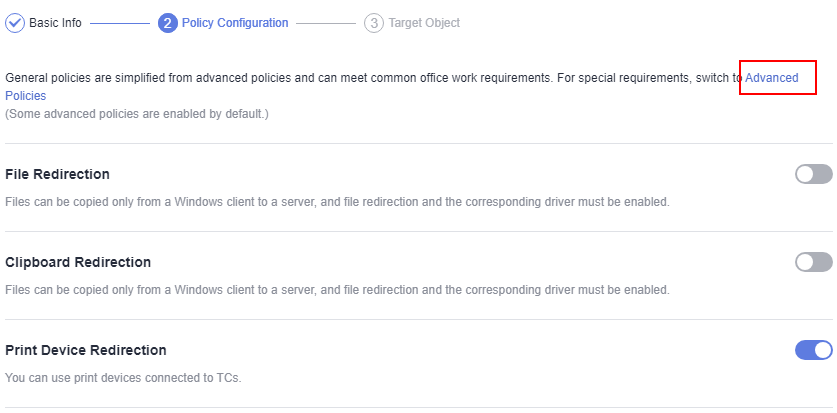
- Click Advanced Policies. Figure 2 Switching to advanced policies
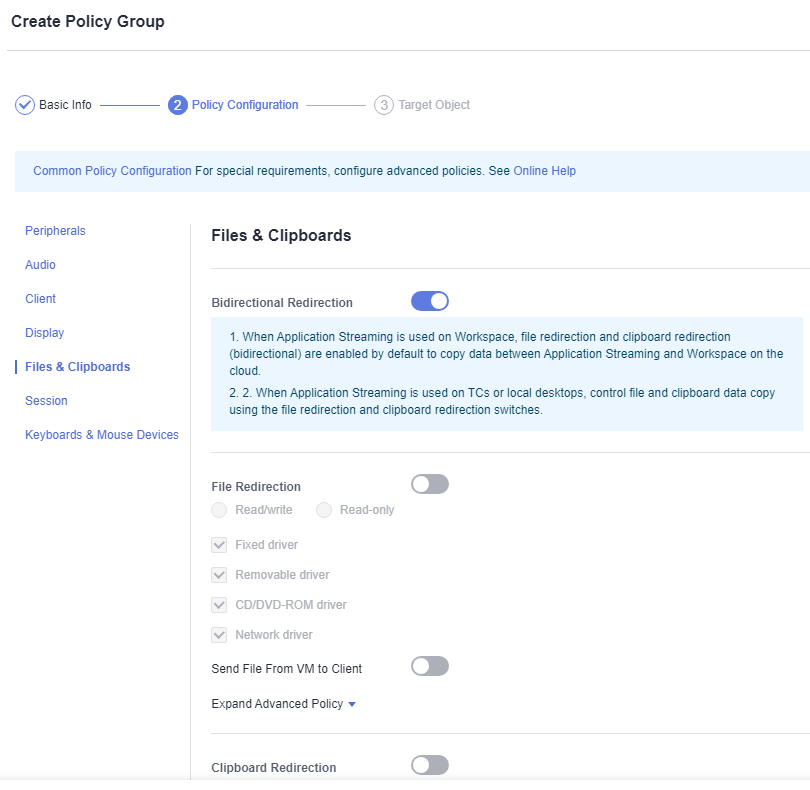
- On the displayed page, click Files & Clipboards.
- Enable the Clipboard Redirection policy, and select Client to server, as shown in Figure 3.

- Rich text copy and file copy are supported only when both the client (TC/SC) OS and the APS OS are Windows. A maximum of 500 files can be copied at the same time.
- If the OS of a client (TC/SC or mobile client) or an APS is not Windows, only text can be copied.
- Click Next: Select Object.
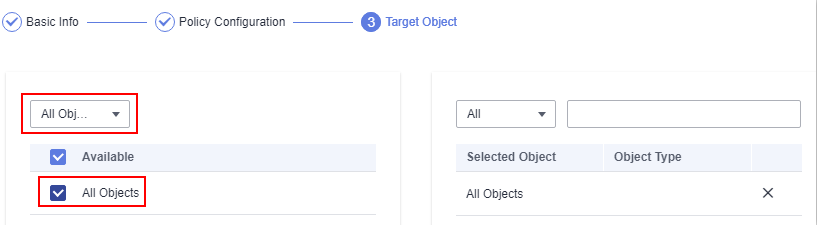
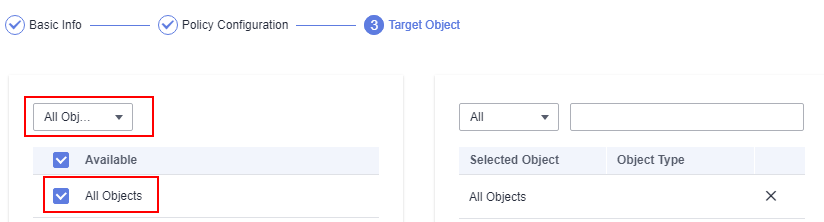
- Select an object as required. For example, if you select All Objects and select all objects, the policy applies to all users and application groups in the current project.Figure 4 Selecting an object
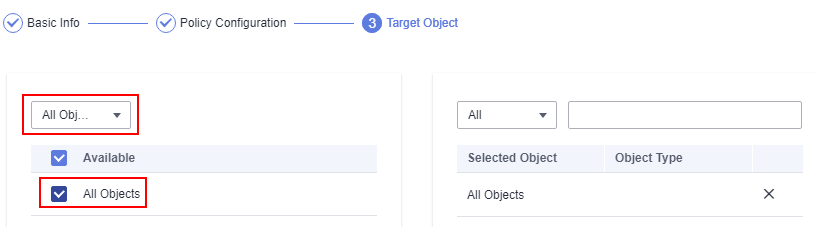
- Click Next: Finish.
File Redirection
- Log in to the Workspace Application Streaming console as an administrator.
- In the navigation pane, click Policy Groups. The Policy Groups page is displayed.
- Click Create Policy Group in the upper right corner. The Create Policy Group page is displayed.
- Configure the Policy Name, Description, and Creation Mode, and click Next: Configure Policy.
- The Policy Name must contain digits, letters, and underscores (_), and cannot contain more than 55 characters, for example, storage2workspace_Fileredirection.
- The description contains up to 255 characters. For example, file redirection is used when an external device copies a file to a Workspace Application Streaming server.
- Retain the default creation mode.
Figure 5 Creating a policy group
- Click Advanced Policies. Figure 6 Switching to advanced policies
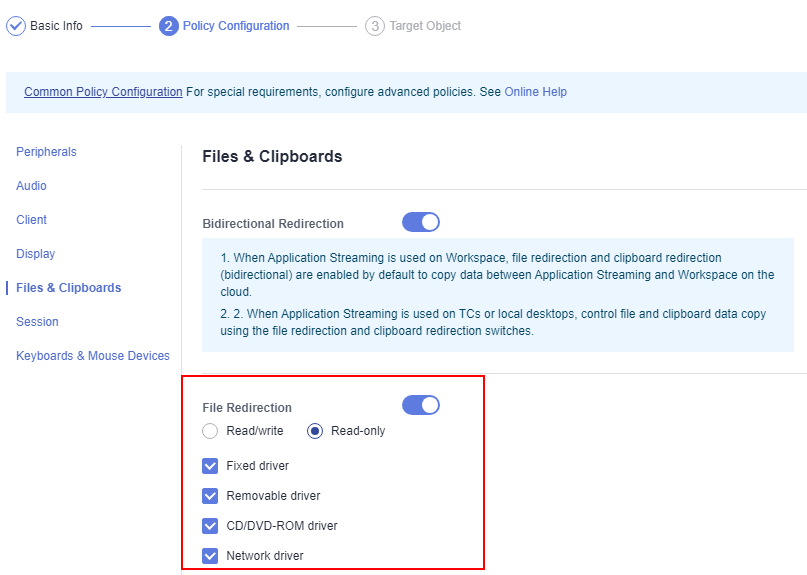
- On the displayed page, click Files & Clipboards.
- Enable the File Redirection policy and select Read-only, as shown in Figure 7.
You do not need to set other advanced policy parameters under Files & Clipboards. If you have strict requirements on the traffic and file size, set the parameters by referring to Configuring an Advanced Policy.
- Click Next: Select Object.
- Select an object as required. For example, if you select All Objects and select all objects, the policy applies to all users and application groups in the current project.Figure 8 Selecting an object
- Click Next: Finish.
File Sending
- Log in to the Workspace Application Streaming console as an administrator.
- In the navigation pane, click Policy Groups. The Policy Groups page is displayed.
- Click Create Policy Group in the upper right corner. The Create Policy Group page is displayed.
- Configure the Policy Name, Description, and Creation Mode, and click Next: Configure Policy.
- The Policy Name must contain digits, letters, and underscores (_), and cannot contain more than 55 characters, for example, storage2workspace_File.
- The description contains up to 255 characters. For example, file sending is used when an external device copies a file to an APS.
- Retain the default creation mode.
Figure 9 Creating a policy group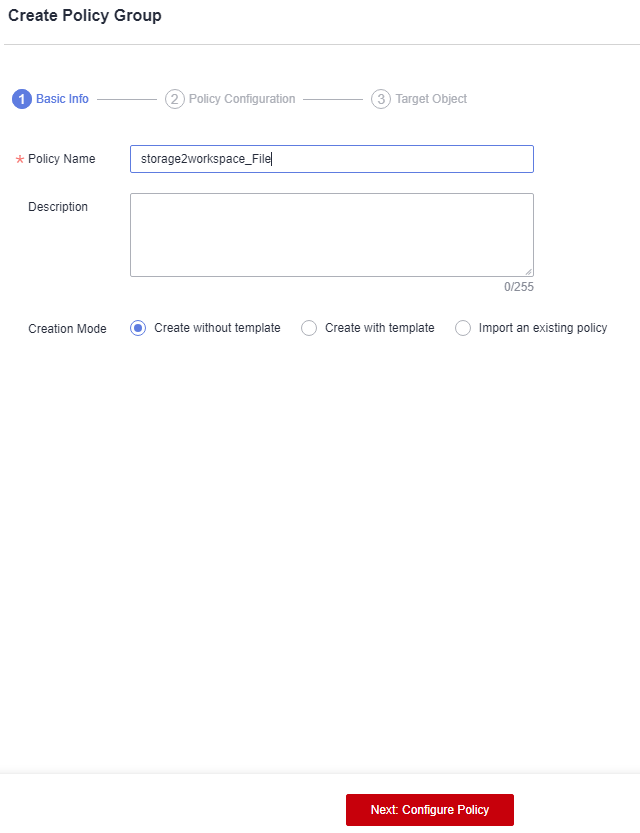
- Click Advanced Policies. Figure 10 Switching to advanced policies
- On the displayed page, click Files & Clipboards.
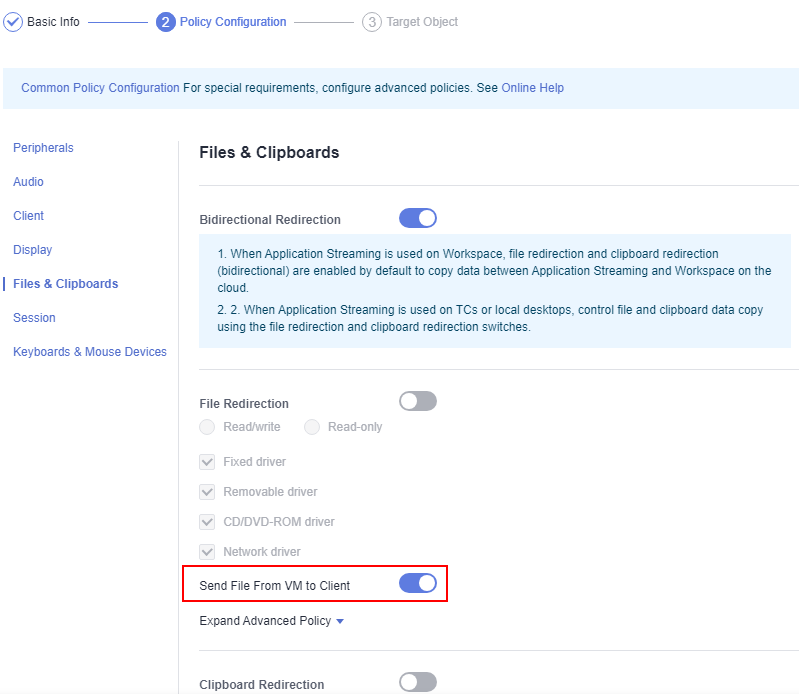
- Enable the Send File From VM to Client policy, as shown in Figure 11.
If Send File From VM to Client is enabled, you can send files from an external storage device to the APS only when both the client (TC/SC) and the server run Windows.
- Click Next: Select Object.
- Select an object as required. For example, if you select All Objects and select all objects, the policy applies to all users and application groups in the current project.Figure 12 Selecting an object
- Click Next: Finish.
Feedback
Was this page helpful?
Provide feedbackThank you very much for your feedback. We will continue working to improve the documentation.See the reply and handling status in My Cloud VOC.
For any further questions, feel free to contact us through the chatbot.
Chatbot


