
Configuring Desktop Data Synchronization
Scenarios
You can use AD group policies to configure folder redirection policies to save users' files and configurations to a remote storage system. When a user logs in to the system, the user can directly read personal files from the remote file system.
Constraints
The file system need to support the SMB (CIFS) protocol.
Procedure
Purchasing a file storage server
- Purchase a cloud desktop or ECS as the file storage server.
In the current project, administrators can purchase a Windows desktop with a large disk capacity or a Windows ECS as the file storage server.
- Purchase a Windows desktop with a large disk capacity by referring to Buying a Custom Desktop.

- Configure the data disk size as required. It is recommended that the data disk size be greater than 100 GB.
- Cloud desktops and cloud applications in the same project are in the same domain. You do not need to manually add them to a domain.
- Buy an ECS and add the ECS to the domain of an APS by referring to How Do I Add an ECS to the Domain of an APS?.
You are advised to purchase general computing-plus ECSs with c6.4xlarge.4 or higher specifications, prepare sufficient bandwidth, and use data disks with ultra-high I/O or extreme SSD storage types.
- Purchase a Windows desktop with a large disk capacity by referring to Buying a Custom Desktop.
Creating a folder redirection security group on the AD server
- Log in to the AD server and open the server manager.
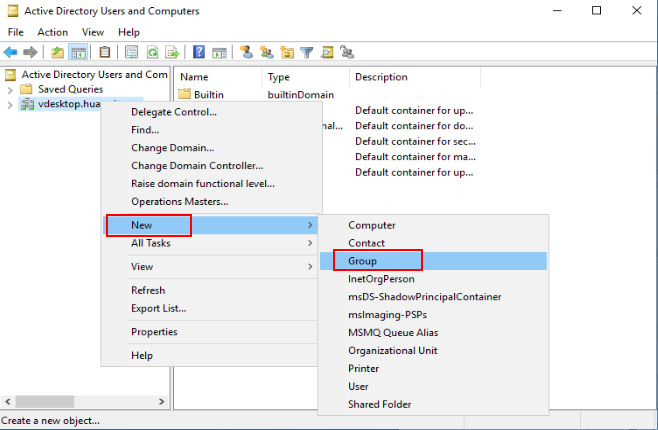
- Choose Tools > Active Directory Users and Computers.
- Right-click a domain or OU and choose New > Group from the shortcut menu.
- Enter group information.
- Set a custom group name. For example, Folder Redirection User Group.
- Set Group scope to Global.
- Set Group type to Security.
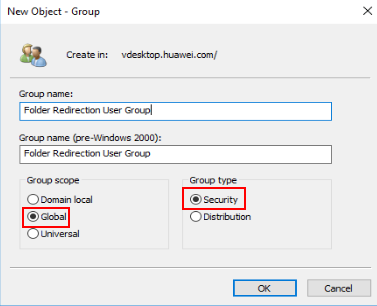
- Click OK.
- Right-click the created user group and choose Properties from the shortcut menu.
- Switch to the Members tab and click Add.
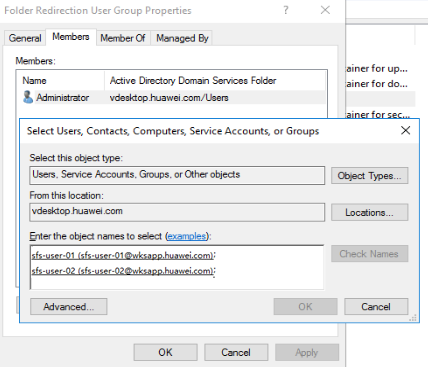
- Enter the user or group to be added to the folder redirection group, click OK, and then click OK.
Creating a shared folder on the file storage server
- Create a folder (for example, Profiles) in the root directory of the data disk on the file storage server.
- Right-click the new folder and choose Share > Specific people from the shortcut menu.
- Search for the security group created in the AD server in the step 5 and add it to the share list.
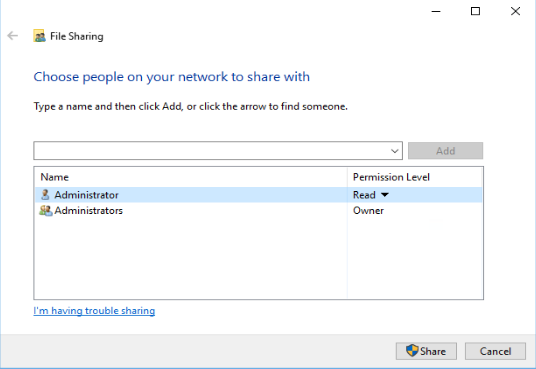
- Click Share.

The generated shared directory \WKSAPP-SFS-02\Profiles is the UNC name of the shared folder.
Create a folder redirection GPO in the group policy management of the AD server.
- Open the server manager on the AD server and choose Tools > Group Policy Management. The Group Policy Management page is displayed.
- Right-click the domain or OU in which you want to create a file redirection policy, and select Create a GPO in this domain, and Link it here.
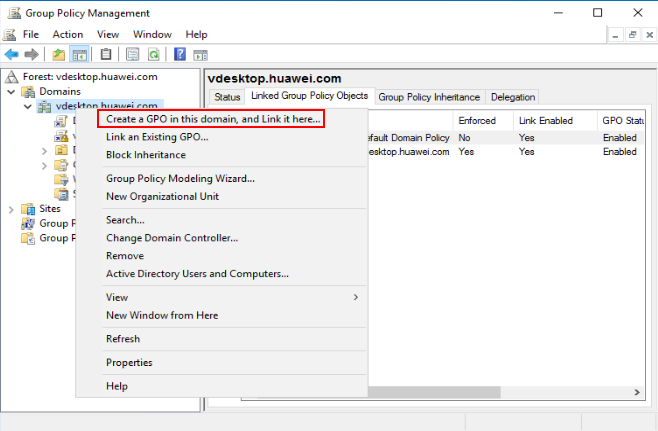
- In the displayed dialog box, enter the GPO name (for example, Folder Redirection) and click OK.
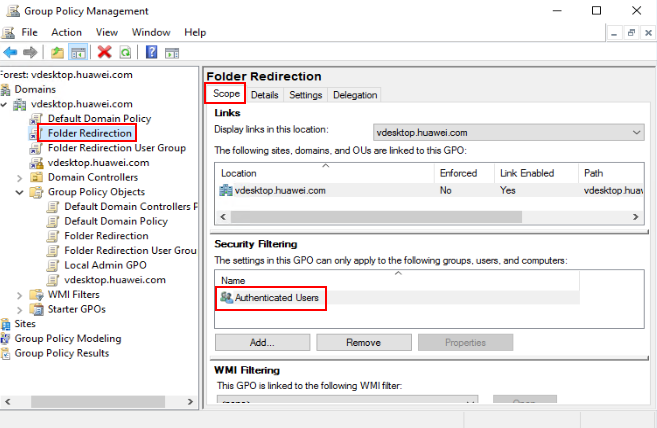
- Select the created GPO. In the right pane, choose Scope > Security Filtering. In the security filtering area, select Authenticated Users and click Remove.
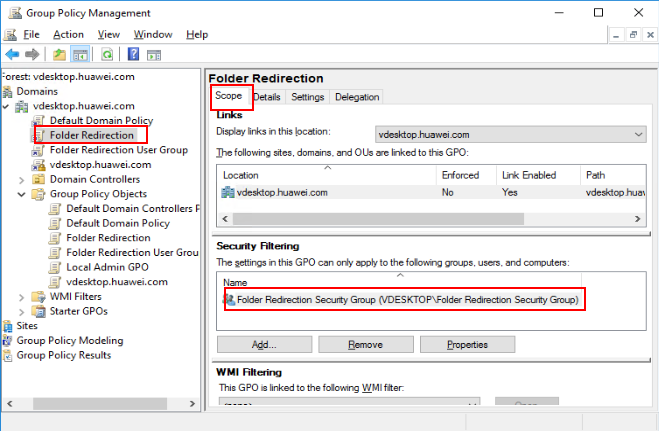
- Click Add, search for the created user group, and click OK to add the user group to the list.
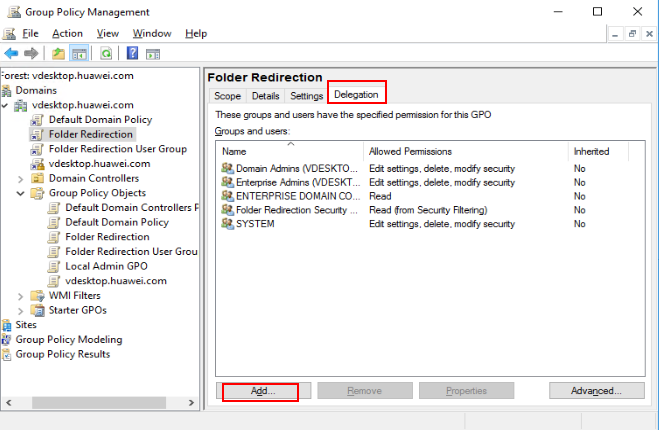
- Choose Delegation > Add, and enter Authenticated Users. Click OK, and then click OK again to accept the default read permission.
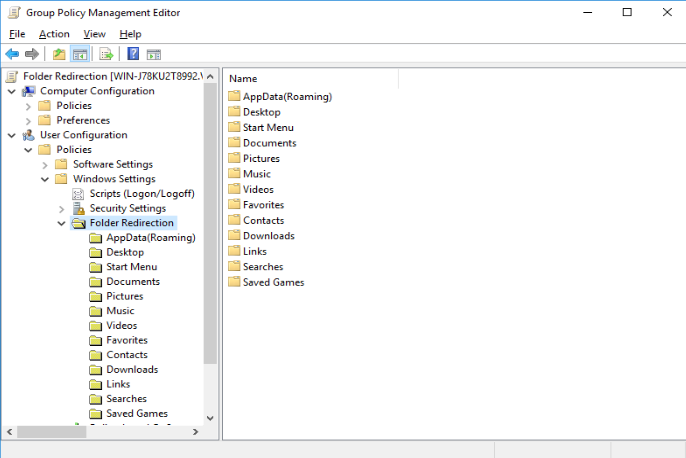
Configuring group policies for folder redirection GOP on the AD server
- Right-click the Folder Redirection GPO object and choose Edit from the shortcut menu. Choose User Configuration > Policies > Windows Settings > Folder Redirection on the displayed page.
- Right-click the folder to be redirected and choose Properties from the shortcut menu.
- In the Target tab page, set Setting to Basic - Redirect everyone's folders to the same location.
- Set Root Path to the UNC name of the shared folder generated in 13, for example, \\WKSAPP-SFS-02\Profiles.
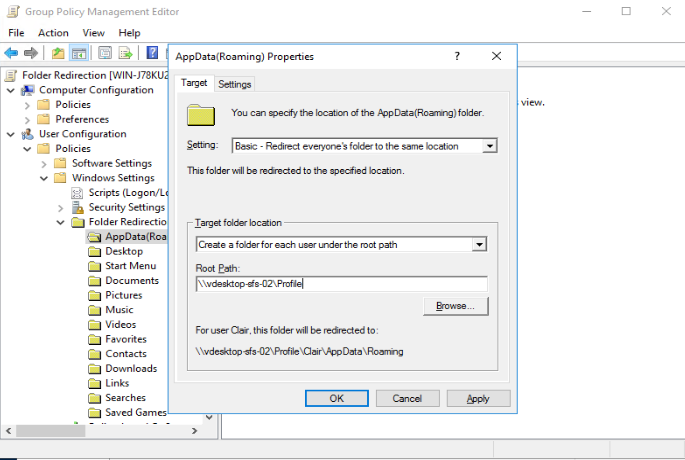
- Click OK.
Testing the function of redirecting a user folder
- Log in to the computer in the domain using a user account that is configured to use the redirection folder. Then confirm the folders and configuration files that have been redirected.
If you have logged in to the computer before, open the command-line interface (CLI) and enter the following command to force the update:
gpupdate /force
- Log in to the file sharing server and check whether the corresponding folder is created in the shared directory.
Feedback
Was this page helpful?
Provide feedbackThank you very much for your feedback. We will continue working to improve the documentation.See the reply and handling status in My Cloud VOC.
For any further questions, feel free to contact us through the chatbot.
Chatbot


