Profile Definition
Overview
A product model (also called profile) is used to describe the capabilities and features of a device. Developers construct an abstract model of a device by defining a profile file on the IoT platform so that the IoT platform can understand the services, properties, and commands supported by the device.

Defining a Profile
If you choose to use a default template during Product Creation, the system automatically chooses the corresponding profile template. You can directly use or modify the profile template. If a customized product template is used, perform the following operations to fully define the profile:
- On the Product Development page, select a product to enter its development space.

- In the development space, choose Profile Definition and click Add Service.

- In the Add Service area, define the service name, properties, and commands. Each service can contain both properties and commands or only one of them. Configure the properties and commands based on the actual situation.

- Enter Service Name using Camel-Case naming method, such as WaterMeter and Battery.

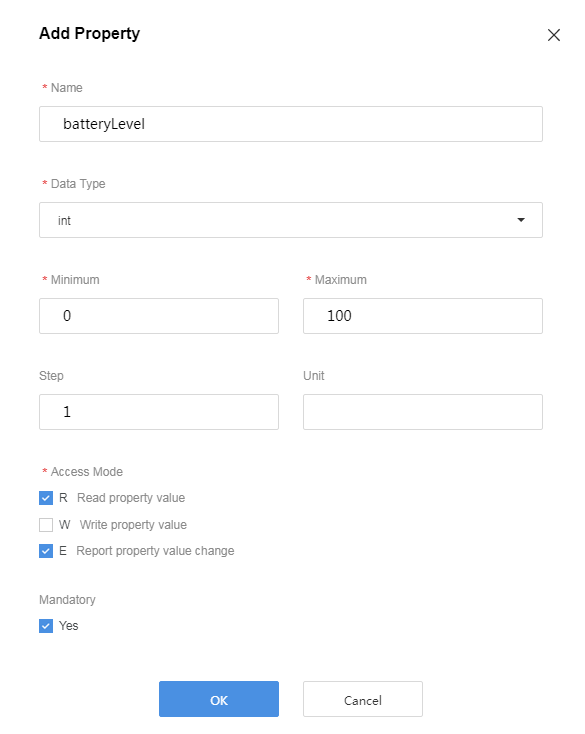
- Click Add under Property List, set the parameters in the displayed dialog box, and click OK. For Name, the first letter of the first word must be lowercase, and the first letters of subsequent words are capitalized, for example, batteryLevel or internalTemperature. For other parameters, set them based on the actual situation.
The rules for configuring Data Type are as follows:
- int: If the reported data is an integer or Boolean values, set the data type to this value.
- decimal: If the reported data is a decimal, set the data type to this value.
- string: If the reported data is a string, enumerated values, or Boolean values, set the data type to this value. If enumerated or Boolean values are reported, use commas (,) to separate the values.
- DateTime: If the reported data is a date, set the data type to this value.
- jsonObject: If the reported data is in JSON structure, set the data type to this value.

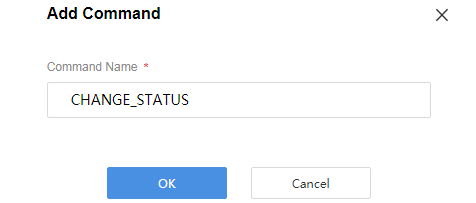
- Click Add under Command List. In the displayed dialog box, set Command Name and click OK. The value of Command Name must consist of uppercase letters, and the words are separated by underscores (_), for example, DISCOVERY or CHANGE_STATUS.

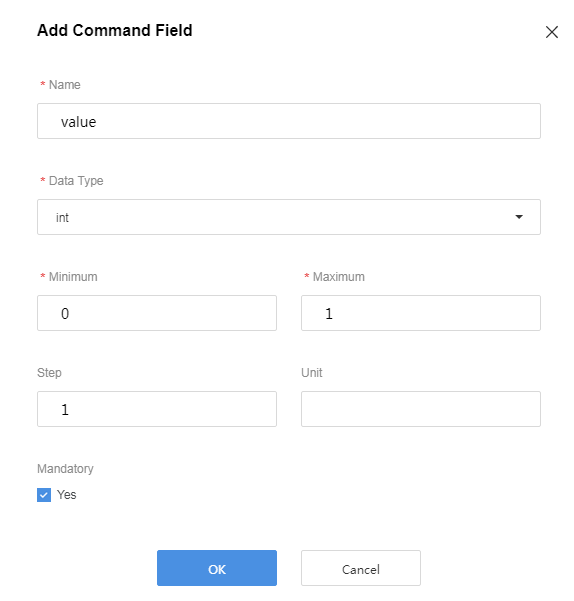
- Click Add under Command Fields. In the dialog box displayed, set the parameters and click OK. For Name of the command field, the first letter of the first word is lowercase, and the first letters of the subsequent words are capitalized, for example, value. For other parameters, set them based on the actual situation.

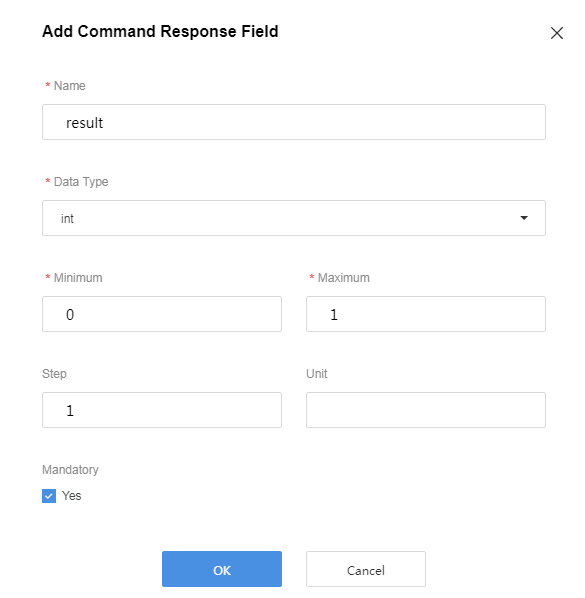
- Click Add under Command Response Fields. In the dialog box displayed, set the parameters and click OK. For Name of the command response field, the first letter of the first word is lowercase, and the first letters of the subsequent words are capitalized, for example, result. For other parameters, set them based on the actual situation.
The command response field is optional. This field needs to be defined only when the device needs to return the command execution result.

- Enter Service Name using Camel-Case naming method, such as WaterMeter and Battery.
Feedback
Was this page helpful?
Provide feedbackThank you very much for your feedback. We will continue working to improve the documentation.See the reply and handling status in My Cloud VOC.
For any further questions, feel free to contact us through the chatbot.
Chatbot


