
Buying and Connecting to an Instance
This section describes how to quickly buy and connect to a GeminiDB Redis instance on the GeminiDB console.
To buy an instance for the production environment, you can set key parameters of its specifications.
Preparations
- Sign up for a HUAWEI ID and complete real-name authentication.
Before buying a GeminiDB Redis instance, Signing Up for a HUAWEI ID and Enabling Huawei Cloud Services.
If you have enabled Huawei Cloud services, skip this step.
- To perform refined management on Huawei Cloud resources, create an IAM user and user group and grant permissions to the user by following Creating a User and Granting GeminiDB Redis API Permissions .
Video Tutorial
This video shows you how to buy and log in to a GeminiDB Redis instance.
Procedure
Buying an Instance
- Log in to the GeminiDB console.
- On the Instances page, click Buy DB Instance.
- Set Billing Mode and Region.
Figure 1 Basic settings

Table 1 Basic settings Parameter
Example Value
Description
Billing Mode
Pay-per-use
Billing mode of an instance
- Yearly/Monthly: You prepay for an instance based on a fixed subscription period (monthly or yearly). Longer subscriptions offer larger discounts. This mode is a good option for long-term stable workloads.
- Pay-per-use: You are billed based on how long you have actually used GeminiDB. Pricing is listed on a per-hour basis, and bills are calculated down to the second. This mode allows you to adjust resource usage easily. You neither need to prepare for resources in advance, nor end up with excessive or insufficient preset resources.
Region
CN-Hong Kong
Region where a tenant is located
NOTE:To reduce network latency, select a region nearest from which you will access the instance. Instances deployed in different regions cannot communicate with each other over a private network. After you buy an instance, you cannot change its region.
- Set Compatible API to Redis.
- Set Storage Type, Product Type, and DB Instance Type.
Figure 2 Resource configuration

Table 2 Resource configuration Parameter
Example Value
Description
Storage Type
Classic
You can select Classic or Cloud native.
- Classic: classic architecture with decoupled storage and compute
- Cloud native: more flexible, new-gen version with support for more AZs
NOTE:- Cloud native storage supports only proxy cluster instances.
- The way you use instances with classic or cloud native storage is similar. Cloud native storage supports more AZs. If both classic and cloud native are supported, you can select any of them.
Product Type
Standard
Classic storage is available to standard and capacity-oriented instances. Cloud native storage is available to capacity-oriented and performance-enhanced instances.
- Standard: Stable and low-latency performance is provided for common scenarios such as advertising and recommendation, gaming, e-commerce, and Internet of Vehicles (IoV).
- Capacity-oriented: Large-capacity key-value storage is suitable for average performance requirements and expectations of low costs.
- Performance-enhanced instances provide high I/O performance and can handle up to millions of QPS per shard, with low latency.
NOTE:- Cloud native storage is unavailable to standard instances.
- Performance-enhanced instances are only available to cloud native storage.
- Performance-enhanced instances are in OBT. To create them, choose Service Tickets > Create Service Ticket in the upper right corner of the console.
DB Instance Type
Proxy cluster
Proxy cluster, Redis Cluster, and primary/standby instances are supported.
- In a sharded cluster, a proxy cluster GeminiDB Redis instance is connected through proxies to a standalone Redis instance, Redis Sentinel, and Redis Cluster. The proxy cluster instance has strong horizontal scaling capabilities and can handle millions of QPS and dozens of terabytes of data.
- With Redis Cluster at its core, a Redis Cluster GeminiDB Redis instance is directly connected to Redis Cluster to reduce latency and improve performance.
- A primary/standby instance is compatible with a standalone Redis instance and Redis Sentinel. This instance type is used when hashtags are unavailable.
- Select Instance Creation Method.
Figure 3 Instance creation method

Table 3 Instance creation method Parameter
Example Value
Description
Instance Creation Method
Fast configure
You can select Fast configure or Standard configure for instances with classic storage.
- If you set Instance Creation Method to Fast configure, you can select the recommended node specifications, quantity, and storage.
NOTE:
- Instance specifications with the memory of 8 GB and 16 GB are available only in a single AZ. The console shows available specifications.
- The QPS is only for reference.
- Standard configure: You can specify node specifications, quantity, and storage.
If the number of nodes exceeds the upper limit, you can choose Service Tickets > Create Service Ticket in the upper right corner of the console and contact the customer service.
- If you set Instance Creation Method to Fast configure, you can select the recommended node specifications, quantity, and storage.
- Set Password.
Figure 4 Setting a password

Table 4 Setting a password Parameter
Example Value
Description
Password
Skip
Select Skip or Configure.
- Skip: Set the database password after creating an instance.
- Configure: Set the database password when creating an instance.
NOTE:You cannot set a password after creating a Redis Cluster GeminiDB Redis instance.
- Set Enterprise Project.
Figure 5 Enterprise project

Table 5 Enterprise project Parameter
Example Value
Description
Enterprise Project
default
This parameter is used for enterprise users.
An enterprise project groups cloud resources, so you can manage resources and members by project. The default project is default.
Select an enterprise project from the drop-down list. For more information about enterprise projects, see Enterprise Management User Guide.
- Retain the default values for other parameters and click Buy Now.
- On the order confirmation page, check the instance information. If you need to modify the information, click Previous. If no modification is required, read and agree to the service agreement and click Submit.
- Click Back to Instance Management to go to the instance list.
- On the Instances page, view and manage the created instance.
- Creating an instance takes about 5 to 9 minutes. During the process, the instance status becomes Creating.
- After the creation is complete, the status changes to Available.
Figure 6 Available instance
Connecting to an Instance Through DAS
Data Admin Service (DAS) makes instance management secure and efficient from a web-based console. You can connect to and manage your instances through DAS. By default, you have permissions required for remote login. DAS is recommended for connecting to your instance. For more information, see Data Admin Service (DAS).
- Log in to the GeminiDB console.
- In the instance list, locate the target instance and click Log In in the Operation column.
Figure 7 Logging in to a GeminiDB Redis instance

You can also click the instance name to go to the Basic Information page. Click Log In in the upper right corner.
Figure 8 Logging in to a GeminiDB Redis instance
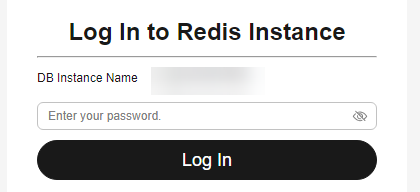
- Enter the password for logging in to the instance.
Figure 9 Logging in to a GeminiDB Redis instance
If you need to log in again after the password is reset, click Re-login in the upper right corner and use the new password.
Figure 10 Re-login
Follow-up Operations

- Save commands to the execution record.
By default, recent commands are saved for future queries.
You can click the Executed Commands tab to view them.
Figure 12 Executed commands
If this function is disabled, the commands executed subsequently are not displayed. You can click
 next to Save Executed SQL Statements in the upper right corner to disable this function.
 - Execute a command.
Enter a command in the command window and click Execute or F8.

- Do not use transactions, Lua scripts, Pub/Sub commands, or other commands that have blocking semantics.
- For an instance with multiple databases, you can switch them on the console, but not by running SELECT.
Figure 13 Executing a command
After a command is executed, you can view the execution result on the Results tab.
- Save a command.
You can save a command to all instances, the current instance, or the current database. Then you can view details in My Commands.
Figure 14 Saving a command
- View my commands.
Common commands are displayed the My Commands page.
You can set a filter to narrow the scope of commands. If you select All, all commands saved in the current account are displayed.
Figure 15 Filtering commands
You can also search for commands by title and statement.
Figure 16 Searching for commands
On the My Commands page, you can also create, edit, and delete a command or copy it to the command window.
Figure 17 Managing a command
- Clear a command.
You can also press F10 to clear the command in the command window.
Figure 18 Clearing a command
FAQs
- How Do I Select Proper Node Specifications and Node Quantity When Purchasing a GeminiDB Redis Instance?
- Is a Primary/Standby or Cluster Deployment Mode Preferred for GeminiDB Redis Instances with Several GB of Storage Space?
- What Should I Do If the DAS Console Cannot Be Redirected After I Click Log In in the Operation Column in the Instance List or Click Log In on the Basic Information Page?
- Can I Change the VPC of a GeminiDB Redis Instance?
Helpful Links
The following documents provide more detailed descriptions and examples.
Related APIs
|
API |
Description |
|---|---|
|
Creates an instance. |
|
|
Deletes an instance. |
|
|
Queries instances and details based on specified conditions. |
Feedback
Was this page helpful?
Provide feedbackThank you very much for your feedback. We will continue working to improve the documentation.See the reply and handling status in My Cloud VOC.
For any further questions, feel free to contact us through the chatbot.
Chatbot


