
Flink Application Development
Flink is a unified computing framework that supports both batch processing and stream processing. It provides a stream data processing engine that supports data distribution and parallel computing. Flink features stream processing and is a top open-source stream processing engine in the industry.
Flink provides high-concurrency pipeline data processing, millisecond-level latency, and high reliability, making it suitable for low-latency data processing.
The Flink system consists of the following parts:
- Client
- TaskManager
TaskManager is a service execution node of Flink, which executes specific tasks. There can be many TaskManagers, and they are equivalent to each other.
- JobManager
JobManager is a management node of Flink. It manages all TaskManagers and schedules tasks submitted by users to specific TaskManagers. In high-availability (HA) mode, multiple JobManagers are deployed. Among these JobManagers, one is selected as the active JobManager, and the others are standby.
MRS provides sample application development projects based on multiple Flink components. This practice provides guidance for you to obtain and import a sample project after creating an MRS cluster and then conduct building and commissioning locally. In this sample project, you can implement Flink DataStream to process data.
Creating an MRS Flink Cluster
- Create and purchase an MRS cluster that contains Hive. For details, see Buying a Custom Cluster.

In this practice, an MRS 3.2.0-LTS.1 cluster, with Hadoop and Flink installed and with Kerberos authentication enabled, is used as an example.
- Click Buy Now and wait until the MRS cluster is created.
Preparing the Cluster Configuration File
- After the cluster is created, log in to FusionInsight Manager and create a cluster user for submitting Flink jobs.
Choose System > Permission > User. On the displayed page, click Create. On the displayed page, create a machine-machine user, for example, flinkuser.
Add the supergroup user group and associate with the System_administrator role.
- Choose System > Permission > User. In the Operation column of flinkuser, choose More > Download Authentication Credential. Save the file and decompress it to obtain the user.keytab and krb5.conf files of the user.
- Choose Cluster. On the Dashboard tab, click More and select Download Client. In the dialog box that is displayed, set Select Client Type to Configuration Files Only and click OK. After the client package is generated, download the package as prompted and decompress it.
For example, if the client configuration file package is FusionInsight_Cluster_1_Services_Client.tar, decompress it to obtain FusionInsight_Cluster_1_Services_ClientConfig_ConfigFiles.tar. Then, continue to decompress this file.
Go to the FusionInsight_Cluster_1_Services_ClientConfig_ConfigFiles\Flink\config directory and obtain the configuration files.
Obtaining the Sample Project
- Obtain the sample project from Huawei Mirrors.
Download the source code and configuration files of the sample project, and configure related development tools on your local PC. For details, see Obtaining Sample Projects from Huawei Mirrors.
Select a branch based on the cluster version and download the required MRS sample project.
For example, the sample project suitable for this practice is FlinkStreamJavaExample, which can be obtained at https://github.com/huaweicloud/huaweicloud-mrs-example/tree/mrs-3.2.0.1/src/flink-examples/flink-examples-security/FlinkStreamJavaExample.
- Use IDEA to import the sample project and wait for the Maven project to download the dependency packages. For details, see Configuring and Importing Sample Projects.
Figure 1 Flink sample project
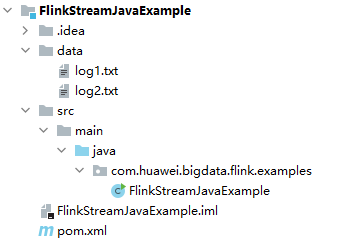
After you configure Maven and SDK parameters on the local PC, the sample project automatically loads related dependency packages.
- Use the Flink client to submit the developed DataStream program so security authentication is not required in the code.
Assume that there is a log file of time on site during weekends of an online shopping website. Write the DataStream program to collect real-time statistics on detailed information about the female users who spend more than 2 hours on online shopping.
The first column in the log file records names, the second column records gender, and the third column records the time on site (in minutes). Three columns are separated by commas (,).- log1.txt: logs collected on Saturday
LiuYang,female,20
YuanJing,male,10
GuoYijun,male,5
CaiXuyu,female,50
Liyuan,male,20
FangBo,female,50
LiuYang,female,20
YuanJing,male,10
GuoYijun,male,50
CaiXuyu,female,50
FangBo,female,60
log2.txt: logs collected on Sunday
LiuYang,female,20
YuanJing,male,10
CaiXuyu,female,50
FangBo,female,50
GuoYijun,male,5
CaiXuyu,female,50
Liyuan,male,20
CaiXuyu,female,50
FangBo,female,50
LiuYang,female,20
YuanJing,male,10
FangBo,female,50
GuoYijun,male,50
CaiXuyu,female,50
FangBo,female,60
The development procedure is as follows:
- Read the text data, generate DataStreams, and parse data to generate UserRecord.
- Search for the target data (time on site of female users).
- Perform keyby operation based on names and genders, and calculate the total time that each female user spends online within a time window.
- Search for users whose consecutive online duration exceeds the threshold.
public class FlinkStreamJavaExample { public static void main(String[] args) throws Exception { // Print the command reference for flink run. System.out.println("use command as: "); System.out.println("./bin/flink run --class com.huawei.bigdata.flink.examples.FlinkStreamJavaExample /opt/test.jar --filePath /opt/log1.txt,/opt/log2.txt --windowTime 2"); System.out.println("******************************************************************************************"); System.out.println("<filePath> is for text file to read data, use comma to separate"); System.out.println("<windowTime> is the width of the window, time as minutes"); System.out.println("******************************************************************************************"); // Read text pathes and separate them with commas (,). If the source file is in the HDFS, set this parameter to a specific HDFS path, for example, hdfs://hacluster/tmp/log1.txt,hdfs://hacluster/tmp/log2.txt. final String[] filePaths = ParameterTool.fromArgs(args).get("filePath", "/opt/log1.txt,/opt/log2.txt").split(","); assert filePaths.length > 0; // Set the time window. The default value is 2 minutes per time window. One time window is sufficient to read all data in the text. final int windowTime = ParameterTool.fromArgs(args).getInt("windowTime", 2); // Construct an execution environment and use eventTime to process the data obtained in a time window. final StreamExecutionEnvironment env = StreamExecutionEnvironment.getExecutionEnvironment(); env.setStreamTimeCharacteristic(TimeCharacteristic.EventTime); env.setParallelism(1); // Read the text data stream. DataStream<String> unionStream = env.readTextFile(filePaths[0]); if (filePaths.length > 1) { for (int i = 1; i < filePaths.length; i++) { unionStream = unionStream.union(env.readTextFile(filePaths[i])); } } // Convert the data, construct data processing logic, and calculate and print the results. unionStream.map(new MapFunction<String, UserRecord>() { @Override public UserRecord map(String value) throws Exception { return getRecord(value); } }).assignTimestampsAndWatermarks( new Record2TimestampExtractor() ).filter(new FilterFunction<UserRecord>() { @Override public boolean filter(UserRecord value) throws Exception { return value.sexy.equals("female"); } }).keyBy( new UserRecordSelector() ).window( TumblingEventTimeWindows.of(Time.minutes(windowTime)) ).reduce(new ReduceFunction<UserRecord>() { @Override public UserRecord reduce(UserRecord value1, UserRecord value2) throws Exception { value1.shoppingTime += value2.shoppingTime; return value1; } }).filter(new FilterFunction<UserRecord>() { @Override public boolean filter(UserRecord value) throws Exception { return value.shoppingTime > 120; } }).print(); // Call execute to trigger the execution. env.execute("FemaleInfoCollectionPrint java"); } // Construct a keyBy keyword for grouping. private static class UserRecordSelector implements KeySelector<UserRecord, Tuple2<String, String>> { @Override public Tuple2<String, String> getKey(UserRecord value) throws Exception { return Tuple2.of(value.name, value.sexy); } } // Resolve text line data and construct the UserRecord data structure. private static UserRecord getRecord(String line) { String[] elems = line.split(","); assert elems.length == 3; return new UserRecord(elems[0], elems[1], Integer.parseInt(elems[2])); } // Define the UserRecord data structure and override the toString printing method. public static class UserRecord { private String name; private String sexy; private int shoppingTime; public UserRecord(String n, String s, int t) { name = n; sexy = s; shoppingTime = t; } public String toString() { return "name: " + name + " sexy: " + sexy + " shoppingTime: " + shoppingTime; } } // Construct a class inherited from AssignerWithPunctuatedWatermarks to set eventTime and waterMark. private static class Record2TimestampExtractor implements AssignerWithPunctuatedWatermarks<UserRecord> { // add tag in the data of datastream elements @Override public long extractTimestamp(UserRecord element, long previousTimestamp) { return System.currentTimeMillis(); } // give the watermark to trigger the window to execute, and use the value to check if the window elements is ready @Override public Watermark checkAndGetNextWatermark(UserRecord element, long extractedTimestamp) { return new Watermark(extractedTimestamp - 1); } } } - log1.txt: logs collected on Saturday
Building and Running the Application
- In IntelliJ IDEA, configure the Artifacts information of the project.
- On the IDEA homepage, choose .
- On the Project Structure page, select Artifacts, click +, and choose JAR > Empty.
Figure 2 Adding Artifacts

- Set the name, type, and output path of the JAR package, for example, flink-demo.
Figure 3 Setting basic information

- Right-click 'FlinkStreamJavaExample' compile output and choose Put into Output Root from the shortcut menu. Then, click Apply.
Figure 4 Put into Output Root

- Click OK.
- Generate a JAR file.
- On the IDEA home page, choose .
- In the displayed menu, choose to generate the JAR file.
Figure 5 Build

- Obtain the flink-demo.jar file from the path configured in 1.c.
- Install and configure the Flink client.
- Install the MRS cluster client, for example, in /opt/hadoopclient.
- Decompress the authentication credential package downloaded from Preparing the Cluster Configuration File and copy the obtained file to a directory on the client node, for example, /opt/hadoopclient/Flink/flink/conf.
- Run the following command to set Flink client configuration parameters and save the settings:
vi /opt/hadoopclient/Flink/flink/conf/flink-conf.yaml
Add the service IP address of the client node and the floating IP address of FusionInsight Manager to the jobmanager.web.allow-access-address configuration item, and add the keytab path and username to the corresponding configuration items.
...
jobmanager.web.allow-access-address: 192.168.64.122,192.168.64.216,192.168.64.234
...
security.kerberos.login.keytab: /opt/client/Flink/flink/conf/user.keytab
security.kerberos.login.principal: flinkuser
...
- Configure security authentication.
- Run the following commands to generate a Flink client security authentication file:
cd /opt/hadoopclient/Flink/flink/bin
sh generate_keystore.sh
Enter a user-defined password for authentication.
- Configure paths for the client to access the flink.keystore and flink.truststore files.
cd /opt/hadoopclient/Flink/flink/conf/
mkdir ssl
mv flink.keystore ssl/
mv flink.truststore ssl/
vi /opt/hadoopclient/Flink/flink/conf/flink-conf.yaml
Change the paths of the following two parameters to relative paths:
security.ssl.keystore: ssl/flink.keystore
security.ssl.truststore: ssl/flink.truststore
- Run the following commands to generate a Flink client security authentication file:
- Upload the JAR package generated in 2 to the related directory on the Flink client node, for example, /opt/hadoopclient.
Create the conf directory in the directory where the JAR package is located, and upload the configuration files in Flink/config of the cluster client configuration file package obtained in Preparing the Cluster Configuration File to the conf directory.
- Upload the application source data files to the node where the NodeManager instance is deployed.
In this example, source data files log1.txt and log2.txt are stored on the local host. You need to upload the files to the /opt directory on all Yarn NodeManager nodes and set the file permission to 755.
- On the Flink client, run the yarn session command to start the Flink cluster.
cd /opt/hadoopclient/Flink/flink
bin/yarn-session.sh -jm 1024 -tm 1024 -t conf/ssl/
...
Cluster started: Yarn cluster with application id application_1683438782910_0009
JobManager Web Interface: http://192.168.64.10:32261
- Open a new client connection window, go to the Flink client directory, and run the program.
source /opt/hadoopclient/bigdata_env
cd /opt/hadoopclient/Flink/flink
bin/flink run --class com.huawei.bigdata.flink.examples.FlinkStreamJavaExample /opt/hadoopclient/flink-demo.jar --filePath /opt/log1.txt,/opt/log2.txt --windowTime 2
...
2023-05-26 19:56:52,068 | INFO  | [main] | Found Web Interface host-192-168-64-10:32261 of application 'application_1683438782910_0009'. | org.apache.flink.yarn.YarnClusterDescriptor.setClusterEntrypointInfoToConfig(YarnClusterDescriptor.java:1854)
Job has been submitted with JobID 7647255752b09456d5a580e33a8529f5
Program execution finished
Job with JobID 7647255752b09456d5a580e33a8529f5 has finished.
Job Runtime: 36652 ms
- Check execution results.
Log in to FusionInsight Manager as user flinkuser and choose Cluster > Service > Yarn. On the Applications page, click a job name to go to the job details page.
Figure 6 Viewing Yarn job details
For the job submitted in a session, you can click Tracking URL to log in to the native Flink service page to view job information.
Figure 7 Viewing Flink job details
In this sample project, click Task Managers and view the running result in the Stdout tab of the job.
Figure 8 View application running results
Feedback
Was this page helpful?
Provide feedbackThank you very much for your feedback. We will continue working to improve the documentation.See the reply and handling status in My Cloud VOC.
For any further questions, feel free to contact us through the chatbot.
Chatbot


