
Performing One-Stop O&M on HaydnCSF
This section describes the full process of HaydnCSF O&M Event Center, including creating a workspace, receiving alarms, and automatically triggering and transferring events.
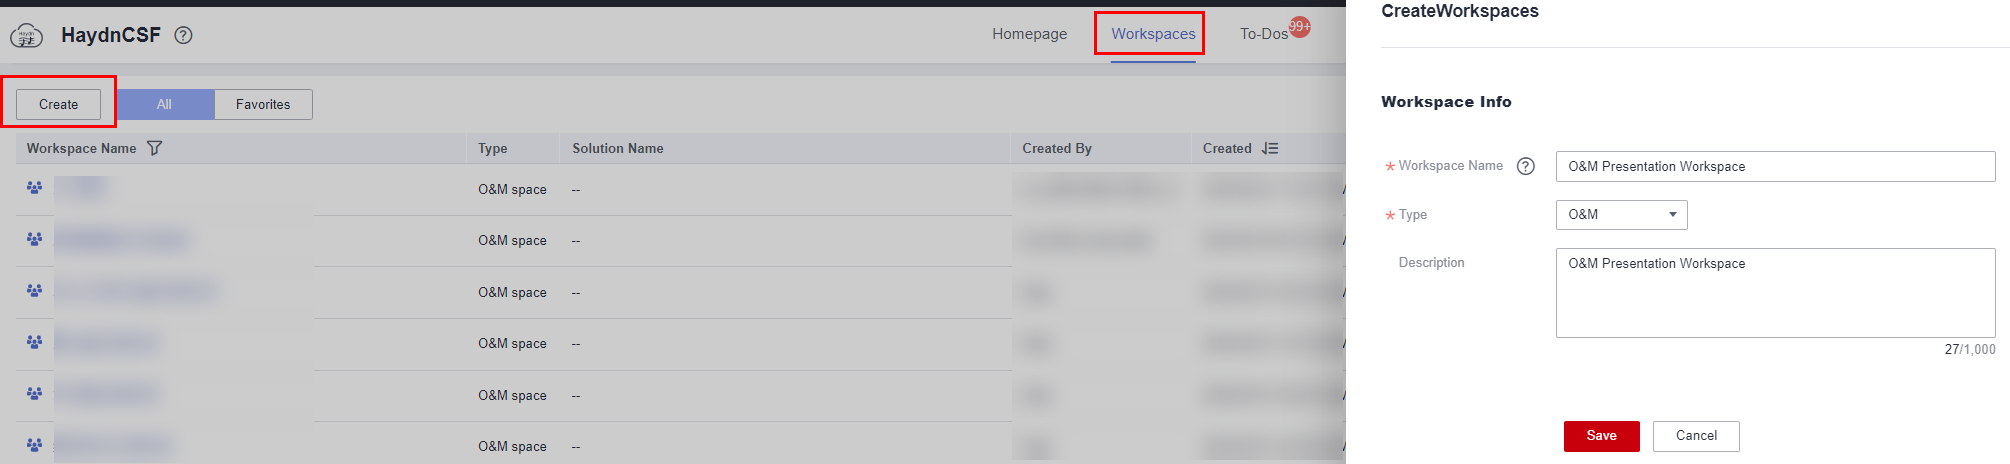
Creating an O&M Workspace
Prerequisites
- You have a Huawei Cloud account.
- You are a HaydnCSF user. For details about how to become a HaydnCSF user, see Accessing HaydnCSF.
Log in to HaydnCSF. Click the Workspaces Tab and click Create.
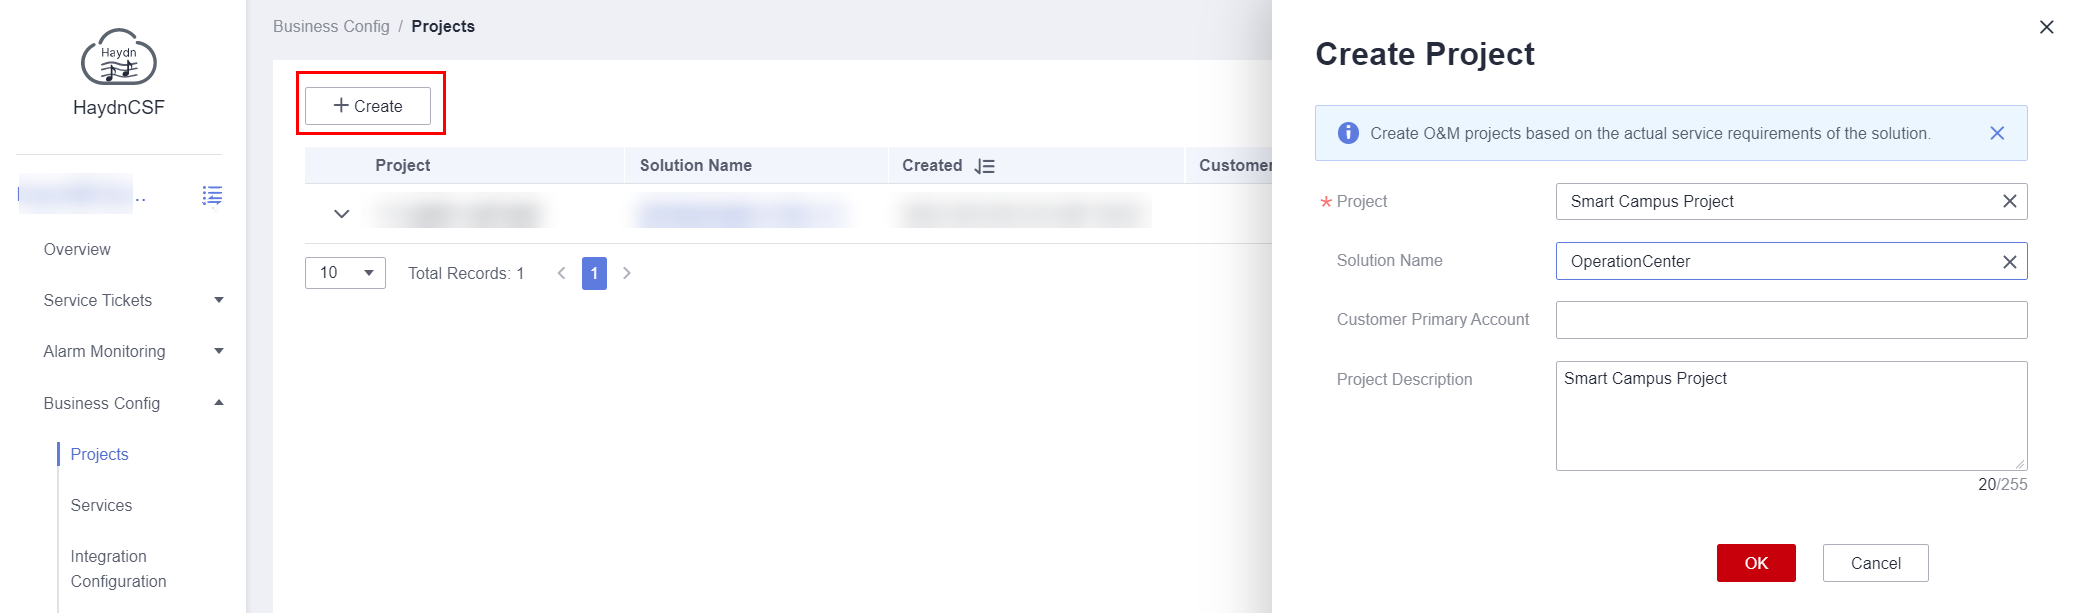
Creating a Project
- In the navigation pane, choose Business Config > Projects.
- On the Projects page, click Create. In the displayed dialog box, enter the project name, solution name, and project description, and click OK.
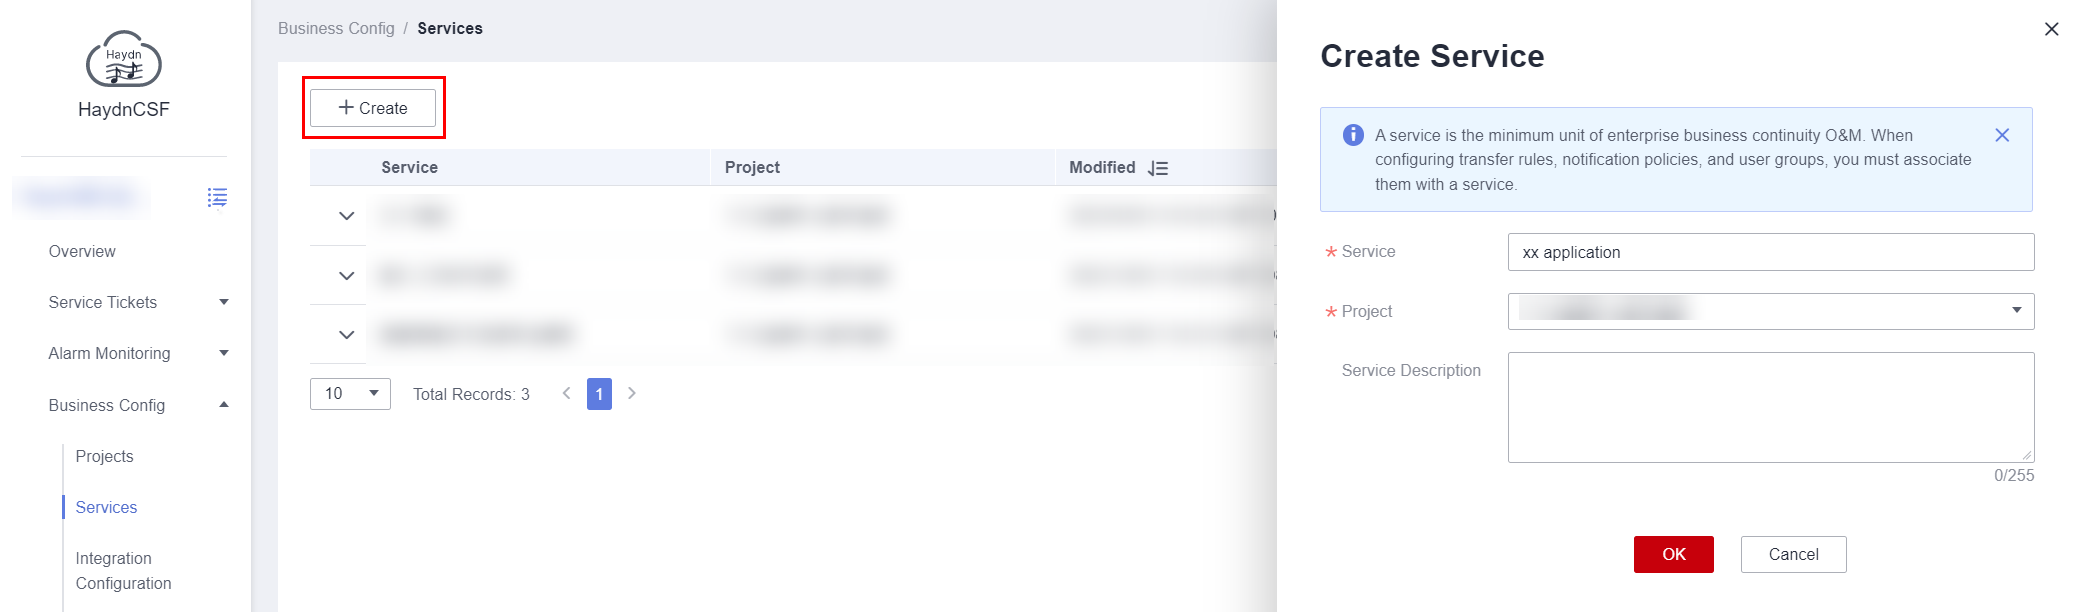
Creating a Service
- In the navigation pane, choose Business Config > Services.
- On the Services page, click Create. In the displayed dialog box, enter the service name, project name, and service description, and click OK.
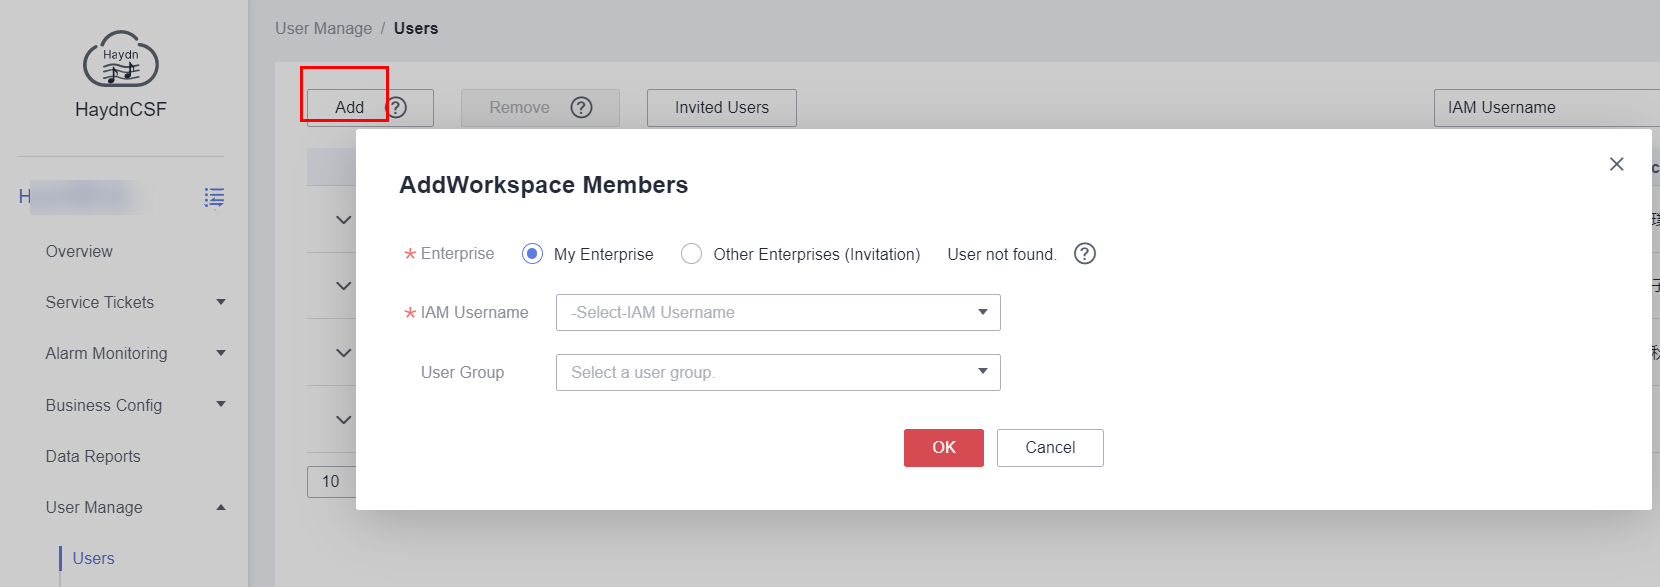
Adding Workspace Members
- In the navigation pane, choose User Management > Users.
- On the Users page, click Add. In the displayed dialog box, select My Enterprise for Enterprise. Select an IAM user for IAM Username and a user group for User Group from the drop-down lists respectively (the user group can be left unselected until it is created). Click OK.
Note: To add an IAM user that does not belong to the current Huawei Cloud account, select Other Enterprises (Invitation) for Enterprise.
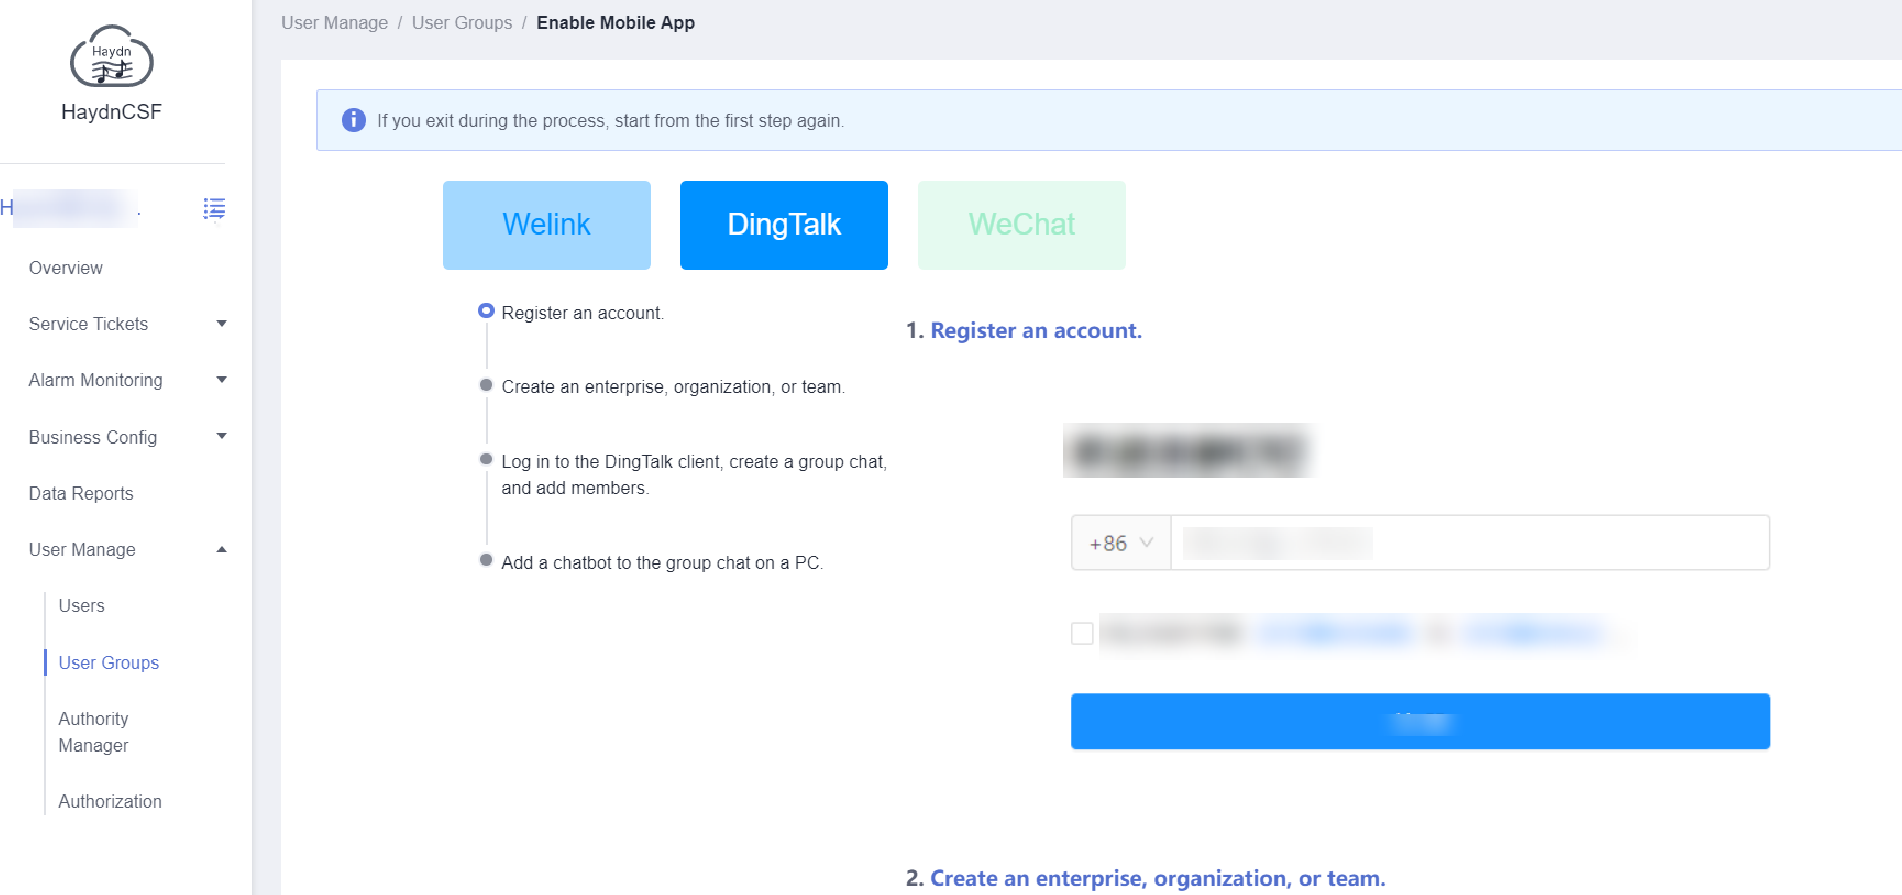
3. The added IAM users can associate their mobile numbers and email addresses with their accounts and subscribe to the SMS message for alarm notification.
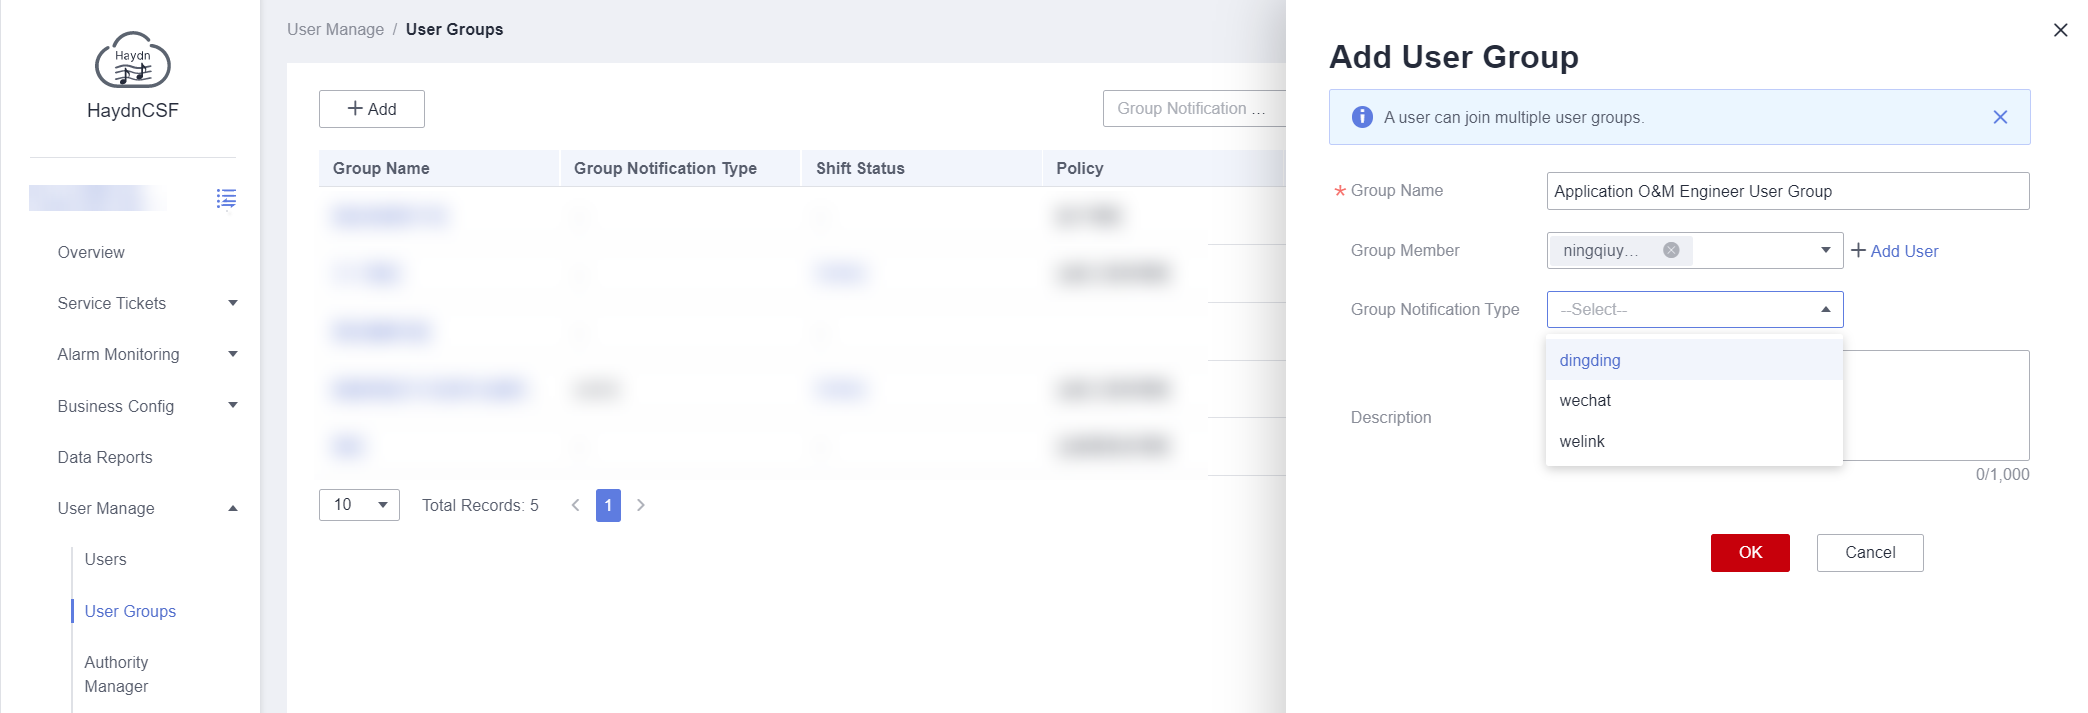
Adding a User Group
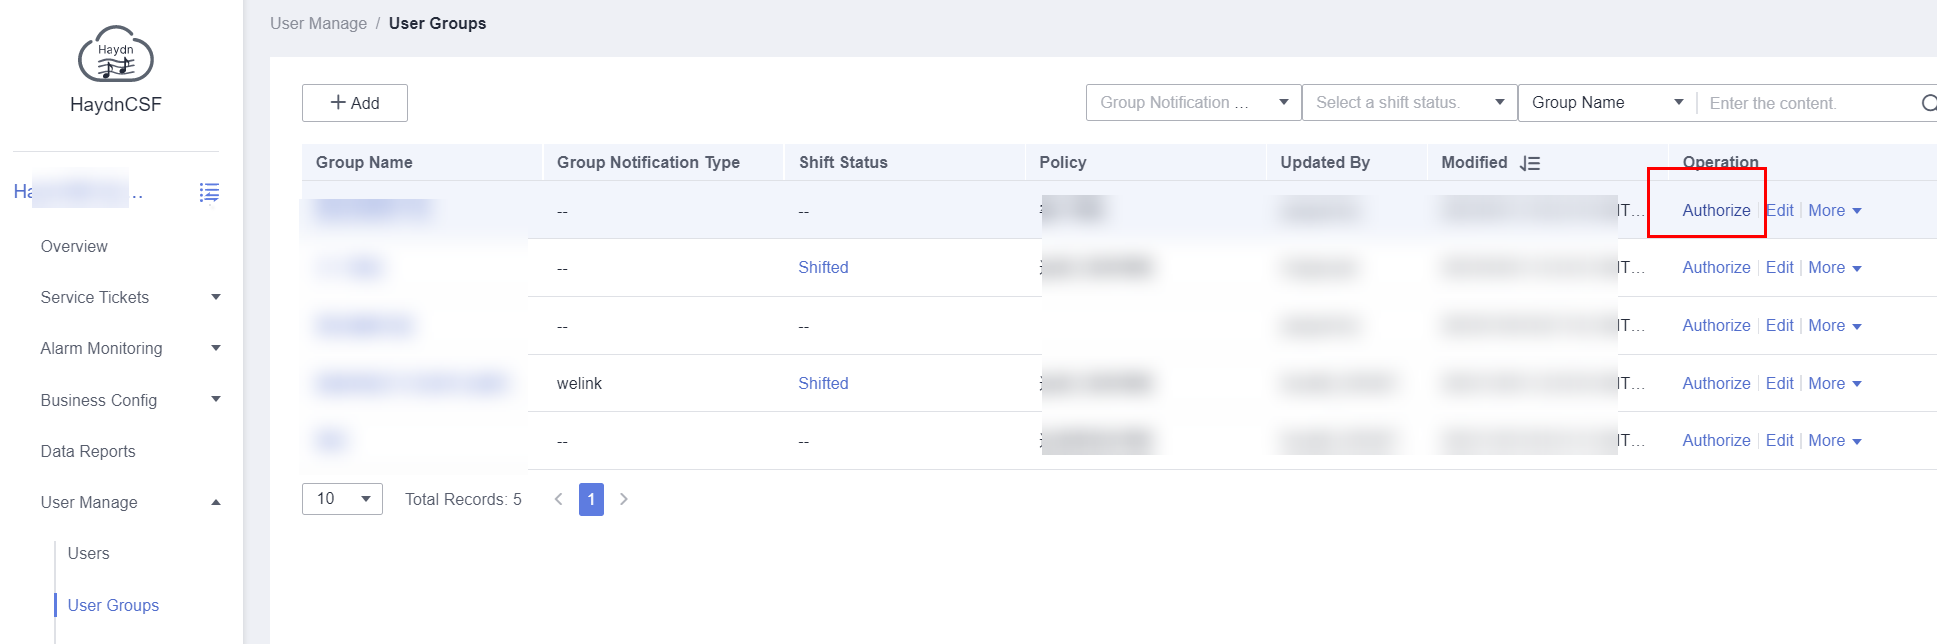
- In the navigation pane, choose User Management > User Groups.
- On the User Groups page, click Add. In the displayed dialog box, specify the group name, member, notification type (Optional. Currently, group notifications can be sent through DingTalk, WeLink, and WeChat), and description. Click OK.
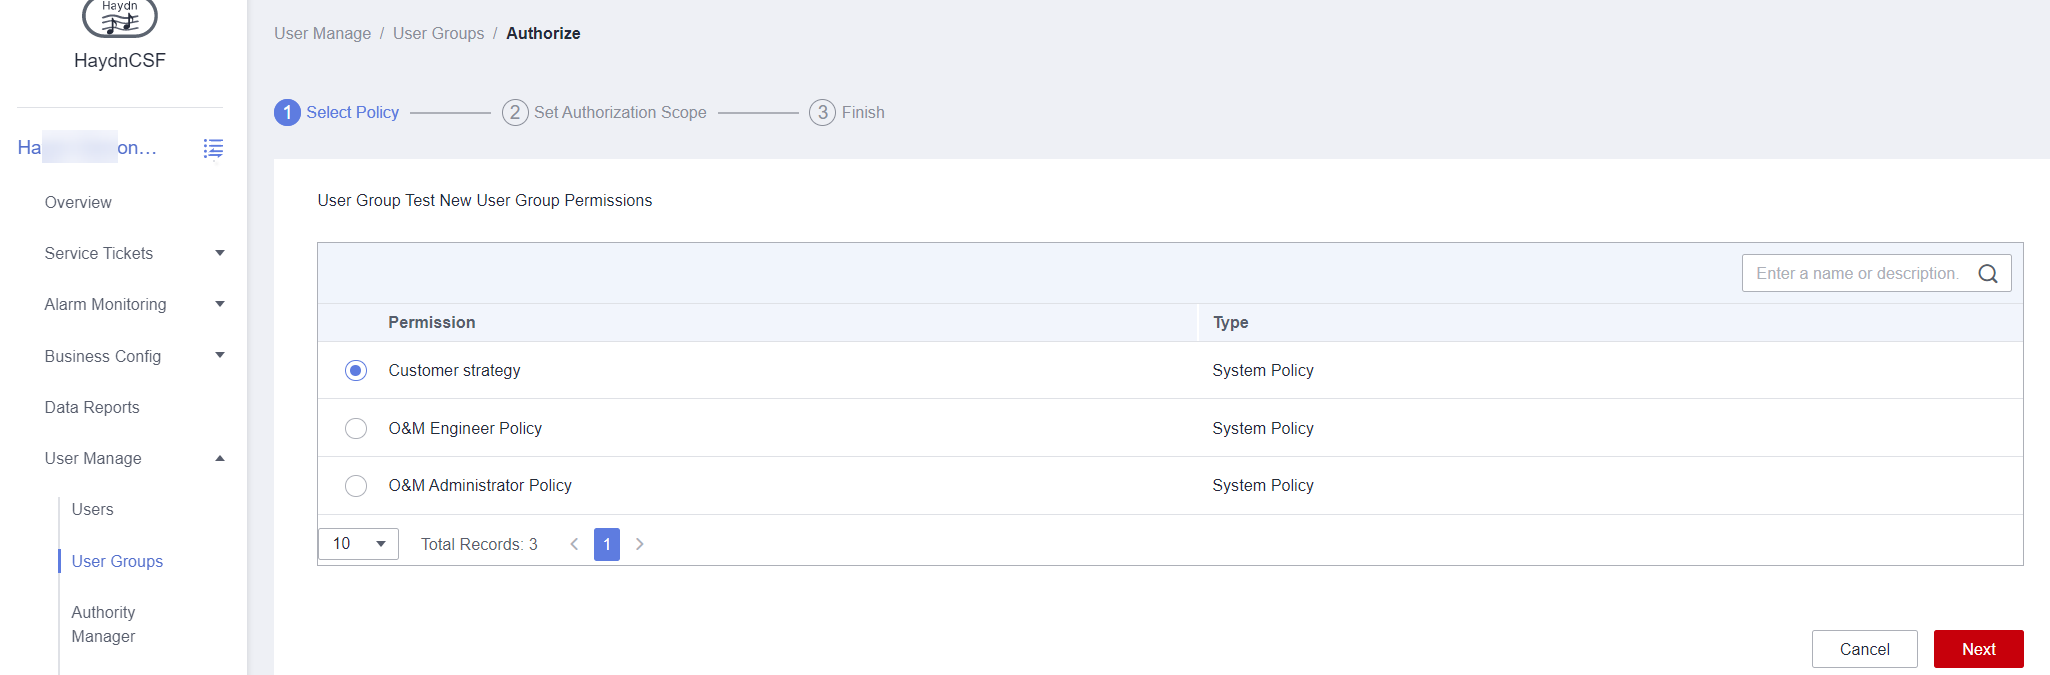
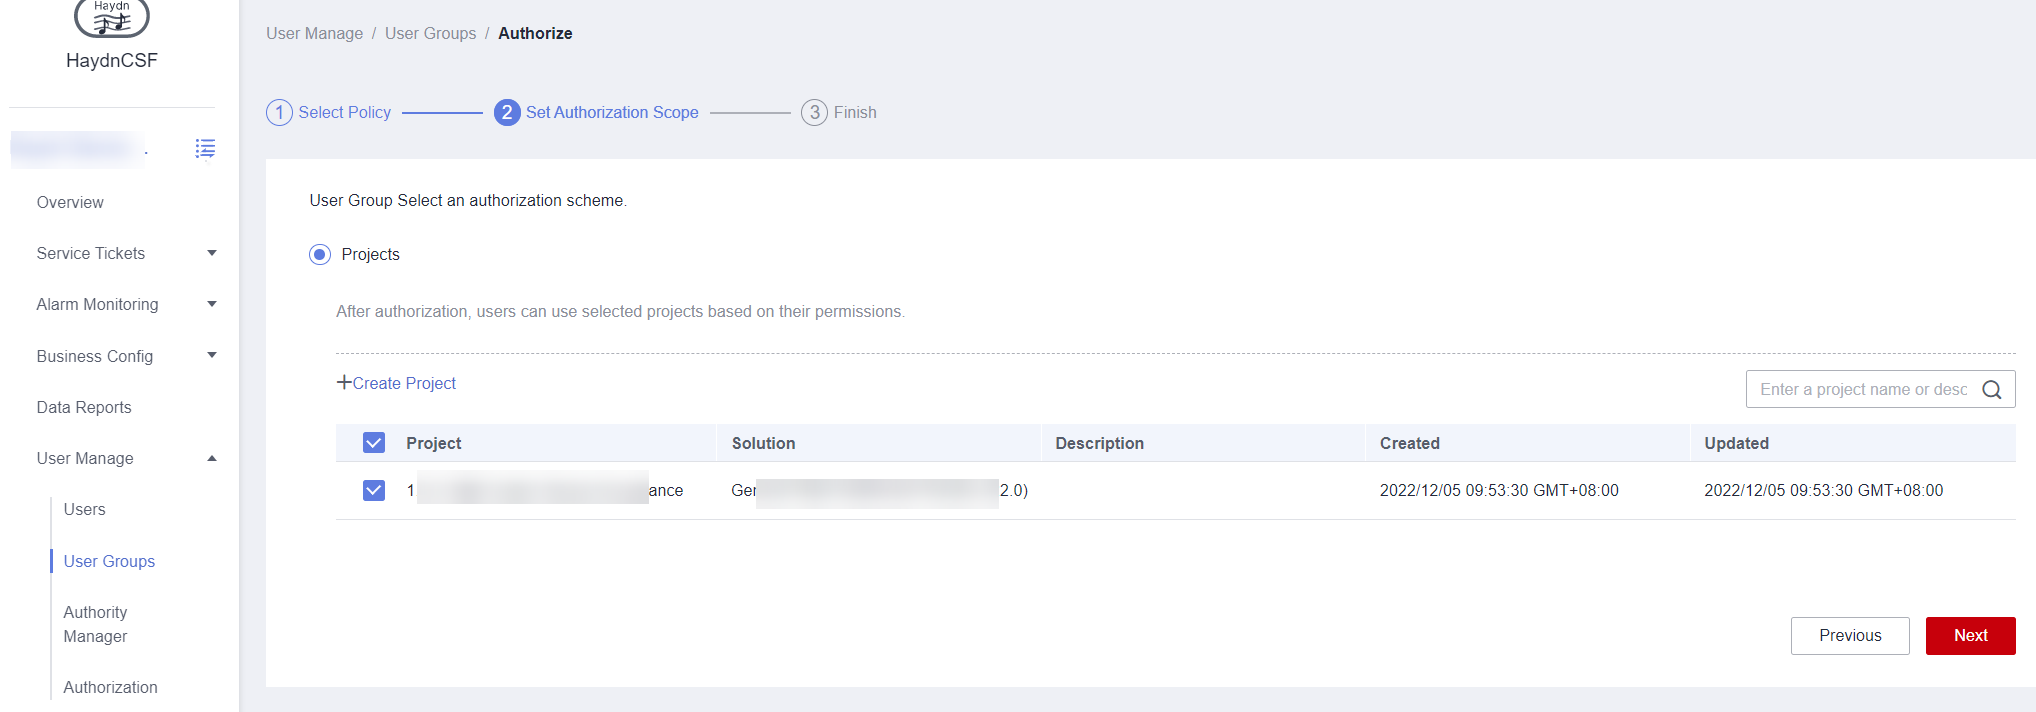
3. On the User Groups page, click Authorize. Select corresponding permissions. Click Next. On the displayed page, select corresponding O&M services or projects.
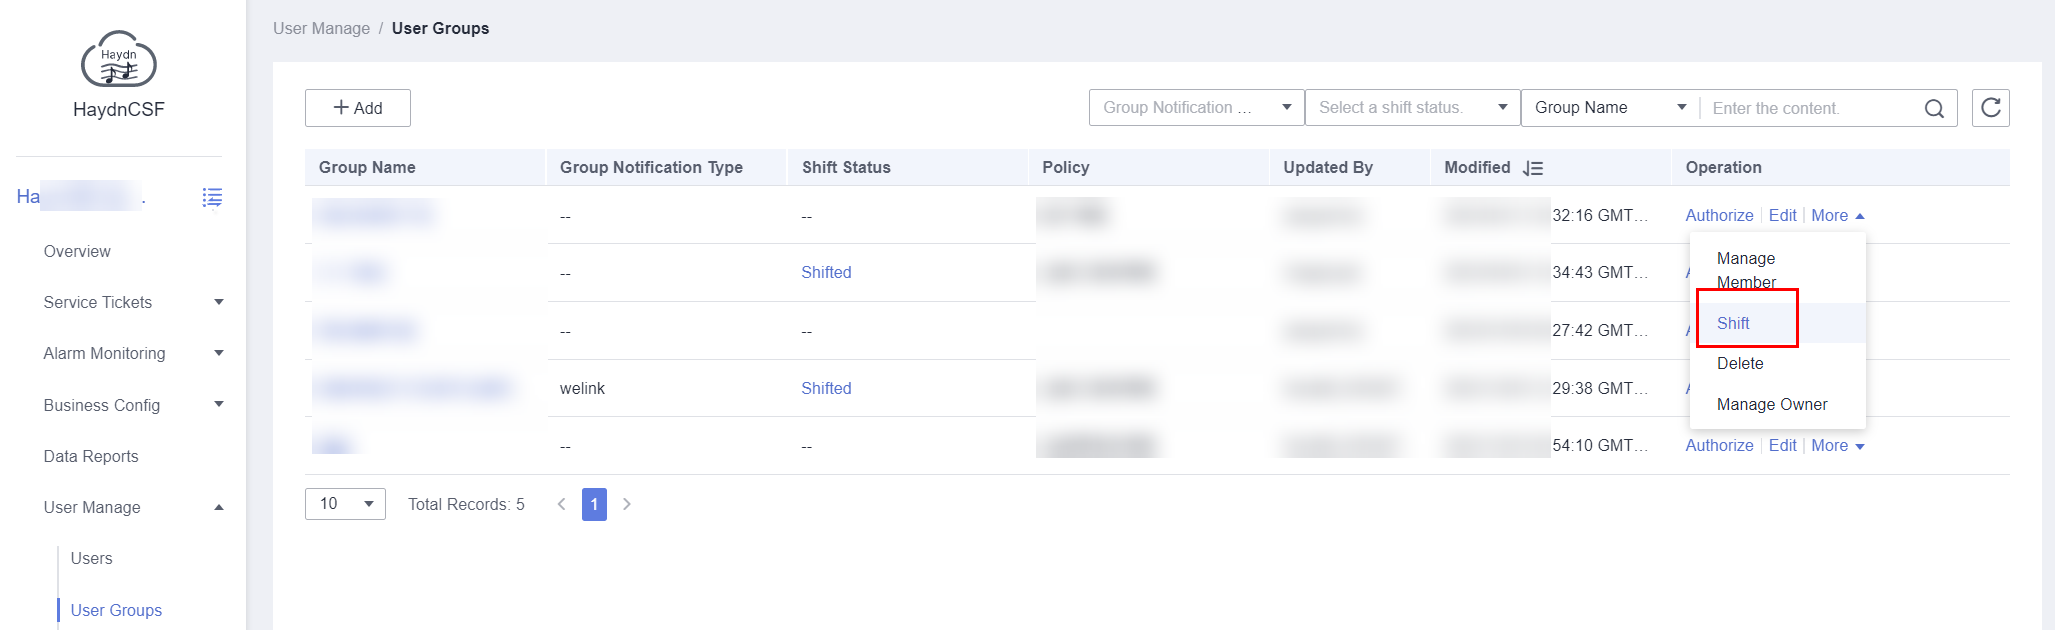
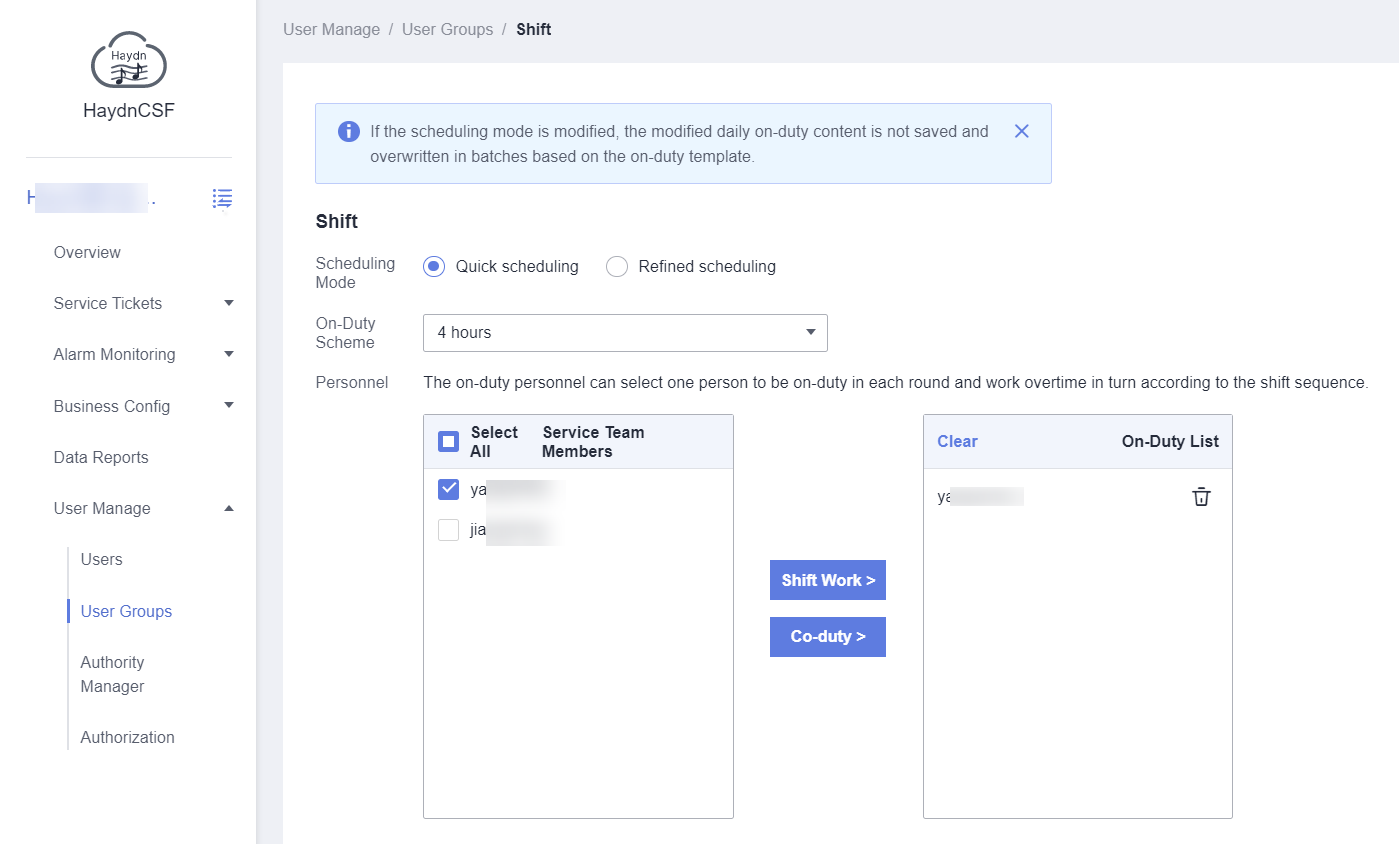
4. (Optional) On the User Groups page, choose More > Shift. On the displayed page, configure shifts for the user group. You can choose Quick scheduling or Refined scheduling for Scheduling Mode. Only on-duty members can receive alarm messages.
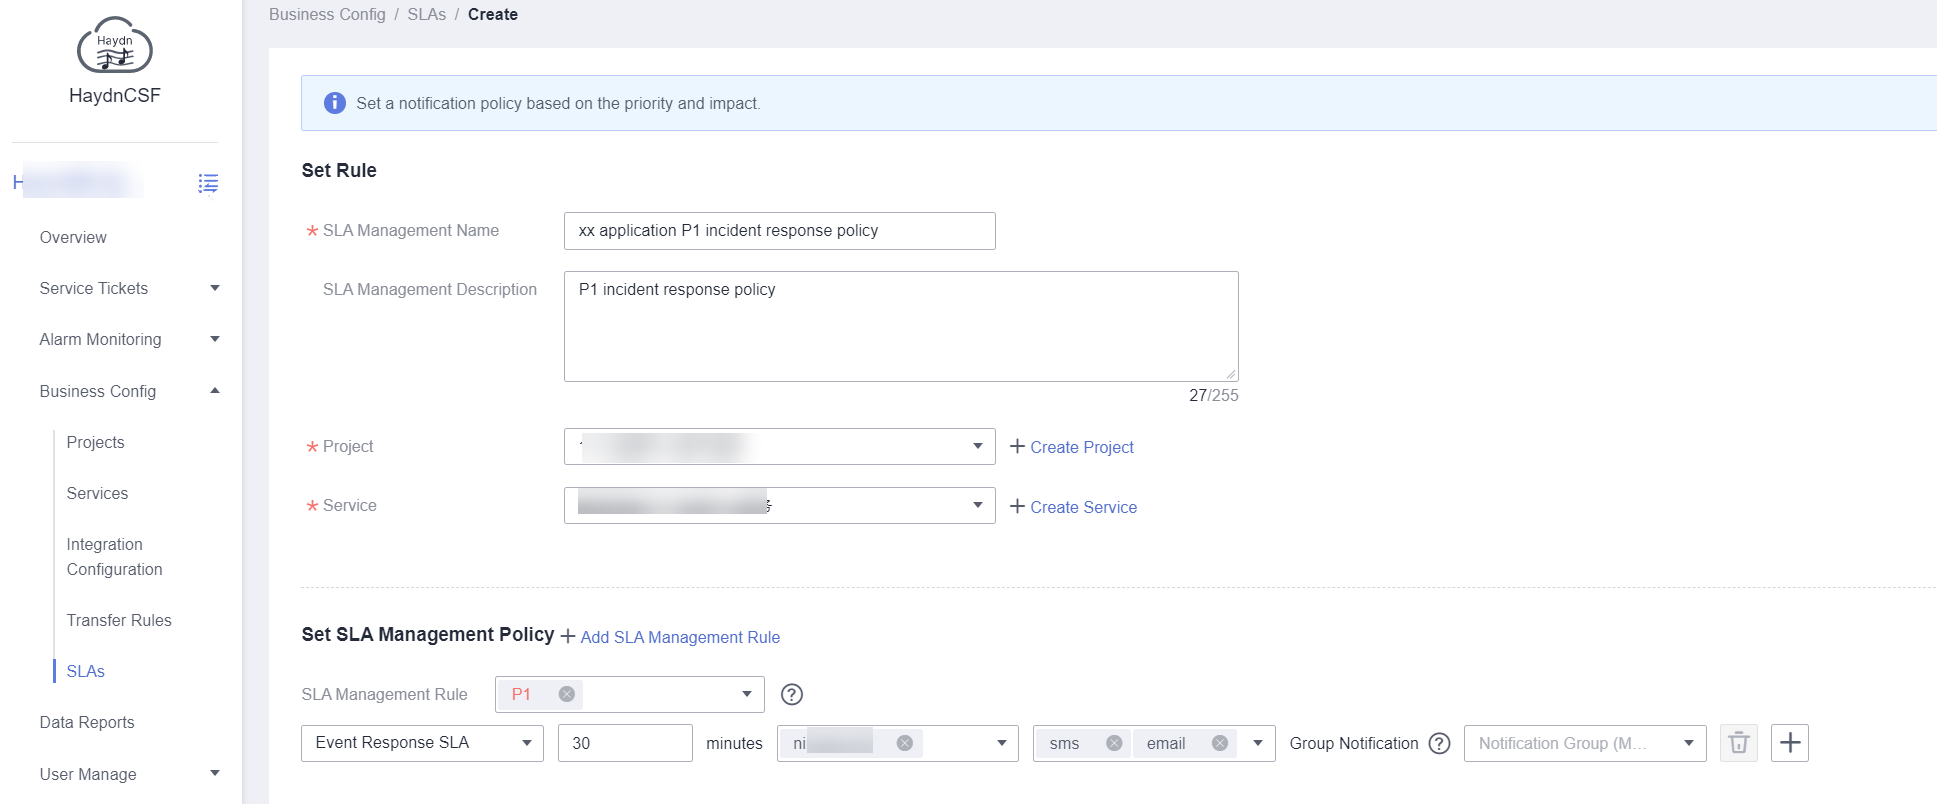
(Optional) Configuring SLAs
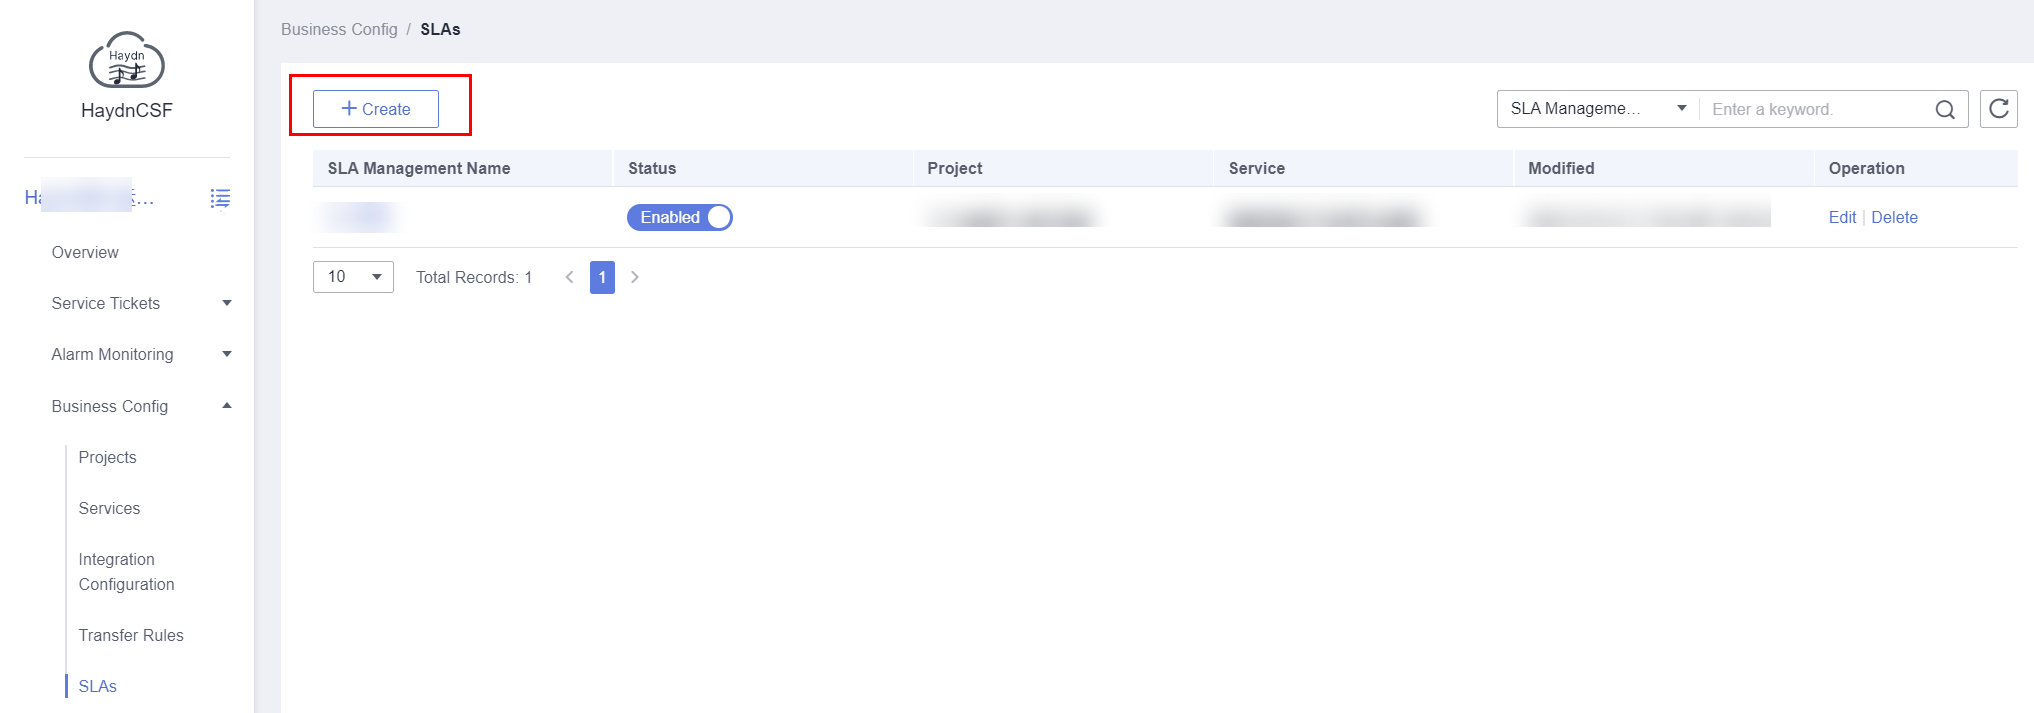
- In the navigation pane, choose Business Config > SLAs.
- On the SLAs page, click Create. On the displayed page, specify the SLA management name and description, and project and service names. In the Set SLA Management Policy area, configure the SLA management rule (event response or handling SLA rules). Click OK.
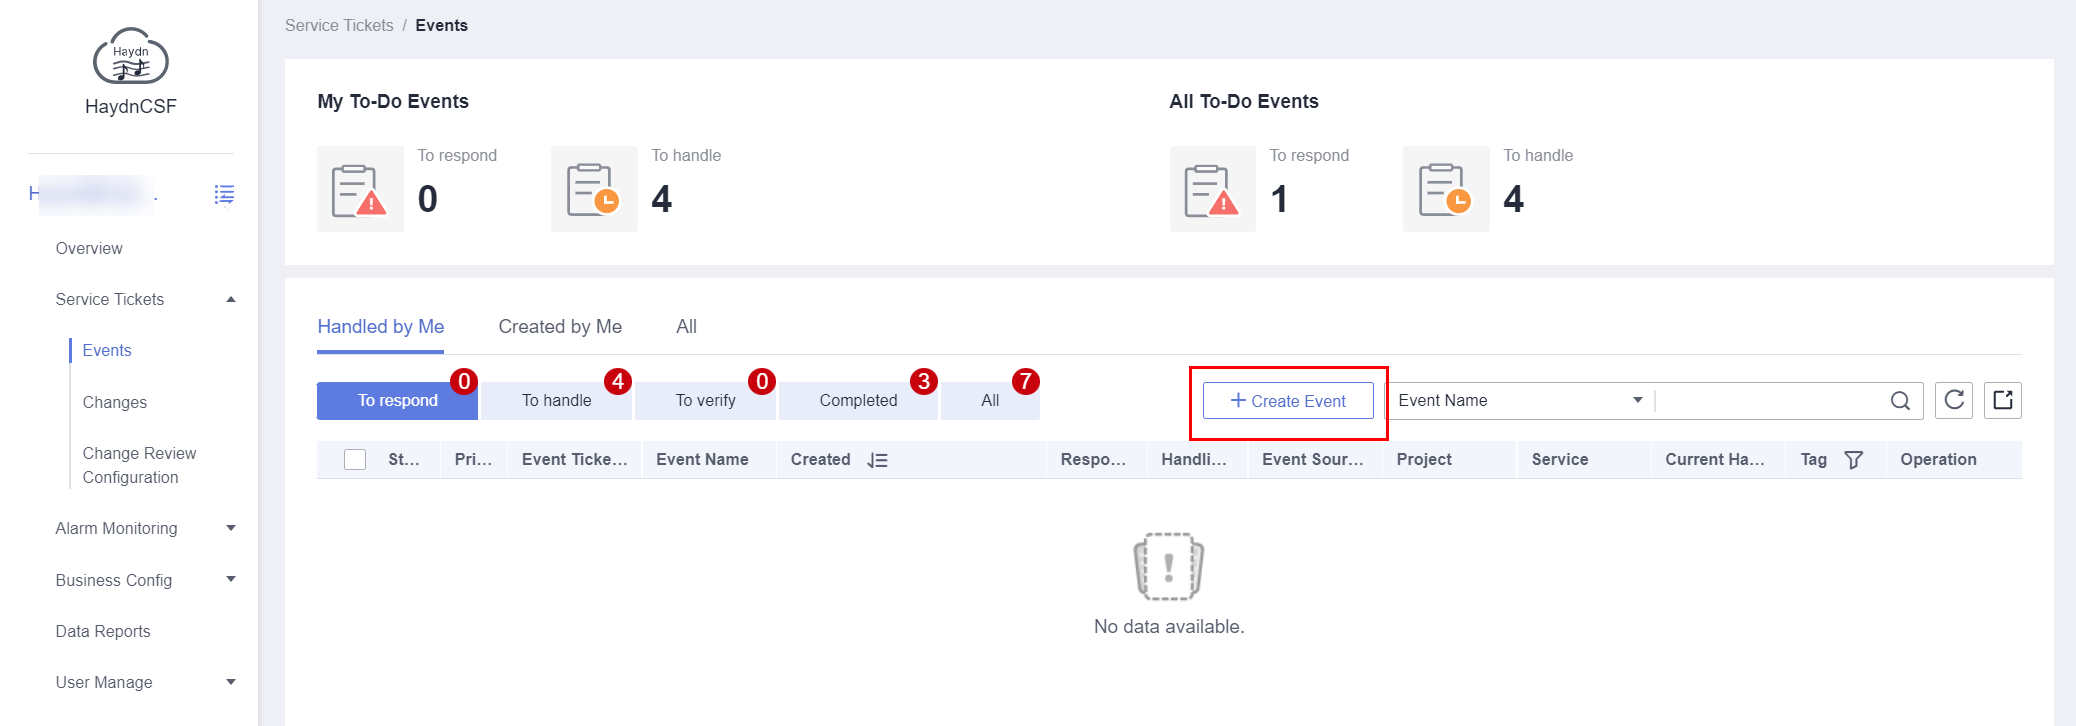
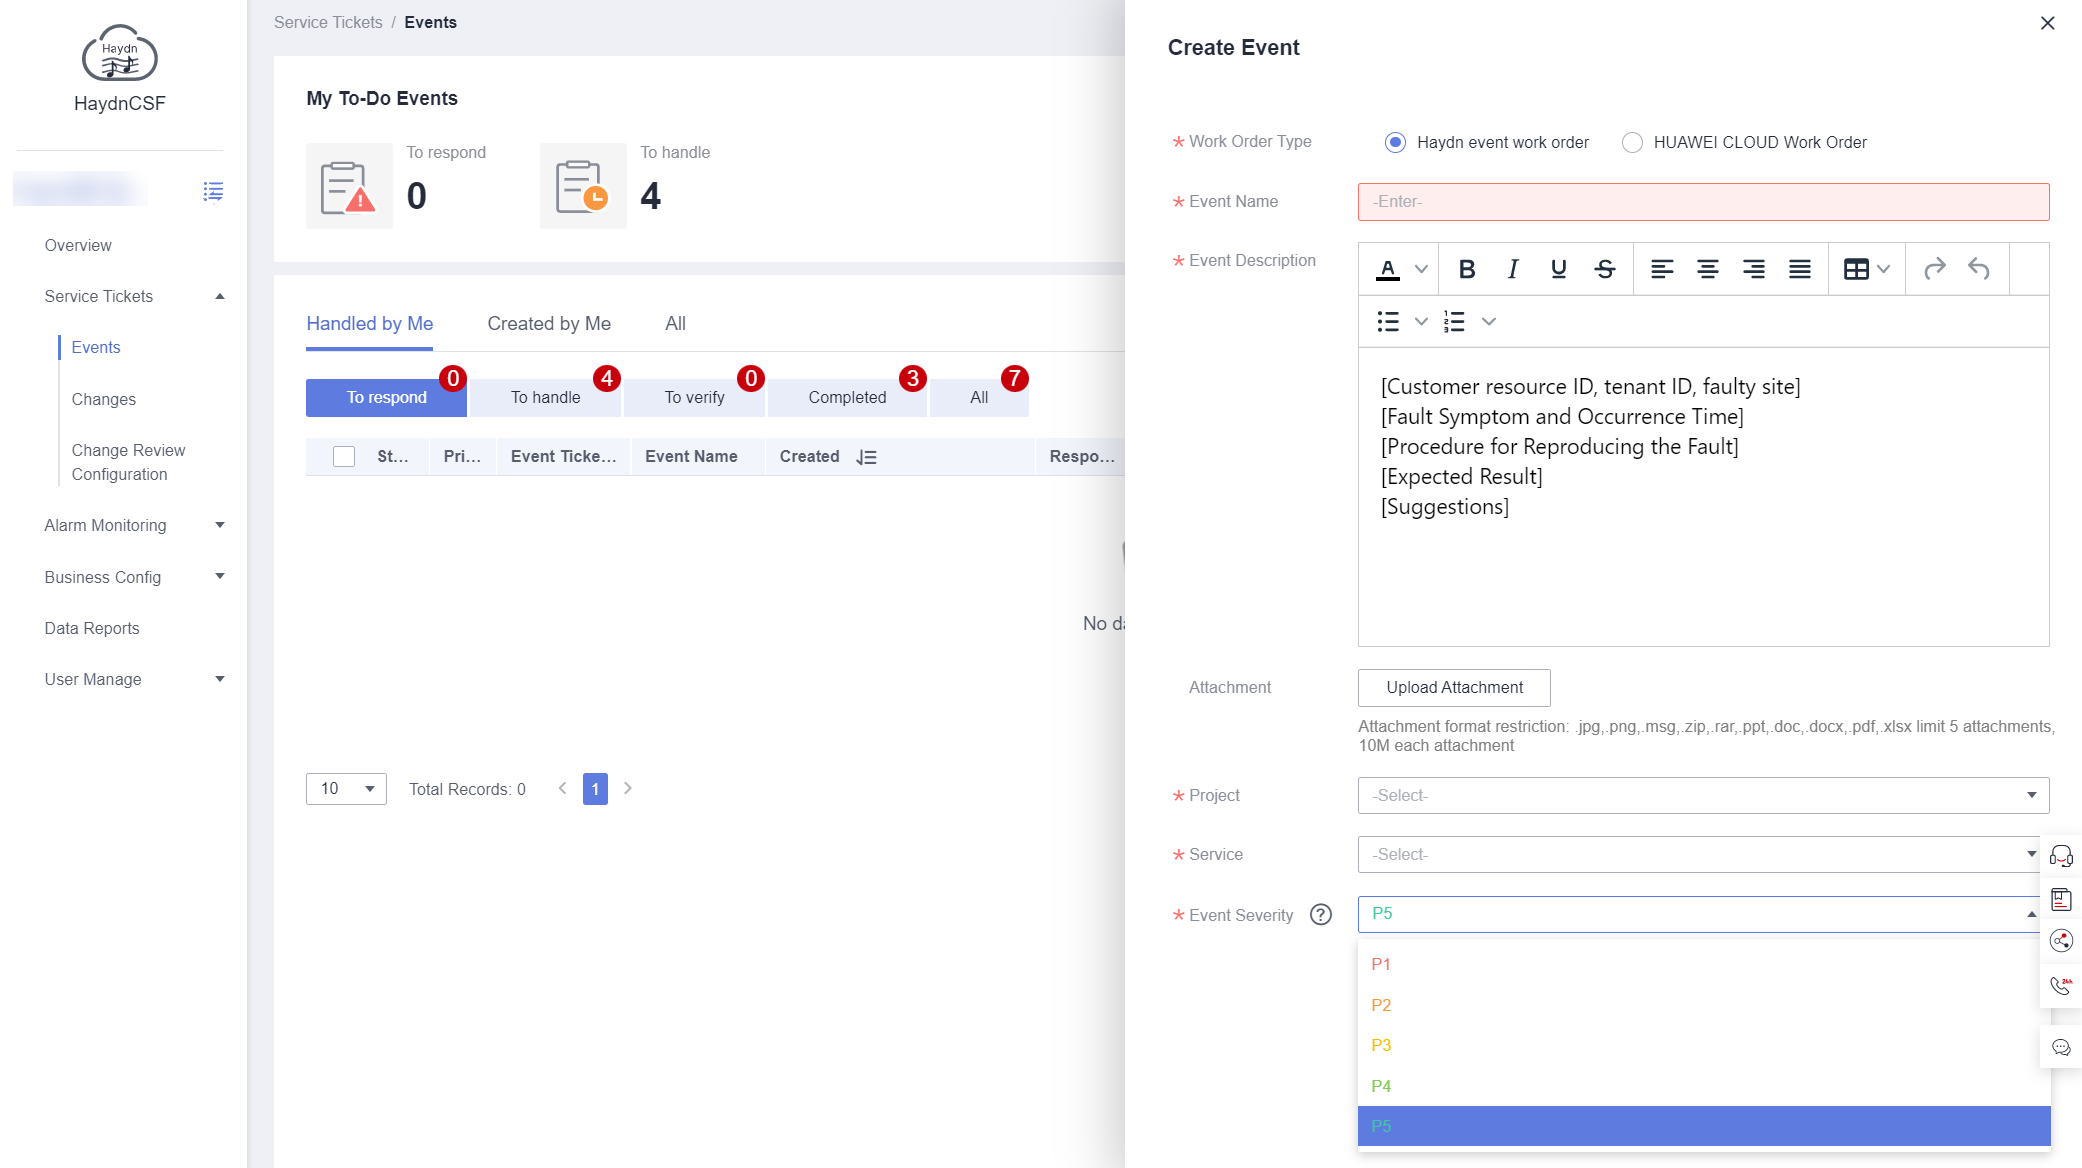
Creating an Event Manually
- In the navigation pane, choose Service Tickets > Events.
- On the displayed Events page, click Create Event. In the displayed dialog box, specify the event name and description, project and service names, and event severity. Click OK. After an event is created, the authorized group members will receive an event notification email and respond to and handle the event.
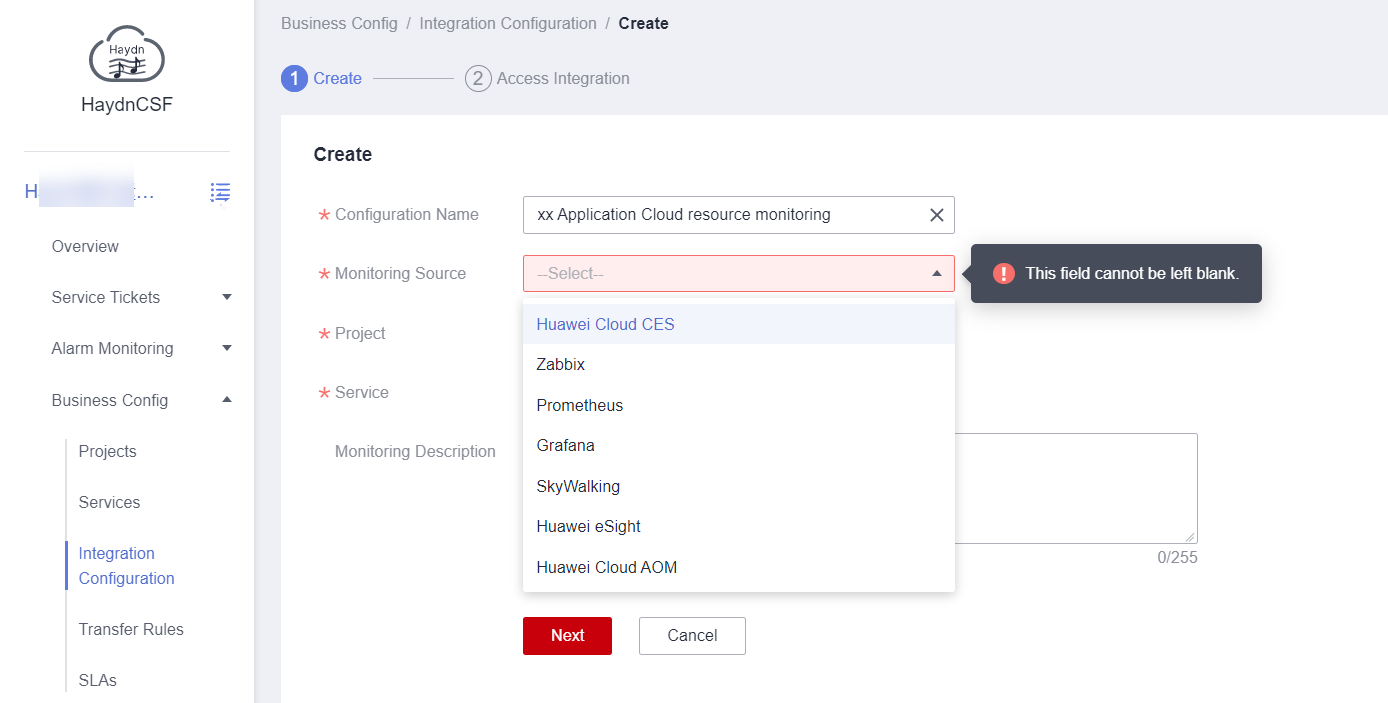
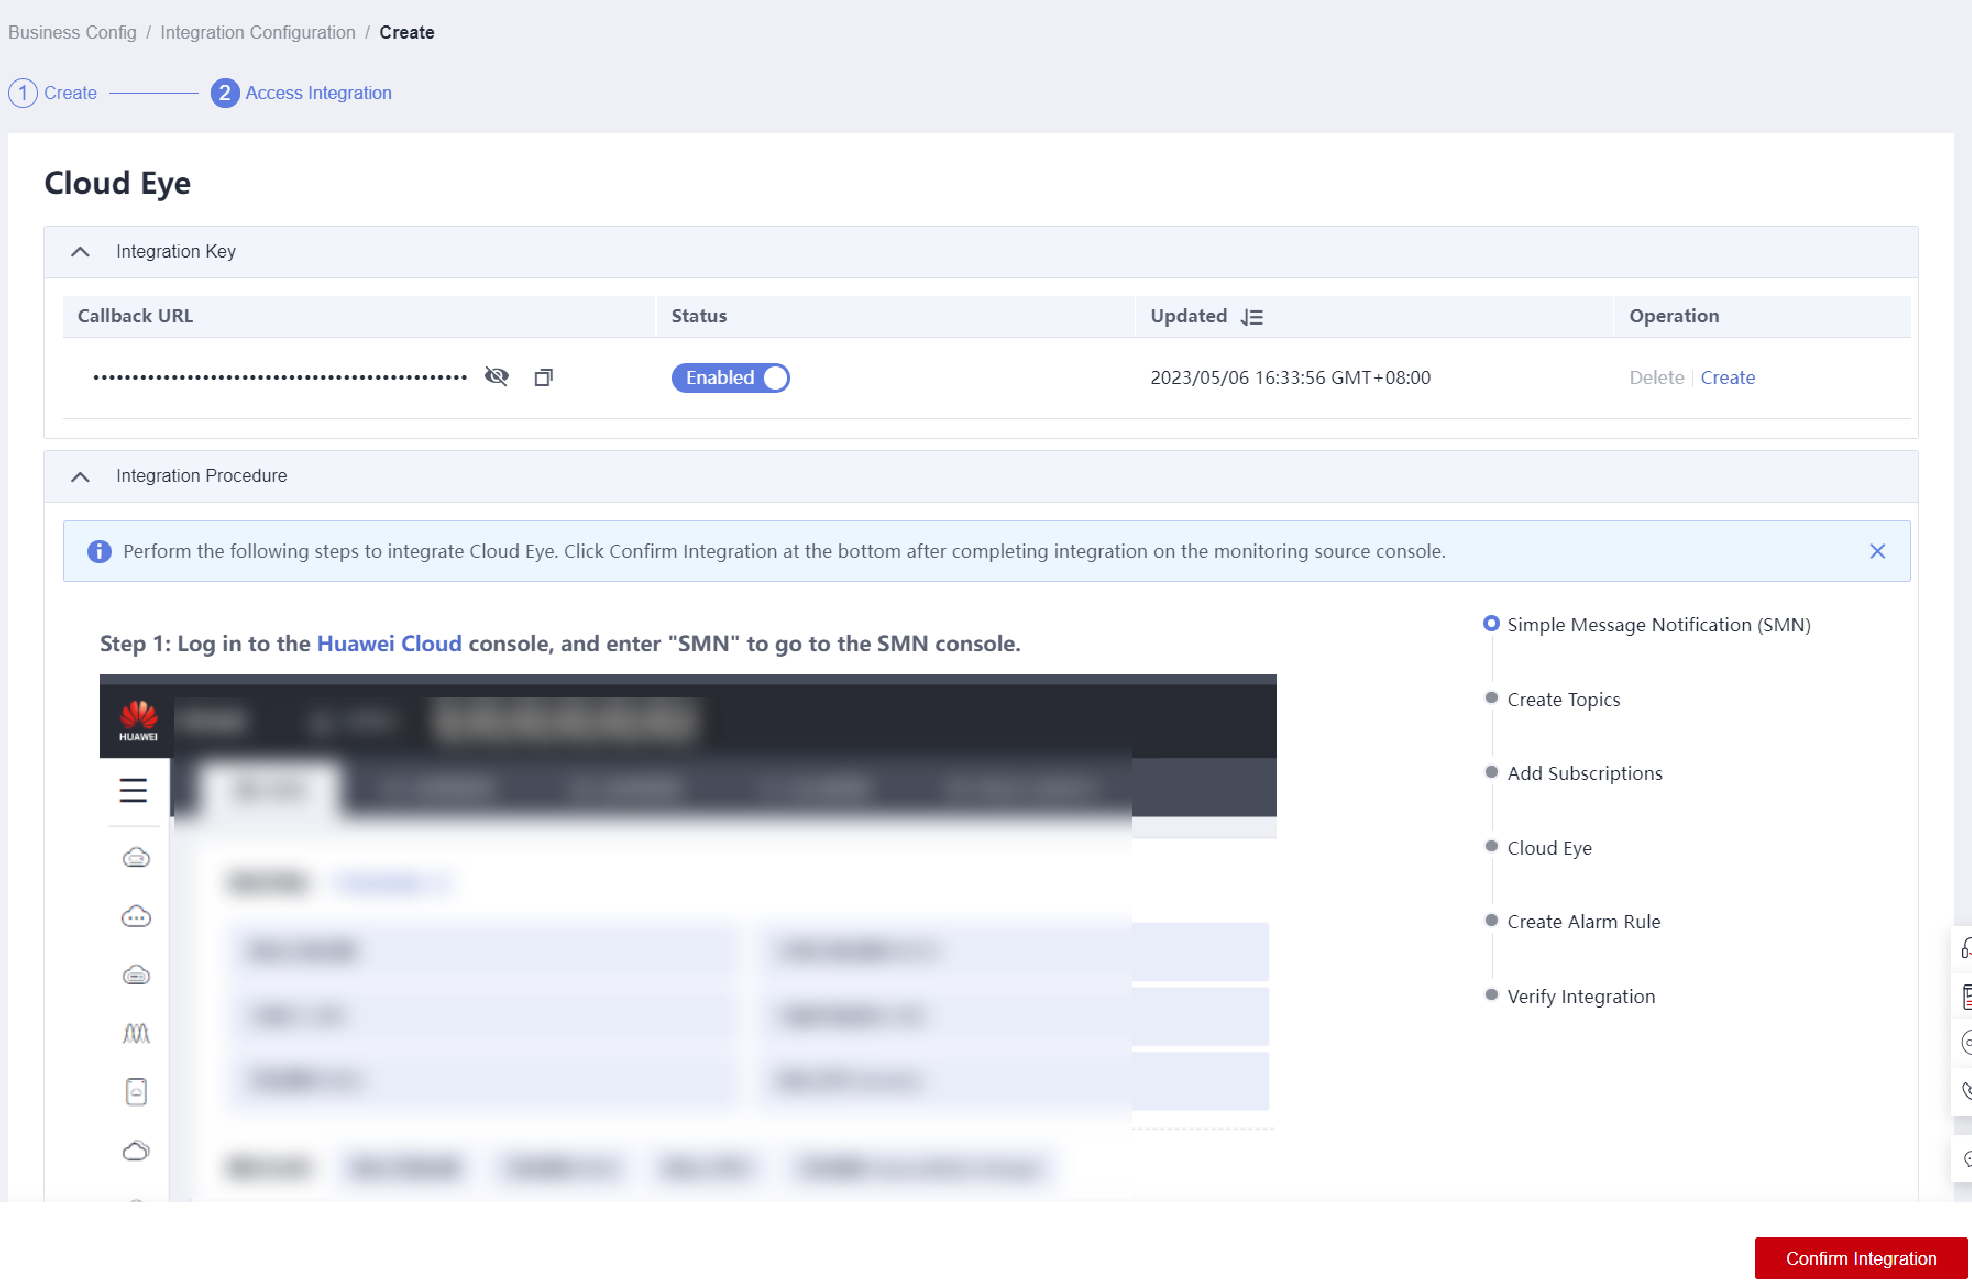
(Optional) Creating Integration Configurations
Prerequisite: Monitoring items of related services have been configured to the monitoring source you want to use.
- In the navigation pane, choose Business Config > Integration Configurations.
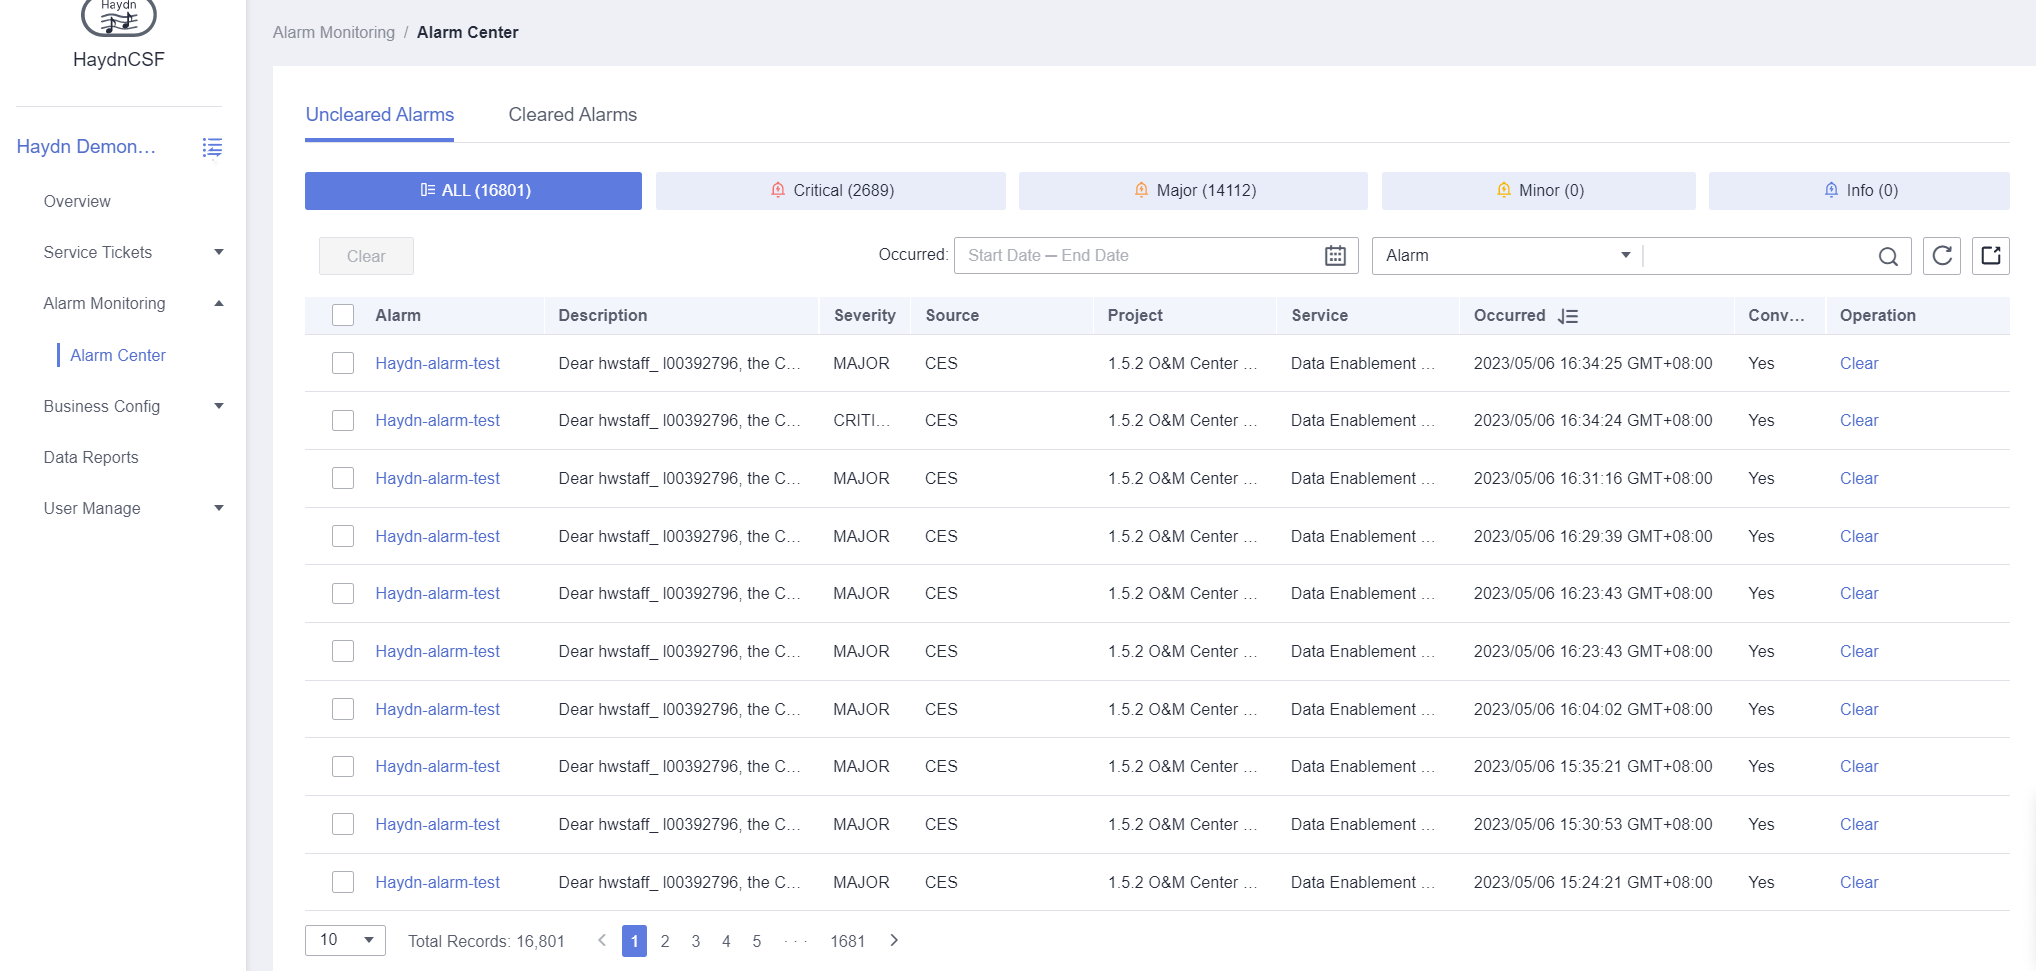
- On the Integration Configurations page, click Create. On the displayed page, specify the configuration name, monitoring source and description, and project and service names. Click Next. On the displayed page, complete integration procedures as prompted and click Confirm Integration. You can view alarm messages in the Alarm Center of Alarm Monitoring.

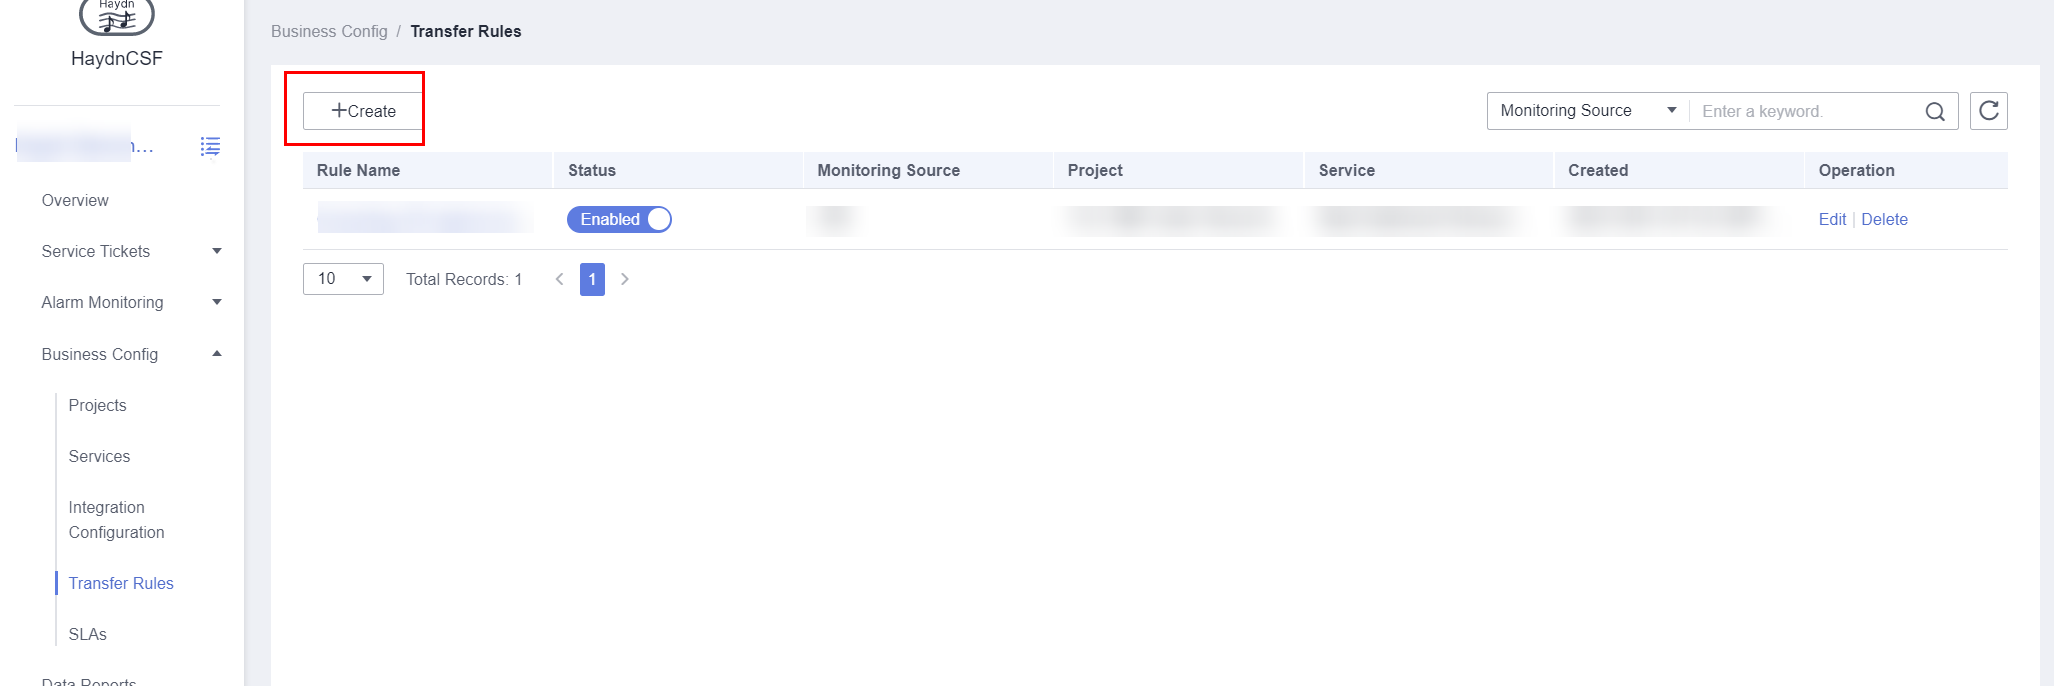
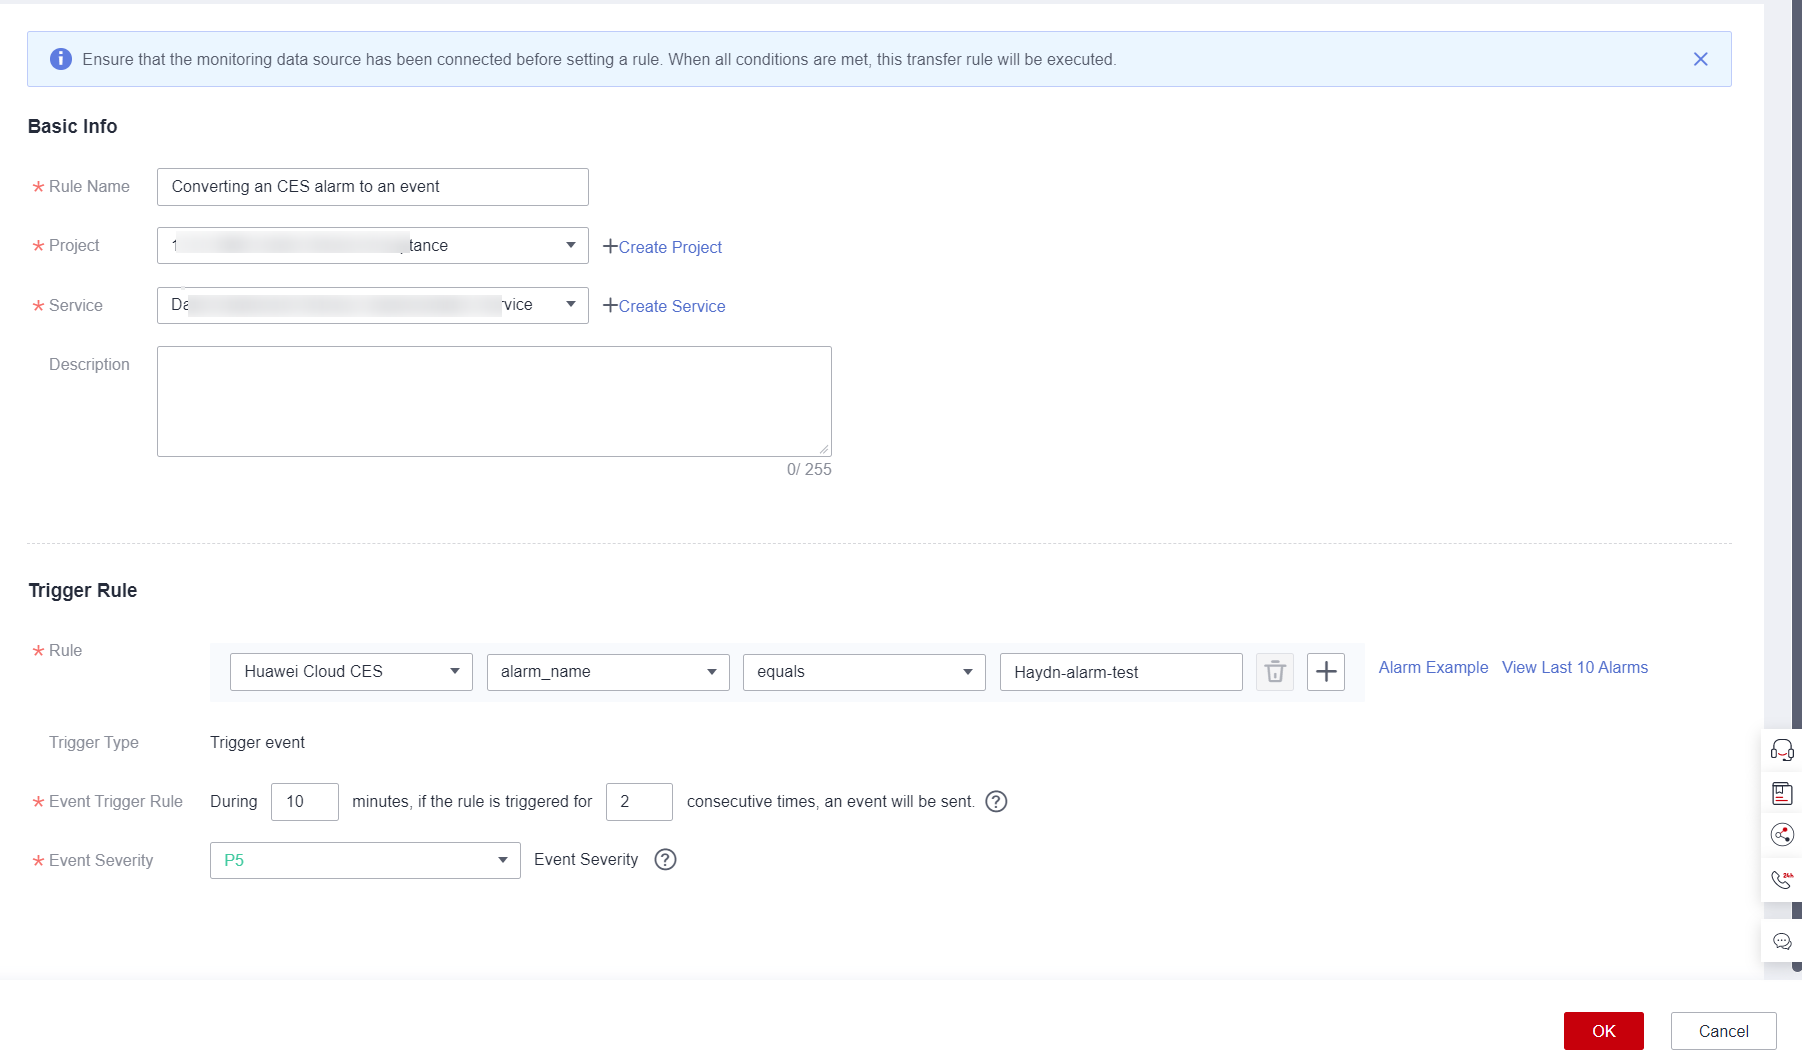
(Optional) Configuring Transfer Rules
- In the navigation pane, choose Business Config > Transfer Rules.
- On the Transfer Rules page, click Create. In the Basic Info area, specify the rule name and description, and project and service names. In the Trigger Rule area, configure the alarm rule, event trigger rule, and event severity. Click OK. HaydnCSF will automatically transfer events based on transfer rules to corresponding user group members and notify them by email.
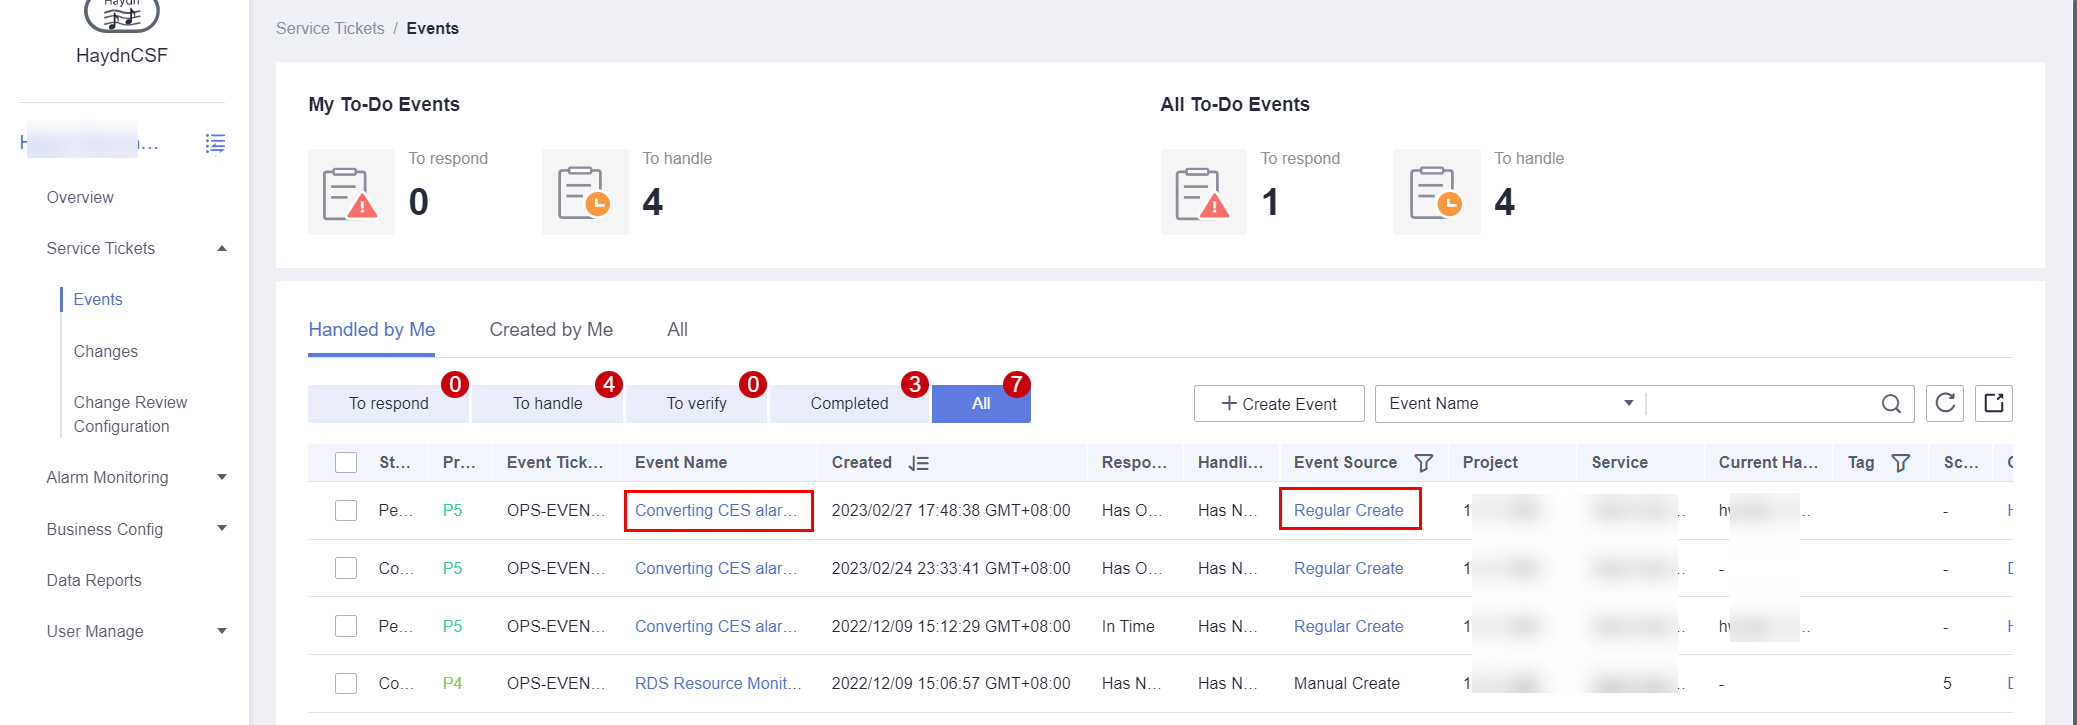
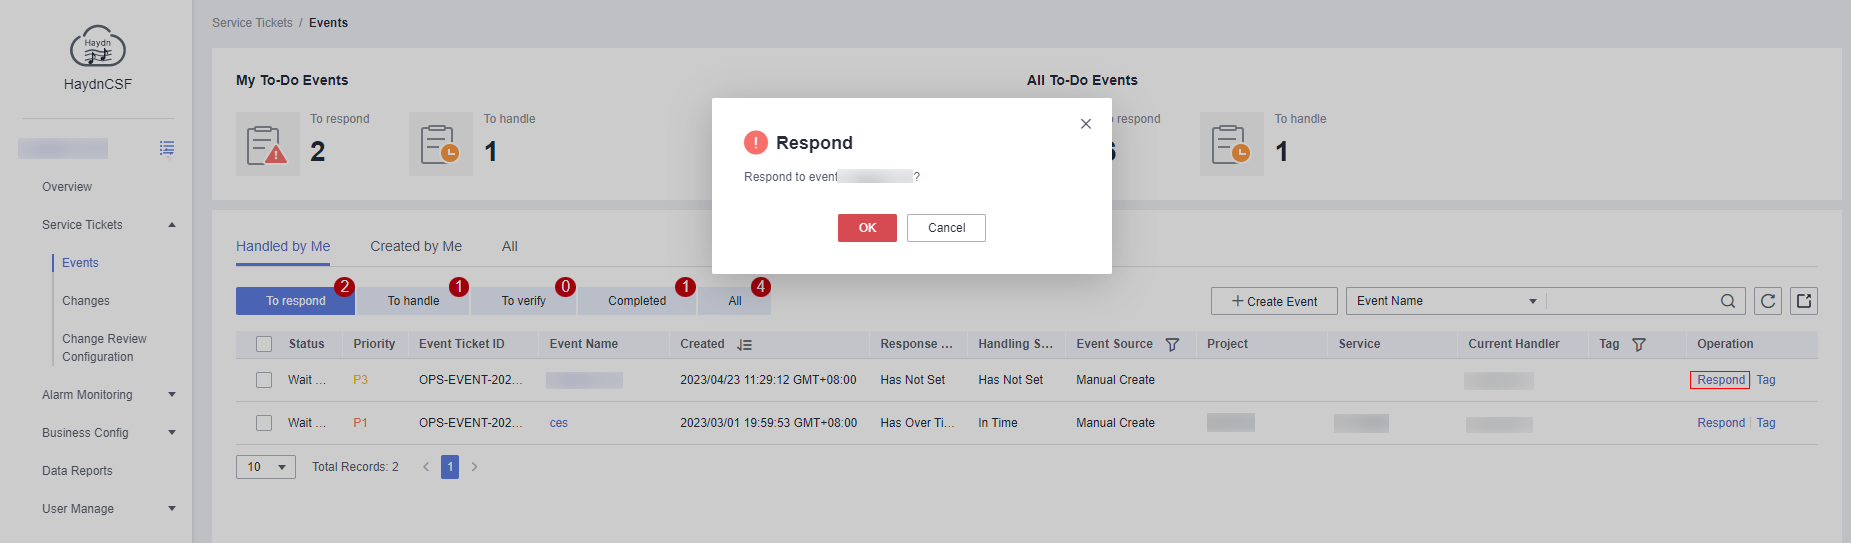
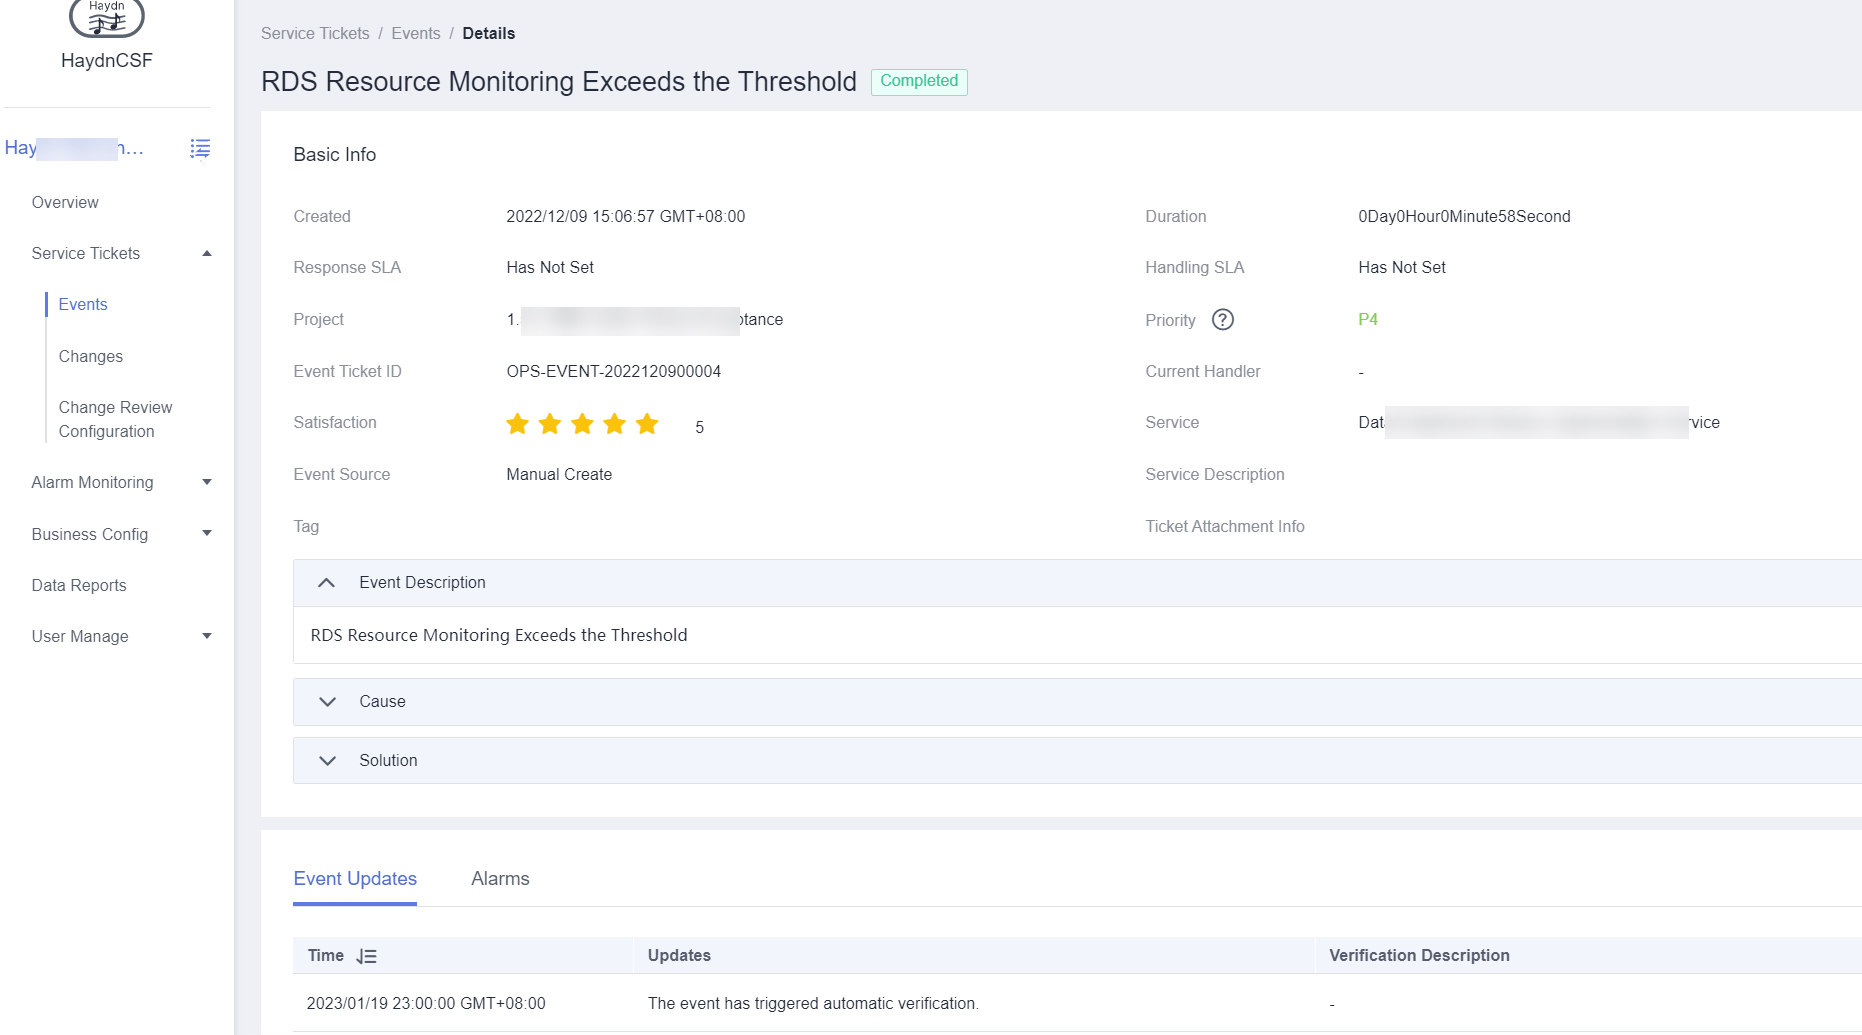
Handling an Event
- In the navigation pane, choose Service Tickets > Events.
- On the Events page, locate the event and click Response in the Operation column.
- Transfer the event to others: The current handler specified by the transfer rule can go to the event details page and click Transfer.
Figure 24 Event response

- Handle: Click Handle in the Operation column or the event name. In the displayed dialog box, enter the event reasons and solution.
- Priority: Go to the event details page to change the priority.
- Major event handling: Initiate a major event handling meeting for P1-P3 level events (P1-P3 level events indicate that services are unavailable).
Feedback
Was this page helpful?
Provide feedbackThank you very much for your feedback. We will continue working to improve the documentation.See the reply and handling status in My Cloud VOC.
For any further questions, feel free to contact us through the chatbot.
Chatbot


