
Pushing Streams and Streaming Content on a PC
This section describes how to push streams and stream content on a PC using third-party software.
Prerequisites
- You have configured an ingest domain name and a streaming domain name on the Live console by referring to Adding Domain Names.
- You have created a channel by referring to Creating a Channel.
- You have installed a streaming tool (recommended: Open Broadcaster Software). If you have not installed it yet, download and install it.
- You have installed a media player (recommended: VLC media player). If you have not installed it yet, download and install it.
Notes
- Check the output resolution of Open Broadcaster Software (OBS).
Pay attention to the input and output resolution levels configured in OBS and the resolution level configured in the live transcoding template of the channel to guarantee the playback.
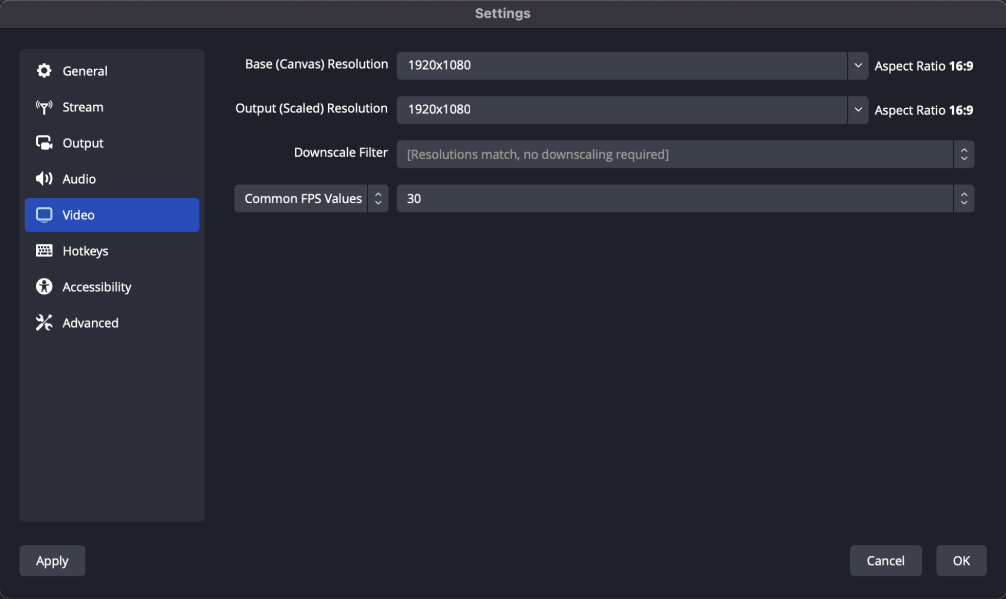
To view the input and output resolution levels of OBS, perform the following steps:
- Open OBS on the local PC.
- On the top navigation bar, choose File > Settings.
- In the navigation pane on the left, choose Video to view Base (Canvas) Resolution and Output (Scaled) Resolution.
Figure 1 Video settings
- Check the GOP duration of OBS following 3.
You can set the GOP duration (recommended: 1–2 seconds) for OBS stream push. A GOP duration too long will compromise user experience when the I-frame interval of the source stream fluctuates greatly.
Pushing Streams
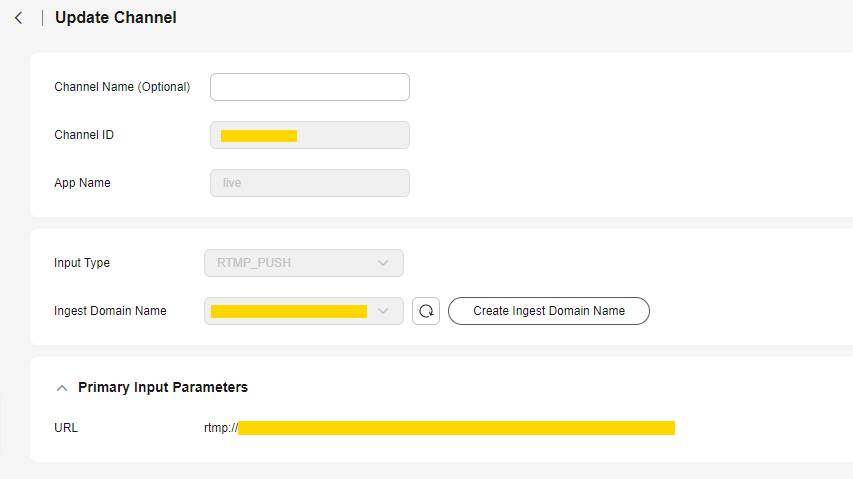
- Obtain the ingest URL.
- Log in to the Live console.
- In the navigation pane on the left, choose Channels under Media Live. The Channels page is displayed.
- Find the desired channel and click Manage on the right. The Update Channel page is displayed.
The ingest URL is required only when Input Type is set to RTMP_PUSH or SRT_PUSH. If FLV_PULL, HLS_PULL, or SRT_PULL is selected, stream push is not required. The streaming URL provided by the user is directly obtained and used by Media Live to push streams to the origin server.
An example of the ingest URL is shown in Figure 2.

SRT_PUSH channels and RTMP_PUSH channels cannot be created at the same time for one domain name.
- RTMP_PUSH URL example: rtmp://live-push.example.com/live/huaweitest?request_source=ott&channel_id=huaweitest
- SRT_PUSH URL example: srt://live-srt-push.example.com:5000?streamid=#!::h=push.bj4.srt.transcodeonline.com,r=live/srtpush,request_source=ott,channel_id=srtpush,m=publish
- Run OBS and click Settings in the lower right corner.
Figure 3 Settings
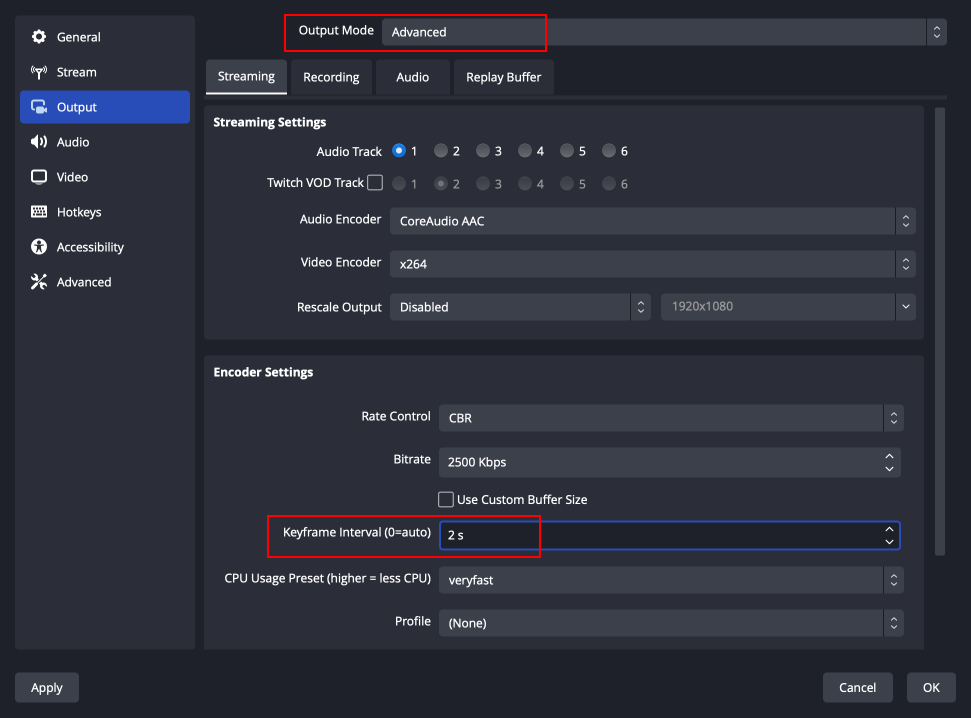
- In the navigation pane on the left, choose Output. Set Output Mode to Advanced and Keyframe Interval to 2.
Figure 4 Output settings
- In the navigation pane on the left, choose Stream and enter the ingest URL obtained in 1.
Figure 5 Livestream settings

The ingest URL consists of two parts: Server and Stream Key.

The parameter names on the GUI may vary depending on the OBS version, but the rules for configuring the parameters are the same.
Rules for setting an RTMP_PUSH ingest URL:- Server: Enter the part from the beginning of the ingest URL to the AppName, for example, rtmp://live-push.example.com/live/
- Stream Key: Enter the URL containing StreamName, for example, huaweitest?request_source=ott&channel_id=huaweitest
Rules for setting an SRT_PUSH ingest URL:
- Method 1:
- Server: Enter a server URL, for example, srt://live-srt-push.example.com:5000
- Stream Key: Enter the URL following streamid=, for example, #!::h=push.bj4.srt.transcodeonline.com,r=live/srtpush,request_source=ott,channel_id=srtpush,m=publish
- Method 2:
- Server: Enter a complete URL, for example, srt://live-srt-push.example.com:5000?streamid=#!::h=push.bj4.srt.transcodeonline.com,r=live/srtpush,request_source=ott,channel_id=srtpush,m=publish
- Stream Key: Leave it empty.
- Click OK.
- Click + in the lower left corner of the Sources area and add a stream source.
Figure 6 Source settings
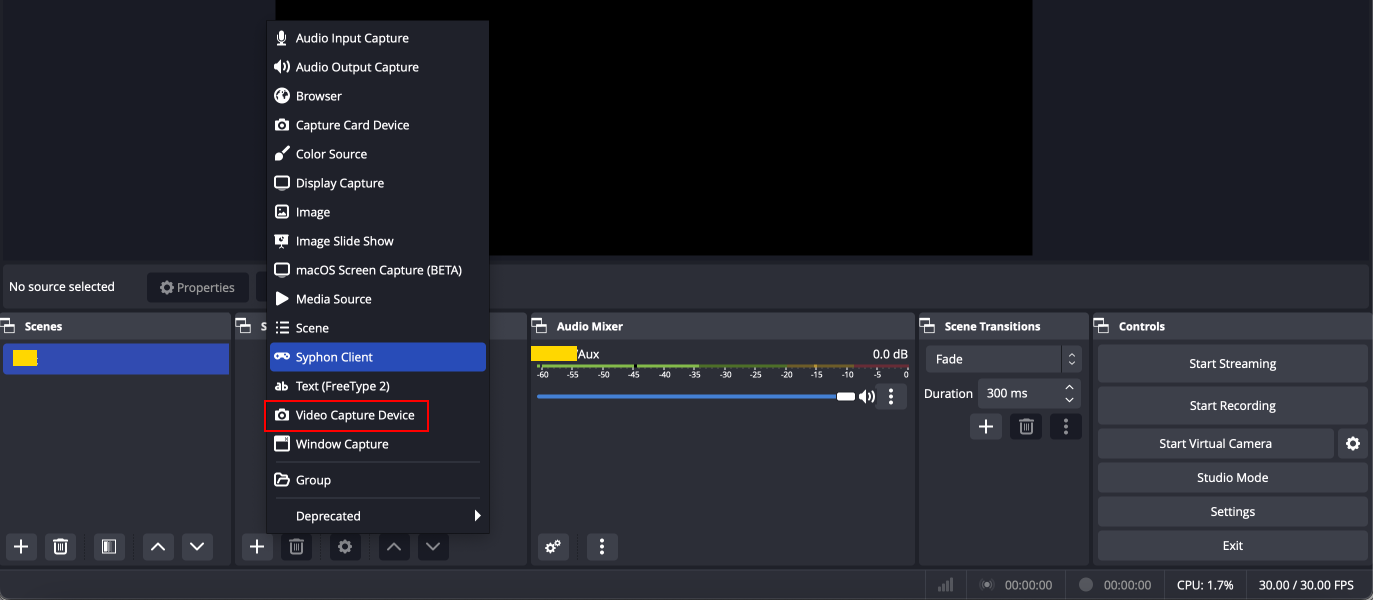
- Media Source indicates local media files.
- Video Capture Device indicates a camera. If a camera is available on the PC, the camera is directly enabled.
- Click Start Streaming in the lower right corner.
Streaming Content
- Obtain the streaming URL.
- Log in to the Live console.
- In the navigation pane on the left, choose Channels under Media Live. The Channels page is displayed.
- Find the desired channel and click Manage on the right. The Update Channel page is displayed.
View the streaming URL, as shown in Figure 7. Streaming URLs whose output protocol is HLS, DASH, or MSS can be assembled. Examples:
- HLS: https://live-play.example.com/{channelld}/hls/{unique_string}/index.m3u8
- DASH: https://live-play.example.com/{channelId}/dash/{unique_string}/index.mpd
- MSS: https://live-play.example.com/{channelId}/mss/{unique_string}.ism/Manifest
A streaming URL supports HTTPS. You can configure an HTTPS certificate by referring to HTTPS Certificates.
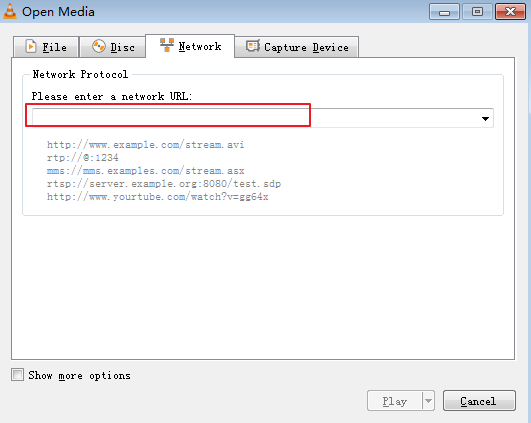
- Run VLC.
- On the menu bar, choose Media > Open Multiple Files.
- In the displayed dialog box, enter the streaming URL obtained in 1. Click Play.
Feedback
Was this page helpful?
Provide feedbackThank you very much for your feedback. We will continue working to improve the documentation.See the reply and handling status in My Cloud VOC.
For any further questions, feel free to contact us through the chatbot.
Chatbot


