
Getting Started
This solution utilizes CloudShell for remote login to the cloud server via port 22. An IP address whitelist is pre-configured. To access the server remotely, simply use CloudShell.
Following successful deployment, environment initialization, including downloading ollama and DeepSeek-R1-Distill model, is estimated to take 5-10 minutes. Network and bandwidth conditions may affect this time; Service can only be available after deployment is complete.
A security group is a collection of access control rules to control traffic to and from cloud resources, such as cloud servers, containers, and databases. Cloud resources associated with the same security group have the same security requirements and are mutually trusted within a VPC.
You can modify security group rules, for example, by adding, modifying, or deleting a TCP port, as follows:
- Adding a security group rule: Add an inbound rule and enable a TCP port if needed.
- Modifying a security group rule: Inappropriate security group settings may introduce serious security risks. You can modify security group rules to ensure the network security of your ECSs.
- Deleting a security group rule: If the source or destination IP address of an inbound or outbound security group rule changes, or a port needs to be disabled, you can delete the security group rule.
CPU-based Solution
- Log in to the Huawei Cloud Flexus X console, select the server created using this solution, and click Remote Login. Figure 1 Click Remote Login

- Click Log In button, insert the server's password on the CloudShell page and click Connect. Figure 2 Click Log In
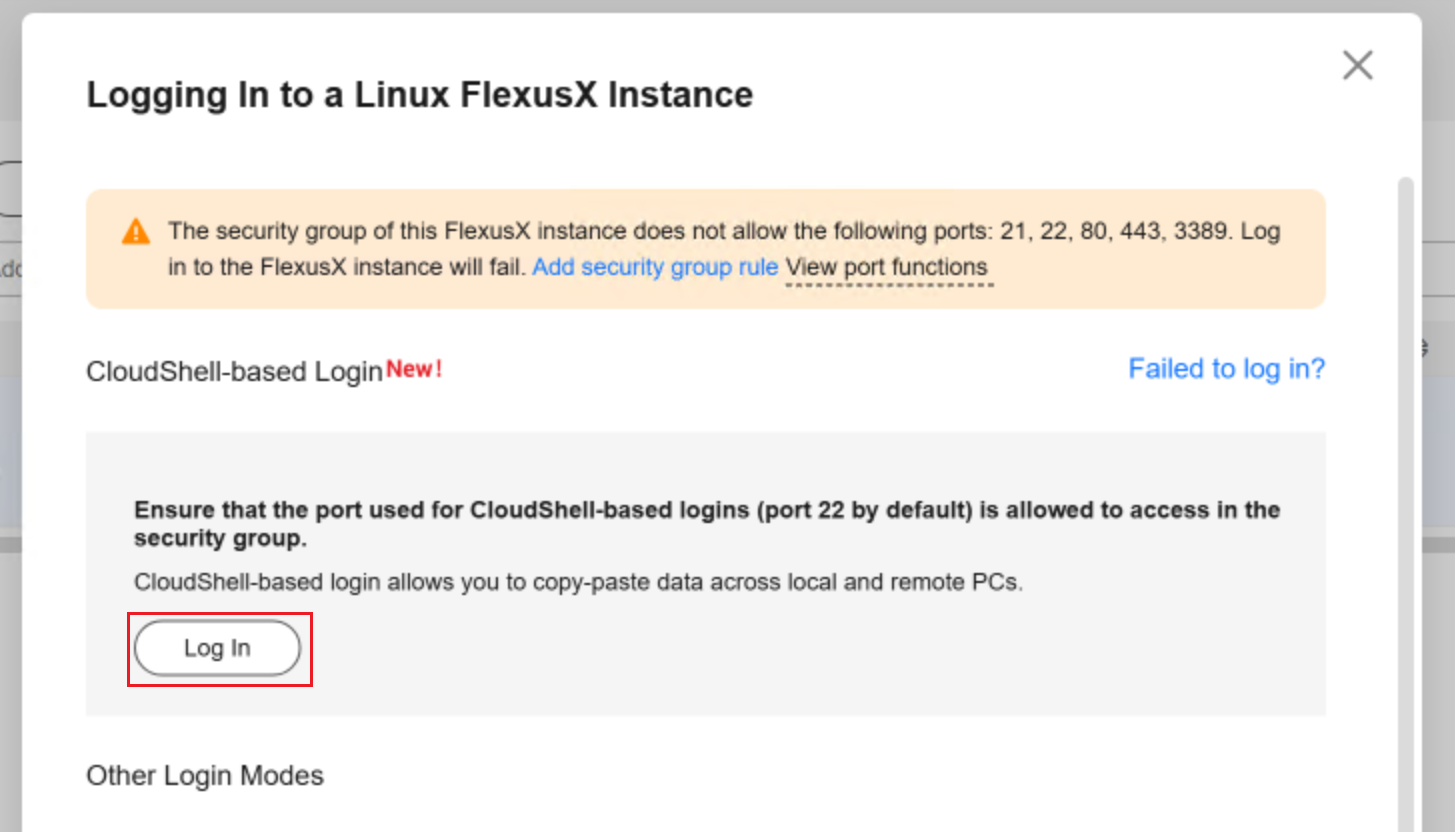 Figure 3 Configurate the connection
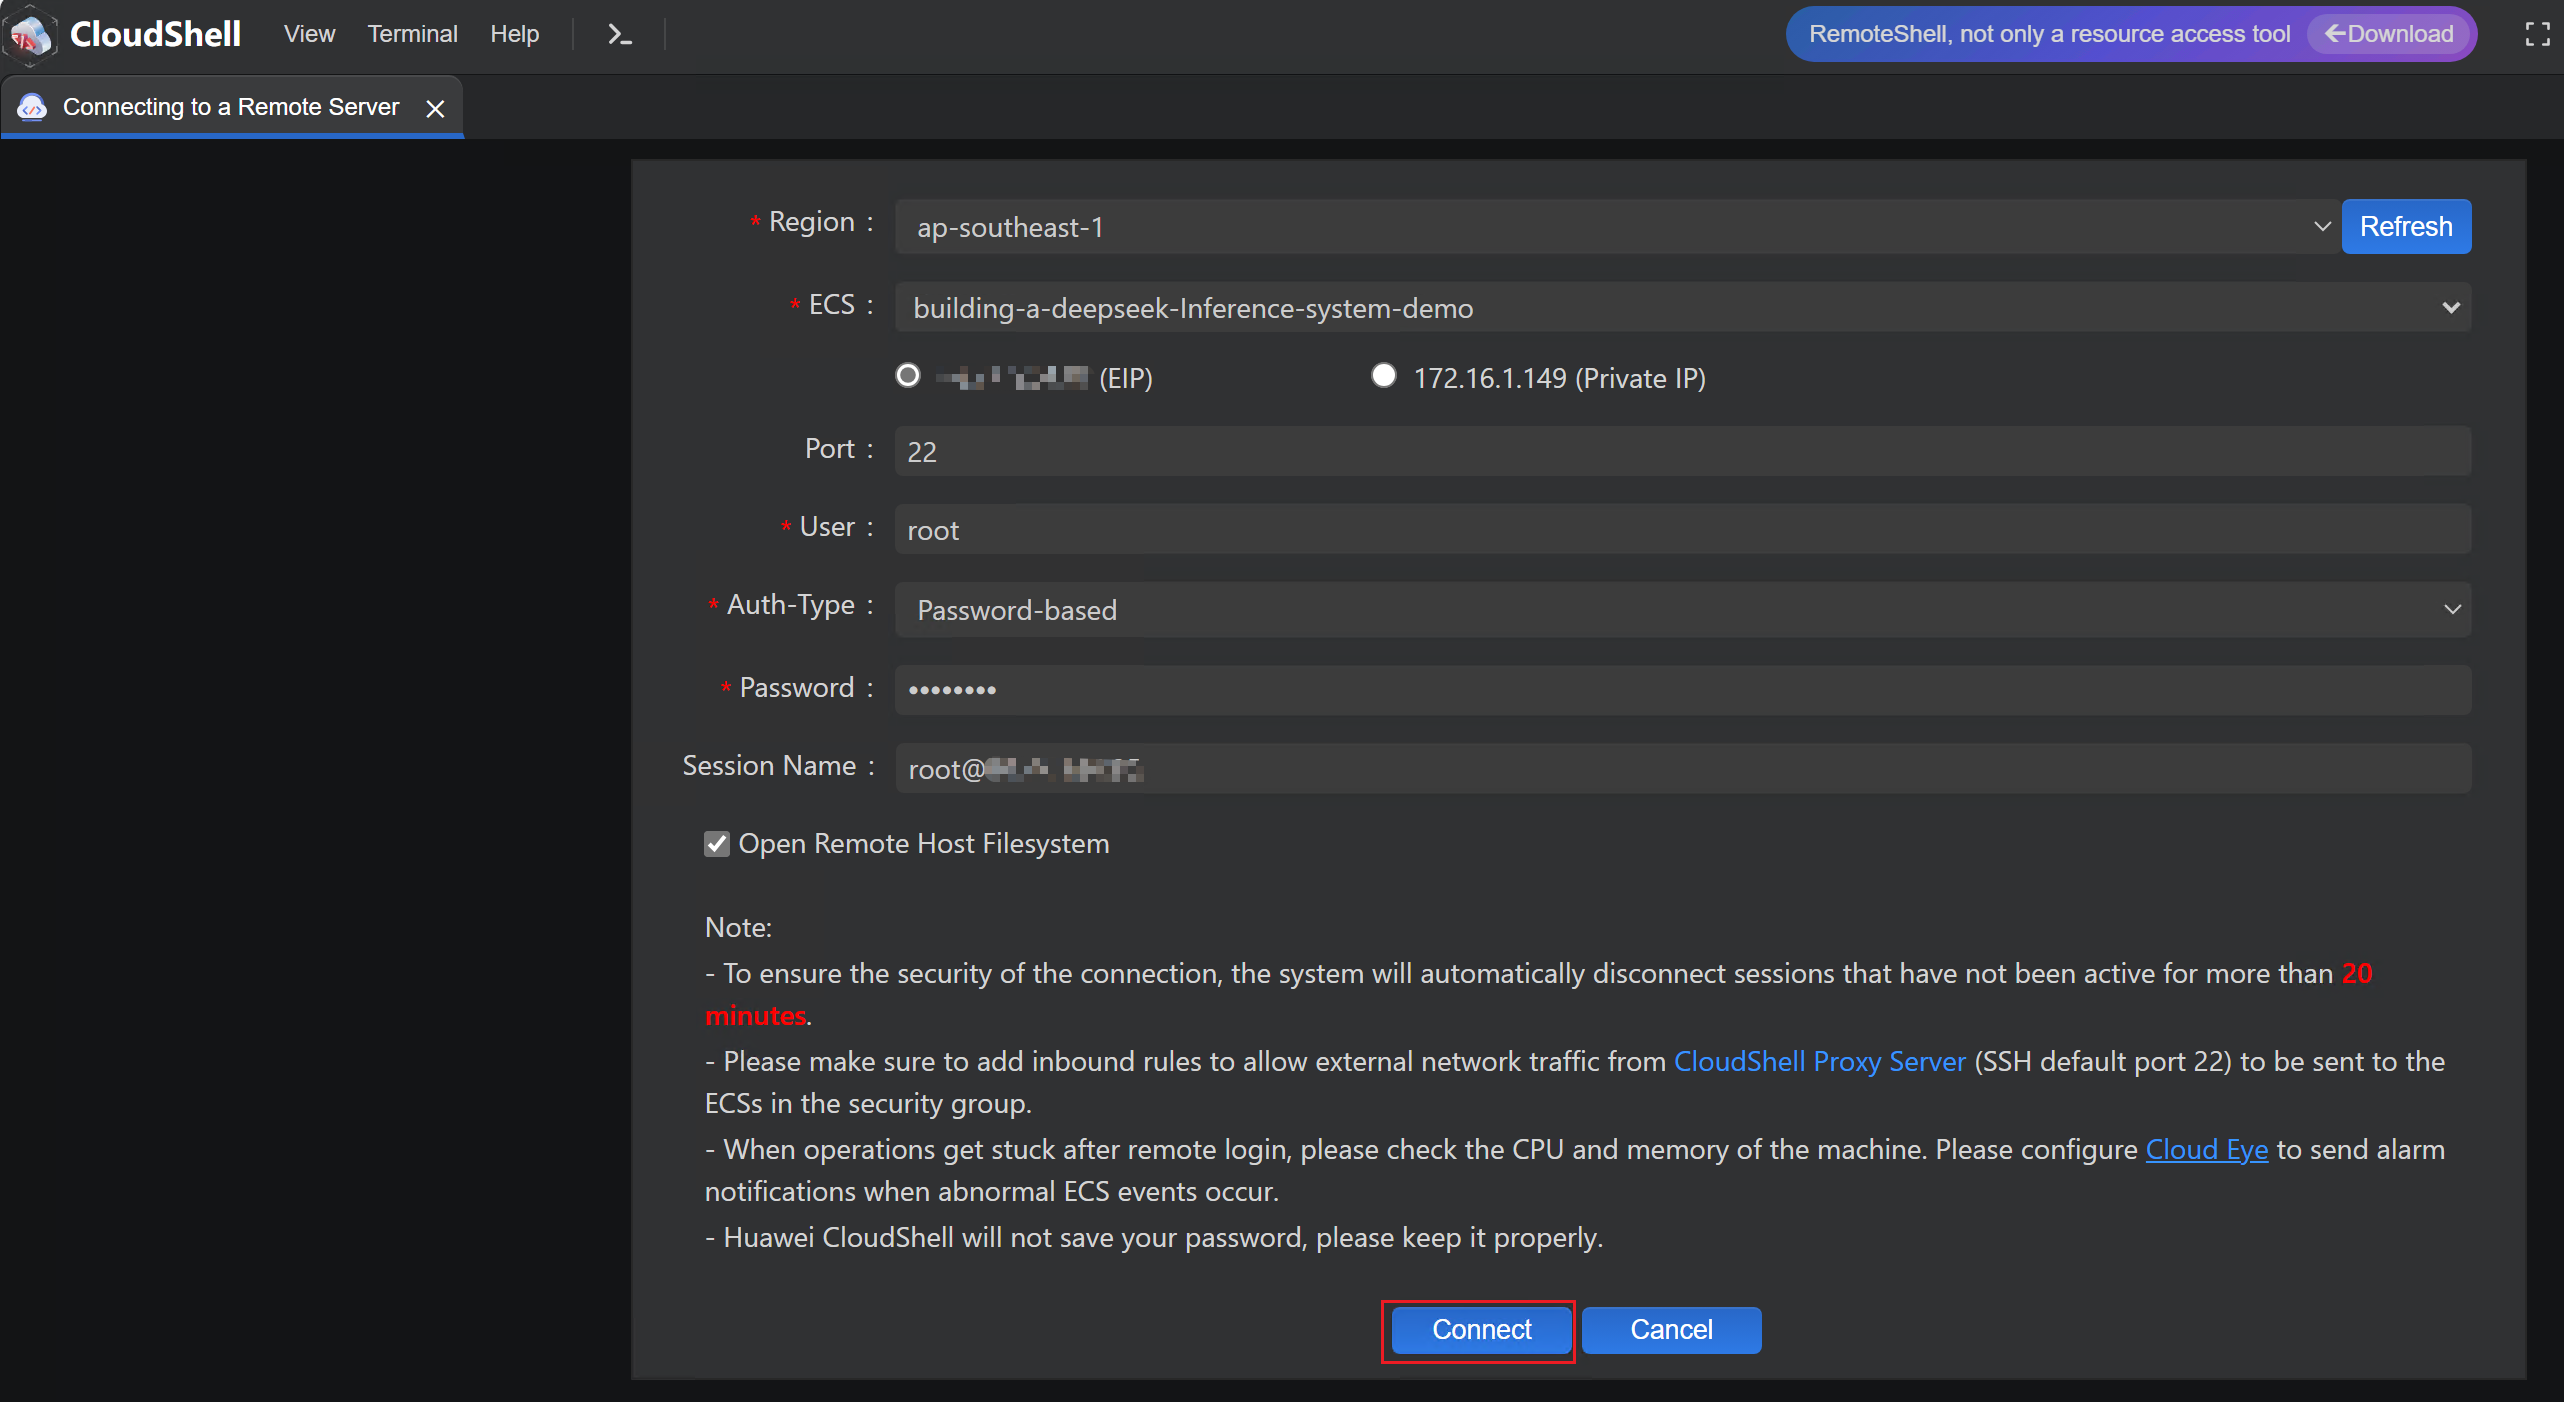
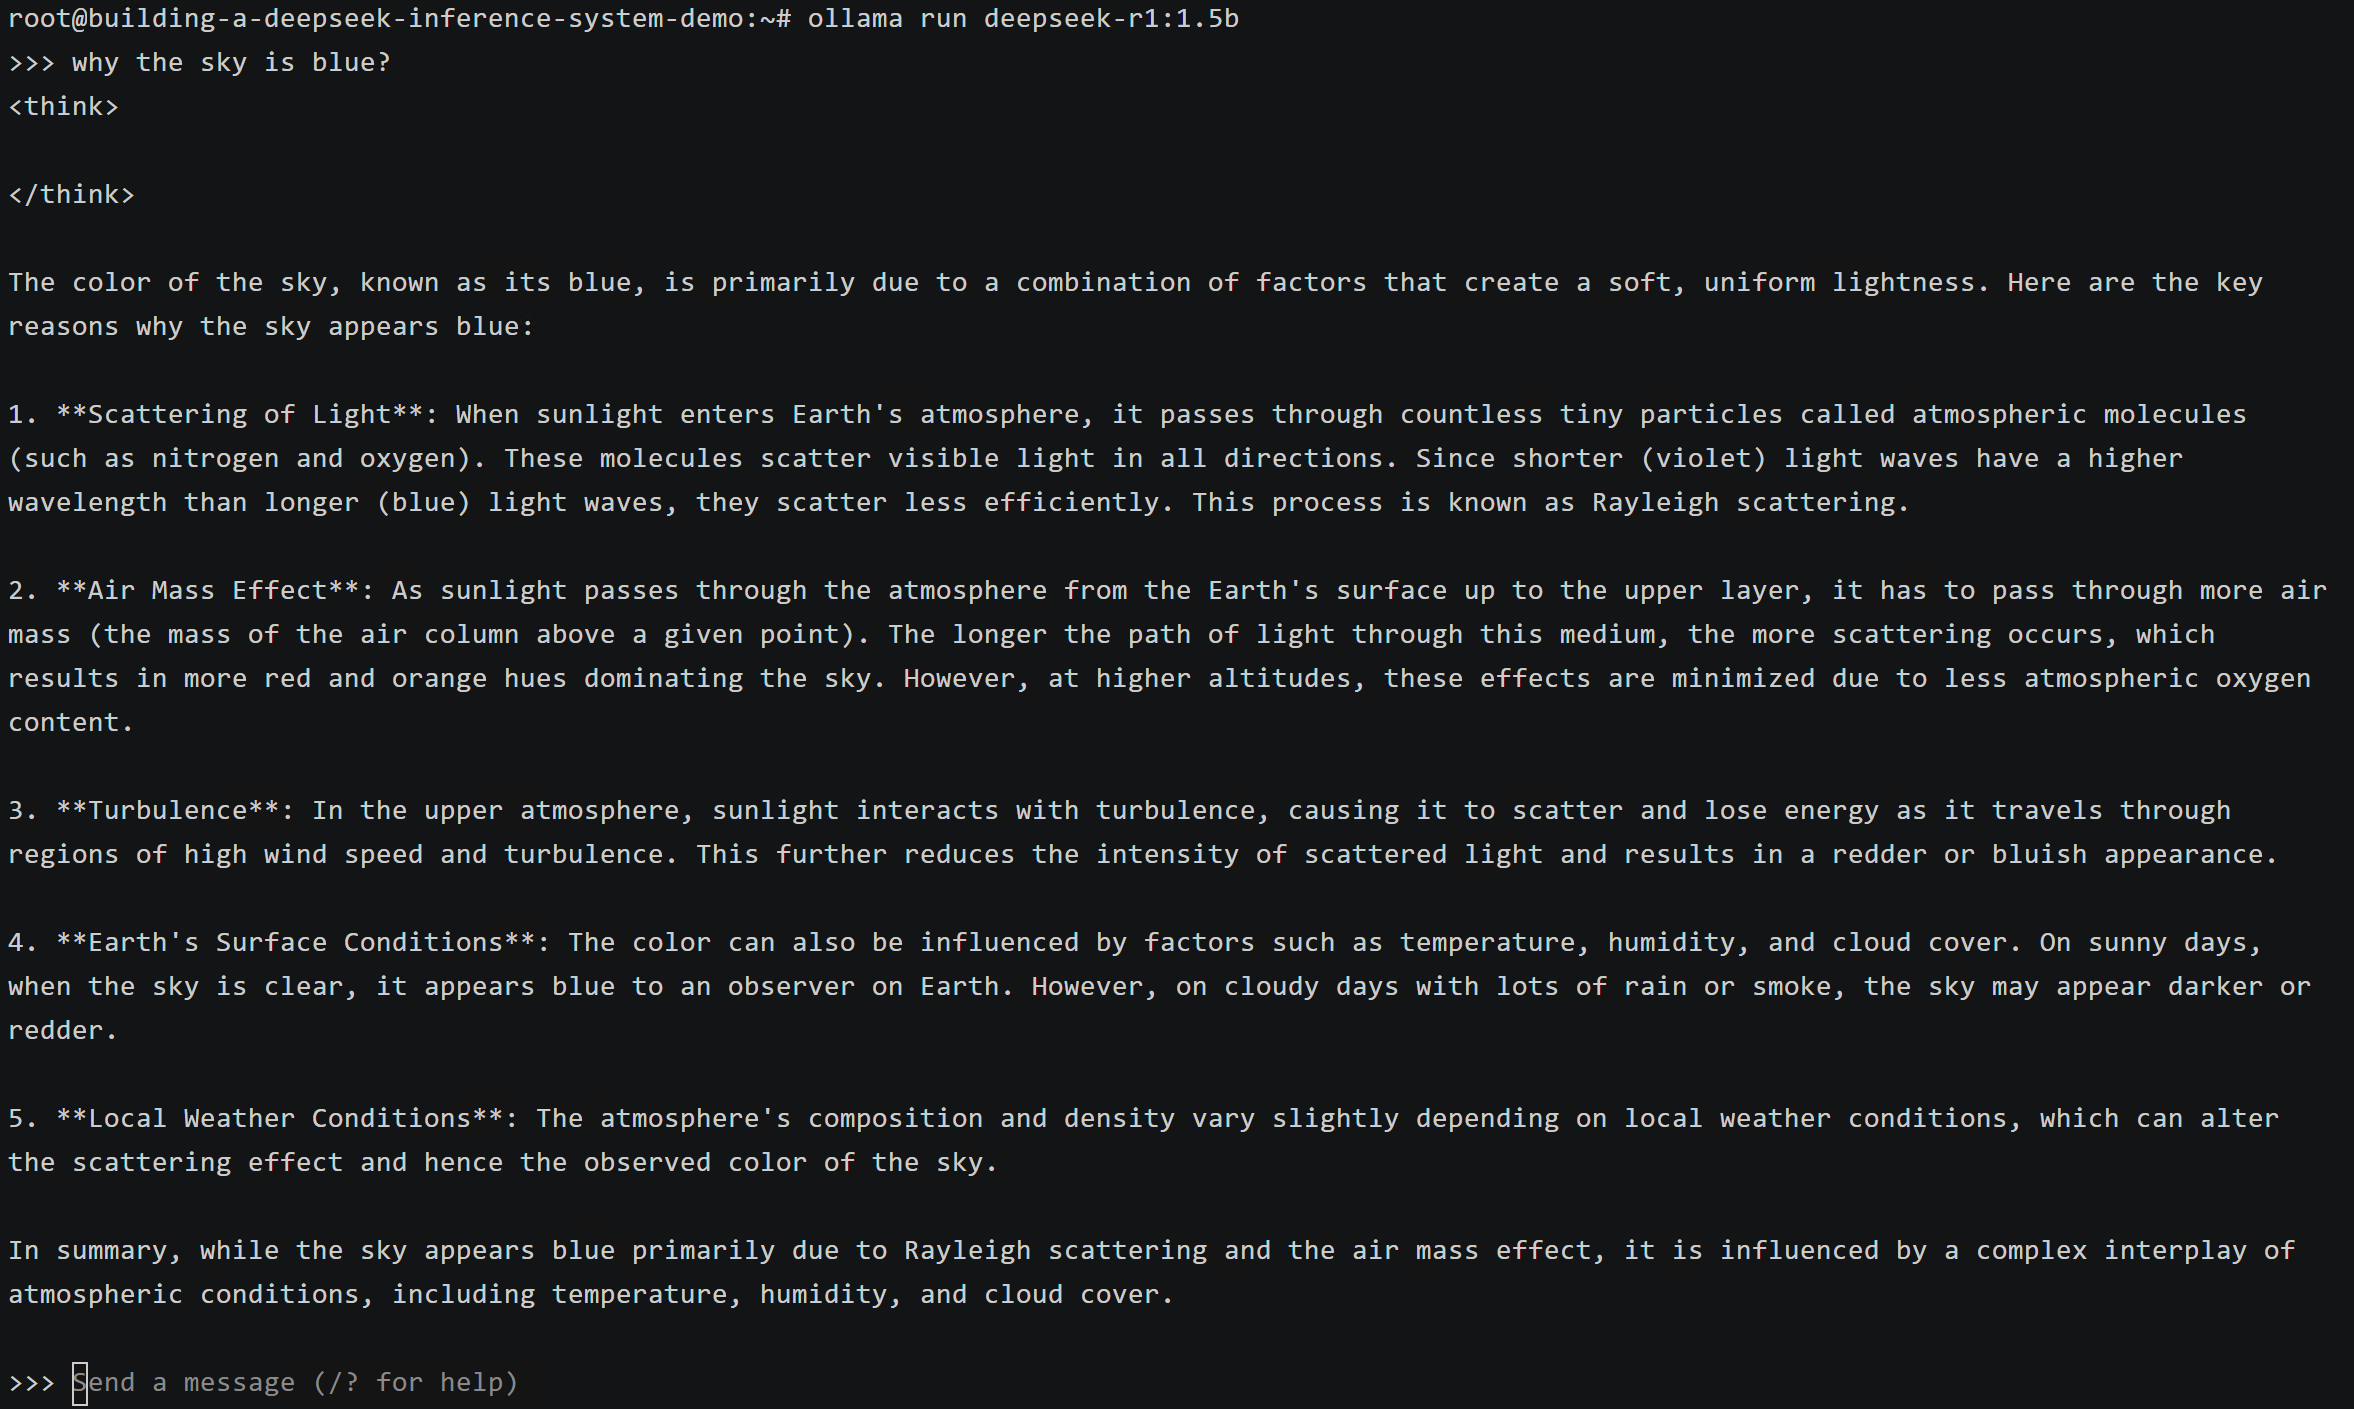
- In the shell, insert "ollama run deepseek-r1:$parameter_quantity". $parameter_quantity supports 1.5b, 7b, 8b. Please replace with the actual value of parameter "parameter_quantity" in 3.2 Quick Deployment. Execute the commad start the dialog test. Figure 4 Dialog test
In the interactive mode, you can test the model under various scenarios, for example:
- Intelligent Customer Service: Input common customer questions, such as "How do I install nginx?"
- Content Creation: Input prompts like "Write an advertisement for a smart watch."
- Programming Assistance: Input requests such as "Implement quicksort in Python."
- Educational Assistance: Input requests for explanations, such as "Explain Newton's Second Law."
Instead of CLI, you can also use Ollama API to interact with the model.
GPU-based Solution
If you enable the dify installation during the 3.2 Step3, then you can walk through the following instructions:
- Log in to the ECS console, and get the EIP and private IP addresses of the instance deployed in the 3.2 Step3. Figure 5 Get EIP and private IP addresses

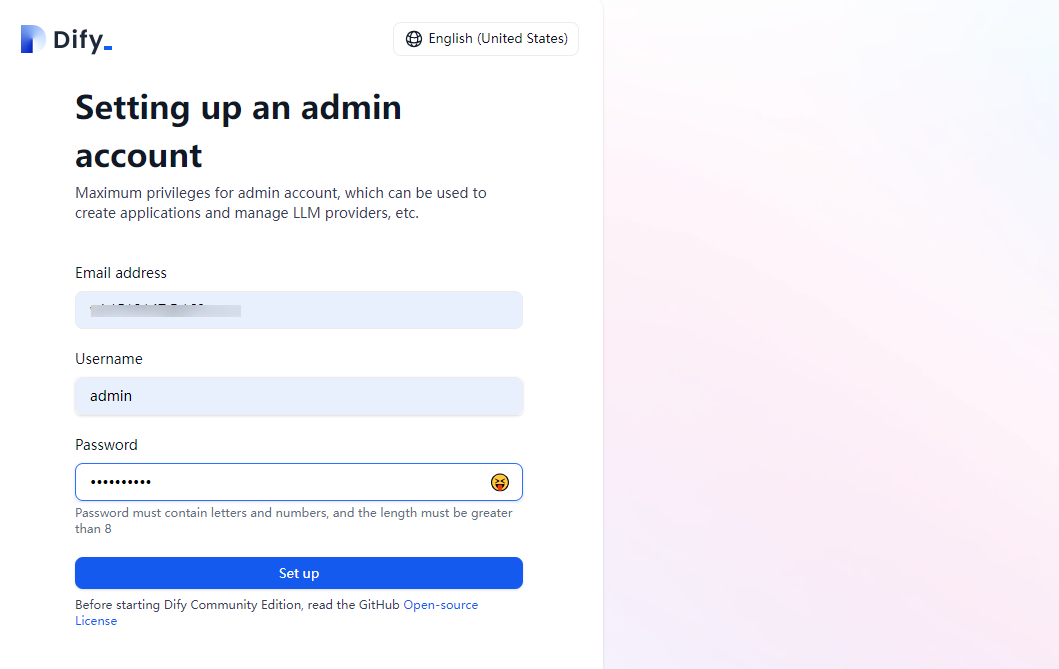
- Access the Dify application by typing "http://[your-instance-EIP]" in the browser. For the first login, you need to register an administrator account by sequentially filling in your email, username, and password. Figure 6 Setting up an admin account
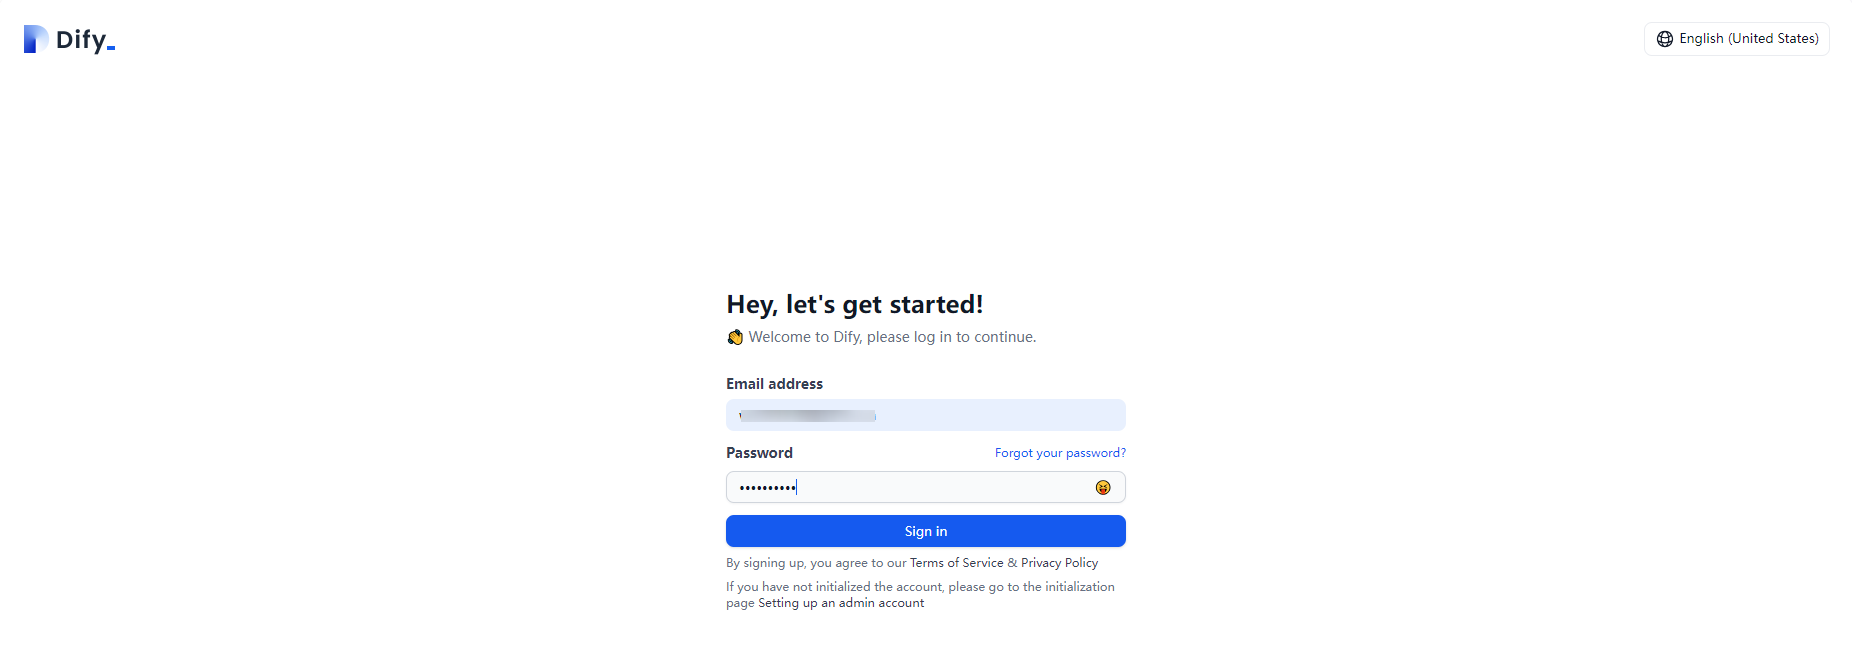
- Log in to the Dify platform using the email and password from the previous step. Figure 7 Log in to the Dify platform
- Click the username in the top right corner and click Settings in the dropdown menu. Figure 8 Click Settings

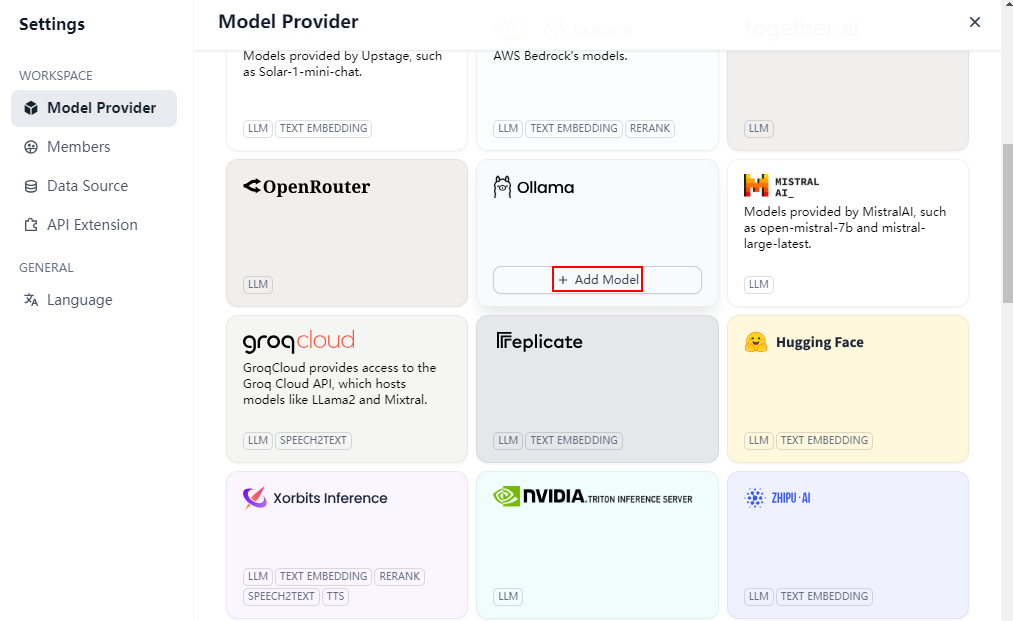
- Click Model Provider in the left panel. Find the Ollama box and click Add Model. Figure 9 Add Model
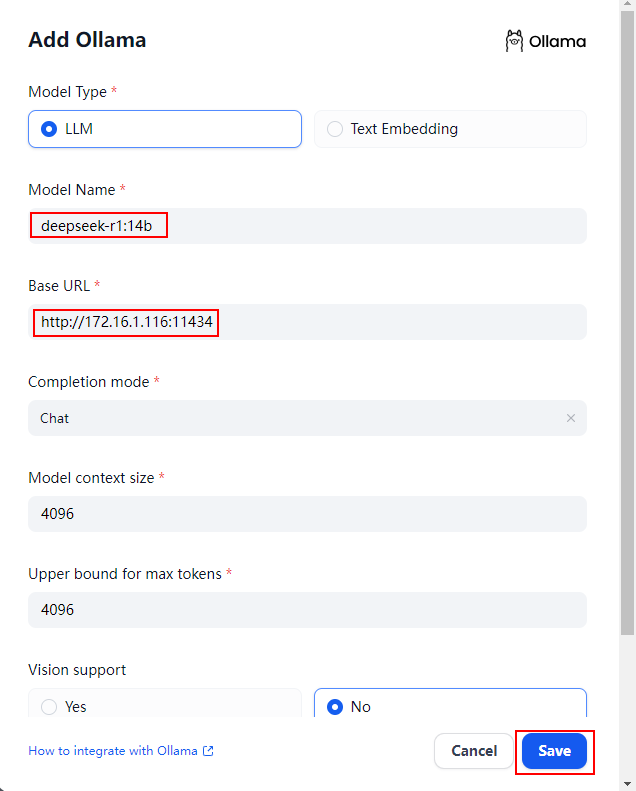
- Type "deepseek-r1:${quantity}b" for Model Name, and "http://${your-instance-private-ip}:11434" for Base URL. Click Save and close the settings window. Figure 10 Add Ollama
- Click Create from Blank, choose "Chatbot" and fill the application name and icon, and then click Create. Figure 11 Create from Blank
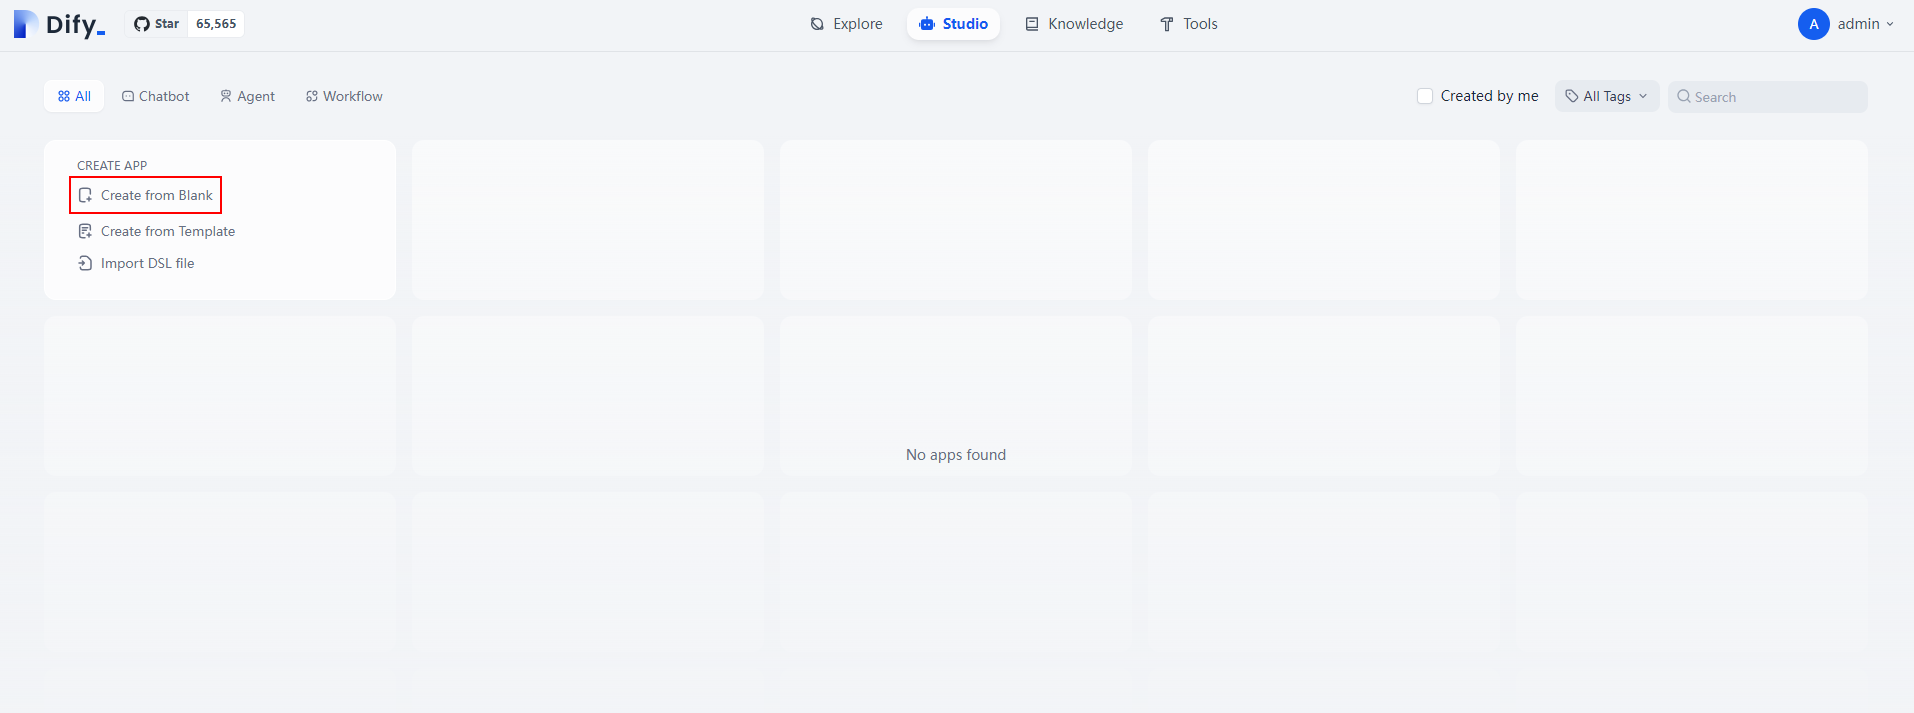 Figure 12 Create application
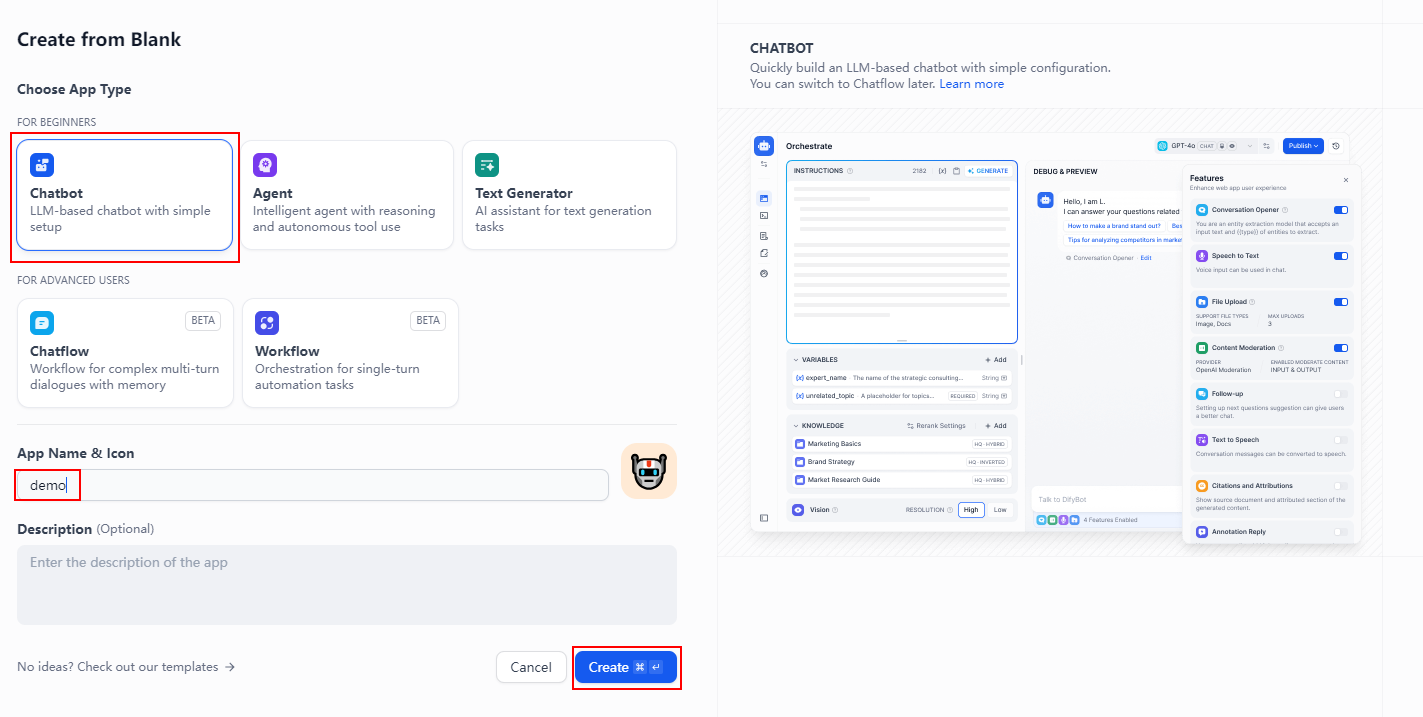
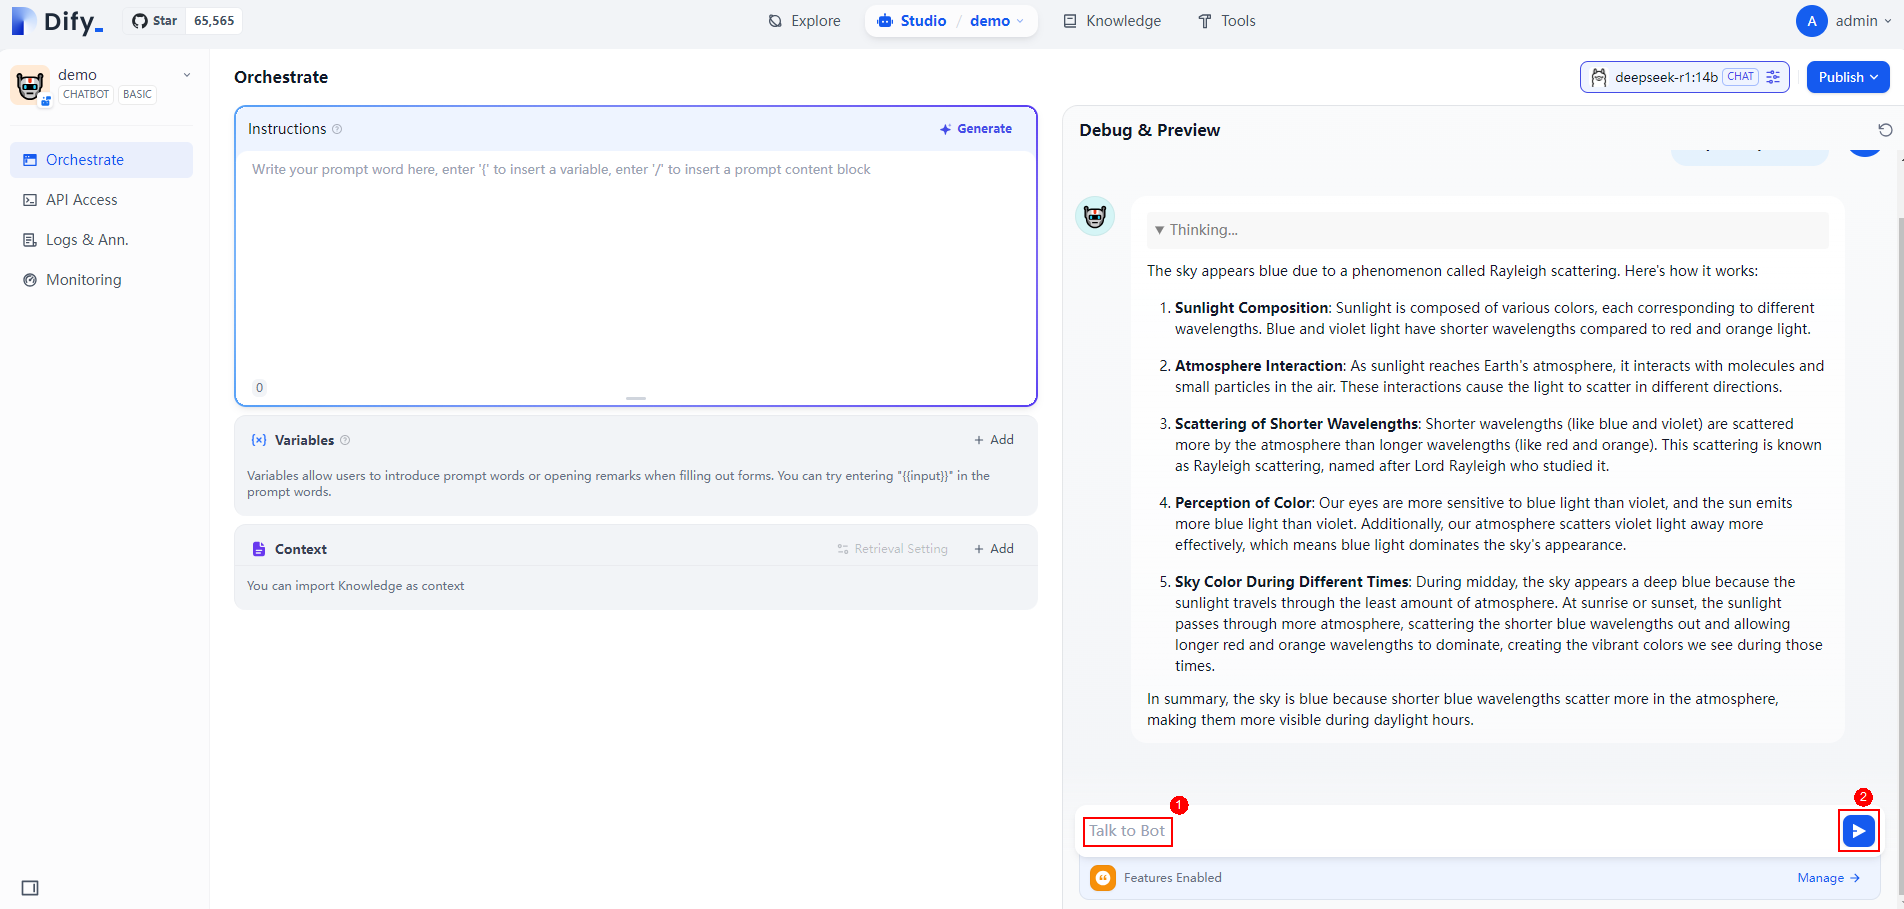
- Click Orchestrate in the left panel and start testing in the Debug & Preview window. Figure 13 Debug & Preview
Feedback
Was this page helpful?
Provide feedbackThank you very much for your feedback. We will continue working to improve the documentation.See the reply and handling status in My Cloud VOC.
For any further questions, feel free to contact us through the chatbot.
Chatbot


