
Third-Party Tools
Binary Vulnerability Scanning (Linux Image )
Trivy is required for mirror image package scanning. The following uses the MySQL container image as an example.
- Environment setup
Installing Docker(The host machine uses CentOS 7.9)
Uninstall Docker of the old version (if any).
Run the following command:sudo yum remove docker docker-client docker-client-latest docker-common docker-latest docker-latest-logrotate docker-logrotate docker-engine
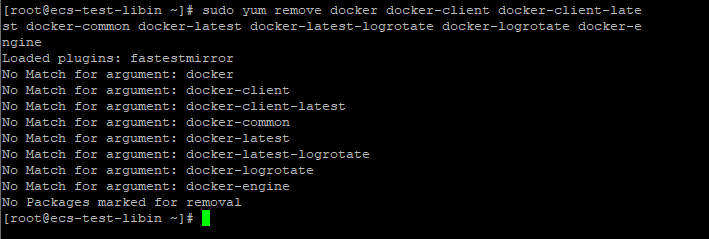
(The server does not have Docker of the earlier version, and a message is displayed indicating that no image is available.)
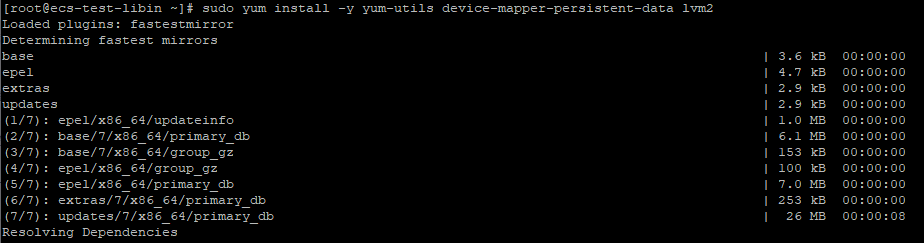
Installing necessary dependency packages.
Run the following command:sudo yum install -y yum-utils device-mapper-persistent-data lvm2
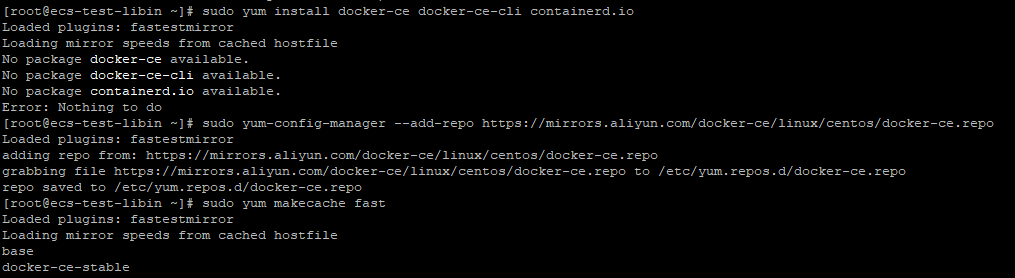
Setting the Docker Image Source(HUAWEI CLOUD image source is used as an example.)
Run the following command:sudo yum-config-manager --add-repo https://mirrors.aliyun.com/docker-ce/linux/centos/docker-ce.repo

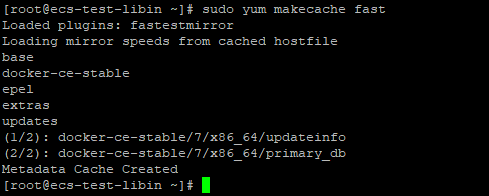
Updating the YUM Software Package Index
Run the following command:sudo yum makecache fast
Installing Docker
Installing Docker CE of the Latest Version (Community Edition)
Run the following command:sudo yum install docker-ce docker-ce-cli containerd.io
Start and enable Docker
Run the following command:
sudo systemctl start docker
sudo systemctl start docker
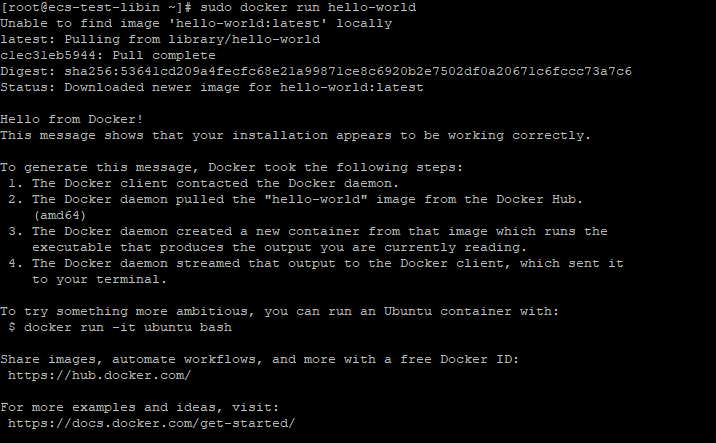
Figure 1
Test Docker
Run the following command:sudo docker run hello-world
- Scanning process
- Trivy Scanning MySQL Container Images.
- Updating the Trivy offline library
Run the following command:docker pull quay.io/sighup/trivy-offline:latest
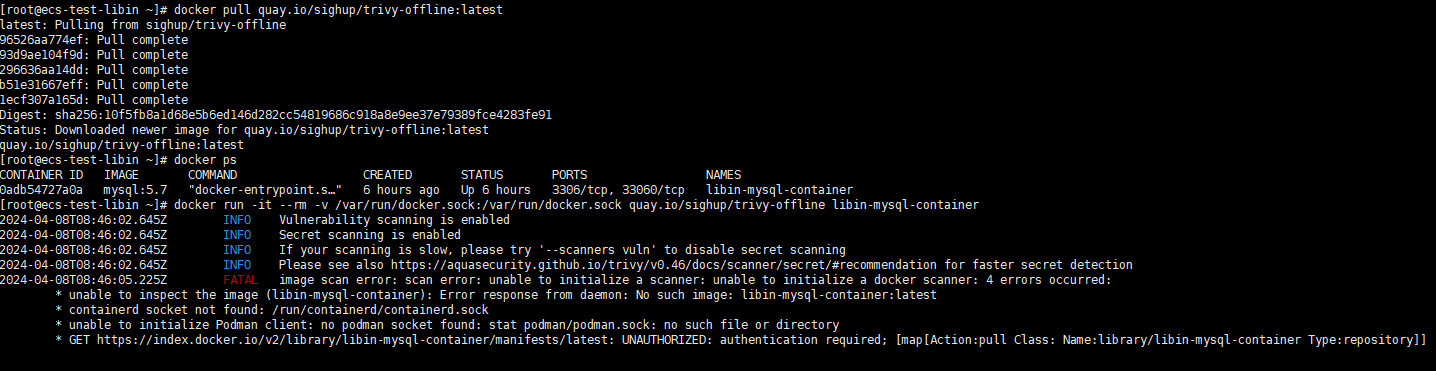
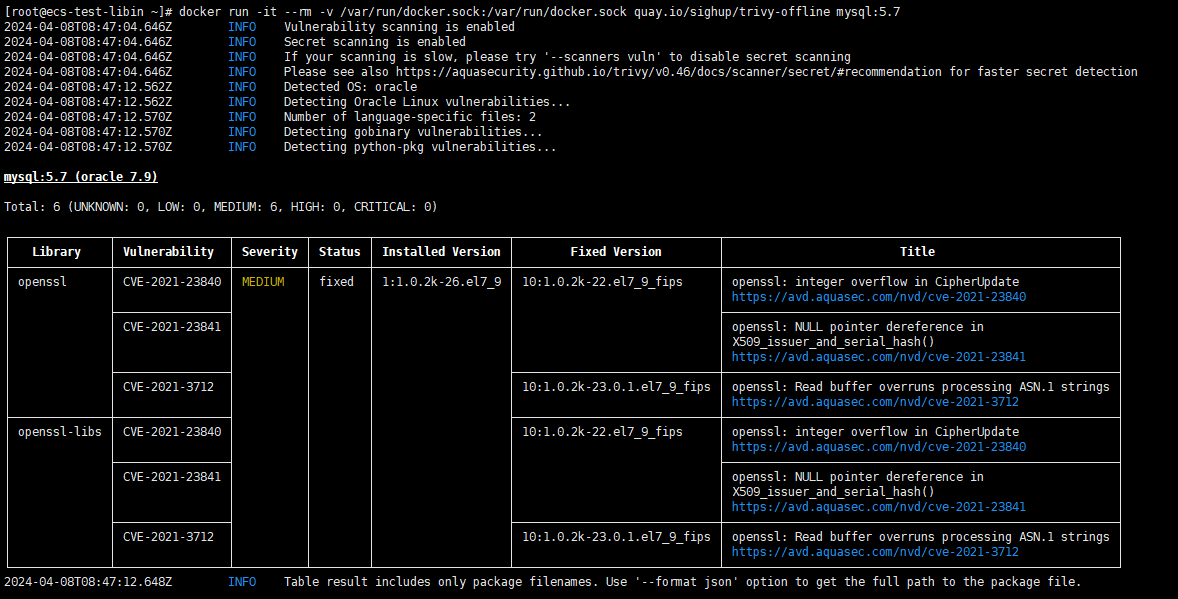
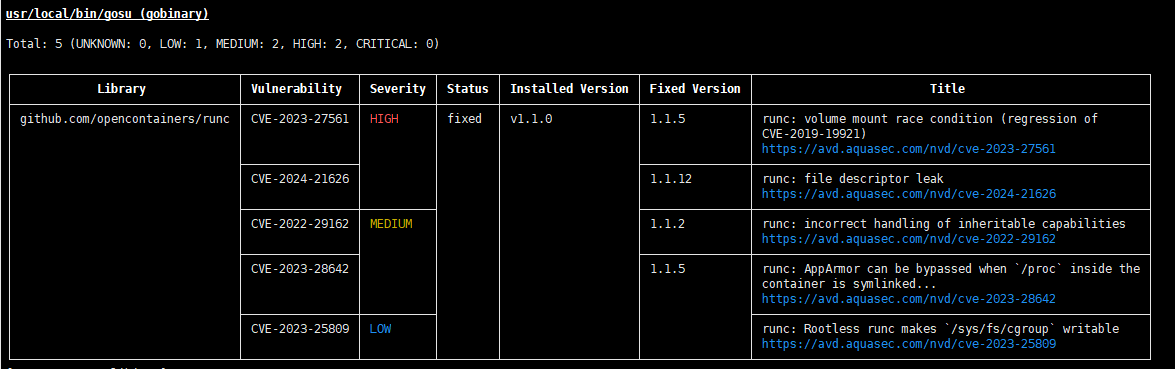
- Use Trivy to scan images and provide scan result screenshots.

The test case can be passed only when the number of high-risk and super-risk vulnerabilities is 0. Otherwise, the vulnerability needs to be fixed and then scanned again.
Run the following command:docker run -it --rm -v /var/run/docker.sock:/var/run/docker.sock quay.io/sighup/trivy-offline mysql:5.7 (Scanning the MySQL:5.7 image offline is used as an example.)
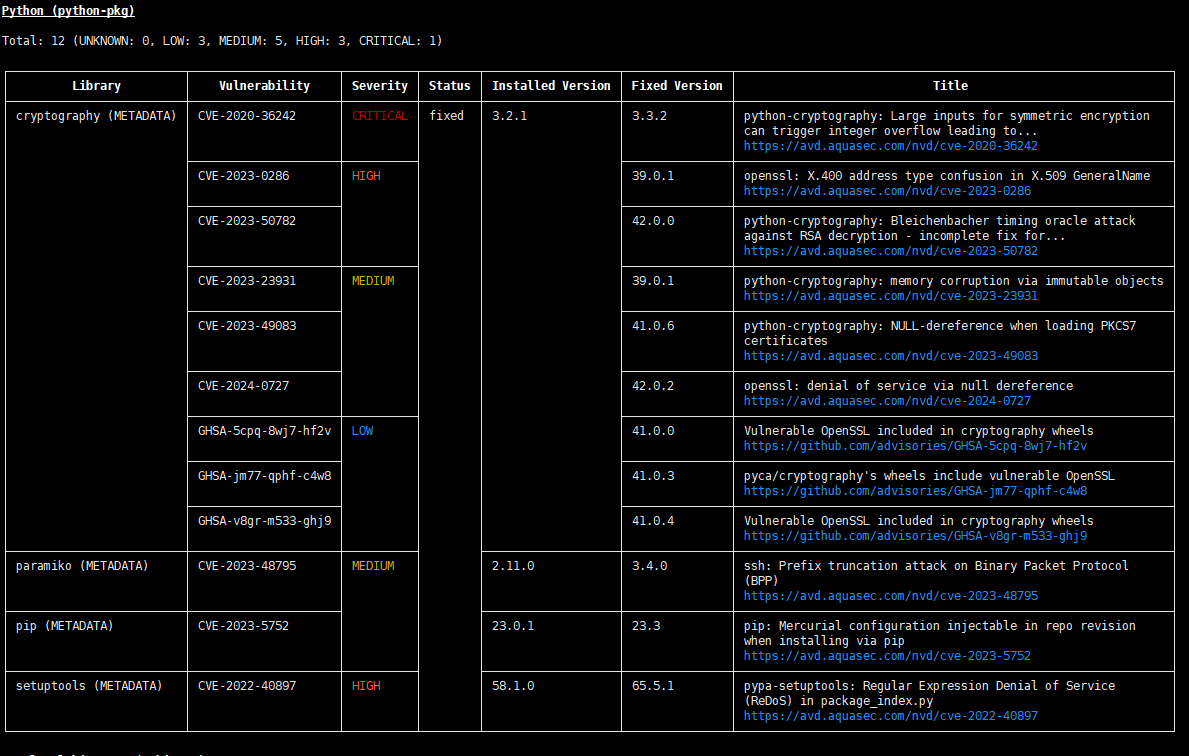
critical vulnerability:CVE-2020-36242
high-risk vulnerability:CVE-2023-0286,CVE-2022-40897,CVE-2023-27561
If the scanning result does not contain vulnerabilities at the HIGH or CRITICAL level, the test case passes. Otherwise, the test case fails,Security vulnerabilities whose severity level is HIGH and CRITICAL need to be fixed.
Screenshots of basic image vulnerabilities are required for each image. Screenshots of application vulnerabilities are required for each application.Screenshots. Refer to three pictures.
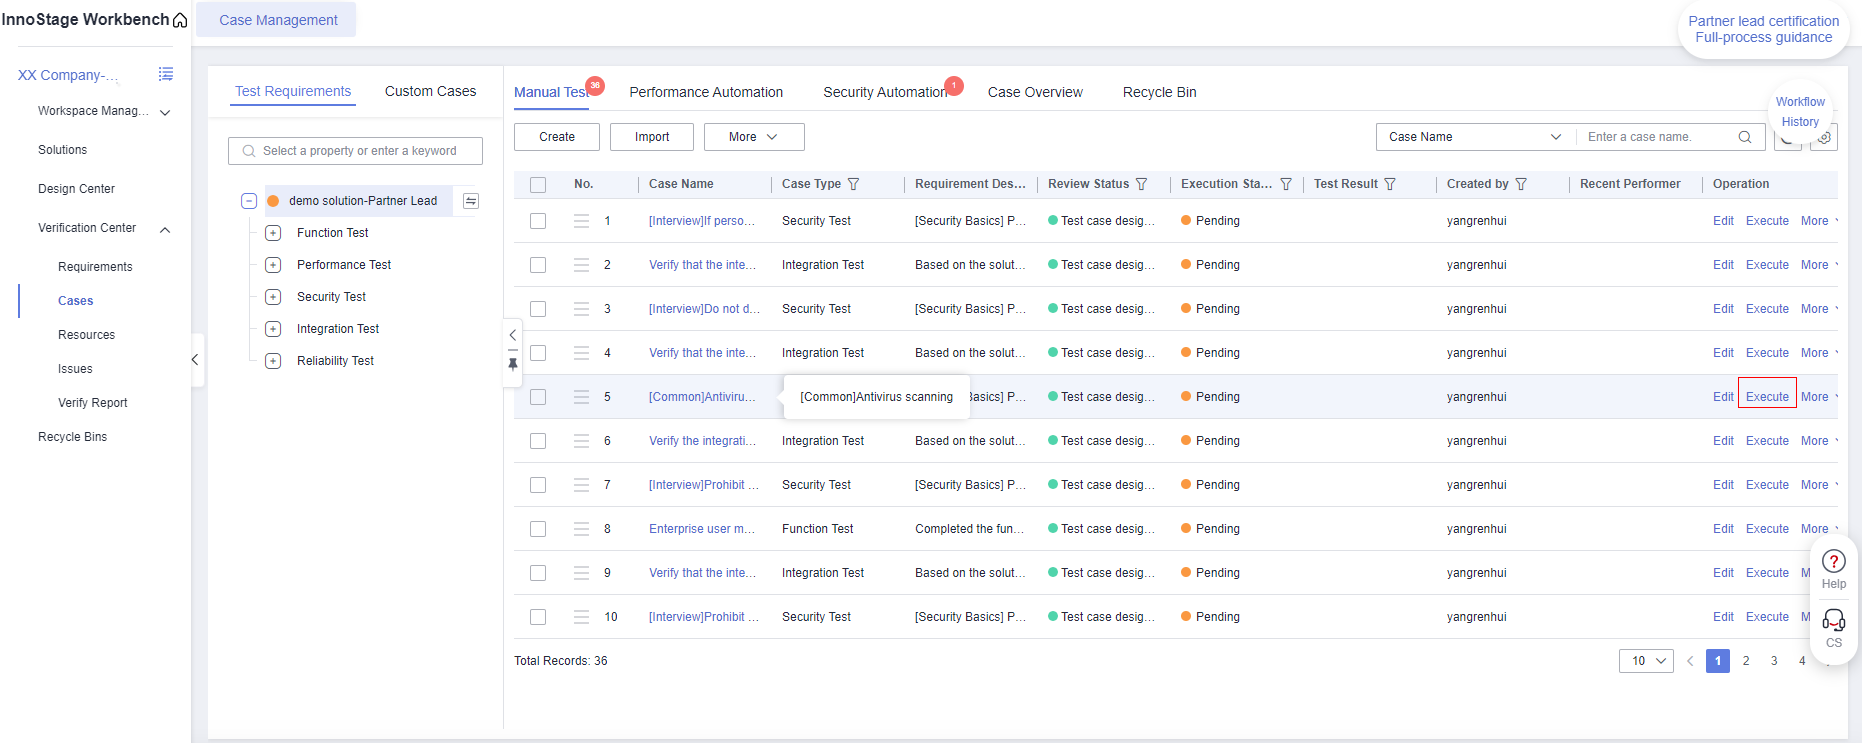
- After the scan is passed,go back to the innostage workbench and enter the case management page.Click the [Execution] button of the binary test case.
Figure 2 Case Management

Copy the expected result to the actual result, and paste the screenshot in step 2 to the actual result,
Case Status:Completed
Execution Result:PassedFigure 3 Test Case Execution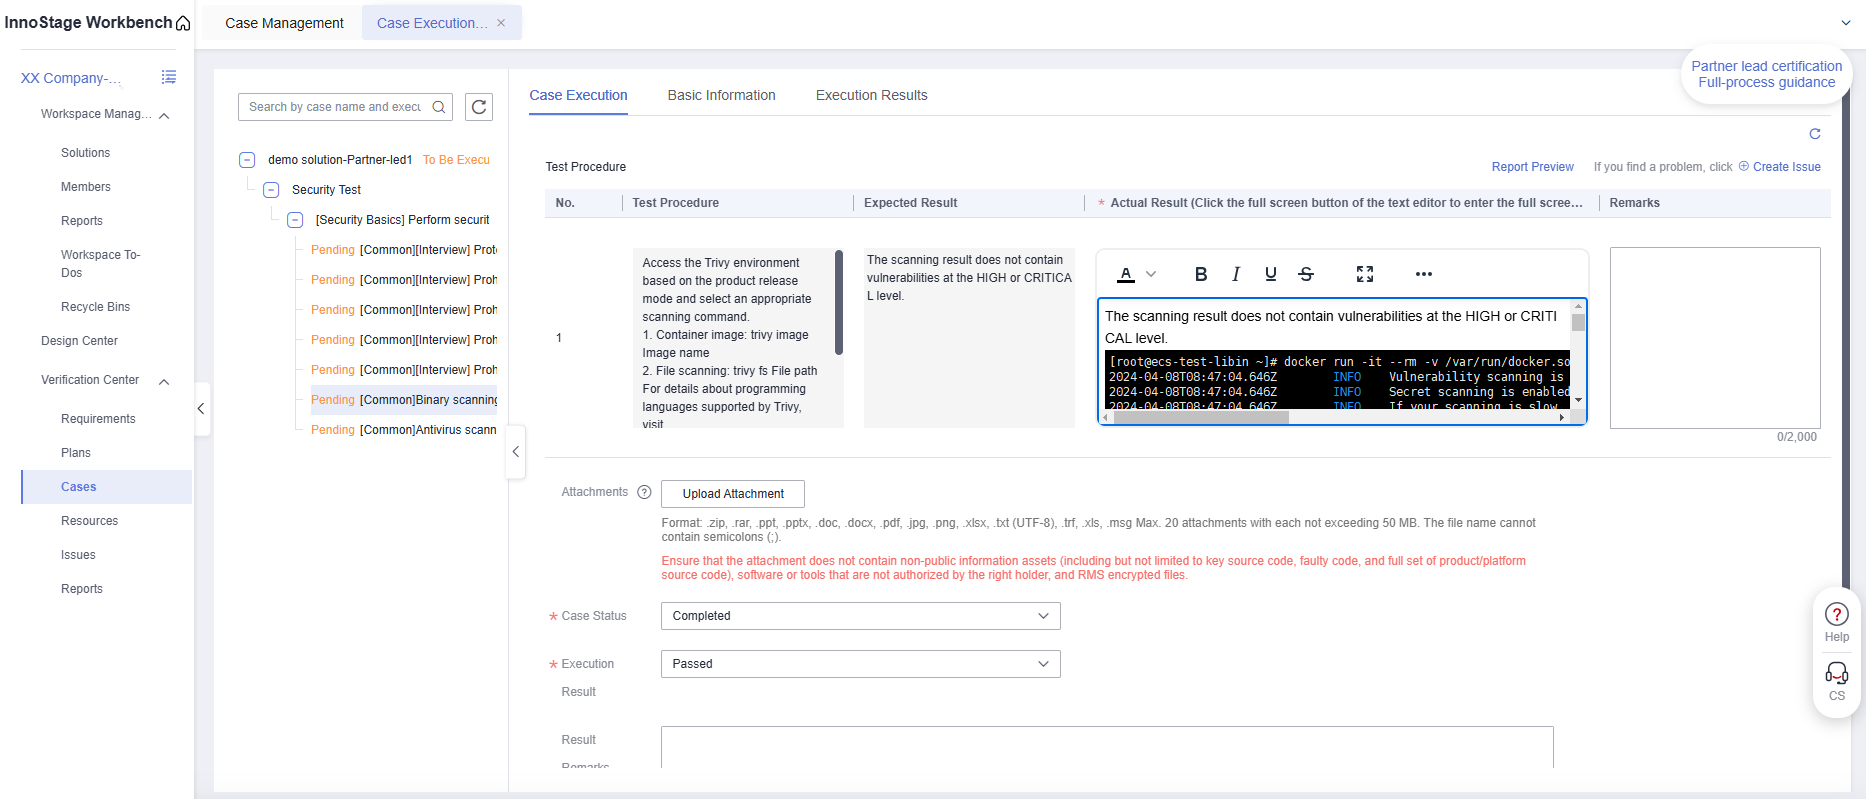
Click[Confirm and go to Next] or click[OK].
- Updating the Trivy offline library
- Binary Security Scanning of Dependent Libraries
Trivy automatically detects supported files and scans for vulnerabilities in application dependencies. Currently, only several binary packages are supported.
Table 1 language
Packet format
Java
JAR/WAR/PAR/EAR
Go
Binaries built by Go
Rust
Binaries built with cargo-auditable
If the file to be scanned is a compressed package, manually decompress the package.
The scanning procedure is as follows:
- Copy the files to be scanned to the current directory, create a container instance, and mount the host file system to the container.
- Enter the container and specify the scanning path to perform scanning. For details about the file system modes supported by different languages, see https://aquasecurity.github.io/trivy/v0.45/docs/coverage/language/
- Run the following command:
docker run --rm -it -v /var/run/docker.sock:/var/run/docker.sock -v
$(pwd):/wrk --entrypoint /bin/sh quay.io/sighup/trivy-offlin
trivy fs --skip-db-update --skip-java-db-update -o /wrk/report.txt /wrk/
The following table lists the scanning parameters of different forms.
Table 2 Formatting
Command parameter
Image
image
Rootfs
rootfs
Filesystem
fs
Repository
repo
- Dependent Open Source Component Definition List Scanning
Trivy can check for vulnerabilities in dependent components through the dependency library definition file.
- Prerequisites
Obtain the third-party dependency definition file of the corresponding development language. The following table lists the supported development language dependency definition files. More supported languages are [https://aquasecurity.github.io/trivy/v0.45/docs/coverage/language/].
Table 3 language
Dependency definition file
Command Parameters
PHP
composer.lock
trivy fs
Go
go.mod
trivy fs
C#
packages.config
trivy fs
Java
pom.xml
trivy rootfs
Node.js
package-lock.json
yarn.lock
pnpm-lock.yaml
trivy fs
Node.js
package.json
trivy rootfs
For example, in the PHP project, the third-party dependency library is managed by the Composer, and the composer.lock file of the development project can be obtained.
- Operation Procedure
- Copy the dependency definition file to the /tmp/trivy/ directory on the Docker host.
- Run the following command to start the container: docker run --rm -it -v /tmp/trivy/:/wrk --entrypoint /bin/sh quay.io/sighup/trivy-offline
- Run the following command to perform the scanning: trivy fs --skip-db-update --skip-java-db-update /wrk/
- Run the following command to save the result to the report.txt file:
trivy fs --skip-db-update --skip-java-db-update -o /wrk/report.txt /wrk/
You are advised Run the following command to export the results to the HTML file report.html:
trivy fs --skip-db-update --skip-java-db-update --format template --template "@/contrib/html.tpl" -o /wrk/report.html /wrk/
- Prerequisites
- Trivy Scanning MySQL Container Images.
- Reference Document
· Language-specific Packages[https://aquasecurity.github.io/trivy/v0.45/docs/coverage/language/]
· Download the vulnerability database[https://github.com/aquasecurity/trivy-db#download-the-vulnerability-database]
· https://github.com/sighupio/trivy-offline[https://github.com/sighupio/trivy-offline]
· Trivy Documents[https://aquasecurity.github.io/trivy/latest/docs/]
· HUAWEI CLOUD Docker CE Mirror[https://mirrors.huaweicloud.com/mirrorDetail/5ea14d84b58d16ef329c5c13]
Docker Ubuntu Installation Document [https://docs.docker.com/engine/install/ubuntu/]
Linux Image Viruses Scanning
Only the host image of Joint operation products needs to be scanned. Other types of products and non-images do not need to be scanned.
This section describes how to use Kaspersky to scan Linux images for viruses.

- Kaspersky offers a 30-day trial.
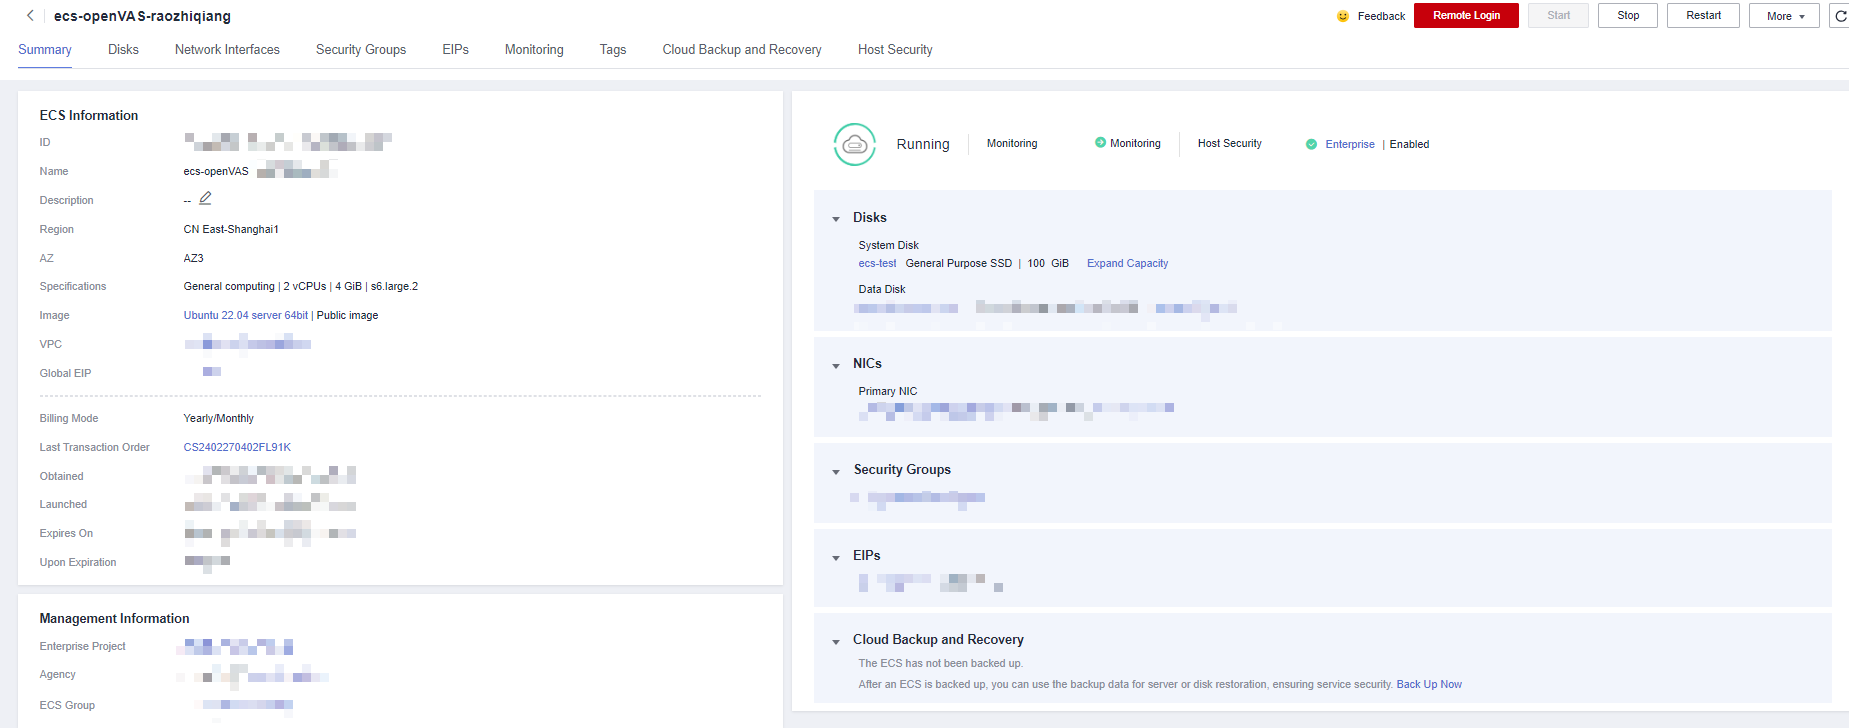
- To download the installation package, the database needs to access the Internet, and the ECS needs to be bound with an EIP.
- Download
Select the Kaspersky Endpoint Security installation package based on the OS type:
- Installed
For Red Hat:RPM format:run the following command:rpm -ivh <Installation package file>
Debian: Deb format:run the following command: dpkg -i <Installation package file>
- Initial Configuration
run the following command:/opt/kaspersky/kesl/bin/kesl-setup.pl script (marked in the red box in the following figure) when the following information is displayed.
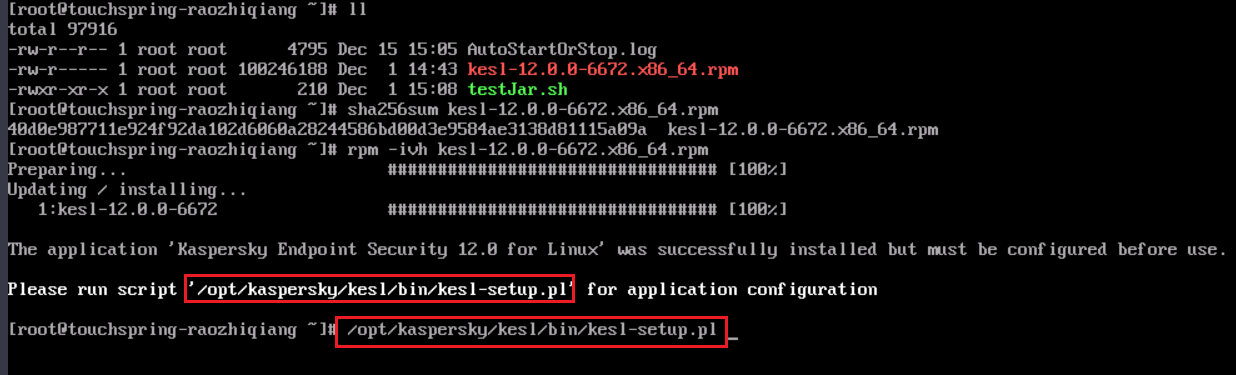
The system prompts you to initialize the configuration.
- If the parameters have default values, press "Enter" and wait until the environment initialization is complete.
- If there is no default value, enter "y" and wait until the environment initialization is complete.
- Scanning and Viewing Results
- Full scan
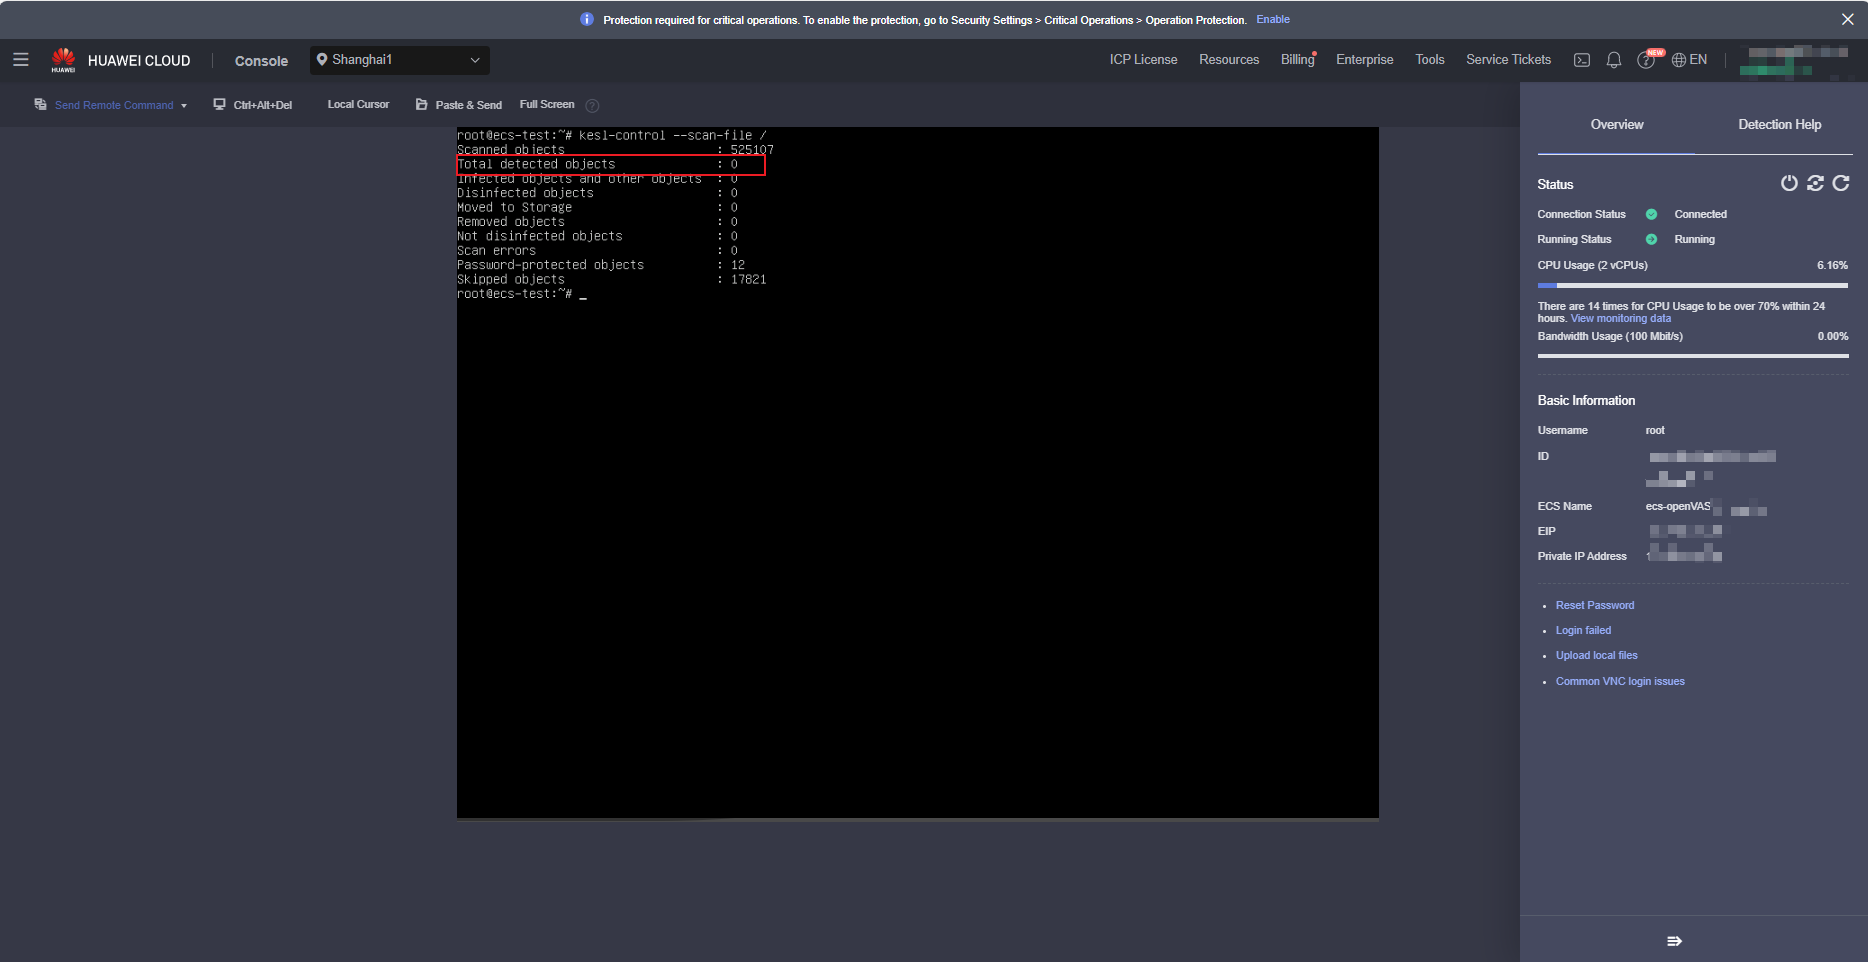
After the environment is initialized, run the following command:kesl-control --scan-file /
After the scanning is complete, the scanning result is displayed, as shown in the following figure (screenshot of the remote login page of the ECS console).

- If the data in the red box is not 0, the result is risky. Generally, the file will be moved to the isolation area.
- If the value in the red box is 0, it indicates that no virus file is found during the scanning. However, it does not mean that the system is not risky. The reason is that the software may have been automatically scanned and isolated after the software is installed.
To sum up, the next step is to check the quarantine file.
- View quarantine files
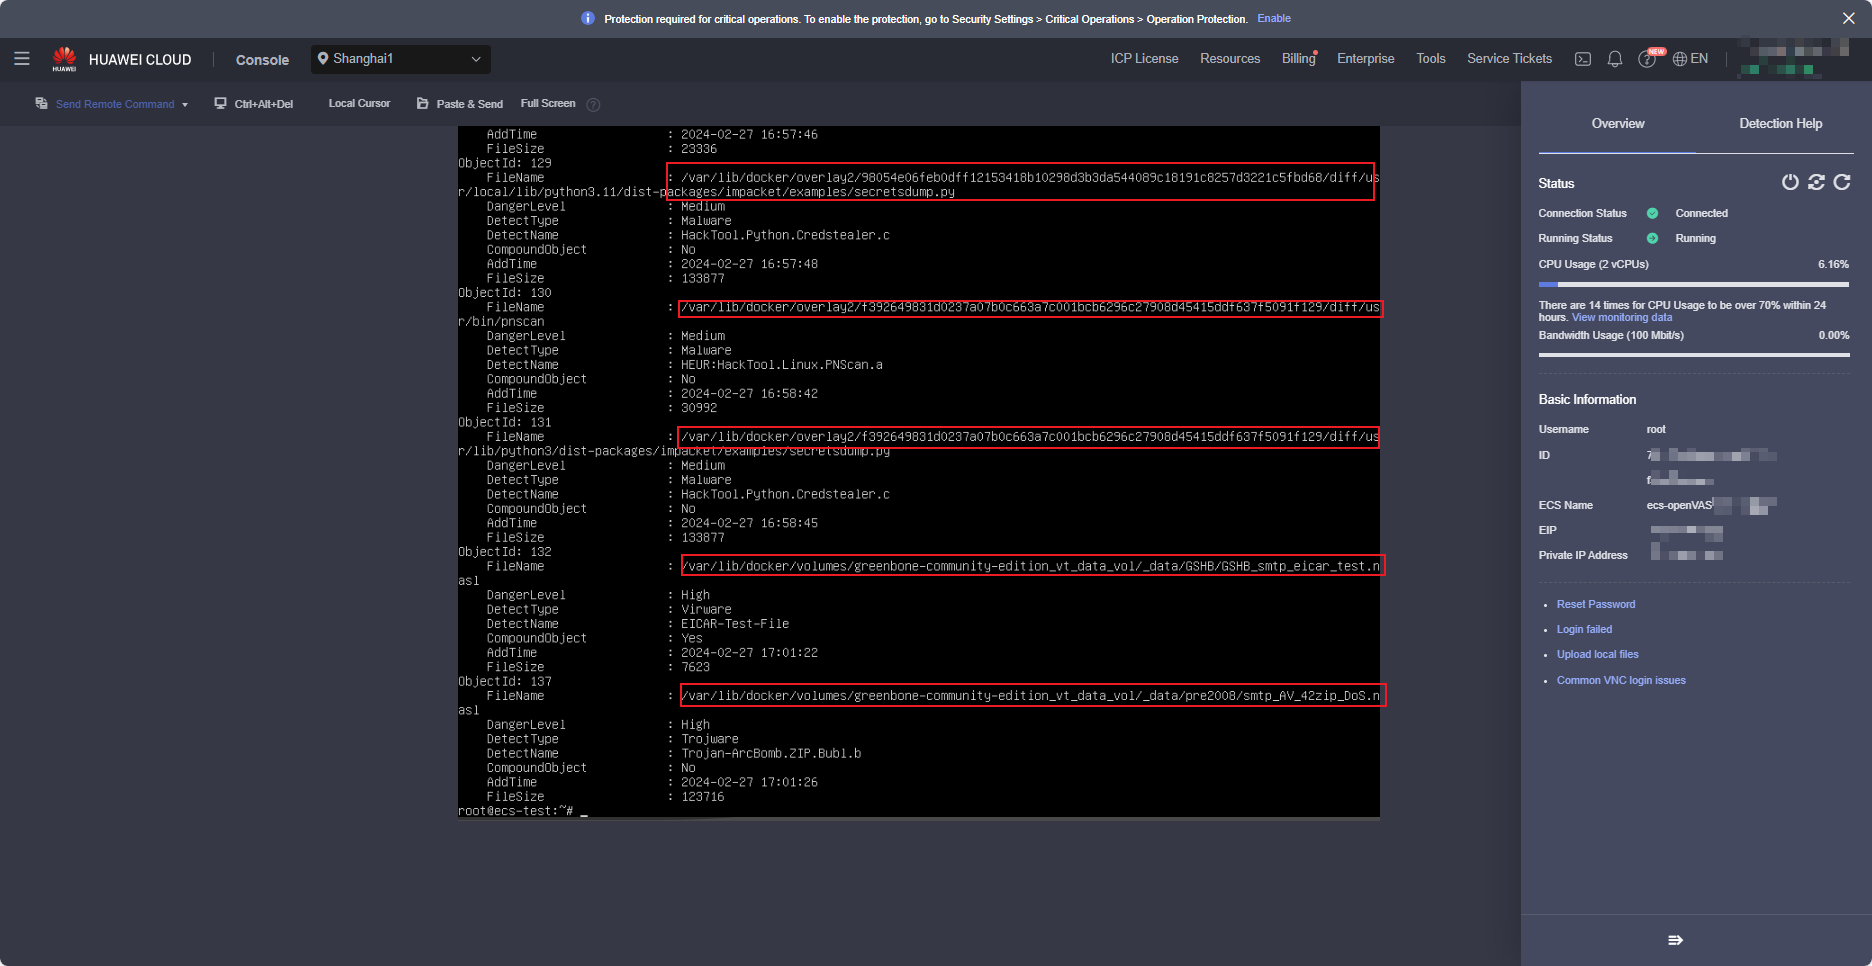
run the following command to view the file in the isolation area:kesl-control -B -query command, as shown in the following figure(Screenshot of the ECS console remote login page).

Analyze the file. If the file is not used by the image, delete the file. If the file is used by the image, check whether the file is falsely reported. The analysis file is displayed as a document.
- Full scan
- Provide scan results
The execution is successful only when the virus value is 0.Otherwise, you need to remove viruses and scan them again.
The partner needs to provide the following materials by email (You do not need to mosaic the screenshot.). The server information in different snapshots must be the same.
- Screenshot of the scanning server
- Screenshot of the final full-disk scanning result (screenshot of the remote login page of the ECS console)
- Check the screenshot of the file in the isolation zone (after the risk is handled) (screenshot of the remote login page of the ECS console).
- Description of the document corresponding to the false positive file (if any).
- Enter the execution result.
- Return to InnoStage Workbench and click the execution button of the "Antivirus scanning" case. The execution page is displayed.
Figure 5 Test Case Management

- If the test case is successfully executed, copy the content in the expected result to the actual result, paste the screenshot obtained in step 5 to the actual result, and click OK.
Figure 6 Test Case Execution

- Return to InnoStage Workbench and click the execution button of the "Antivirus scanning" case. The execution page is displayed.
- Reference URL
Kaspersky Documentation: https://support.kaspersky.com/help/KES4Linux/12.0.0/zh-Hans/93769.htm


Windows Image Viruses Scannin
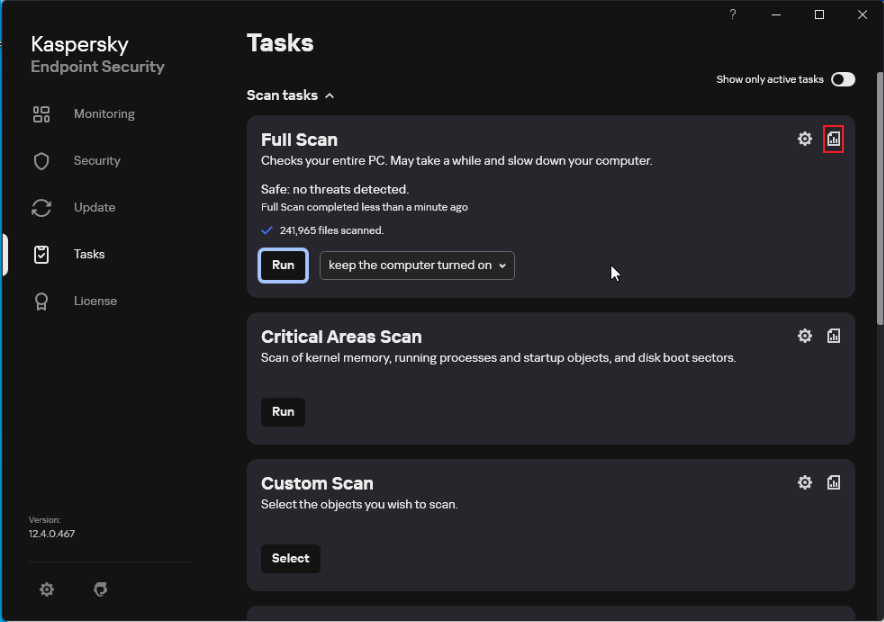
Download and install the official Kaspersky software in Windows to perform a full scan.
- Download (Kaspersky)
Kaspersky download address reference (with a 30-day trial period after download):
China site: https://www.kaspersky.com.cn/small-to-medium-business-security/downloads/endpoint
International site: https://www.kaspersky.com/small-to-medium-business-security/downloads/endpoint
Select Kaspersky Endpoint Security for Windows and select Kaspersky Endpoint Security for Windows Version 12.4.0.467 | Windows | Distributive | Lite encryption for the version.
- Installation Reference Website
Install the Kaspersky reference document: https://support.kaspersky.com/KESWin/12.4/zh-Hans/141289.htm
- Operation Procedure
The execution is successful only when the virus value is 0.Otherwise, you need to remove viruses and scan them again.
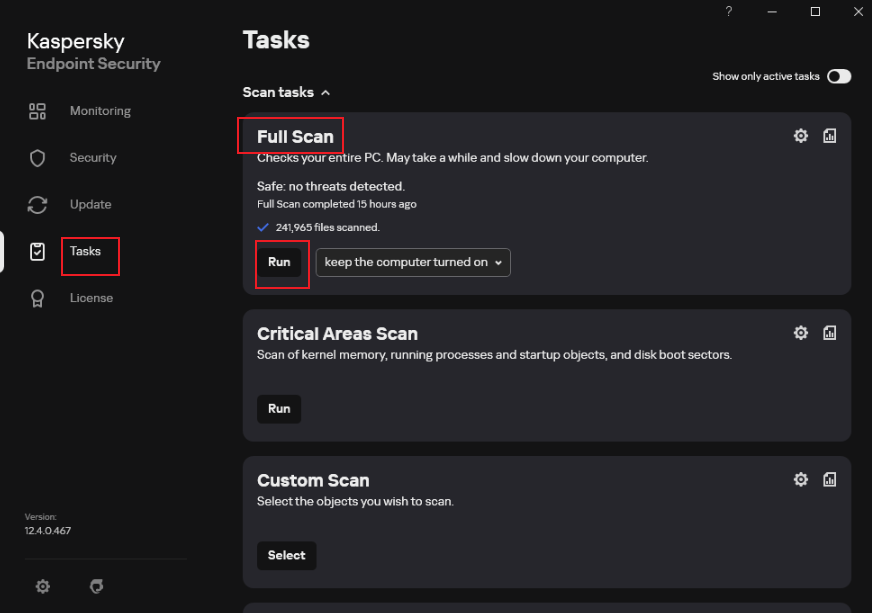
- Start Kaspersky, click Task, and click [Run] to start the full disk scanning. Wait until the scanning is complete.
- Check whether the latest scanning result contains risky items.
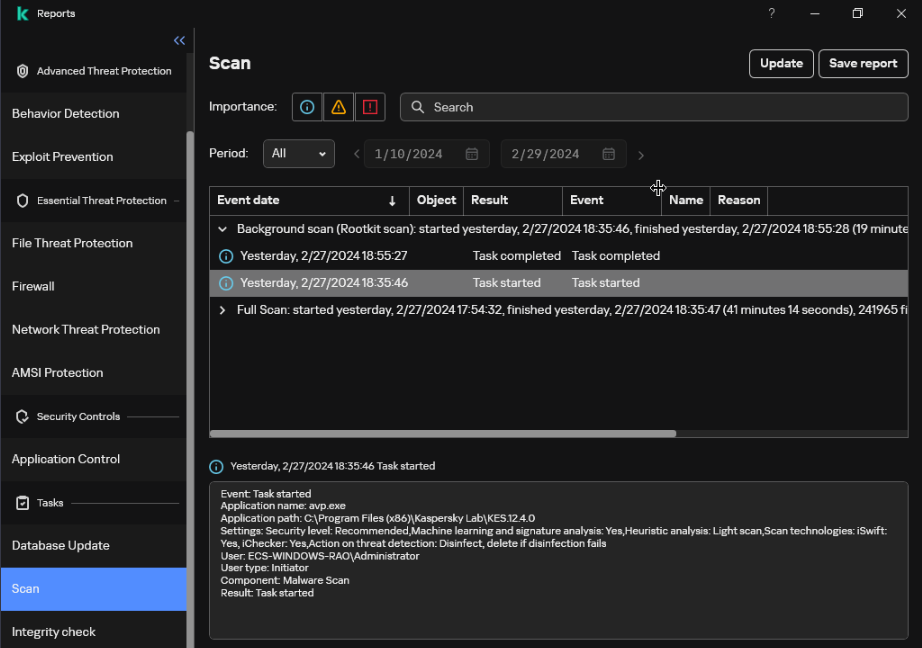
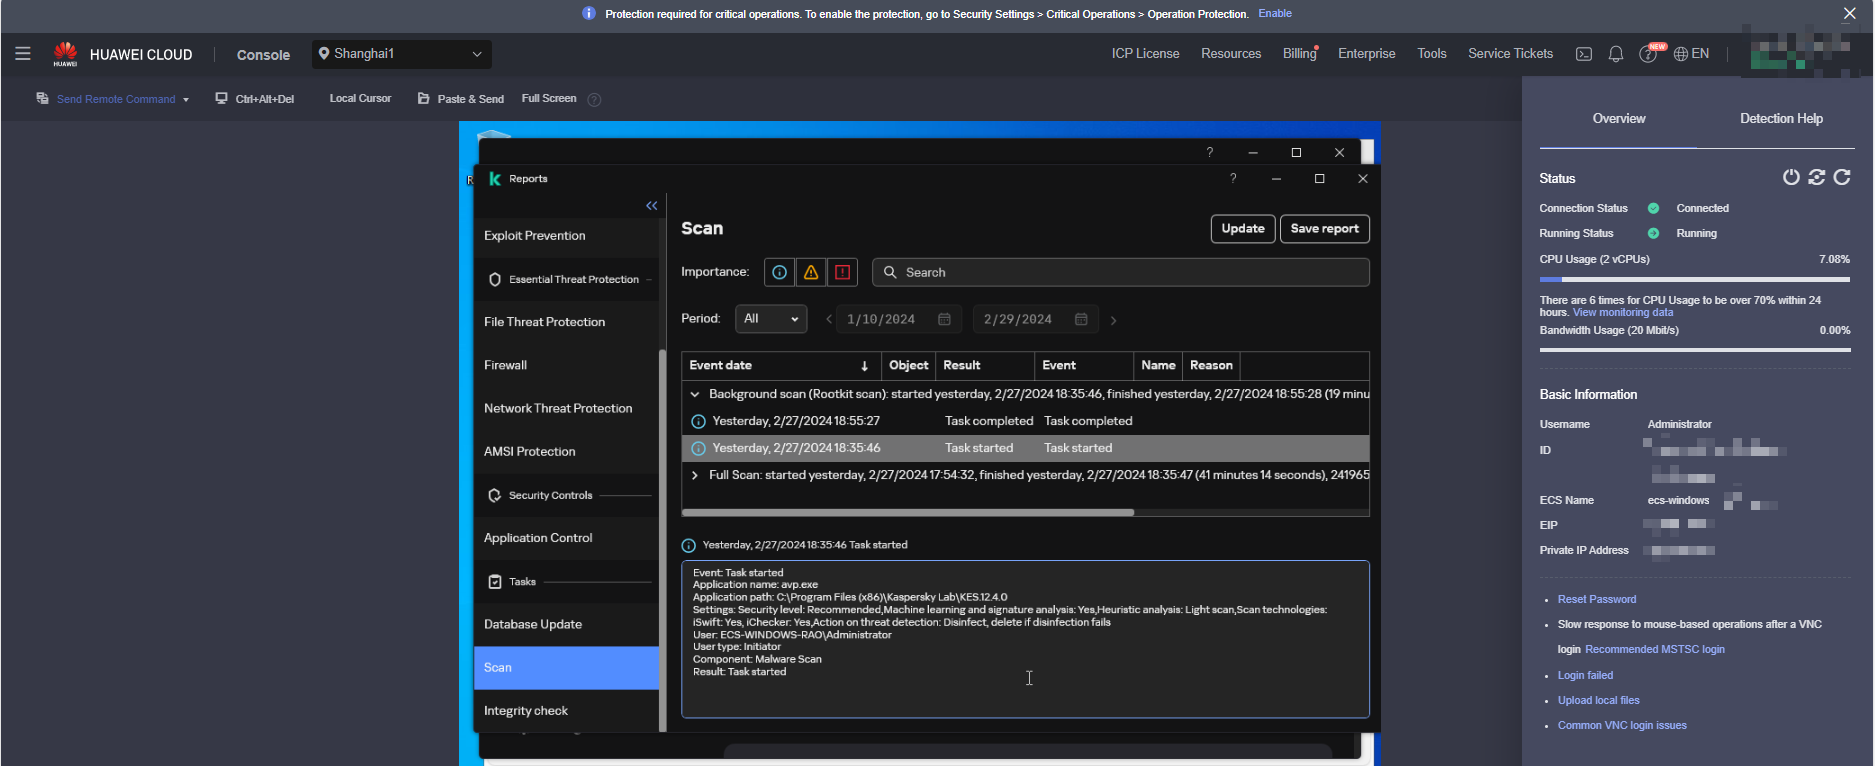
If no problem is found, only the task start and finished information is displayed in the list. If the scanning has risks, the risk items are displayed in the list. All the risk items need to be resolved and the scanning needs to be performed again.
- Provide scan results
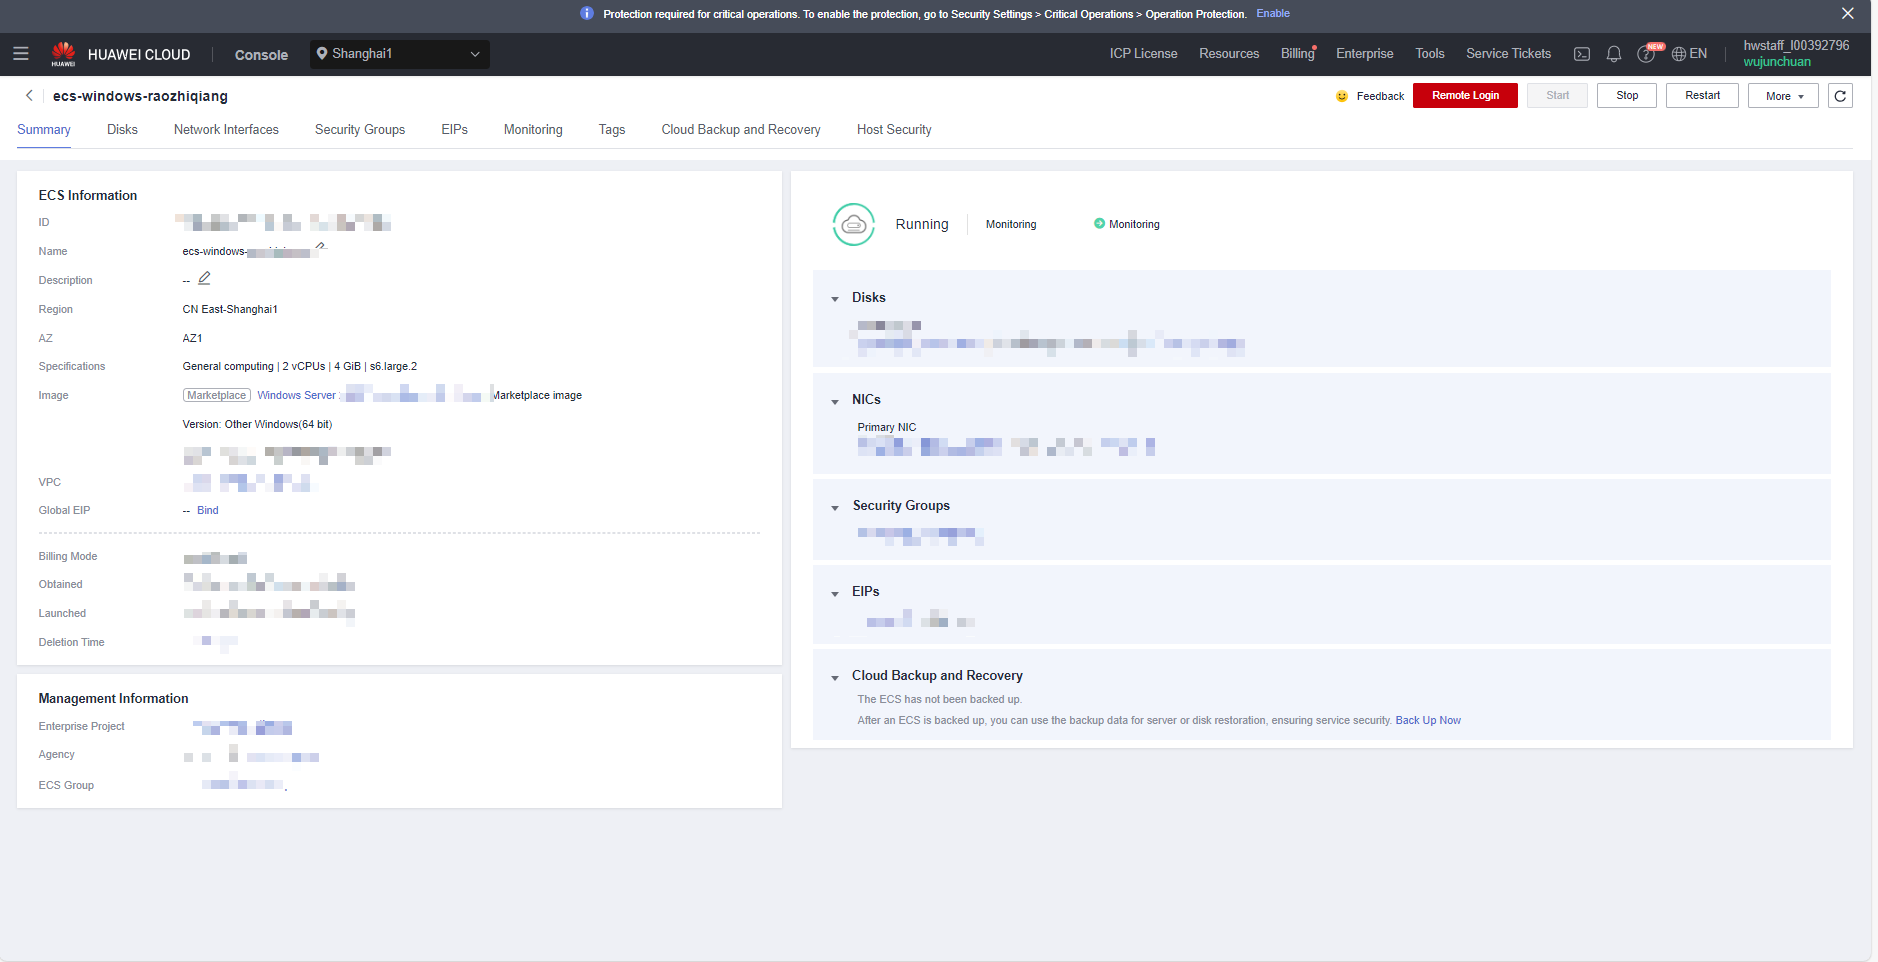
The partner needs to provide the following materials by email: (You do not need to mosaic the screenshot.). The server information in different snapshots must be the same.
- Screenshot of the scanning server
- Screenshot of the final full-disk scanning result (screenshot of the remote login page of the ECS console)
If the scanning has risks, the risk items are displayed in the list. All the risk items need to be resolved and the scanning needs to be performed again.
- Description of the document corresponding to the false positive file (if any)
- Enter the execution result.
- Return to InnoStage Workbench and click the execution button of the "Antivirus scanning" case. The execution page is displayed.
Figure 7 Test Case Management

- If the test case is successfully executed, copy the content in the expected result to the actual result, paste the screenshot obtained in step 5 to the actual result, and click OK.
Figure 8 Test Case Execution
- Return to InnoStage Workbench and click the execution button of the "Antivirus scanning" case. The execution page is displayed.

Binary Virus Scanning(non-image)
Download and install the official Kaspersky software in Windows to perform a full scan.
- Download (Kaspersky)
Kaspersky download address reference (with a 30-day trial period after download):https://www.kaspersky.com/small-to-medium-business-security/downloads/endpoint
Select Kaspersky Endpoint Security for Windows and select Kaspersky Endpoint Security for Windows Version 12.4.0.467 | Windows | Distributive | Lite encryption for the version.
- Install the Kaspersky reference document:https://support.kaspersky.com/KESWin/12.4/zh-Hans/141289.htm
- Scan operation
- Start Kaspersky, click Task, and click Run to start the full disk scanning. Wait until the scanning is complete.
- Check whether the latest scanning result contains risky items.
 If no problem is found, only the task start and finished information is displayed in the list. If the scanning has risks, the risk items are displayed in the list. All the risk items need to be resolved and the scanning needs to be performed again.
- Provide scan results
the partner needs to provide the following materials by email: (You do not need to mosaic the screenshot.). The server information in different snapshots must be the same.
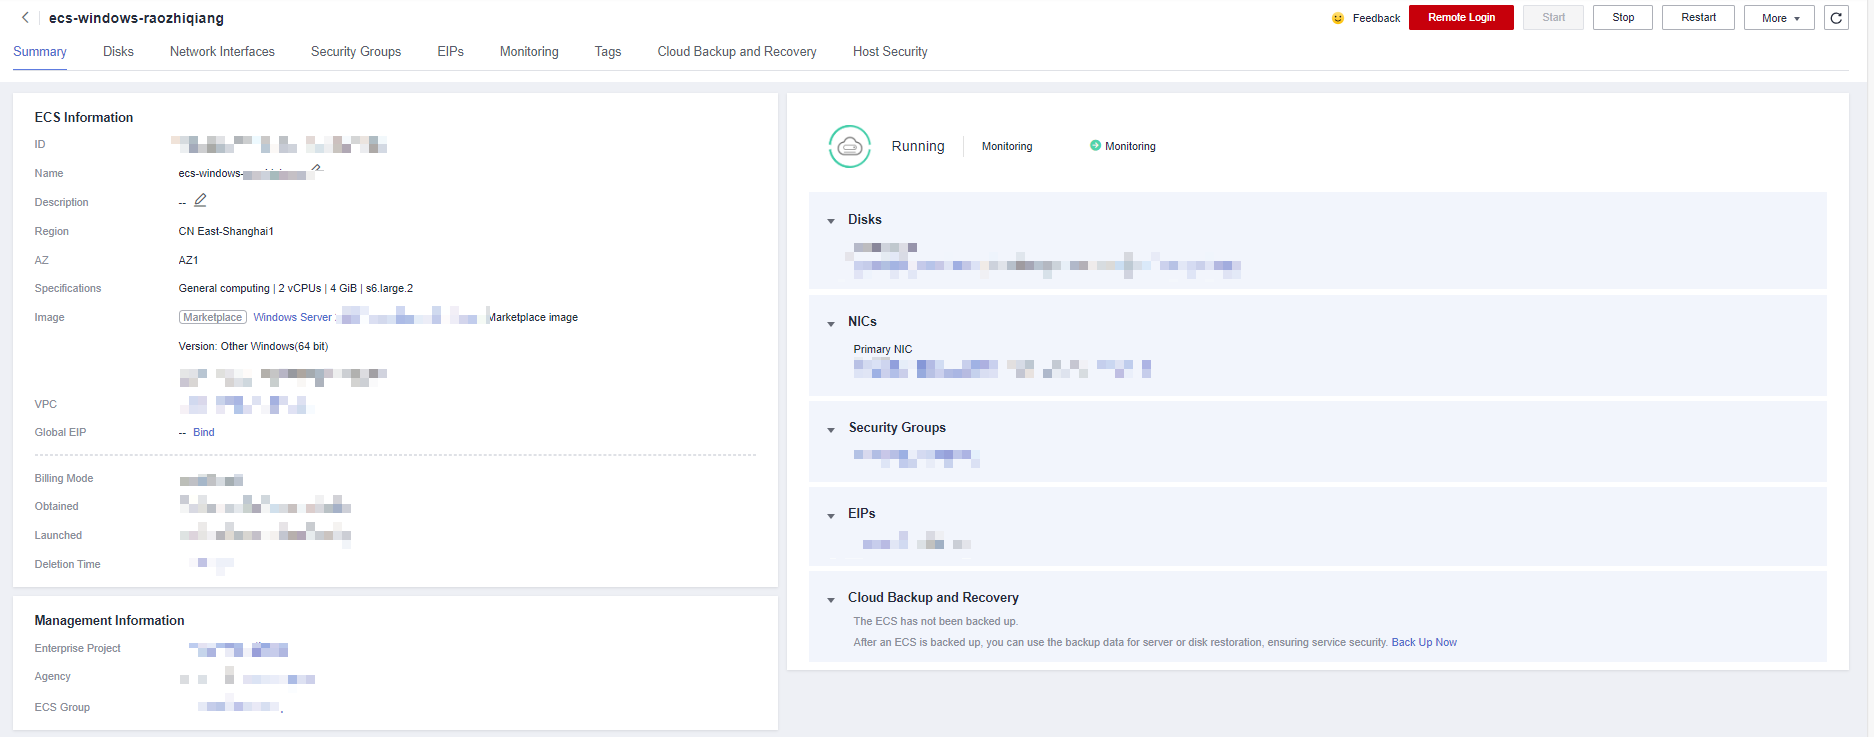
- Screenshot of the scanning server
Figure 9
- Screenshot of the final full-disk scanning result (screenshot of the remote login page of the ECS console)
Figure 10


If the scanning has risks, the risk items are displayed in the list. All the risk items need to be resolved and the scanning needs to be performed again.
- Description of the document corresponding to the false positive file (if any)
- Screenshot of the scanning server
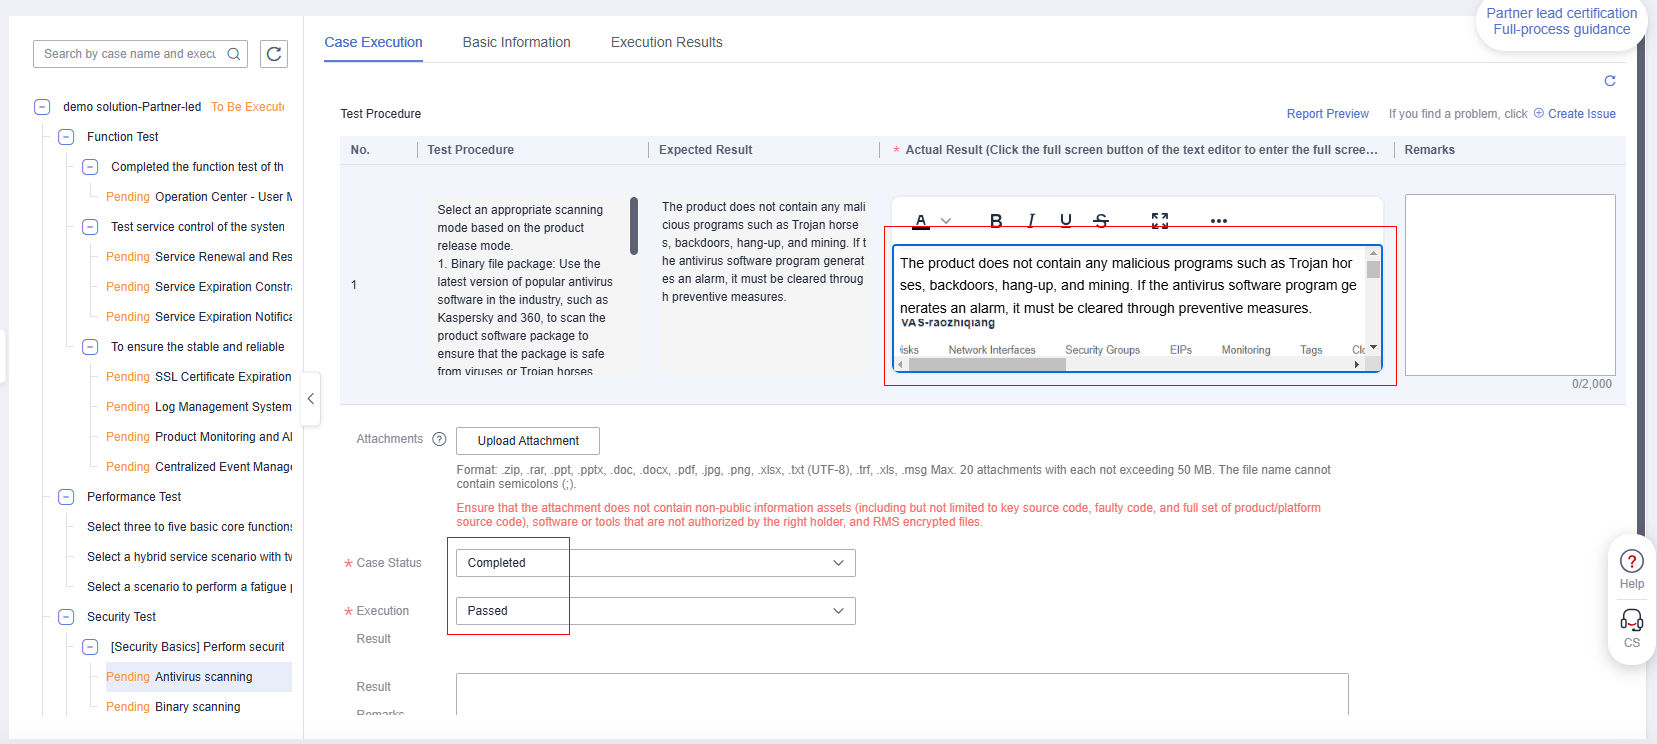
- After the scan is passed,go back to the innostage workbench and enter the case management page.Click the [Execution] button of the binary test case.
Figure 11 Test Case Management
Copy the expected result to the actual result, and paste the screenshot in step 4 to the actual result,
Case Status:Completed
Execution Result:Passed
Figure 12 Case Execution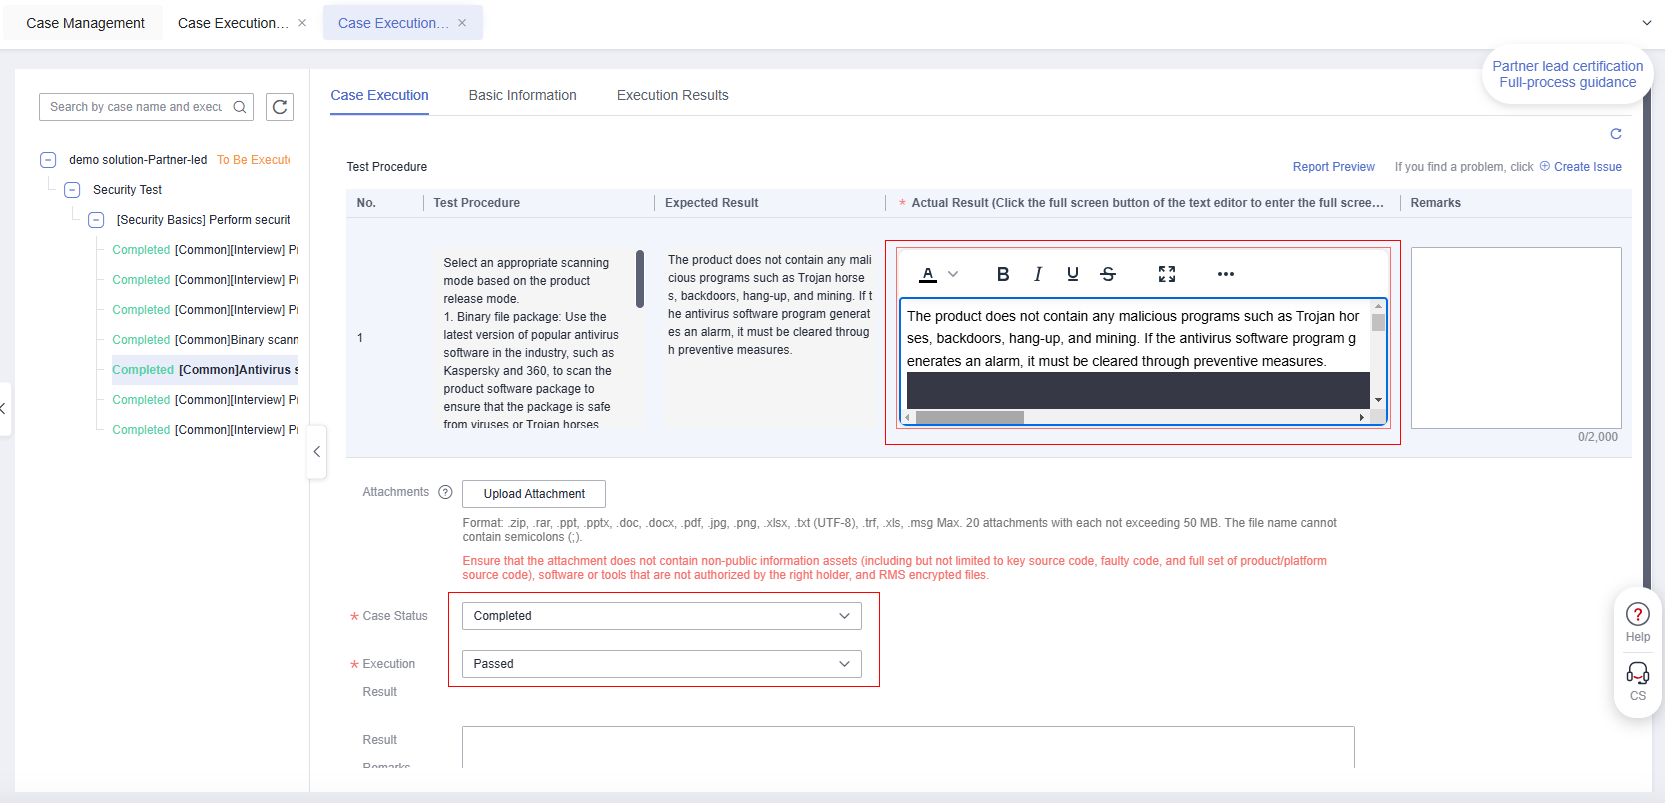 Figure 13 Test Case Execution
 - Click[Confirm and go to Next] or click[OK].

Feedback
Was this page helpful?
Provide feedbackThank you very much for your feedback. We will continue working to improve the documentation.See the reply and handling status in My Cloud VOC.
For any further questions, feel free to contact us through the chatbot.
Chatbot


