
Procedure
Test Resource Groups and Their Constraints
- Test resource groups are classified into shared resource groups and private resource groups. Shared resource groups are provided by the system by default, and private resource groups need to be created. To obtain the network segment of a shared resource group, submit a service ticket to after-sales.
- Execution nodes of the shared resource group have been bound with an elastic IP address (EIP). When the tested application has network access restrictions, use a private resource group.
- A shared resource group supports a maximum of 1,000 concurrent users and 100 Mbit/s bandwidth. If higher concurrency or bandwidth is required, use a private resource group.
- JMeter test tasks can use only private resource groups.
Preparing Test Resources
- Log in to the CodeArts PerfTest console, choose Resource Groups in the navigation pane, and click Create Private Resource Group.
- (Optional) If this is the first time you create a private resource group, grant CodeArts PerfTest permissions necessary for creating private resource groups.
- If you do not have a Cloud Container Engine (CCE) cluster, create a cluster and then create a resource group. If a CCE cluster is available, create a resource group.
- Create a cluster.
- In the upper part of the page, click create one to access the page for buying a CCE cluster. For details about how to create a cluster, see Buying a CCE Cluster.
Configure the cluster parameters as follows:
- You are advised to use an independent CCE cluster for pressure tests to avoid configuration conflicts with CCE clusters in test or production environments. When you conduct a pressure test on a CCE cluster in a test or production environment, service loads may be scheduled to nodes that function as executors. To prevent this, go to the cluster's Nodes page, click the Nodes tab, click More > Manage Taint in the Operation column of the execution node, and set the node as a taint, as shown below.

- The cluster management scale is related to the number of execution nodes. Create nodes of the corresponding specifications based on the number of concurrent users for pressure testing. For example, if 20 execution nodes are required, you can set the cluster scale to 50 nodes.
- You are advised to select Tunnel network as the network model. Container CIDR Block and Service CIDR Block must be the same as those of the tested object.
- CentOS is prone to IPVS- or Conntrack-related stability issues on a heavy-load network. Therefore, do not use CentOS as the operating system of cluster nodes when selecting IPVS. When both IPVS and CentOS are selected, network connection reuse may time out.
- You are advised to use an independent CCE cluster for pressure tests to avoid configuration conflicts with CCE clusters in test or production environments. When you conduct a pressure test on a CCE cluster in a test or production environment, service loads may be scheduled to nodes that function as executors. To prevent this, go to the cluster's Nodes page, click the Nodes tab, click More > Manage Taint in the Operation column of the execution node, and set the node as a taint, as shown below.
- Click Next: Select Add-on. On the page displayed, select the add-ons to be installed during cluster creation. When selecting add-ons, retain the default settings for the test executor. For example, deselect unnecessary add-ons, such as NodeLocal DNSCache and Cloud Native Cluster Monitoring, to prevent the add-ons from occupying executor resources.
- Click Next: Configure Add-on. On the displayed page, retain the default settings.
- Click Next: Confirm Settings. Review the cluster configurations, select the disclaimer, and click Submit. It takes about 6 to 10 minutes to create a cluster.
- After the cluster is created, return to the cluster management page and click Create Node. For details about how to create a node, see Creating a Node.
Configure the node parameters as follows:
- A node must have at least 4 vCPUs and 8 GB memory.
- Select EulerOS as the operating system.
- At least two nodes (one debugging node and one execution node) are required. The number of nodes depends on the specifications of the pressure test object. For example, a pressure test for 100,000 concurrent users requires 21 nodes (one debugging node and 20 execution nodes), each with a minimum of 4 vCPUs and 8 GB of memory.
- If the CCE cluster node and the application to be tested are not in the same VPC network, bind an EIP to the CCE cluster node. You can use existing EIPs. If no EIP is available, click Auto assign to create one. When EIPs are automatically created, you are advised to pay by traffic and set the bandwidth to a large value to avoid affecting the pressure test. Additionally, an EIP with specified configurations is automatically assigned to each node. If the number of EIPs is less than the number of nodes, the EIPs are randomly bound to the nodes.
- In the (Optional) Advanced Settings area, set Kubernetes Node Name to Node private IP. If you select Cloud server name, the node cannot be managed.
- To enhance the security of a CCE node, see Configuration Suggestions on CCE Node Security.
- Click Next: Confirm. Review the node configurations, select the disclaimer, and click Submit. After the node is created, return to the CodeArts PerfTest console.
- In the upper part of the page, click create one to access the page for buying a CCE cluster. For details about how to create a cluster, see Buying a CCE Cluster.
- Create a resource group.
Choose Resource Groups in the navigation pane, and click Create Private Resource Group.
Configure the parameters as described in Table 1.Table 1 Creating a private resource group Parameter
Description
Resource Group Name
Name of the private resource group to be created.
Debugging Cluster
Select a CCE cluster from the drop-down list.
Debug Node
Select the management node that performs a pressure test.
The debugging node cannot be changed after the resource group is created.
Execution Node
Select the target machine that a pressure test will be performed on and provides performance data during testing.
Click Create.
Creating, Debugging, and Starting a Task
- In the navigation pane, choose Dashboard. Click All-in-one Scene in the Hot Template to create a pressure test project.
- After the test project is created, its case details page is displayed.
Figure 1 All-in-one system pressure test project
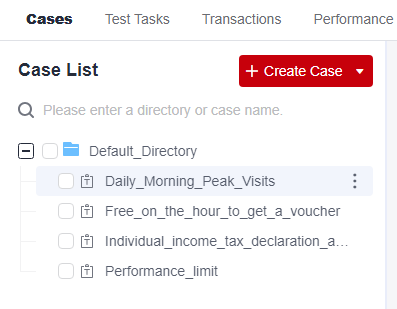
- Select a test case and modify the parameters. For example, modify the request information in the Performance_limit scenario and click Save.
- Click Debug, select the target test resource group as the executor, and click Start to start debugging. If an error is reported in the debugging result, edit the case based on the log information and debug it again.
- On the Test Tasks tab, click Create Task.
- Enter a test task name, click Add Case. On the page that is displayed, select the target case, and click OK. Click Save. The test task is created.
- Click
 in the Operation column of the test task.
Figure 2 Starting a task
in the Operation column of the test task.
Figure 2 Starting a task
- Select a resource group type, select Confirm that this pressure test is approved and complies with local laws, and click Start.
Test Report Analysis
- After you start a test task, click View Report in the displayed dialog box to view the real-time test report.
You can view the real-time monitoring data and chart reports of each metric during the pressure test.
- After the pressure test is complete, an offline test result report is generated automatically. You can view the report of the completed test task.
- You can also click Download report to download an offline PDF report to a local PC. Identify performance bottlenecks of the all-in-one system based on the report.
Feedback
Was this page helpful?
Provide feedbackThank you very much for your feedback. We will continue working to improve the documentation.See the reply and handling status in My Cloud VOC.
For any further questions, feel free to contact us through the chatbot.
Chatbot


