How Do I Disable Login Verification?
To ensure account security, you are advised to enable login verification.
After you enable this function, you and IAM users created using your account need to enter verification codes generated by the bound virtual MFA device, SMS verification codes, or email verification codes on the Login Verification page during login.
If you disable this function, you and the IAM users only need to enter the account name/username and password during login.
Disabling IAM User Login Verification as an Administrator
- An administrator can disable login verification for an IAM user on the IAM console as follows:
- Log in to the IAM console.
- In the navigation pane, choose Users.
- Click Security Settings in the row containing the target user.
- On the Security Settings tab, click
 next to Verification Method under Login Protection, and select Disabled.
 - Click OK.
Disabling Administrator Login Verification
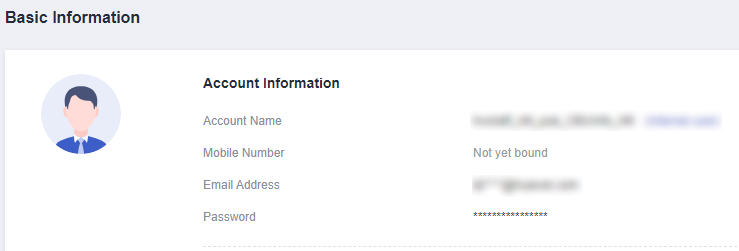
Check whether the current account is a HUAWEI ID or Huawei Cloud account by hovering over the login account name in the upper right corner and clicking Basic Information from the drop-down list. If HUAWEI ID Information is displayed in the Basic Information area, the current account is a HUAWEI ID. Otherwise, the current account is a Huawei Cloud account. Disable login verification for a HUAWEI ID by performing the operations described in Disabling the login verification function for a HUAWEI ID. Disable login verification for a Huawei Cloud account by performing the operations described in Disabling login verification for yourself (account administrator).

- Disabling login verification for a HUAWEI ID
Log in to Huawei account center and choose Account & security > Security verification > Two-step verification, click Disable, and enter the verification information to disable login verification.
- Disabling login verification for yourself (account administrator) on the Security Settings page
- Hover over the username in the upper right corner and choose Security Settings from the drop-down list.
- Click the Critical Operations tab, and click Change in the Login Protection row.
- In the slide-out Login Protection panel, select Disable.
- Click OK.
Feedback
Was this page helpful?
Provide feedbackThank you very much for your feedback. We will continue working to improve the documentation.See the reply and handling status in My Cloud VOC.
For any further questions, feel free to contact us through the chatbot.
Chatbot


